GE JES2251SJ Owner's Manual
Ge jes2251sj: user guide
Hide thumbs
Also See for JES2251SJ:
- Datasheet (2 pages) ,
- Datasheet (2 pages) ,
- Technical service manual (27 pages)
Table of Contents
Advertisement
ge.com
. . . . . . . . .2-6
Owner's Manual
Operating Instructions
JES2251
Automatic Features . . . . . . . . . .13
Microwave Terms . . . . . . . . . . . .18
Other Features . . . . . . . . . . .16, 17
Oven Features . . . . . . . . . . . . .7, 8
Power Levels . . . . . . . . . . . . . . . .9
Sensor Features . . . . . . . . . .14, 15
Time Features . . . . . . . . . . . .9-12
. . . . . .18, 19
. . . . . . .20
Things That Are Normal . . . . . .20
Consumer Support
Consumer Support . . .Back Cover
Product Registration . . . . . .21, 22
Warranty . . . . . . . . . . . . . . . . . .23
Write the model and serial
numbers here:
Model # __________________
Serial # __________________
You can find them on a label
inside the oven.
F00036P41AG 49-40511 01-06 JR
Advertisement
Table of Contents

Related Manuals for GE JES2251SJ


Summary of Contents for GE JES2251SJ
-
Page 1: Table Of Contents
Automatic Features ..13 Microwave Terms ... .18 Other Features ...16, 17 Oven Features . -
Page 2: Important Safety Instructions
Do not mount this appliance over a sink. s Do not mount the microwave oven over or near any portion of a heating or cooking appliance. (c) Do Not Operate the oven if it is damaged. It is... -
Page 3: Save These Instructions
IMPORTANT SAFETY INSTRUCTIONS. Use this appliance only for its intended purpose as described in this Owner’s Manual. s This microwave oven is not approved or tested for marine use. s Do not store this appliance outdoors. Do not use this product near water—for example, in a wet basement,... -
Page 4: Important Safety Information
Such use of the microwave oven could result in injury. s Do not boil eggs in a microwave oven. Pressure will build up inside egg yolk and will cause it to burst, possibly resulting in injury. -
Page 5: Grounding Instructions
Some cookware is labeled “suitable for microwaving.” s If you are not sure if a dish is microwave-safe, use this test: Place in the oven both the dish you are testing and a glass measuring cup filled with 1 cup of water—set the measuring cup... -
Page 6: Adapter Plugs
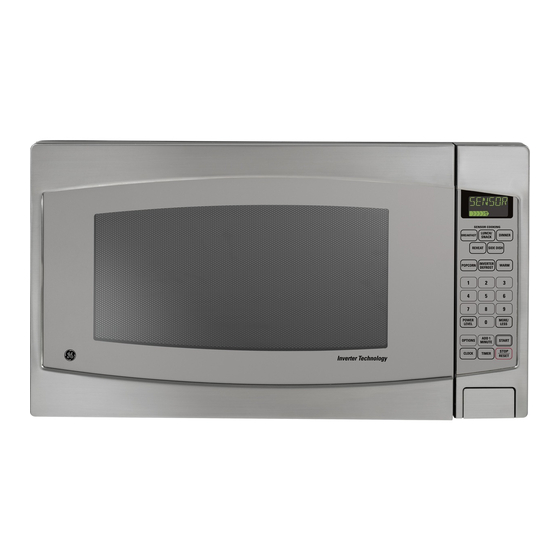
If you use an extension cord, the interior light may flicker and the blower sound may vary when the microwave oven is on. Cooking times may be longer, too. READ AND FOLLOW THIS SAFETY INFORMATION CAREFULLY. - Page 7 Touch Control Panel Display. Door Latch Release. Press latch release to open door. NOTE: Rating plate, oven vent(s) and oven light are located on the inside walls of the microwave oven. ge.com...
-
Page 8: Time Features
About the features of your microwave oven. You can microwave by time, with the sensor features or with the auto feature. Cooking Controls Time Features Press Number Pads WARM POPCORN Press once, twice or three times POWER LEVEL Press one to ten times... - Page 9 Variable power levels add flexibility to microwave cooking. Power Level 7 (P7) is microwave energy at 70% of full power. Power Level 3 (P3) is microwave energy at 30% of full power. Most cooking will be done on High (P10), which gives you 100% of power.
- Page 10 About the time features. Cooking Guide for Timed Cooking Use High power level (P10) unless otherwise noted. Vegetable Amount Asparagus (fresh spears) 1 lb. (frozen spears) 10-oz. package Beans (fresh green) 1 lb. cut in half (frozen green) 10-oz. package (frozen lima) 10-oz.
- Page 11 It cannot be used in combination with Sensor or Auto features. ge.com Press ADD 1 MINUTE, up to 10 times. Press START. The oven will beep 5 times when cooking is completed.
- Page 12 Power Levels and cooking times. Brown Sugar To soften 1 cup of brown sugar, place sugar in a microwave-safe dish with a slice of bread. Cover with lid or plastic wrap. Select POWER LEVEL P10 (High). Enter 20 to 30 seconds.
- Page 13 12–13 14–15 Adds approximately 10% more time Subtracts approximately 10% time Defrosting Tips s Place food in a microwave safe dish. s Place roasts fat-side down. Place whole poultry breast-side down. s Drain liquids during defrosting. Standing Time After defrosting, most meats should stand 5 minutes to complete defrosting.
- Page 14 Never use tight sealing plastic containers—they can prevent steam from escaping and cause food to overcook. Vented s Be sure the outside of the cooking containers and the inside of the microwave oven are dry before placing food in the oven. Beads of moisture turning into steam can mislead the sensor.
- Page 15 Break apart in glass bowl or colander. Cover with vented plastic wrap. Stir after 2 beeps. Re-cover and press START. 4 to 16 oz. Arrange in a single layer. Cover with vented plastic wrap. ge.com ⁄ tbsp. melted ⁄ cup of vegetables. Cover ⁄...
-
Page 16: About The Other Features
About the other features. Stop/Reset Use the STOP/RESET pad to clear the memory. During cooking, press once to stop the cooking process. Press twice to cancel all cooking instructions. Options Features The OPTIONS pad allows you to establish and set preferred non-cooking features. These features include: Child Lock, Word Speed, Language Choice and more. - Page 17 10 (P10). Enter the desired cooking time using the number pads. Press TIMER. ge.com Time will count down in the display window. The oven will beep 5 times to alert you when the time is up. Opening the door will not stop the countdown.
-
Page 18: Care And Cleaning
Standing Time When you cook with regular ovens, foods such as roasts or cakes are allowed to stand to finish cooking or to set. Standing time is especially important in microwave cooking. Note that a microwaved cake is not placed on a cooling rack. - Page 19 Do not use cleaners containing ammonia or alcohol on the microwave oven. Ammonia or alcohol can damage the appearance of the microwave oven. If you choose to use a common household cleaner, first apply the cleaner directly to a clean cloth, then wipe the soiled area.
-
Page 20: Troubleshooting Tips
What To Do • Replace fuse or reset circuit breaker. • Unplug the microwave oven, then plug it back in. • Make sure the 3-prong plug on the oven is fully inserted into wall outlet. • Open the door and close securely. - Page 21 You can rest easy, knowing that all your valuable household products are protected against expensive repairs. Place your confidence in GE and call us in the U.S. toll-free at for more information. *All brands covered, up to 20 years old, in the continental U.S.
- Page 22 Check here if you do not want to receive communications from GEA’s carefully selected partners. FAILURE TO COMPLETE AND RETURN THIS CARD DOES NOT DIMINISH YOUR WARRANTY RIGHTS. For information about GEA’s privacy and data usage policy, go to ge.com and click on “Privacy Policy” or call 800.626.2224. Read your Owner’s Manual carefully.
- Page 23 This warranty is extended to the original purchaser and any succeeding owner for products purchased for home use within the USA. If the product is located in an area where service by a GE Authorized Servicer is not available, you may be responsible for a trip charge or you may be required to bring the product to an Authorized GE Service Location for service.
-
Page 24: Consumer Support
Caution must be exercised, since improper servicing may cause unsafe operation. Contact Us If you are not satisfied with the service you receive from GE, contact us on our Website with all the details including your phone number, or write to: General Manager, Customer Relations Register Your Appliance Register your new appliance on-line—at your convenience! Timely product registration will allow for...
Need help?
Do you have a question about the JES2251SJ and is the answer not in the manual?
Questions and answers
How do I replace the inside light bulb on Model No. JES2251SJ02, S/N VZ 9 33606 U?