Table of Contents
Advertisement
Quick Links
Advertisement
Table of Contents

Subscribe to Our Youtube Channel
Summary of Contents for Milesight WS301
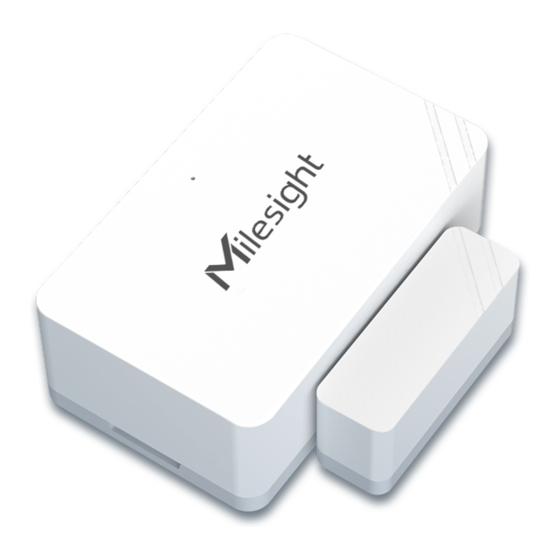
- Page 1 Magnet Contact Switch Featuring LoRaWAN ® WS301 User Guide Milesight IoT...
- Page 2 The device must never be subjected to shocks or impacts. Declaration of Conformity WS301 is in conformity with the essential requirements and other relevant provisions of the CE, FCC, and RoHS. Copyright © 2011-2021 Milesight. All rights reserved. All information in this guide is protected by copyright law. Whereby, no organization or individual shall copy or reproduce the whole or part of this user guide by any means without written authorization from Xiamen Milesight IoT Co., Ltd.
-
Page 3: Table Of Contents
Contents 1. Product Introduction..........................4 1.1 Overview............................4 1.2 Features............................4 2. Hardware Introduction..........................4 2.1 Packing List............................4 2.2 Hardware Overview.........................5 2.3 LED Patterns............................ 5 2.4 Dimensions(mm)..........................5 3. Operation Guide............................6 3.1 NFC Configuration.......................... 6 3.2 LoRaWAN Settings..........................7 3.3 General Settings..........................10 3.4 Maintenance..........................11 3.4.1 Upgrade.......................... -
Page 4: Product Introduction
LoRaWAN ® enables encrypted radio transmissions over long distances while consuming very little power. The user can obtain sensor data and view the trend of data change through Milesight IoT Cloud or through the user's own Application Server. 1.2 Features Up to 15 km communication range ... -
Page 5: Hardware Overview
2.2 Hardware Overview Sensor: Magnet: 2.3 LED Patterns Function Action LED Indicator Switch On/Off (network unregistered) Red, blink once Door/Window Status Switch On/Off (network registered) Green, blink once Send join network requests Red, blink once Network Status Joined the network successfully Green, blink twice The device is un-installed (tamper is detected) Red, blink once... -
Page 6: Operation Guide
1. Pull out the battery insulating sheet to power on the device. The indicator will light up in green for 3 seconds when device turns on. 2. Download and install “Milesight ToolBox” App from Google Play or Apple Store. 3. Enable NFC on the smartphone and open Milesight ToolBox. -
Page 7: Lorawan Settings
Via TTL UART interface inside the device. Please select General type to log in ToolBox and configure the device. (Default password: 123456) 3.2 LoRaWAN Settings LoRaWAN settings are used for configuring the transmission parameters in LoRaWAN network. ® Basic LoRaWAN Settings: Go to Device->Setting->LoRaWAN Settings of ToolBox App to configure join type, App EUI, App Key and other information. - Page 8 Parameters Description Device EUI Unique ID of the device which can also be found on the label. App EUI Default App EUI is 24E124C0002A0001. Application Port The port used for sending and receiving data, default port is 85. Join Type OTAA and ABP modes are available.
- Page 9 1) Please contact sales for device EUI list if there are many units. 2) Please contact sales if you need random App keys before purchase. 3) Select OTAA mode if you use Milesight IoT cloud to manage devices. 4) Only OTAA mode supports rejoin mode.
-
Page 10: General Settings
Reporting interval of magnet, tamper and battery level to network server. Default: 1080min Reporting Interval Note: WS301 will also transmit alarm when magnet status if changed or tamper button is activated. Enable or disable the light indicating in chapter 2.3. LED Indicator Note: The indicator of reset button is not allowed to disable. -
Page 11: Maintenance
2) Only Android version ToolBox supports the upgrade feature. 3.4.2 Backup WS301 supports configuration backup for easy and quick device configuration in bulk. Backup is allowed only for devices with the same model and LoRa frequency band. 1. Go to “Template” page on the App and save current settings as a template. You can also edit the template file. -
Page 12: Reset To Factory Default
Note: Slide the template item left to edit or delete the template. Click the template to edit the configurations. 3.4.3 Reset to Factory Default Please select one of the following methods to reset device: Via Hardware: Hold on the reset button inside the device for more than 10s. After reset complete, the indicator will blink in green twice and device will reboot. -
Page 13: Installation
4. Installation 3M Tapes Fix: Tear the 3M tapes of both parts, then make sure the magnet part is placed inside the door (portable part) and sensor is inside the door frame (fixed part). For double doors, put every part on each door. -
Page 14: Device Payload
1 Byte 1 Byte M Bytes 1 Byte For decoder examples please find files on https://github.com/Milesight-IoT/SensorDecoders. 5.1 Basic Information WS301 reports basic information of sensor every time joining the network. Channel Type Data Example Description 01(Milesight Protocol Version) Device SN is 08(Device SN)... -
Page 15: Downlink Commands
Channel Type Value (Tamper (Un-installed) Status) 5.3 Downlink Commands WS301 supports downlink commands to configure the device. Application port is 85 by default. Channel Type Data Example Description 03(Set Reporting Interval) b0 04 b0 04 => 04 b0 = 1200s...


Need help?
Do you have a question about the WS301 and is the answer not in the manual?
Questions and answers