
Related Manuals for Krüger & Matz KM0550B

Summary of Contents for Krüger & Matz KM0550B
- Page 1 DVB-T2 HD tuner KM0550B BEDIENUNGSANLEITUNG OWNER’S MANUAL INSTRUKCJA OBSŁUGI MANUAL DE UTILIZARE...
- Page 3 Bedienungsanleitung SICHERHEITSANLEITUNGEN Lesen Sie diese Bedienungsanleitung vor Inbetriebnahme sorgfältig durch, und bewahren diese auf zum späteren Nachschlagen. Der Hersteller übernimmt keine Haftung für Schäden, verursacht durch unsachgemäße Bedienung und Benutzung des Gerätes. Das Blitzsymbol mit Pfeilspitze im gleichseitigen Dreieck soll den Benutzer auf das Vorhandensein von nicht isolierter, gefährlicher Spannung, innerhalb des Produktgehäuses aufmerksam machen, die so stark sein kann, dass die Gefahr eines Stromschlags besteht.
- Page 4 Bedienungsanleitung • Verwenden Sie niemals dieses Gerät, wenn dieses beschädigt ist oder abnormal funktioniert. • Das Gerät nicht zerlegen, ändern oder versuchen dieses zu reparieren. Bei Beschädigung, wenden Sie sich an einen autorisierten Kundendienst für Überprüfung / Reparatur. • Das Gerät kann von Kindern benutzt werden, die älter als 8 Jahre alt sind und von Personen mit eingeschränkten physischen, sensorischen oder geistigen Fähigkeiten oder Mangel an Erfahrung und Wissen, wenn sie von einer Person beaufsichtigt und geleitet werden, die für ihre Sicherheit zuständig ist, in einer vorsichtigen Art...
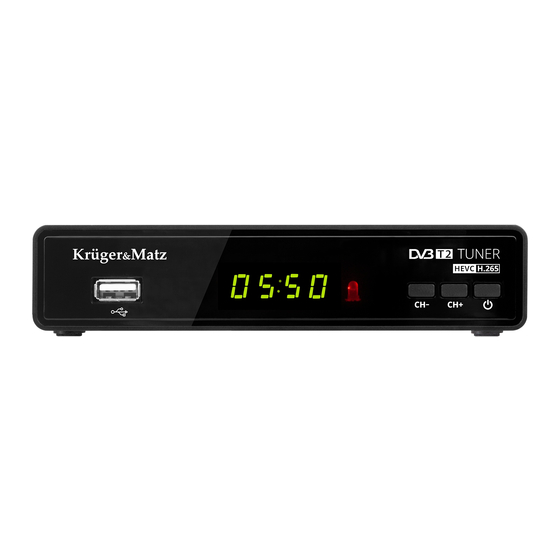
- Page 5 Bedienungsanleitung BEDIENELEMENTE Front Paneel 1. USB Steckplatz 4. Nächster Kanal 2. Display 5. Netztaste [POWER] 3. Vorheriger Kanal Rückseitiges Paneel 1. Antenneneingang [ANT IN] 4. SCART 2. Coaxial 5. Netzkabelanschluss [AC IN] 3. HD ausgang [HD-OUT...
- Page 6 Bedienungsanleitung FERNBEDIENUNG 1. Taste Ein/Aus 2. Vorherige Datei/Titel 3. Schneller Rücklauf 4. Nächste Datei/Titel 5. Schneller Vorlauf 6. Wiedergabe 7. Pause 8. Aufnehmen [REC] 9. Stopp 10. Rote Taste [USB]: Media Player 11. Grüne Taste [SUBTITLE]: Untertitel anzeigen 12. Blaue Taste [AUDIO]: Spracheinstellungen 13.
- Page 7 Bedienungsanleitung PROGRAMMIEREN DER TV STEUERTASTEN 1. Platzieren Sie die Tuner-Fernbedienung und die TV-Fernbedienung in einem Abstand von etwa 4 cm zueinander. 2. Halten Sie die Taste SET gedrückt, bis die rote LED stärker leuchtet. 3. Drücken Sie auf der Tuner-Fernbedienung eine der programmierbaren Tasten (im TV Steuer-Rahmen).
-
Page 8: Batterien Einlegen
Bedienungsanleitung BATTERIEN EINLEGEN 1. Batteriefachdeckel entfernen. 2. Zwei “AAA” Batterien einlegen. Achten Sie auf die korrekte Polarität. 3. Schließen Sie den Batteriefachdeckel bis er einrastet. Hinweise: • Verwenden Sie nicht neue und alte Batterien zusammen. • Entfernen Sie die Batterien, wenn die Fernbedienung für einen längeren Zeitraum nicht verwendet wird.Legen Sie die Fernbedienung nicht in die pralle Sonne oder in der Nähe von Wärmequellen. - Page 9 Bedienungsanleitung HAUPTMENÜ rogramm Sender bearbeiten: Dieses Menü ermöglicht das Blockieren, Löschen, Überspringen und Ändern der Reihenfolge der Sender sowie das Hinzufügen von Sendern zu Favoriten. Um eine Vorschau des ausgewählten Senders anzuzeigen, drücken Sie die Taste OK. Drücken Sie eine der Tasten, um in den Senderbearbeitungsmodus zu gelangen: •...
- Page 10 Bedienungsanleitung Dieses Menü ermöglicht das Einstellen von Datum und Uhrzeit, Schlaftimer und automatisches Ein-/Ausschalten. Timer: • Drücken Sie die grüne Taste, um dem Timer einen neuen Eintrag hinzuzufügen. Stellen Sie Modus (Benachrichtigung oder Aufnahme), Typ, Datum und Uhrzeit sowie Sender ein.
- Page 11 Bedienungsanleitung » Drücken Sie PAUSE, um die Wiedergabe anzuhalten. » Drücken Sie FWD und REV, um die Wiedergabe vor- oder zurückzuspulen. » Drücken Sie STOP, um die Funktion zu beenden und das Programm weiter anzusehen. Hinweise: » Es wird empfohlen, ein USB Laufwerk im 2.0-Standard zu verwenden. USB Laufwerke mit niedrigen Parametern sind möglicherweise nicht mit dem Gerät kompatibel.
-
Page 12: Technische Daten
Bedienungsanleitung TECHNISCHE DATEN HAUPTMERKMALE LED-Anzeige Voll kompatibel mit DVB-T2/DVB-T Automatische/manuelle Suche Software-Aktualisierung, Medienwiedergabe und PVR über USB 2.0 Steckplatz 7 Tage EPG Zeitverschiebung Mehrsprachiges Menü PVR Aufnahmeprogrammierung Signalstärke und Qualität Logische Kanalnummerierung TV Sender-Vorschau Kindersicherung Timer Teletext Favoritenliste Wetter SYSTEM CPU: GX6702S5 Interner Speicher: 32 Mb RAM: 512 MB DDR3... -
Page 13: Fehlerbehebung
Bedienungsanleitung ANSCHLÜSSE SCART COAXIAL HDMI (576I/P, 720I/P, 1080I/P) USB 2.0 1x IEC Anschluss (ANT) NETZGERÄT Eingangsspannung: 110-240 V; 50/60 Hz Fernbedienung: 2x AAA Batterien Energieverbrauch: Max. 6 W Energieverbrauch im Bereitschaftsmodus: Max. 1 W PHYSISCHE PARAMETER Abmessungen: 150 x 86 x 32 mm Kabellänge: 1,1 m Gewicht: 226 g IM SET... - Page 14 Bedienungsanleitung Fernbedienung Das Gerät ist ausgeschaltet Gerät einschalten funktioniert nicht Die Fernbedienung Fernbedienung auf ist nicht am Gerät das Gerät richten in ausgerichtet einem Abstand nicht größer als 8 Meter vom Fernbedienungs-Sensor und innerhalb von 30° horizontal und 30° vertikal von der Vorderseite des Gerätes Es gibt Hindernisse...
-
Page 15: Safety Instructions
Owner’s manual SAFETY INSTRUCTIONS Read the instruction manual carefully before first use and keep it for future reference. Producer is not responsible for damages caused by inappropriate handling and use of the device. The lightning flash with arrowhead symbol, whithin an equilateral triangle is indicated to alert the user the presence of uninsulated, dangerous voltage, within the product enclosure that may be of sufficient magnitude to constitute risk of electric shock to persons. - Page 16 Owner’s manual authorized service point for check-up/repair. • This appliance may be used by children who are above 8 years old and by persons with reduced physical, sensory or mental capabilities, or lack of experience and knowledge, if they are supervised and guided by a person who is responsible for their safety in a cautious manner, and all the safety precautions are understood and followed.
-
Page 17: Product Description
Owner’s manual PRODUCT DESCRIPTION Front panel 1. USB port 4. Next channel 2. Display 5. Power button 3. Previous channel Back panel 1. Antenna input 4. SCART output 2. Coaxial output 5. Power cord 3. HDMI output... -
Page 18: Remote Control
Owner’s manual REMOTE CONTROL Power button Previous file/track Fast rewind Next file/track Fast forward Play Pause Record Stop 10. Red button (USB): Media Player 11. Green button (SUBTITLE): enable subtitles 12. Blue button (AUDIO): language settings 13. Yellow button (TTX) 14. -
Page 19: Connecting To The Tv
Owner’s manual PROGRAMMING TV CONTROL BUTTONS 1. Place the tuner remote and the TV remote towards each other, at around 4 cm. 2. Press and hold the SET button, until red LED glows stronger. 3. On the tuner remote, press one of the programmable buttons (placed in TV CONTROL frame) 4. -
Page 20: Installation Of Batteries
Owner’s manual INSTALLATION OF BATTERIES 1. Open the battery compartment. 2. Insert 2x AAA batteries with correct polarization (+/-). 3. Close the battery compartment. Notes: • Do not mix the batteries. • Remove the batteries if the remote control is not going to be used for an extended period of time. - Page 21 Owner’s manual MAIN MENU rogram Channel Edit: This menu allows for blocking, deleting, skipping and changing order of the channels, and adding channels to favorites. To preview selected channel, press the OK button. Press one of the buttons, to go to the channel edit mode: •...
- Page 22 Owner’s manual • Press the red button to delete highlighted timer entry. • Press the yellow button to edit highlighted timer entry. • Press the blue button to delete all timer entries. PtionS Settings for language, subtitles and sound. yStem Parental Control: •...
- Page 23 Owner’s manual RECORDING 1. Make sure the USB drive is connected to the device. 2. While watching a program, press the REC button on the remote control to start recording (press the REC button twice to change the default recording time). 3.
-
Page 24: Troubleshooting
Owner’s manual TROUBLESHOOTING Problem Possible reason Possible solution LED indicator is not on Power adapter is Check the connection of disconnected power adapter No signal Antenna is disconnected Check antenna connection Antenna is damaged/ improperly set No signal is transmitted No image or sound Improper mode has been Choose proper mode on... -
Page 25: Specification
Owner’s manual SPECIFICATION MAIN FEATURES LED display Fully compliant with DVB-T2/DVB-T Automatic/manual scan Software update, media playback and PVR by USB 2.0 port 7 days EPG Timeshift Multilanguage menu PVR schedule recording Signal strength and quality display LCN (Logical Channel Number) TV channels preview Parental control Timer... -
Page 26: Physical Parameters
Owner’s manual POWER SUPPLY Input voltage: 110-240 V; 50/60 Hz Remote control: 2x AAA battery Power consumption: Max. 6 W Power consumption in standby mode: Max. 1 W PHYSICAL PARAMETERS Dimensions: 150 x 86 x 32 mm Power cord length: 1,1 m Weight: 226 g IN SET Remote control, user’... - Page 27 Instrukcja obsługi KWESTIE BEZPIECZEŃSTWA Przed użyciem należy dokładnie zapoznać się z treścią instrukcji obsługi oraz zachować ją w celu późniejszego wykorzystania. Producent nie ponosi odpowiedzialności za nieprawidłowe użycie produktu. Symbol błyskawicy zakończonej strzałką obrębie trójkąta równobocznego ma na celu ostrzegać użytkownika o obecności nieizolowanego “niebezpiecznego napięcia”...
- Page 28 Instrukcja obsługi jeżeli zapewniony zostanie nadzór lub instruktaż odnośnie użytkowania sprzętu w bezpieczny sposób, tak aby związane z tym zagrożenia były zrozumiałe. Należy poinstruować dzieci, aby nie traktowały urządzenia jako zabawki. Dzieci nie powinny wykonywać czyszczenia i konserwacji sprzętu bez nadzoru. •...
-
Page 29: Opis Produktu
Instrukcja obsługi OPIS PRODUKTU Panel przedni 1. Port USB 4. Następny kanał 2. Wyświetlacz 5. Przycisk zasilania 3. Poprzedni kanał Panel tylny 1. Wejście antenowe 4. Wyjście SCART 2. Wyjście Coaxial 5. Przewód zasilania 3. Wyjście HDMI... -
Page 30: Pilot Zdalnego Sterowania
Instrukcja obsługi PILOT ZDALNEGO STEROWANIA Przycisk zasilania Poprzedni plik/utwór Przewijanie do tyłu Następny plik/utwór Przewijanie do przodu Odtwarzanie Pauza Nagrywanie programu Stop 10. Czerwony przycisk (USB): odtwarzanie filmów z USB 11. Zielony przycisk (SUBTITLE): włączenie napisów 12. Żółty przycisk (TTX): telegazeta 13. -
Page 31: Podłączanie Do Telewizora
Instrukcja obsługi PROGRAMOWANIE PRZYCISKÓW DO KONTROLI TELEWIZORA 1. Umieścić pilot tunera i pilot telewizora diodami do siebie, w odległości około 4 cm. 2. Nacisnąć i przytrzymać przycisk SET, aż czerwona dioda zacznie świecić mocniej. 3. Na pilocie tunera nacisnąć jeden z programowalnych przycisków (znajdujące się w ramce TV CONTROL). -
Page 32: Instalacja Baterii
Instrukcja obsługi INSTALACJA BATERII 1. Należy otworzyć gniazdo baterii. 2. Następnie umieścić 2x baterie AAA zgodnie z zaznaczoną polaryzacją. 3. Zamknąć pokrywę baterii. Uwagi: • Nie należy umieszczać w pilocie różnych typów baterii jednocześnie. • Jeśli pilot nie będzie używany przez dłuższy czas, należy przechowywać... -
Page 33: Menu Główne
Instrukcja obsługi MENU GŁÓWNE rogram Edycja kanałów: Menu pozwala na blokowanie, usuwanie, pomijanie i zmianę kolejności kanałów, oraz dodawanie kanałów na listę ulubionych. Aby podejrzeć wybrany kanał na liście, należy nacisnąć przycisk OK. Nacisnąć przycisk, aby przejść do trybu edycji kanałów: •... - Page 34 Instrukcja obsługi Timer: • Nacisnąć zielony przycisk, aby dodać wpis do timera. Ustawić tryb, typ, datę i godzinę rozpoczęcia oraz kanał. Nacisnąć przycisk EXIT, aby zapisać. • Nacisnąć czerwony przycisk, aby usunąć podświetlony wpis. • Nacisnąć żółty przycisk, aby edytować wpis. •...
- Page 35 Instrukcja obsługi potwierdzić przyciskiem OK. » Nacisnąć przycisk Pauzy, aby zatrzymać odtwarzanie. » Nacisnąć przycisk REV i FWD aby przewijać odtwarzanie. » Nacisnąć przycisk STOP, aby wyjść z funkcji Timeshift, i wrócić do aktualnie nadawanego programu. Uwaga: » Zalecane jest używanie dysków USB w standardzie 2.0. Dyski USB o niższych standardach mogą...
-
Page 36: Rozwiązywanie Problemów
Instrukcja obsługi ROZWIĄZYWANIE PROBLEMÓW Problem Możliwa przyczyna Możliwe rozwiązanie Wskaźnik LED nie świeci się Zasilacz jest odłączony Należy sprawdzić podłączenie zasilacza Brak sygnału Antena jest odłączona Należy sprawdzić podłączenie anteny Antena jest uszkodzona / nieprawidłowo ustawiona Brak nadawanego sygnału Brak obrazu lub dźwięku Nie został... -
Page 37: Główne Funkcje
Instrukcja obsługi SPECYFIKACJA GŁÓWNE FUNKCJE Wyświetlacz LED W pełni kompatybilny z DVB-T2/DVB-T Automatyczne/ręczne wyszukiwanie kanałów Aktualizacja oprogramowania, odtwarzanie multimediów oraz PVR przez port USB 7-dniowy przewodnik po programach (EPG) Timeshift Wielojęzyczne menu Programowanie nagrywania (PVR) Wyświetlanie siły i jakości sygnału LCN (Logiczny Numer Kanału) Podgląd kanałów TV Kontrola rodzicielska... -
Page 38: Zawartość Zestawu
Instrukcja obsługi WEJŚCIA/WYJŚCIA SCART COAXIAL HDMI (576I/P, 720I/P, 1080I/P) USB 2.0 1x IEC konektor (ANT IN) ZASILANIE Napięcie wejściowe: 110-240 V; 50/60 Hz Pilot: 2x bateria AAA Pobór mocy: Maks. 6 W Pobór mocy w trybie czuwania: Maks. 1 W PARAMETRY FIZYCZNE Wymiary: 150 x 86 x 32 mm Długość... - Page 39 Manual de utilizare ASPECTE PRIVIND SIGURANȚĂ Înainte de utilizare, citiți cu atenție instrucțiunile de utilizare și păstrați-le pentru utilizare ulterioară. Producătorul nu este răspunzător pentru utilizarea incorectă a produsului. Triunghiul continand simbolul fulgerului indica cazurile in care sanatatea dumneavoastra este in pericol (datorita electrocutarii, de exemplu).
- Page 40 Manual de utilizare nu au experiență și nu sunt familiarizate cu echipamentul, dacă sunt asigurate supraveghere sau instructaj privind utilizarea echipamentelor într-un mod sigur, astfel încât riscurile asociate cu aceasta să fie înțelese. Copii trebuie instructați ca să nu a trateze dispozitivul ca o jucărie. Copiii nu trebuie să efectueze curățarea și întreținerea echipamentului fără...
-
Page 41: Descrierea Produsului
Manual de utilizare DESCRIEREA PRODUSULUI Panoul frontal 1. Port USB 4. Canalul următor 2. Afișaj 5. Buton alimentare 3. Canalul anterior Panoul spate 1. Intrare antenă 4. Ieșire SCART 2. Coaxial 5. Cablu de alimentare 3. Ieșire HDMI... - Page 42 Manual de utilizare TELECOMANDĂ Buton alimentare Fișie/melodia anterioară Derulare rapidă înapoi Fișier/melodia următoare Derulare rapidă înainteRedare Redare Pauză Înregistrare Stop 10. Buton roșu (USB): Player Media 11. Buton verde (SUBTITLE): activare subtitrări 12. Buton albastru (AUDIO): setări limbă 13. Buton galben (TTX) 14.
-
Page 43: Instalarea Bateriei
Manual de utilizare PROGRAMAREA BUTOANELOR DE CONTROL ALE TELEVIZORULUI 1. Puneți telecomanda tuner-ului și telecomanda TV-ului una către celălaltă, la aproximativ 4 cm distanță unul față de celălalt. 2. Apăsați și țineți apăsat butonul SET, până când LED-ul roșu luminează puternic. 3. - Page 44 Manual de utilizare CONECTAREA LA TV » Pentru a obține o rezoluție standard, conectați dispozitivul la TV cu cablu SCART. » Pentru a obține o rezoluție mare, conectați dispozitivul la TV cu cablu HDMI. Cablu HDMI Antenă Alimentare Cablu SCART INSTALARE RAPIDĂ...
-
Page 45: Meniu Principal
Manual de utilizare MENIU PRINCIPAL rogram Editare canal: Acest meniu permite blocarea, ștergerea, omiterea și modificarea ordinii canalelor și adăugarea de canale favorite. Pentru a previzualiza canalul selectat, apăsați butonul OK. Apăsați unul dintre butoane pentru a accesa modul de editare al canalului: •... - Page 46 Manual de utilizare Temporizator: • Apăsați butonul verde pentru a adăuga o intrare nouă la temporizator. Setați modul (notificare sau înregistrare), tipul, data - ora și canalul. Apăsați butonul EXIT pentru a salva. • Apăsați butonul roșu pentru a șterge intrarea evidențiată a temporizatorului. •...
- Page 47 Manual de utilizare Note: » Este recomandat să utilizați o unitate USB standard 2.0. Este posibil ca unele din unitățile USB să nu fie compatibili cu dispozitivul. » Unitățile USB de mare capacitate pot necesita alimentare externă. RECORDING (ÎNREGISTRARE) 1. Asigurați-vă că unitatea USB este conectată la dispozitiv. 2.
- Page 48 Manual de utilizare DEPANARE Problemă Motiv posibil Soluție posibilă Indicatorul LED nu este Adaptorul de alimentare Verificați conexiunea pornit este deconectat adaptorului de alimentare Fără semnal Antena este deconectată Verificați conexiunea antenei Antena este deteriorată/ setată necorespunzător Nu este transmis niciun semnal Fără...
-
Page 49: Caracteristici Principale
Manual de utilizare SPECIFICATII CARACTERISTICI PRINCIPALE Afisaj cu LED Compatibil cu DVB-T2/DVB-T Scanare automata /manuala Actualizare software, redare media și PVR prin port USB 2.0 EPG 7 zile Funcție temporizator Meniu multilingv PVR program de inregistrare Putere și calitate semnal LCN (Număr logic de canale) Previzualizare canale TV Control parental... - Page 50 Manual de utilizare ALIMENTARE Tensiune de intrare: 110-240 V; 50/60 Hz Telecomanda: 2 baterii AAA Consum putere: Max. 6 W Consum de putere în modul standby: Max. 1 W PARAMETRI FIZICI Dimensiuni: 150 x 86 x 32 mm Lungime cablu alimentare: 1,1 m Greutate: 226 g CONTINUT COLET Telecomandă, manual de utilizare...
- Page 52 www.krugermatz.com is a registered trademark...
Need help?
Do you have a question about the KM0550B and is the answer not in the manual?
Questions and answers