
Related Manuals for Krüger & Matz KM0550

Summary of Contents for Krüger & Matz KM0550
- Page 1 DVB-T2 HD tuner KM0550 BEDIENUNGSANLEITUNG OWNER’S MANUAL INSTRUKCJA OBSŁUGI MANUAL DE UTILIZARE...
- Page 3 Bedienungsanleitung SICHERHEITSANLEITUNGEN Lesen Sie diese Bedienungsanleitung vor Inbetriebnahme sorgfältig durch, und bewahren diese auf zum späteren Nachschlagen. Der Hersteller übernimmt keine Haftung für Schäden, verursacht durch unsachgemäße Bedienung und Benutzung des Gerätes. Das Blitzsymbol mit Pfeilspitze im gleichseitigen Dreieck soll den Benutzer auf das Vorhandensein von nicht isolierter, gefährlicher Spannung, innerhalb des Produktgehäuses aufmerksam machen, die so stark sein kann, dass die Gefahr eines Stromschlags besteht.
- Page 4 Bedienungsanleitung • Verwenden Sie niemals dieses Gerät, wenn dieses beschädigt ist oder abnormal funktioniert. • Das Gerät nicht zerlegen, ändern oder versuchen dieses zu reparieren. Bei Beschädigung, wenden Sie sich an einen autorisierten Kundendienst für Überprüfung / Reparatur. • Das Gerät kann von Kindern benutzt werden, die älter als 8 Jahre alt sind und von Personen mit eingeschränkten physischen, sensorischen oder geistigen Fähigkeiten oder Mangel an Erfahrung und Wissen, wenn sie von einer Person beaufsichtigt und geleitet werden, die für ihre Sicherheit zuständig ist, in einer vorsichtigen Art...
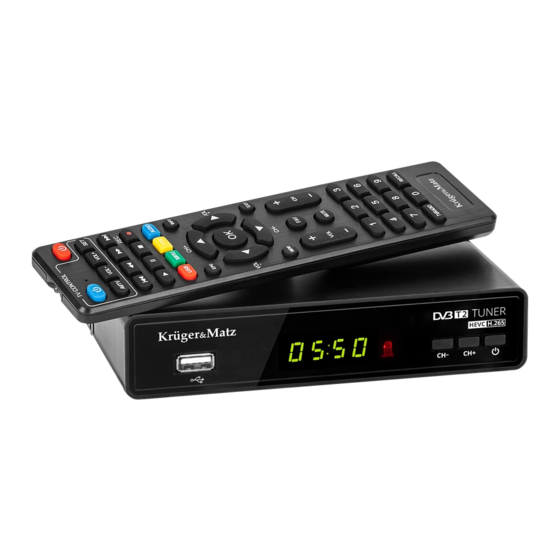
- Page 5 Bedienungsanleitung BEDIENELEMENTE Front Paneel 1. USB Steckplatz 4. Nächster Kanal 2. Display 5. Netztaste [POWER] 3. Vorheriger Kanal Rückseitiges Paneel 1. Antenneneingang [ANT IN] 4. Ethernet 2. HD ausgang [HD-OUT 5. Netzkabelanschluss [AC IN] 3. SCART...
- Page 6 Bedienungsanleitung FERNBEDIENUNG 1. Taste Ein/Aus 2. Vorherige Datei/Titel 3. Schneller Rücklauf 4. Nächste Datei/Titel 5. Schneller Vorlauf 6. Wiedergabe 7. Pause 8. Aufnehmen [REC] 9. Stopp 10. Rote Taste [USB]: Media Player 11. Grüne Taste [SUBTITLE]: Untertitel anzeigen 12. Blaue Taste [AUDIO]: Spracheinstellungen 13.
- Page 7 Bedienungsanleitung PROGRAMMIEREN DER TV STEUERTASTEN 1. Platzieren Sie die Tuner-Fernbedienung und die TV-Fernbedienung in einem Abstand von etwa 4 cm zueinander. 2. Halten Sie die Taste SET gedrückt, bis die rote LED stärker leuchtet. 3. Drücken Sie auf der Tuner-Fernbedienung eine der programmierbaren Tasten (im TV Steuer-Rahmen).
-
Page 8: Batterien Einlegen
Bedienungsanleitung BATTERIEN EINLEGEN 1. Batteriefachdeckel entfernen. 2. Zwei “AAA” Batterien einlegen. Achten Sie auf die korrekte Polarität. 3. Schließen Sie den Batteriefachdeckel bis er einrastet. Hinweise: • Verwenden Sie nicht neue und alte Batterien zusammen. • Entfernen Sie die Batterien, wenn die Fernbedienung für einen längeren Zeitraum nicht verwendet wird.Legen Sie die Fernbedienung nicht in die pralle Sonne oder in der Nähe von Wärmequellen. -
Page 9: Installation
Bedienungsanleitung INSTALLATION » Automatische Sendersuche [Auto Channels Scan]: Automatische Suche und Speicherung der verfügbaren TV Sender. » Manuelle Sendersuche [Manual Channels Scan]: Manuelle Suche nach TV Sender. Sie können die Sender nach Nummer oder Frequenz suchen. Nach Auswahl der gewünschten Option, drücken Sie Suchen [Search] um die Suche zu starten. »... - Page 10 Bedienungsanleitung 4. Sender verschieben Wählen Sie einen Sender und drücken die gelbe Taste. Drücken Sie die Taste OK. Der Sender wird mit einem Symbol gekennzeichnet. Verwenden Sie die Tasten Aufwärts und Abwärts auf der Fernbedienung, um den Sender zu verschieben, und drücken die Taste OK.
- Page 11 Bedienungsanleitung Hinweis: Wenn der Aktualisierungsprozess nicht startet, benutzen Sie einen USB Speicher in FAT32 Format. Auto Standby Stellen Sie ein, nach welcher Zeit der Receiver automatisch in den Bereitschafts-Modus wechselt. Network » Netzwerkeinstellung [Network Setting]: Wählen Sie Ethernet oder WLAN [Wi-Fi]. Nach Auswahl der WLAN Option, wird eine Netzwerkliste angezeigt (USB WLAN Karte wird benötigt).
- Page 12 Bedienungsanleitung » GMT Verschiebung [GMT Offset]: Stellen Sie die Zeitzone ein (nur wenn "GMT Verwendung" auf " Benutzerdefiniert" eingestellt ist). » Datum [Date]: Stellen Sie das Datum ein (nur wenn "GMT Verwendung" auf "Aus" eingestellt ist). » Zeit [Time]: Stellen Sie die Zeit ein (nur wenn "GMT Verwendung " auf "Aus" gestellt ist).
- Page 13 Bedienungsanleitung Andere [Other] » Antennenstromversorgung [Antenna power]: Stellen Sie diese Option auf EIN, wenn Sie eine aktive Antenne ohne Netzteil haben. Stellen Sie AUS ein, wenn Sie eine passive Antenne oder eine aktive Antenne mit Netzteil haben. Der Standardwert ist AUS. »...
- Page 14 Bedienungsanleitung PVR Speicherinformationen [PVR Storage Information] Zeigt Informationen zum USB Laufwerk an. PVR Einstellungen [PVR Settings] » Zeitversetzt [Timeshift]: Der Standardwert ist AUS. » Sprung [Jump]: Verfügbare Optionen sind: 30 Sek., 1 Min., 5 Min., 10 Min. Oder 30 Min. »...
-
Page 15: Technische Daten
Bedienungsanleitung 4. Aufnahmen werden auf dem USB Laufwerk gespeichert und sind im Media Player verfügbar. Hinweis: Verwenden Sie die Timer-Funktion oder EPG, um eine Aufnahme zu planen. EPG (ELEKTRONISCHER PROGRAMMFÜHRER) 1. Drücken Sie die Taste EPG auf der Fernbedienung, um den elektronischen Programmführer aufzurufen. - Page 16 Bedienungsanleitung Videodekodierung: MPEG-2, MPEG-4, H.264, H.265, AAC, HE-AAC, AC-3, DD+ Unterstützte Formate: H.264, HEVC, MP3, MP4, MKV, JPEG, AVI Audiodekodierung: MPEG-1 Layer I/II, MPEG-2 layer I/II, AAC, AAC+/HE-AAC/AC3,Dolby plus Dateisystem: FAT32, NTFS TV TUNER Eingangsfrequenz: (VHF) 170~230 MHz; (UHF) 470~862 MHz Demodulation: QPSK, 16QAM, 64QAM, 256QAM Band: 7 MHz, 8 MHz ANSCHLÜSSE...
-
Page 17: Fehlerbehebung
Bedienungsanleitung FEHLERBEHEBUNG Problem Mögliche Ursache Mögliche Lösung LED Anzeige leuchtet nicht Netzgerät ist getrennt Überprüfen Sie die Verbindung des Netzgerätes Kein Signal Antenne ist getrennt Antennenverbindung überprüfen Antenne ist beschädigt / nicht richtig eingestellt Kein Signal wird übertragen Kein Bild oder Ton Falscher Modus wurde am Richtigen Modus am TV TV ausgewählt... - Page 18 Bedienungsanleitung Wenn das Gerät in einen Antennenanschluss Überprüfen Sie den anderen Raum bewegt am neuem Platz kann Antennenanschluss oder wird, gibt es kein Signal unterschiedlich sein verbinden Sie die Antenne (niedrigere Signalstärke mit einem Verstärker führt zu schwächeren Empfang oder kein Signal) Deutsch Korrekte Entsorgung dieses Produkts (Elektromüll)
-
Page 19: Safety Instructions
Owner’s manual SAFETY INSTRUCTIONS Read the instruction manual carefully before first use and keep it for future reference. Producer is not responsible for damages caused by inappropriate handling and use of the device. The lightning flash with arrowhead symbol, whithin an equilateral triangle is indicated to alert the user the presence of uninsulated, dangerous voltage, within the product enclosure that may be of sufficient magnitude to constitute risk of electric shock to persons. - Page 20 Owner’s manual authorized service point for check-up/repair. • This appliance may be used by children who are above 8 years old and by persons with reduced physical, sensory or mental capabilities, or lack of experience and knowledge, if they are supervised and guided by a person who is responsible for their safety in a cautious manner, and all the safety precautions are understood and followed.
-
Page 21: Product Description
Owner’s manual PRODUCT DESCRIPTION Front panel 1. USB port 4. Next channel 2. Display 5. Power button 3. Previous channel Back panel 1. Antenna input 4. Ethernet port 2. HDMI output 5. Power cord 3. SCART output... -
Page 22: Remote Control
Owner’s manual REMOTE CONTROL Power button Previous file/track Fast rewind Next file/track Fast forward Play Pause Record Stop 10. Red button (USB): Media Player 11. Green button (SUBTITLE): enable subtitles 12. Blue button (AUDIO): language settings 13. Yellow button (TTX) 14. -
Page 23: Connecting To The Tv
Owner’s manual PROGRAMMING TV CONTROL BUTTONS 1. Place the tuner remote and the TV remote towards each other, at around 4 cm. 2. Press and hold the SET button, until red LED glows stronger. 3. On the tuner remote, press one of the programmable buttons (placed in TV CONTROL frame) 4. -
Page 24: Installation Of Batteries
Owner’s manual INSTALLATION OF BATTERIES 1. Open the battery compartment. 2. Insert 2x AAA batteries with correct polarization (+/-). 3. Close the battery compartment. Notes: • Do not mix the batteries. • Remove the batteries if the remote control is not going to be used for an extended period of time. -
Page 25: Channel Menu
Owner’s manual CHANNEL MENU TV Channel List: Editing channel lists by locking, deleting, skipping, moving channels and creating favorite channel lists. To preview the channel, select it and press OK. 1. Adding a channel to favorites » Select a channel and press the FAV button on he remote control. Press the OK button to display lists of favorites. -
Page 26: System Setup
Owner’s manual Radio Channel List: Edits the Radio Channel List. Delete All: Opens a warning window. If you choose Yes, all channels will be deleted. TOOLS Information Displays information about the device. Factory Settings Deletes channels and user settings. Upgrade by USB Copy the latest firmware to a USB stick. - Page 27 Owner’s manual » Digital Audio Output: Available options: BS Out or LPCM Out. The default value is LPCM Out. Display settings: » Brightness (default value is 50) » Contrast (default value is 50) » Saturation (default value is 50) » Hue (default value is 50) »...
- Page 28 Owner’s manual OSD Setting » OSD Timeout: Select the duration of displaying Info bar, from 1 to 10 seconds. The default value is 5. » OSD Transparency: Set the OSD transparency to Off, or from 10% to 40%. The default value is Off.
- Page 29 Owner’s manual PVR Storage Information Displays information about the USB drive. PVR Settings » Timeshift: The default value is OFF. » Jump: Available options are: 30 sec, 1 min, 5 min, 10 min or 30 min. » Timeshift to Record: It allows to record timeshift video. Remove USB device safely Select the connected USB drive and press the OK button to safely remove the USB drive.
-
Page 30: Troubleshooting
Owner’s manual EPG (ELECTRONIC PROGRAM GUIDE) 1. Press the EPG button on the remote control to enter Electronic Program Guide. 2. Use direction buttons on the remote control to navigate the menu. 3. Press the Timer button to enter the PVR schedule menu. TROUBLESHOOTING Problem Possible reason... -
Page 31: Specification
Owner’s manual Forgotten channel Delete locked channel and password scan channels again When the device is moved Antenna connection in Check antenna connection to another room, there is new place may be different or connect amplifier to the no signal (lower signal strength antenna resulting in weaker... -
Page 32: Physical Parameters
Owner’s manual Audio decoding: MPEG-1 Layer I/II, MPEG-2 layer I/II, AAC, AAC+/HE-AAC/AC3,Dolby plus File system: FAT32, NTFS TV TUNER Input frequency range: (VHF) 170~230 MHz; (UHF) 470~862 MHz Demodulation: QPSK, 16QAM, 64QAM, 256QAM Band: 7 MHz, 8 MHz INPUT/OUTPUT SCART HDMI (576I/P, 720I/P, 1080I/P) USB 2.0 1x IEC connector (ANT IN) - Page 33 Instrukcja obsługi KWESTIE BEZPIECZEŃSTWA Przed użyciem należy dokładnie zapoznać się z treścią instrukcji obsługi oraz zachować ją w celu późniejszego wykorzystania. Producent nie ponosi odpowiedzialności za nieprawidłowe użycie produktu. Symbol błyskawicy zakończonej strzałką obrębie trójkąta równobocznego ma na celu ostrzegać użytkownika o obecności nieizolowanego “niebezpiecznego napięcia”...
- Page 34 Instrukcja obsługi jeżeli zapewniony zostanie nadzór lub instruktaż odnośnie użytkowania sprzętu w bezpieczny sposób, tak aby związane z tym zagrożenia były zrozumiałe. Należy poinstruować dzieci, aby nie traktowały urządzenia jako zabawki. Dzieci nie powinny wykonywać czyszczenia i konserwacji sprzętu bez nadzoru. •...
-
Page 35: Opis Produktu
Instrukcja obsługi OPIS PRODUKTU Panel przedni 1. Port USB 4. Następny kanał 2. Wyświetlacz 5. Przycisk zasilania 3. Poprzedni kanał Panel tylny 1. Wejście antenowe 4. Port Ethernet 2. Wyjście HDMI 5. Przewód zasilania 3. Wyjście SCART... -
Page 36: Pilot Zdalnego Sterowania
Instrukcja obsługi PILOT ZDALNEGO STEROWANIA Przycisk zasilania Poprzedni plik/utwór Przewijanie do tyłu Następny plik/utwór Przewijanie do przodu Odtwarzanie Pauza Nagrywanie programu Stop 10. Czerwony przycisk (USB): odtwarzanie filmów z USB 11. Zielony przycisk (SUBTITLE): włączenie napisów 12. Żółty przycisk (TTX): telegazeta 13. -
Page 37: Podłączanie Do Telewizora
Instrukcja obsługi PROGRAMOWANIE PRZYCISKÓW DO KONTROLI TELEWIZORA 1. Umieścić pilot tunera i pilot telewizora diodami do siebie, w odległości około 4 cm. 2. Nacisnąć i przytrzymać przycisk SET, aż czerwona dioda zacznie świecić mocniej. 3. Na pilocie tunera nacisnąć jeden z programowalnych przycisków (znajdujące się w ramce TV CONTROL). -
Page 38: Instalacja Baterii
Instrukcja obsługi INSTALACJA BATERII 1. Należy otworzyć gniazdo baterii. 2. Następnie umieścić 2x baterie AAA zgodnie z zaznaczoną polaryzacją. 3. Zamknąć pokrywę baterii. Uwagi: • Nie należy umieszczać w pilocie różnych typów baterii jednocześnie. • Jeśli pilot nie będzie używany przez dłuższy czas, należy przechowywać... -
Page 39: Edycja Kanałów
Instrukcja obsługi INSTALACJA » Wyszukiwanie automatyczne: automatyczne szukanie i zapisywanie kanałów telewizyjnych i radiowych » Wyszukiwanie ręczne: Wyszukiwanie w wybranym zakresie i trybie skanowania. Po wybraniu opcji należy nacisnąć przycisk Szukaj, aby rozpocząć. » LCN (Logical Channel Number): Należy wybrać tę opcję, aby włączyć numerowanie kanałów według ich logicznego numeru. - Page 40 Instrukcja obsługi 5. Edycja Nacisnąć niebieski przycisk. Pojawią się dostępne opcje » Sortuj: Nacisnąć czerwony przycisk, aby sortować kanały. » Edycja: Nacisnąć zielony przycisk, aby włączyć tryb edycji. Wybrać kanał i nacisnąć przycisk OK, aby edytować nazwę kanału. Nacisnąć żółty przycisk, aby zatwierdzić nazwę.
-
Page 41: Ustawienia Systemu
Instrukcja obsługi USTAWIENIA SYSTEMU Język: Zmiana języka menu, dźwięku i napisów. System TV » Rozdzielczość: Wybór rozdzielczości obrazu. Domyślną rozdzielczością w przypadku używania złącza HDMI jest 1080i@25, w przypadku używania złącza SCART- 576i » Proporcje obrazu: Wybór proporcji obrazu. » Cyfrowe wejście audio: Dostępne opcje: BS Out, LPCM Out. Wartością domyślną jest LPCM Out. - Page 42 Instrukcja obsługi Blokada rodzicielska » Zablokuj menu: Po włączeniu funkcji, edycja i wyszukiwanie kanałów będzie chronione hasłem. Domyślnie funkcja jest wyłączona » Blokada wieku: ustawienie wieku dziecka. » Nowe hasło: wprowadzanie nowego hasła. » Potwierdź hasło: potwierdzanie nowego hasła. Uwaga: domyślne hasło to 0000. Jeżeli użytkownik nie pamięta ustawionego hasła, należy wprowadzić...
- Page 43 Instrukcja obsługi Informacje o HDD Wyświetla informacje o podłączonym dysku USB. Ustawienia PVR » Timeshift: domyślnie wyłączone » Przewiń: dostępne opcje: 30 sekund, 1 minuta, 5 minut, 10 minut, 30 minut. » Nagrywanie Timeshift: pozwala na nagrywanie funkcji TImeshift na dysk. Bezpieczne odłączanie USB Przed odłączeniem dysku USB od tunera, należy wybrać...
-
Page 44: Rozwiązywanie Problemów
Instrukcja obsługi EPG - PRZEWODNIK PO PROGRAMACH » Nacisnąć przycisk EPG, aby włączyć przewodnik po programach. » Uzyć przycisków nawigacyjnych, aby poruszać się po przewodniku. » Nacisnąć zielony przycisk, aby uruchomić funkcję Timer. ROZWIĄZYWANIE PROBLEMÓW Problem Możliwa przyczyna Możliwe rozwiązanie Wskaźnik LED nie świeci się... -
Page 45: Główne Funkcje
Instrukcja obsługi Po przeniesieniu urządzenia Podłączenie anteny w nowym Należy sprawdzić podłączenie do innego pomieszczenia, miejscu może być inne (słabsza anteny lub podłączyć do niej urządzenie przestało odbierać siła sygnału, powodująca wzmacniacz kanały zakłócenia w odbiorze kanałów lub ich brak) SPECYFIKACJA GŁÓWNE FUNKCJE Wyświetlacz LED... -
Page 46: Zawartość Zestawu
Instrukcja obsługi WEJŚCIA/WYJŚCIA SCART HDMI (576I/P, 720I/P, 1080I/P) USB 2.0 1x IEC konektor (ANT IN) RJ45 ZASILANIE Napięcie wejściowe: 110-240 V; 50/60 Hz Pilot: 2x bateria AAA Pobór mocy: Maks. 6 W Pobór mocy w trybie czuwania: Maks. 1 W PARAMETRY FIZYCZNE Wymiary: 150 x 86 x 32 mm Długość... - Page 47 Manual de utilizare ASPECTE PRIVIND SIGURANȚĂ Înainte de utilizare, citiți cu atenție instrucțiunile de utilizare și păstrați-le pentru utilizare ulterioară. Producătorul nu este răspunzător pentru utilizarea incorectă a produsului. Triunghiul continand simbolul fulgerului indica cazurile in care sanatatea dumneavoastra este in pericol (datorita electrocutarii, de exemplu).
- Page 48 Manual de utilizare nu au experiență și nu sunt familiarizate cu echipamentul, dacă sunt asigurate supraveghere sau instructaj privind utilizarea echipamentelor într-un mod sigur, astfel încât riscurile asociate cu aceasta să fie înțelese. Copii trebuie instructați ca să nu a trateze dispozitivul ca o jucărie. Copiii nu trebuie să efectueze curățarea și întreținerea echipamentului fără...
-
Page 49: Descrierea Produsului
Manual de utilizare DESCRIEREA PRODUSULUI Panoul frontal 1. Port USB 4. Canalul următor 2. Afișaj 5. Buton alimentare 3. Canalul anterior Panoul spate 1. Intrare antenă 4. Port Ethernet 2. Ieșire HDMI 5. Cablu de alimentare 3. Ieșire SCART... - Page 50 Manual de utilizare TELECOMANDĂ Buton alimentare Fișie/melodia anterioară Derulare rapidă înapoi Fișier/melodia următoare Derulare rapidă înainteRedare Redare Pauză Înregistrare Stop 10. Buton roșu (USB): Player Media 11. Buton verde (SUBTITLE): activare subtitrări 12. Buton albastru (AUDIO): setări limbă 13. Buton galben (TTX) 14.
-
Page 51: Instalarea Bateriei
Manual de utilizare PROGRAMAREA BUTOANELOR DE CONTROL ALE TELEVIZORULUI 1. Puneți telecomanda tuner-ului și telecomanda TV-ului una către celălaltă, la aproximativ 4 cm distanță unul față de celălalt. 2. Apăsați și țineți apăsat butonul SET, până când LED-ul roșu luminează puternic. 3. - Page 52 Manual de utilizare CONECTAREA LA TV » Pentru a obține o rezoluție standard, conectați dispozitivul la TV cu cablu SCART. » Pentru a obține o rezoluție mare, conectați dispozitivul la TV cu cablu HDMI. Cablu HDMI Antenă Alimentare Cablu SCART INSTALARE RAPIDĂ...
- Page 53 Manual de utilizare INSTALLATION (INSTALARE) » Auto Channels Scan (Scanare automată canale): Căutarea automată și salvarea canalelor disponibile. » Manual Channels Scan (Scanare manuală canale): Căutarea manuală a canalelor TV. Puteți căuta canalul după număr sau frecvență. După ce alegeți opțiunea dorită, apăsați Căutare pentru a începe căutarea.
- Page 54 Manual de utilizare 4. Mutarea unui canal Selectați un canal și apăsați butonul galben. Apăsați butonul OK. Acest canal va fi marcat cu o pictogramă. Utilizați butoanele sus și jos de pe telecomandă pentru a muta canalul, apăsați butonul OK. Pentru a confirma noua poziție a canalului, apăsați butonul EXIT. Notă: Dacă...
- Page 55 Manual de utilizare Network (Rețea) Network Setting (Setare rețea): alegeți Ethernet sau WiFi. După selectarea opțiunii WiFi, lista rețelelor va fi afișată (este necesar un card USB WiFi). Settings (Setări): Modificați setările rețelei. Network application (Aplicație de rețea): Aplicație meteo disponibilă (este necesară conexiunea la internet). SYSTEM SETUP (SETĂRI SISTEM) Language (Limbă): Selectați limba meniului prima dată, iar apoi audio și teletext.
- Page 56 Manual de utilizare » Wake up channel: Setați canalul. » Wake up date: Setați data. » On Time: Setați ora de pornire. » Duration (Durata): Setați durata afișării sau înregistrării unui canal. Notă: De asemenea, este posibil să setați temporizatorul din meniul EPG (consultați secțiunea EPG).
- Page 57 Manual de utilizare MEDIA PLAYER/PVR » Switch (Comutare): Apăsați 1 de pe telecomandă pentru a comuta între PVR, Muzică, Imagine și Video. » Sort (Sortare): Apăsați 2 de pe telecomandă pentru a sorta canalele în funcție de nume, oră, dimensiune și favorite. Opțiunea Sortare este activată în modurile muzică, imagine și video.
- Page 58 Manual de utilizare TIMESHIFT (TEMPORIZARE) Funcția Timeshift permite oprirea și repornirea programelor TV dacă unitatea USB este conectată la port-ul USB al dispozitivului. 1. Asigurați-vă că unitatea USB este conectată la dispozitiv. 2. Accesați PVR Settings și activați funcția Timeshift. 3.
- Page 59 Manual de utilizare DEPANARE Problemă Motiv posibil Soluție posibilă Indicatorul LED nu este Adaptorul de alimentare Verificați conexiunea pornit este deconectat adaptorului de alimentare Fără semnal Antena este deconectată Verificați conexiunea antenei Antena este deteriorată/ setată necorespunzător Nu este transmis niciun semnal Fără...
-
Page 60: Caracteristici Principale
Manual de utilizare SPECIFICATII CARACTERISTICI PRINCIPALE Afisaj cu LED Compatibil cu DVB-T2/DVB-T Scanare automata /manuala Actualizare software, redare media și PVR prin port USB 2.0 EPG 7 zile Funcție temporizator Meniu multilingv PVR program de inregistrare Putere și calitate semnal LCN (Număr logic de canale) Previzualizare canale TV Control parental... - Page 61 Manual de utilizare ALIMENTARE Tensiune de intrare: 110-240 V; 50/60 Hz Telecomanda: 2 baterii AAA Consum putere: Max. 6 W Consum de putere în modul standby: Max. 1 W PARAMETRI FIZICI Dimensiuni: 150 x 86 x 32 mm Lungime cablu alimentare: 1,1 m Greutate: 226 g CONTINUT COLET Telecomandă, manual de utilizare...
- Page 62 Notes ............... .
- Page 64 www.krugermatz.com is a registered trademark...
Need help?
Do you have a question about the KM0550 and is the answer not in the manual?
Questions and answers