
Subscribe to Our Youtube Channel
Related Manuals for OHAUS ANALYTICAL Plus Series


Summary of Contents for OHAUS ANALYTICAL Plus Series
- Page 1 Menu ANALYTICAL Plus Electronic Balances Models AP110, AP210, AP310, AP250D, AP110E, AP210E, AP310E and AP250E Instruction Manual Menu...
- Page 2 Menu NOTE: THIS EQUIPMENT HAS BEEN TESTED AND FOUND TO COMPLY WITH THE LIMITS FOR A CLASS A DIGITAL DEVICE, PURSUANT TO PART 15 OF THE FCC RULES. THESE LIMITS ARE DESIGNED TO PROVIDE REASONABLE PROTECTION AGAINST HARMFUL INTERFERENCE WHEN THE EQUIPMENT IS OPERATED IN A COMMERCIAL ENVIRONMENT. THIS EQUIPMENT GENERATES, USES, AND CAN RADIATE RADIO FREQUENCY ENERGY AND, IF NOT INSTALLED AND USED IN ACCORDANCE WITH THE INSTRUCTION MANUAL, MAY CAUSE HARMFUL INTERFERENCE TO RADIO COMMUNICATIONS.
-
Page 3: Table Of Contents
Menu TABLE OF CONTENTS INTRODUCTION ......................1 DESCRIPTION ........................ 1 FEATURES ........................1 UNPACKING ........................2 INSTALLATION ....................... 3 Environment ......................3 Weigh Below Hook ....................3 Leveling the Balance ....................4 Installing the Pan Assembly ..................4 In-Service Cover ....................... 4 RS232 Interface ....................... - Page 4 Menu Reference Number ..................... 20 High Point ....................... 20 Printing Data ......................21 Time and Date ....................21 List ........................22 Automatic Calibration Printout ................23 User Calibration Printout ..................23 Calibration Test Printout ..................23 Statistics Printout ....................24 Sampling ......................
- Page 5 Menu SETUP MENU ....................... 35 Setup Menu Protection ................... 36 Reset ........................36 Type Approved/LFT ....................37 Unit Selection ......................37 Functions ........................ 38 Statistics ......................... 39 Net .......................... 40 Custom Unit or Volume Selection ................40 Good Laboratory Practices ..................42 Parts Counting Error ....................
- Page 6 Menu Print Stable Data Only ..................57 Print Numeric Data Only ..................57 Time ........................58 Date ........................58 Reference ......................58 Difference ......................59 List ........................59 CARE AND MAINTENANCE ..................60 TROUBLESHOOTING ....................60 Error Codes List ..................... 61 SERVICE INFORMATION .....................
-
Page 7: Introduction
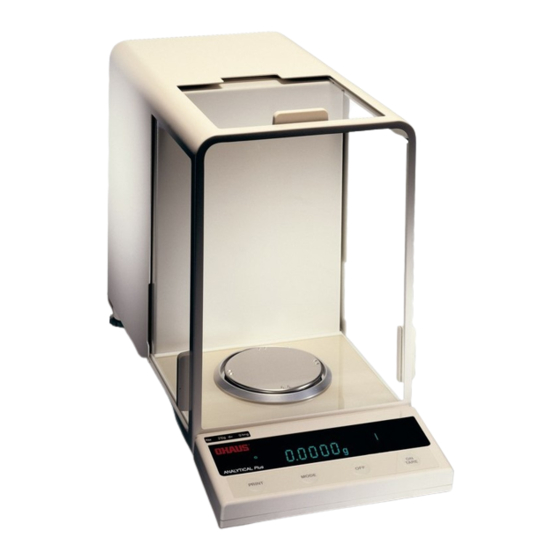
The Analytical Plus series is constructed using a die-cast aluminum base finished with a durable corrosion resistant epoxy powder paint. The weighing area is protected from air currents by a draft shield. -
Page 8: Unpacking
Menu INSTALLATION UNPACKING Your ANALYTICAL Plus balance was shipped with the following items: • Pan assembly (including pan, shield, ring and assembly instructions) • In-service cover • AC power cord • Spare fuse • Instruction manual • Warranty card Remove the contents from the carton and carefully remove all packing material. It is recommended to save the carton and packing material for storing and/or transporting the balance. -
Page 9: Installation
Menu INSTALLATION INSTALLATION Environment The balance should always be used in an environment which is free from excessive air currents, corrosives, vibration, and temperature or humidity extremes. These factors will affect displayed weight readings. DO NOT install the balance: • next to open windows or doors causing drafts or rapid temperature changes. •... -
Page 10: Leveling The Balance
Menu INSTALLATION Leveling the Balance The balance is equipped with a level indicator on the floor of the weighing chamber and two adjustable leveling feet at the rear. Adjust the leveling feet until the bubble appears in the center circle of the level indicator. Level Indicator Leveling... -
Page 11: Rs232 Interface
Menu INSTALLATION RS232 INTERFACE ANALYTICAL Plus balances are equipped with a bi-directional RS232 compatible interface for communication with printers and computers. When the balance is connected directly to a printer, displayed data can be output at any time by simply pressing PRINT, or by using the Auto Print feature. - Page 12 Menu INSTALLATION RS232 COMMAND TABLE Command Character Description Print current unit. Field: Mode Stab CR Length: Grams, Dwt, Carat, Oz Av, Oz t, Grain, Tael 1, Tael 2, Tael 3, Momme, Custom Unit blank if stable “ ? ” if unstable minimum level Set averaging level to “x”, where x = 0, 1, 2 maximum level...
- Page 13 Menu INSTALLATION Command Character Description Set stable data only printing (set x = 0 for OFF, or x = 1 for ON. Same effect as pressing on tare button. Print EPROM version Field: Model # 1 EPROM # CR LF Length: Balance Model “98101-xx Sr#x.xx”...
-
Page 14: Connecting Power
Menu INSTALLATION Connecting Power Before connecting the power cord, check For 100-120 V∼ that the line voltage switch located at the rear of the balance is set correctly for your location. If not, use a small screwdriver to For 220 240 V∼ set the switch correctly. -
Page 15: Operation
Menu OPERATION OPERATION Switch Functions MODE PRINT TARE Press and Release: Turns on the balance if it is off, zeros the balance. In the menu TARE system, this button is used to accept a choice or enter a submenu. Press and Release: Turns the balance off. -
Page 16: Symbols Used For Operation Of The Balance
Menu OPERATION Symbols Used for Operation of the Balance This instruction manual uses certain symbols to explain various operational procedures and actions that occur. Examples of the symbols used are shown as follows: Pushbutton Switches: = NORMAL PRESS AND RELEASE TARE = MULTIPLE PRESS TARE... -
Page 17: Navigating The Menus
Menu OPERATION Navigating the Menus There are four menus used in the balance: CALIBRATION USER SETUP PRINT To enter the menus, the button is pressed and held until MENU is displayed. When TARE released, CAL is displayed which is the Calibration menu. When in the menus, repeated pressing of advances through the MODE... -
Page 18: Operational Guide/Index
Menu OPERATION Operational Guide/Index The Operational Guide/Index lists the pages for all balance operations and options. After settings are made, exit menus to save settings. FUNCTION TO OPERATE SETUP (See pages) (See pages) 1. Turning the Balance ON ---- 2. Weighing (grams) ---- 3. -
Page 19: Turning The Balance On
Menu OPERATION Turning the Balance ON After the Self Test in the Installation Section is completed (power applied to the balance), make sure the pan on the balance is clear, then, close the chamber doors. TARE ap25FD sR3.1 ˛ 0.00000 Display Indications The following table describes each of the display indicators. -
Page 20: Stabilization
Menu OPERATION Stabilization Before initally using the balance, allow time for it to adjust to its new environment. The balance only requires to be plugged in to warm up. Recommended warm up period is twenty (20) minutes. The balance is powered whenever it is plugged into a power source. Auto Range (AP250D and E Only) Modes AP250D and E offer both a fine range (0.01 mg readability from 0 to 52 g) and a coarse range (0.1 mg over 52 g). -
Page 21: Percent Weighing
Menu OPERATION Percent Weighing Percent Weighing is enabled only when the EXAMPLE Percent Function is selected under the Setup menu. Refer to page 38. Percent weighing A 10g reference load is set for 20%: permits you to place a reference load on the •... -
Page 22: Parts Counting
Menu OPERATION Parts Counting Parts Counting is enabled only when the Parts Counting Function is selected in the Setup menu. Refer to page 38. In the parts counting mode, the balance displays the quantity of parts you place on the pan. Since the balance determines the quantity based on the average weight of a single part, all parts must be reasonably uniform in weight. -
Page 23: Check Weighing
Menu OPERATION Check Weighing Check Weighing is enabled only when the Check Weighing Function is selected in the Setup menu. Refer to page 38. Refer to page 43, Check Weighing Options under the Setup menu to set the Reference Type and Display Type options. In the check weighing mode, a reference weight can be set into the balance either as a reference weight on the pan or as a user entered number. -
Page 24: Animal Weighing
Menu OPERATION Check Weighing (Cont.) 13. Repeat steps 10 and 11 to set the over value. When the last digit is entered, the display indicates one of three display modes for check weighing. 14. Check weighing can now be performed by removing a sample and placing a new sample on the platform. -
Page 25: Fill Guide
Menu OPERATION Fill Guide FILLGUIDE BAR GRAPH Fill Guide is enabled only when Fill Guide Function is selected under the Setup menu. Refer to page 38. To set options, refer to page 46, Fill Options under the Setup Options submenu. FILLGUIDE INDICATOR The FillGuide... -
Page 26: Reference Number
Menu OPERATION Fill Guide (Cont.) Reference Number If reference number was selected under the Fill Option submenu with the balance in a weighing mode, proceed as follows: I I I I I I I I I I I I I I I I I I I I I I I I I I I I I I I I I I I I I I seT Ref TARE 00000.00... -
Page 27: Printing Data
Menu OPERATION High Point (Cont.) To view the lowest and highest sample weight. The display LIMIT flashes, TARE the lowest sample weight is displayed followed by two short beeps, the display then indicates the highest sample weight for a few seconds then automatically changes back to the normal weighing mode. -
Page 28: List
Menu OPERATION Printing Data (Cont.) AP250D 98101-35 Sr# 3.0 List User Menu List is a convienent method of examining which AL = 1, Stb = 1 parameters are set up in the balance. The para- AZT = On meters do not show up on the display but print Setup Menu out when selected. -
Page 29: Automatic Calibration Printout
Menu OPERATION Printing Data (Cont.) Automatic Calibration Printout - - - - - AUTO SPAN CAL - - - - - - When performing an Automatic calibra- 6/22/95 8:42:24 AM tion with CAL option (GLP submenu of the Bal Id 183 Setup Options submenu set to ON), a Auto. -
Page 30: Statistics Printout
Menu OPERATION Printing Data (Cont.) Statistics Printout When statistics is enabled, a printout can be made with any of the major balance functions such as; Percent, Parts Counting, Check Weighing, Animal Weighing and FillGuide . Under the Setup Options menu, Statistics has parameters such as Enable, Standard Deviation, Mean, Sum, High, Low and Difference which can be turned on or off. -
Page 31: Percent Weighing
Menu OPERATION Printing Data (Cont.) Percent Weighing Statistical printouts of Percent Weighing are similar to sampling statistics. Loads on the balance platform may be displayed - - - - - START - - - - - as a percentage of a defined sample. To 6/22/95 10:53:24 AM obtain a printout in this mode, the balance... -
Page 32: Check Weighing
Menu OPERATION Printing Data (Cont.) Check Weighing - - - - - START - - - - - When the balance is in a Check Weighing 6/22/95 12:09:29 PM mode, each sample can be checked to print 5.96781 g an under, accept or over weight on the CW UNDER 0.00397 g printout by setting the Print Options param-... -
Page 33: Menus
Menu MENUS MENUS Each submenu of the AP Balance contains numerous selections which can be set for specific operations. To customize the operation of the balance for specific measurements, functions and printing, it is necessary to make selections in each menu. The following illustration identifies the major items in each menu. -
Page 34: Menu Lock-Out Protection
Menu MENUS MENU LOCK-OUT PROTECTION Unlocked The menus can be locked out to prevent settings from being changed. When locked out, Setup and Print menus may still be Remove plug to accessed for viewing but settings may not access switch. Locked be changed. -
Page 35: Calibration Menu
Menu MENUS CALIBRATION MENU Analytical Plus balances features Auto , USER and TEST calibration methods. Auto is a method where the balance calibrates itself using internal calibrated masses. USER is a method where the balance can be calibrated using an external mass of known value by entering that value into the balance. -
Page 36: User Calibration
Menu MENUS User Calibration User calibration is used when it is desired to calibrate the balance using a mass of known value. NOTE: Before beginning user calibration, make sure masses are on hand. If you are in the calibration menu and realize masses are not available or you do not want to calibrate, exit the menus and return to normal weighing. -
Page 37: Cal Test
Menu MENUS Cal Test This feature checks the calibration against last stored calibration information. The Cal Error display indicates the difference since the last automatic calibration. 1. Make sure there is no load on the pan and close the chamber doors. ^]emu TARE auTo... -
Page 38: User Menu
Menu MENUS USER MENU The User menu is used to adapt the balance to environmental conditions. It contains sub- menus which enable you to turn features on or off, and program balance parameters. Reset changes all submenus to original factory default settings. Reset does not appear if menu has been locked out. -
Page 39: Averaging Level
Menu MENUS Averaging Level Averaging level compensates for vibration or excessive air currents. Factory default setting is shown in bold type. AL 0 reduced stability, fastest stabilization time AL 1 normal stability, normal stabilization time AL 2 more stability, slow stabilization time NOTE: Averaging level does not affect balance accuracy, but it does affect stabilization To view or change the averaging level: 1. -
Page 40: Auto-Zero
Menu MENUS Auto-Zero Auto-Zero minimizes the effects of temperature changes and shift on the zero reading. The balance maintains the zero display until the threshold is exceeded. Factory default setting is shown in bold type. Turns Auto-Zero OFF. Turns Auto-Zero ON. To view or change the auto-zero setting: 1. -
Page 41: Setup Menu
Menu MENUS SETUP MENU The Setup menu is used to customize the operation of the balance for your specific requirements. It contains submenus which enable you to turn features on or off, and program balance parameters. Reset changes all submenus to original factory default settings. Reset does not appear if menu has been locked out. -
Page 42: Setup Menu Protection
Menu MENUS Setup Menu Protection SETUP MENU FACTORY DEFAULTS The Setup menu may be locked out to prevent unauthorized personnel from changing the settings. If -SAFE- is dis- Unit Selection grams played, the Setup menu has been locked Functions None out. -
Page 43: Type Approved/Lft
Menu MENUS Type Approved/LFT LFT can be set to ON or OFF. Selecting ON automatically sets the parameters shown in the table to conform to type approved requirements. For sealing method, refer to Type Approved Sealing section. Default setting are shown as follows: Lockswitch Menu Setup Locked Print Stable Data Only... -
Page 44: Functions
Menu MENUS Unit Selection (Cont.) Taels If taels are enabled, choose one of three different taels: Hong Kong, Singapore, or Taiwan. TARE (Hong Kong), Tael 1 Tael 2 MODE Tael 3 (Singapore), or (Taiwan). TARE Functions The Functions submenu permits the selection of only one function. These functions are: Percent, Parts Counting. -
Page 45: Statistics
Menu MENUS Statistics Statistics provides printed display data of: Standard Deviation either population or sample, Mean, Sum, High, Low and Difference readings. Each can be individually set ON or OFF. SETUP 1. Access menu. opT ION5 sTaT5 TARE emaBle . Enable allows the statistics feature to be turned off TARE without losing the individual settings programmed into memory. -
Page 46: Net
Menu MENUS Weight shown on the display can be referred to as a zero value (gross value) or tare value (net value). When enabled the display value also has GROSS/NET Indicator turned ON, this feature will allow you to obtain a zero value by a long press on . - Page 47 Menu MENUS Custom Unit or Volume Selection (Cont.) EXPONENTS cuNIT 1. Access the UNITS Moves decimal point 3 submenu under the Setup Options places to the left. menu. Moves decimal point 2 facTOR TARE places to the left. 1.000000 Moves decimal point 1 place .
-
Page 48: Good Laboratory Practices
Menu MENUS Custom Unit or Volume Selection (Cont.) NONe TARE lITeR MODE fl 02 ·uaRT . Selecting NONE disables the volumetric units. DeNsITy TARE NOTE: To use this function the printer must be on and all communication parameters must be set first. Operating Procedure 1. -
Page 49: Parts Counting Error
Menu MENUS Parts Counting Error Parts counting Error is enabled only when the ERROR LEVELS Parts Counting Function is selected. Disables error level limits. The parts counting error level is the level of .1 % ±0.1% acceptable error. accuracy you consider acceptable for parts .25 % ±0.25% acceptable error. -
Page 50: Sample Displays
Menu MENUS SAMPLE DISPLAYS NOTE: Samples of the displays for check weighing are shown as follows using a reference weight of 50 grams. The over limit was set at 55 grams, and the lower limit was set at 45 grams. NORMAL DISPLAYS IIIIIIIIIIIIIIIIIIIIIIIIIIIIIIIIIIIIIIIIII OVER... - Page 51 Menu MENUS Check Weighing Options (Cont.) The following procedure describes how to set up the balance for all choices. Before starting, the Check Weighing option must have been selected under the Functions submenu. c_ı opT 1. Access the submenu under the Setup Options submenu. (reference).
-
Page 52: Animal Weighing Options
Menu MENUS Animal Weighing Options Animal Weighing Options is enabled only when Animal Weighing Function is selected. The balance samples the weight data for a variable sampling interval and processes the data to filter out the instabilities by the live animal. The strength of the filtering activity as well as the duration of the sampling period can be adjusted by selecting one of four AW OPT levels, 0 through 3. -
Page 53: Time
Menu MENUS Fill Option (Cont.) . If REF WT is Ref _ıT NU^]BeR MODE selected, a sample reference weight is used later to set the weight parameter into the balance. If NUMBER is selected, a number representing the desired sample weight has to be entered. -
Page 54: Adjust
Menu MENUS Time (Cont.) MODE 00 a first two digits are flashing. TARE to change flashing digits to current local hour. MODE MODE flashes the last two digits. TARE NOTE: will back up display. PRINT changes minutes display. MODE MODE to accept. -
Page 55: Date
Menu MENUS Date Date is a feature which enables the balance to be set to a U.S.A. date standard or European date standard. U.S. standard has the month, date followed by the year each separated by (/) in the printout. The European date standard has the day first, followed by the month and then the year each separated by a period. -
Page 56: Lockswitch
Menu MENUS Lockswitch Lockswitch enables you to lock out one or more menu selections. Each menu can be individually locked on or off after all functions have been set . The Calibration, User, Setup and Print menus can be individually locked on or off by selecting the appropriate menu and then locked by the switch located under the front of the control panel. -
Page 57: Print Menu
Menu MENUS PRINT MENU The Print menu provides a number of options which includes: reset, communications, good laboratory practices, print options, and list. Reset sets all submenus contained in the Print menu to factory default settings. Communication specifies baud rate, number of data bits, parity bit type and stop bits. -
Page 58: Reset
Menu MENUS Reset This submenu enables you to reset all Print menu selections to the factory default settings shown below. Reset does not appear if the menu has been locked out. Function Default Baud Rate br2400 Data Bits 7 data Parity none Stop Bits... -
Page 59: Baud Rate
Menu MENUS Baud Rate This submenu is used to select the desired baud rate. There are five available baud rates to choose from: 300, 1200, 2400, 4800 and 9600. The default setting is 2400 baud. To view or change the baud rate: 1. -
Page 60: Parity
Menu MENUS Parity Parity can be set to Odd, Even or None. The default setting is None. To set parity, proceed as follows: 1. Access the paR ITy submenu. NONe TARE NONe MODE -oDD- paR ITy TARE Stop Bits The number of stop bits can be set to 1 or 2. The default setting is 2. To set stop bits, proceed as follows: sTop 1. -
Page 61: Print Options
Menu MENUS Good Laboratory Practice (GLP) (Cont.) NOTE: allows going back to the previous digit for correction. MODE accepts value and moves to second digit. TARE to change next digit. MODE 7. Repeat steps 4 through 6 to change all digits. iD NO TARE pR NO... -
Page 62: Initialize
Menu MENUS Initialize This submenu allows you to: • Specify a time interval (in seconds) for automatic output. • Exclude a range of weights from being output, or specify a range for output, by the Auto Print feature. It does not appear on the Print menu if Auto Print is set to OFF. Use the following procedure to set these features: iN IT 1. -
Page 63: Print Stable Data Only
Menu MENUS Initialize (Cont.) 11. After the last digit is entered, NON-pl is displayed again. NON-ph for the high limit. MODE indicates current high end value. 0000000 TARE 14. Repeat steps 8 through 10 to change the numbers as required. NON-ph 15. -
Page 64: Time
Menu MENUS Time When the Time function is set ON, allows the balance to output the current time to the printer. To set the Time feature ON or OFF, proceed as follows: T I^]e 1. Access the submenu under the Print Options menu TARE MODE T I^]e... -
Page 65: Difference
Menu MENUS Difference Difference data is only output to the printer when Check Weighing or Fill Guide mode was selected. D Iff 1. Access the submenu under the Print Options menu TARE MODE D Iff TARE List This submenu can be used to output a listing of current menu settings via the RS232 interface. -
Page 66: Care And Maintenance
Menu MAINTENANCE CARE AND MAINTENANCE To keep the balance operating properly, the housing and platform should be kept clean and free from foreign material. If necessary, a cloth dampened with a mild detergent may be used. Keep calibration masses in a safe dry place. TROUBLESHOOTING SYMPTOM PROBABLE CAUSE(S) -
Page 67: Error Codes List
Menu MAINTENANCE Error Codes List The following list describes the various error codes and which can appear on the display and the suggested remedy. Data Errors Internal data errors. If error persists, the balance must be serviced. Internal data errors. If error persists, the balance must be serviced. Tare Errors Illegal tare operation or balance is unable to stabilize within time limit after taring. -
Page 68: Reset Setup
Menu MAINTENANCE Error Codes List (Cont.) System Errors 5.1 thrrough 5.9 System errors. Turn the power off, then turn it back on. If error persists, have the balance serviced. Checksum Errors Invalid setup data checksum. Check Setup, User, and Print menus settings. If possible, try to enter menus and exit using END to restore menu settings. -
Page 69: Service Information
If the Troubleshooting section does not resolve or describe your problem, you will need to contact an authorized Ohaus Service Agent. For Service assistance in the United States, please call Ohaus Corporation toll-free at (800) 526-0659. An Ohaus Product Service Specialist will be available to help you. -
Page 70: Specifications
Menu MAINTENANCE SPECIFICATIONS MODEL AP110 AP210 AP310 AP250D Capacity (g) 52/210 Readability (mg) 0.01/0.1 Weighing modes g, oz, ct, dwt, (3) taels, oz t, gn, mommes, 1 custom unit, parts counting, percent weighing, Repeatability (Std. dev.) (mg) 0.02/0.1 Linearity (mg) ±0.2 ±0.5 ±0.03/0.2... -
Page 71: Declaration Of Conformity
Ohaus Corporation, 19A Chapin Road, Pine Brook, New Jersey, 07058-9878, USA Declaration of Conformity We, Ohaus Corporation, declare under our sole responsibility that the balance models listed below marked with “CE” - are in conformity with the directives and standards mentioned. - Page 72 Qualitätssystem zweckmässig gehandhabt wird. Certificat ISO 9001 pour Ohaus Corporation. La société Ohaus Corporation, USA, a été contrôlée en 1994 par Bureau Veritas Quality International BVQI et a obtenu le certificat, degré ISO 9001. Celui-ci atteste que Ohaus Corporation, USA, dispose d’un système qualité...
- Page 73 Si el fondo está dividido y rayado, la balanza ha de ser verificada en el lugar de uso por el sevicio técnico Ohaus certificado. Si la duración de la validez de la verificación está limitada de acuerdo con las normas de los distintos países, el propio usuario de tal balanza es responsable de la verificación posterior a su debido tiempo.
- Page 74 I tipi marcati con ii contrassegno “M” su sfondo nero/barrato diagonalmente dovranno essere verificati sul luogo d’installazione da parte d’un tecnico autorizzato dal Servizio Assistenza Ohaus o ispettore dell’Ufficio Metrico. Queste bilance sono state verificate in fabbrica e recano il contrassegno “M” sull’apparecchio stesso, e sull’imballo. É obbligo dell’untente denunciare la detenzione dello strumento all’ufficio metrico competente per territorio e sottoporio...
-
Page 75: Limited Warranty
Ohaus. The warranty period shall begin at the date of installation, or three months from shipment to the buyer, whichever occurs first. - Page 76 OHAUS UK Ltd 19A Chapin Road, 64 Boston Road Pine Brook, NJ 07058-9878, USA Beaumont Leys Tel: (973) 377-9000, Leicester LE4 1AW Fax: (973) 593-0359 England With offices worldwide. www.ohaus.com © Ohaus Corporation 2001, all rights reserved. 709101E 0102/2.12 Menu...
Need help?
Do you have a question about the ANALYTICAL Plus Series and is the answer not in the manual?
Questions and answers