Page 1
Installation guide 
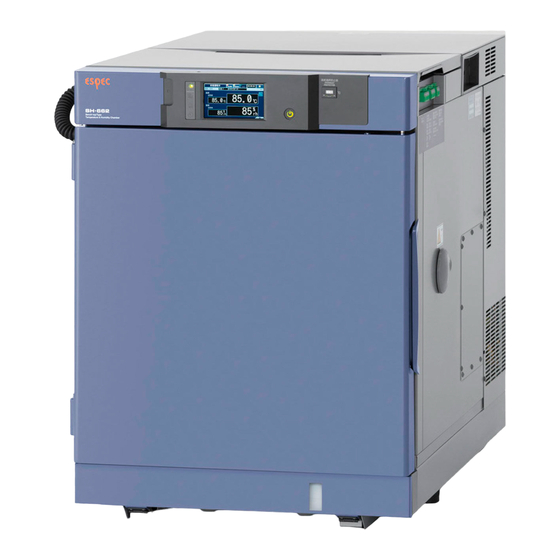
Bench-top type temperature (and humidity) chamber SH / SU This guide describes how to bring in and install the chamber. Before starting these works, read it through. 40093010010A0 May 10, 2019 ESPEC CORP.
Page 2
Liability ESPEC CORP. assumes NO responsibility whatsoever for accidents or equipment trouble arising from the failure to observe handling instructions contained herein. Do not perform any operation or handle the chamber in any way or form that is not described in this guide or which is herein specifically prohibited.
4 How to remove moisture absorbents (export specifications only) ..................9 5 Checking accessories and spare parts ..............10 6 Drainage work ....................... 12 7 Power supply work ....................14 8 Power ON/OFF ...................... 18 9 Supplying water (SH only) ..................19 ESPEC CORP.
The following keywords are used throughout this manual. Provides information necessary for gaining full performance from the chamber or to prevent damage to Note the equipment. Explains how to operate the chamber on a step-by-step Procedure basis. Offers additional information. Reference ESPEC CORP.
Bench-top type temperature(humidity) chamber ESPEC’s environmental labeling “GREEN PRODUCT Label” ESPEC has been striving for the development of eco-friendly products by establishing an environmentally conscious design and development guidelines for the prevention of global warming and pollution and the promotion of resource recycling.
Altitude not higher than 1000m Notice Do not use the chamber under an ambient temperature that is out of the specified operating range. Doing so may result in malfunction. The operating condition is between +5C to +35C. ESPEC CORP.
Page 7
When using a forklift, make sure that the front ends of the forks are not covered by the chamber. List of Center of Gravity Positions ESPEC CORP.
Page 8
Install the chamber indoors in a place that satisfies the below conditions. Flat place to withstand the weight of the chamber. (Weight of one chamber is as follows.) Model 222,242 222,242 642,662 642,662 242-5 242-5 100V AC Except 100V AC With viewing window (option) (kg) ESPEC CORP.
Page 9
SH-222,242 SU-222,242 SH-262 SU-262 SH-642,662 SU-642,662 SH-242-5 SU-242-5 Including protrusions(mm) Heat exhaust from chamber The maximum heat load generated from the chamber is as follows. (Ambient temperature:+23C) SH/SU-222,242 3500 SH/SU-262 4200 SH/SU-642,662 5040 SH/SU-242-5 5700 (kJ/h) ESPEC CORP.
Page 10
Levelling feet < Procedure > 1) Turn the adjustable foot until at a height that the chamber sits level. To raise To lower 2) Place a level on the center of the test area floor, and check the level. ESPEC CORP.
The chamber door is fitted with a retainer before shipping from the factory, so as to prevent the door from opening during transport. After the chamber has been installed, detach the retainer. < Procedure > Peel off the moisture absorbents. Moisture absorbents ESPEC CORP.
(SH ③ hose only) I.D. 5 mm hose with quick detachment plug. Use Water tank level to drain the water tank level sensor tank. (SH ④ sensor tank drain hose chambers only) ESPEC CORP.
Page 13
Use for comfortable touchscreen operation. Stylus pen ⑫ Provides the instructions for correct operation of Operation manual 1 set ⑬ the chamber. (CD, Installation guide) Warranty card Warranty information for the product. ⑭ ESPEC CORP.
* Drain pipe ID: Ø12 mm Whenever needed to check, maintain or run the chamber, connect the drain hose to the nipple and drain water from the chamber. Fit the hose over the nipple and press inward until hearing the connection catch. ESPEC CORP.
Page 15
Water supply sensor container drain hose I.D. 5 mm hose with plug. (SH only) Drain pipe Drains water accumulated in the test area or from the dew tray. * Equipped at the bottom of the machinery compartment on the SU. ESPEC CORP.
Page 17
Unless the equipment is grounded, the leakage breaker will not trip in the event current leaks, possibly resulting in electric shock. Furthermore, this will leave the equipment unprotected against power supply noise. Sometimes, the temperature (humidity) in the chamber can be destabilized. ESPEC CORP.
Page 18
220 and 230V AC supplies have a cable with the below plug. Prepare an outlet on the primary power system to match this plug. Grounding pole CEE 7/7 plug 3-pole plug with grounding pole For 100V AC (SH/SU-222,242 only) For 220/230V AC (SH/SU-222,242,262 only) For 100V AC (SH/SU-262 only) ESPEC CORP.
Page 19
N phase voltage 115V AC Black White Green +Yellow To primary power supply To ground ON/OFF switch Grounding terminal Grounding wire Chamber power cable rounding The chamber must be grounded with a max. 100 Ω resistance against ground. ESPEC CORP.
◆ Note ◆ Do not repeatedly turn the circuit breaker ON and immediately turn it OFF. To protect the system, wait at least 20 seconds after you turn the circuit breaker ON until you turn it OFF. ESPEC CORP.
3) Detach the cap from the water tank and supply deionized water up to upper limit water level. The tank can hold approximately 5L. Cap and supply port Upper limit water Label for upper level line for limit water level water tank ESPEC CORP.
Page 22
OFF when the chamber is shipped from the factory. < Procedure > 1) Turn the circuit breaker ON.(On the right wall of the chamber) 2) Press the POWER switch on the instrumentation. 3) The monitor screen will appear. ESPEC CORP.
Page 23
Ten-key pop-up window CLR: Clears all numeric characters in the character string window. DEL: Deletes the last character entered. ENT: Confirms the input value and closes the ten-key window. QUIT: Discards the input value and closes the ten-key window. ESPEC CORP.
Page 24
[YES]: Stops the operation and goes back to the original screen. [NO]: Goes back to the Operation Mode screen without stopping the operation. 10) Press the POWER switch on the instrumentation. For details on the operation method of instrumentation, refer to the operation manual “Controller guide” ESPEC CORP.
Page 25
Before taking off the humidifying tray water level regulator level check panel, shut OFF power at the main power switch. It may result in injuries when you put your hand farther because of the air circulator in the mechanical parts compartment. ESPEC CORP.
Page 26
Then, retighten the nut. Water level sensor Humidifying tray Water level regulator Water and wick pan Level WATER LEVEL mark Fixing plate 4) Reattach the water level check panel. Turn the main power switch ON. ESPEC CORP.
Page 28
Edited and Published by ESPEC CORP. 3-5-6, Tenjinbashi, Kita-ku, Osaka 530-8550, Japan Tel:81-6-6358-4741 Fax:81-6-6358-5500 Printed in Japan...
Need help?
Do you have a question about the SU Series and is the answer not in the manual?
Questions and answers