
Related Manuals for OPW Petro Vend FSC3000


Summary of Contents for OPW Petro Vend FSC3000
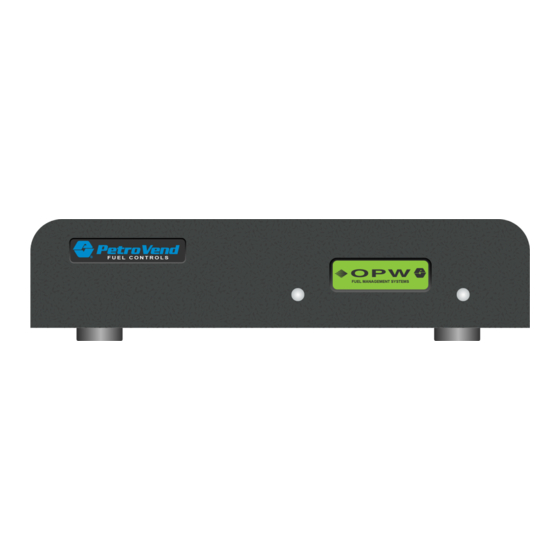
- Page 1 Part Number: M1700, Rev. 14 Issue Date: 8/10/2021 Supersedes: 7/8/2020 M1700 - FSC3000™ FSC3000...
- Page 2 Download the latest revision if necessary. OPW Fuel Management Systems is a part of Dover Fueling Solutions. Copyright Information © 2021 Dover Fueling Solutions. All rights reserved. DOVER, the DOVER D Design, DOVER FUELING SOLUTIONS, and other trademarks referenced herein are trademarks of Delaware Capital Formation.
- Page 3 For installation wiring reference, fuel control field wiring diagrams for the equipment that follows that includes Bennett, Fill-Rite, Wayne and other products, go to the OPWGlobal.com website (technician login required). Scan or click the QR code below or go to http://www.opwglobal.com/opw-fms/tech-support/technicians- portal/fuel-control-field-wiring-diagrams-for-dispensing-equipment. NOTE: A Technician login is required to access the Technician Portal. For technician registration, go to the Technician Registration page at http://www.opwglobal.com/opw-...
-
Page 4: Table Of Contents
Doc. No.: M1700 Rev.: 14 Page 4 of 75 Table of Contents Section 1 Important Safety Information 1.1 Safety Warnings 1.2 Information Panels 1.3 Installer Safety 1.4 Electrostatic Sensitive Devices (ESD) 1.5 FCC Compliance 1.6 Applicable Warnings, Battery Safety 1.6.1 Internal Coin Cell Battery Safety Section 2 FSC3000 Controller 2.1 Technical Specifications 2.1.1 Remote vs. - Page 5 Doc. No.: M1700 Rev.: 14 Page 5 of 75 2.4.4 Wireless Radio Modem Installation 2.4.5 Additional System Options 2.5 Physical Configuration 2.5.1 FSC3000 Access Connections – Baud Rate Setting 2.5.2 Direct-Connect Serial Communication to PC 2.5.3 PC Connection via Dial-In 2.5.4 PC Connection via Built-in Ethernet Adapter 2.6 Startup &...
- Page 6 Doc. No.: M1700 Rev.: 14 Page 6 of 75 3.1.8.2 DPC Interface for Gasboy Pedestal Installation 3.1.9 Physical Configuration 3.1.9.1 DPC Interface Jumper Setup (for Wayne and Gilbarco) 3.1.10 Software Configuration 3.1.11 Testing 3.2 Dispenser Terminal Control (DTC) 3.2.1 Technical Specifications 3.2.2 Terminal Types 3.2.2.1 Wayne CAT (Card Authorization Terminal) 3.2.2.2 Gilbarco CRIND (Card Reader in Dispenser)
-
Page 7: Section 1 Important Safety Information
Doc. No.: M1700 Rev.: 14 Page 7 of 75 Section 1 Important Safety Information You must read and understand all safety information in this manual. IMPORTANT: ONLY APPROVED, TRAINED TECHNICIANS ARE PERMITTED TO INSTALL OR DO SERVICING ON THE EQUIPMENT AND COMPONENTS SHOWN IN THE PROCEDURES IN THIS MANUAL. -
Page 8: Safety Warnings
Doc. No.: M1700 Rev.: 14 Page 8 of 75 1.1 Safety Warnings This manual contains many important Safety Alerts. There can be a risk of injury or damage to property if you do not obey these alerts. The panels below show the types of safety warnings that can be seen and how each is specified. - Page 9 Doc. No.: M1700 Rev.: 14 Page 9 of 75 REMINDER: This panel shows information that has been given before in the manual that is important to show again. TIP: A step or procedure that is recommended to make another step or procedure easier. INFORMATION: This panel shows references to more information in other sources.
-
Page 10: Installer Safety
Doc. No.: M1700 Rev.: 14 Page 10 of 75 1.3 Installer Safety CAUTION: Incorrect installation can cause a risk of injury to installers and users of this equipment. Incorrect installation can result in environmental contamination or equipment damage. Read these instructions carefully! Refer to the National Electrical Code (NFPA No. -
Page 11: Electrostatic Sensitive Devices (Esd)
Doc. No.: M1700 Rev.: 14 Page 11 of 75 1.4 Electrostatic Sensitive Devices (ESD) This product contains components that can be damaged by Electrostatic Discharge. See the instructions below to work safely with these components. ATTENTION: Electrostatic Sensitive Device - To prevent damage from electrostatic discharge, obey the precautions below when it is necessary to move or touch electrostatic sensitive devices. -
Page 12: Fcc Compliance
Doc. No.: M1700 Rev.: 14 Page 12 of 75 1.5 FCC Compliance This system complies with Part 15 of the Federal Communications Commission (FCC) Rules & Regulations. Operation is applicable to these conditions: This device must not cause harmful interference. This device must accept interference received. -
Page 13: Applicable Warnings, Battery Safety
Doc. No.: M1700 Rev.: 14 Page 13 of 75 1.6 Applicable Warnings, Battery Safety NOTE: Only certified OPW-FMS technicians are authorized to install and program this system. This is necessary for warranty registration. 1.6.1 Internal Coin Cell Battery Safety DANGER: The coin cell battery can explode if it is used incorrectly. Do not recharge, disassemble or discard this battery in fire. -
Page 14: Section 2 Fsc3000 Controller
Doc. No.: M1700 Rev.: 14 Page 14 of 75 Section 2 FSC3000 Controller The Fuel Site Controller (FSC) contains the site configuration that manages card and pump processes to and from the Fuel Island Terminals (FITs) and Pump Control Terminals (PCTs). The FSC communicates to the FITs and PCT 24/7 through a two-wire RS485 communication circuit (i.e., Petro-Net™). -
Page 15: Technical Specifications
Doc. No.: M1700 Rev.: 14 Page 15 of 75 2.1 Technical Specifications The FSC3000 Fuel Site Controller can be contained in its own remote/desktop enclosure or installed inside a FIT. See below for additional information of a remote FSC and an integrated FSC. 2.1.1 Remote vs. -
Page 16: Components & Diagrams
Doc. No.: M1700 Rev.: 14 Page 16 of 75 2.2 Components & Diagrams 2.2.1 Main Board Components Components of the FSC3000 Main Board The power supply supplies 12 VDC to the main board. This lets the main board run logic and communication circuit devices. - Page 17 Doc. No.: M1700 Rev.: 14 Page 17 of 75 FSC3000 Parts List Item No. Part Number Description 20-4089-01 Internal FSC3000 Display 20-7073 Journal Printer with Cable 20-7078 Network Modem 75-2047 Indoor Wireless Modem...
-
Page 18: System Wiring Schematics
Doc. No.: M1700 Rev.: 14 Page 18 of 75 2.2.3 System Wiring Schematics Typical System Installation Diagram with Electronic Pump Control... - Page 19 Doc. No.: M1700 Rev.: 14 Page 19 of 75 Typical System Installation Diagram with Mechanical Pump Control...
-
Page 20: Ports
Doc. No.: M1700 Rev.: 14 Page 20 of 75 2.3 Ports 2.3.1 USB Key The USB Key port will allow fuel transactions to be written to the supplied USB key. Ideal for using with integrated systems that do not have a PC connection to the FSC for retrieving transaction data. -
Page 21: Ethernet
Doc. No.: M1700 Rev.: 14 Page 21 of 75 2.3.2 Ethernet The Ethernet port allows a remote PC connection to the FSC3000 using your company’s local area network. When using the PCI-compliant application, the Ethernet connection is not allowed for the Admin user account. -
Page 22: Phone Line
Doc. No.: M1700 Rev.: 14 Page 22 of 75 2.3.3 Phone Line RJ-11 Phone Line connection only used when the FSC3000 is equipped with an optional internal dial in modem. Can only be used with an analog phone line. Connecting via Dial-in Modem A Dial-In modem allows remote access by Phone Line. -
Page 23: Rs-485
Doc. No.: M1700 Rev.: 14 Page 23 of 75 2.3.4 RS-485 FSC3000 Petro-Net Connection (RS-485 port) RS-485 port connects to the supplied junction box cover. This is the communication to all Fuel Island Terminals and Pump Control Terminals. The supplied cable (P/N 20-1443) connects the J-box to the FSC3000. -
Page 24: Rs-232
Direct Connect allows you to access the FSC3000 by serial port. If your PC lacks a serial port and you are planning on using a USB-to-Serial adapter, please call OPW for the latest recommended USB-to-Serial adapters. Connect 20-1520-01 cable RJ-45 connector into port 1 and the other side into a serial port. - Page 25 Doc. No.: M1700 Rev.: 14 Page 25 of 75 FSC3000 Journal Printer Connection (RS-232 port 3) Port 3: Connects to the optional journal printer with the cable connection (P/N: 20-1517-05). All transactions will be printed in real time to this printer. All fueling transactions are printed real-time to the Journal printer.
- Page 26 Doc. No.: M1700 Rev.: 14 Page 26 of 75 DPC Interface Connection (RS-232 port 4) The FSC3000 supports direct pump control for Gilbarco and Wayne pumps. Refer to DPC Installation and Configuration sections for more information. Port 4: Is used to connect the FSC3000 to the DPC communication interface. FSC3000 Host (Network) IP Gateway Connection (RS-232 port 5/6) The FSC3000 supports a variety of networks.
- Page 27 Doc. No.: M1700 Rev.: 14 Page 27 of 75 Gateway Connections: NOTE: The colors of the cables in the illustration are used to show the routing of the wires only. Power cables are shown in black. IP Gateway (Abierto - p/n 20-6013) 1.
- Page 28 Doc. No.: M1700 Rev.: 14 Page 28 of 75 20-1517-01 cable from serial port 2 on the IP Gateway to port 1 on the FSC3000 (blue cable in the illustration). 3. Connect a standard Ethernet cable (not supplied) from the Ethernet port on the Gateway to an Ethernet access point at the fuel site, typically an Ethernet router (red cable in the illustration).
- Page 29 Doc. No.: M1700 Rev.: 14 Page 29 of 75 Cellular Options F M S P a r t N u m b e r 2 0 - 7 5 0 0 - E X T - T - External Cellular Option (AT&T) F M S P a r t N u m b e r 2 0 - 7 5 0 0 - E X T - V - External Cellular Option (Verizon) The External option is for remote installations where the FSC3000 is located in an office.
- Page 30 Doc. No.: M1700 Rev.: 14 Page 30 of 75 FSC3000 External Connections: Inbound/Outbound with Cellular Modem and IP Gateway...
- Page 31 1. Testing the Network Card Authorization - Configure the FSC3000 to communicate on "dial" to the processor as if you were to use a new OPW modem and phone line. 2. Power ON and wait for the "status" light to flash green (approximately once every second).
- Page 32 Doc. No.: M1700 Rev.: 14 Page 32 of 75 5. Test the Inbound connection to the OPW FSC3000 using the external IP address for the site and port 8002 (Abierto only). Future Media Price Sign (RS-232 port 7) The FSC3000 has the ability to interface to a Future Media price sign. If purchased, plug a 20-1519-01 cable ®...
- Page 33 Ethernet, etc., connecting hardware. Port 8: Allows a secondary device such as an OPW Automatic Tank Gauge to be communicated with a PC through the FSC3000 Pass-Thru serial port. This eliminates the need for an additional PC connection to the Tank Gauge for sites using the optional Phoenix™ software, polling both the FSC3000 fuel transactions and ATG data for performing site reconciliation.
-
Page 34: Installation
Doc. No.: M1700 Rev.: 14 Page 34 of 75 2.4 Installation 2.4.1 Integrated FSC3000 Communication Conduit Follow the instructions below if the FSC3000 is to be installed in one of the FITs. NOTE: If the installation is for a Remote FSC3000, see "Remote FSC3000" below. This conduit is required when you use a FIT with an integrated FSC3000 controller. -
Page 35: Simm Activation
FIT(s) at the fuel island to the FSC3000 located in a building. They can also be used to connect between FITs at different fuel islands. See OPW Manual M00-20-7074 for complete information on the suitability and installation of these modems. NOTE: Currently, wireless Petro-Net™ is not supported on OPW AVI-enabled systems. -
Page 36: Physical Configuration
Doc. No.: M1700 Rev.: 14 Page 36 of 75 2.5 Physical Configuration 2.5.1 FSC3000 Access Connections – Baud Rate Setting Set connection baud rate to desired connection rate (default 38400). Unless needed, it is recommended that ™ the FSC3000 access baud rate be set to 38400 for maximum ARTWare performance. -
Page 37: Pc Connection Via Built-In Ethernet Adapter
Doc. No.: M1700 Rev.: 14 Page 37 of 75 Parity: Even Stop: 1 2.5.4 PC Connection via Built-in Ethernet Adapter The LED status lights indicate the following: LED Light Behaviors OFF: No Link Has Been Network Link Detected Status Top-Left (yellow) ON: Link Has Been Detected Serial... -
Page 38: Startup & Test
Doc. No.: M1700 Rev.: 14 Page 38 of 75 2.6 Startup & Test 2.6.1 Cold-Start Once the FSC3000 has been configured for the site-specific components and operating parameters, the entire system operation must be tested. Begin, by cold-starting your FSC3000. NOTICE: Double-check the wiring before applying power to the system components. -
Page 39: Fsc3000 Ethernet Port Setup
ARTWare contains the software needed to configure the IP address of the Fuel Site Controller’s network adapter. ARTWare is availavle on the MCD0001 Manuals and Utility software USB distributed by OPW-FMS. ARTWare can also be downloaded from the OPW-FMS website at https://www.opwglobal.com/opw-... - Page 40 7. With the Digi device selected, click the [Configure network settings] option in the [Device Tasks] section of the program to configure the IP address. NOTE: Because the OPW applications used to configure and manage the FSC require that a specific IP address and port number be entered, OPW recommends configuring the FSC to a static IP, or the DHCP server should be configured to always assign the same IP address to the MAC Address shown.
- Page 41 Doc. No.: M1700 Rev.: 14 Page 41 of 75 IMPORTANT: The FSC3000's network port setting is set to 2101 during manufacturing. It might have been changed during the FSC3000's network setup. Make sure the port settings match. USB Memory Key Operation A USB memory key can be inserted into the USB port on the FSC3000.
- Page 42 Doc. No.: M1700 Rev.: 14 Page 42 of 75 NOTE: Transactions may still take place while the key is removed. The system will store these transactions in the main system buffer until a new key is inserted. Using a USB Key with Phoenix When using Phoenix with the USB key features of the FSC3000, perform the following steps.
- Page 43 Doc. No.: M1700 Rev.: 14 Page 43 of 75 NOTE: This is an optional feature on the FSC3000. 1. Select the [Update Cards] option from the [Utilities] menu. After the update files are created and the [Update Cards] dialog box appears allowing you to select the site for update, click [Cancel]. 2.
- Page 44 Doc. No.: M1700 Rev.: 14 Page 44 of 75 System Testing Once the FSC3000 has been configured for the site-specific components and operating parameters, the entire system operation must be tested. ü FSC3000 Testing Checklist Verify all connection methods to be utilized by site are functional (direct, modem, Bluetooth®, etc.) Verify all FITs, PCMs, UPCs are communicating on Petro-Net Verify all FSC3000 options required are enabled - (Networks, DPC, transaction/card limits, etc.) Verify card buffer is set up to customer needs...
-
Page 45: Section 3 Pump Control
Doc. No.: M1700 Rev.: 14 Page 45 of 75 Section 3 Pump Control The FSC3000 fuel control system has two(2) primary methods to control fuel dispensers. Pump Control Module (PCM): This is a mechanical dispenser control solution that uses a stand- alone board. -
Page 46: Direct Pump Control (Dpc)
Doc. No.: M1700 Rev.: 14 Page 46 of 75 3.1 Direct Pump Control (DPC) Illustration of a DPC Board 3.1.1 Wayne and Gilbarco Wayne dispensers can connect directly to the DPC interface board or the Wayne Data Distribution Box can be used. -
Page 47: Dpc Installation
Doc. No.: M1700 Rev.: 14 Page 47 of 75 3.1.4 DPC Installation Parts Required Remote Pedestal Part # Part Description 20-8225-DPC Remote DPC for Gibarco/Wayne 20-0612 DPC Interface 12-3004 Cable RJ45 to RJ45 Stranded 10-15 Ft. Cable, PCM Master (Power Cable [C/OPT or 20-1618 FIT500]) 3.1.5 DPC Pump Control (Electronic Control) Conduit Requirements... -
Page 48: Dpc Interface In A Remote Enclosure (For Wayne And Gilbarco)
Doc. No.: M1700 Rev.: 14 Page 48 of 75 3.1.6 DPC Interface in a Remote Enclosure (for Wayne and Gilbarco) NOTE: The 20-8225-DPC assembly includes all internal wiring for the power supply and the DPC interface board. Refer to the instructions that follow to install and connect external power and communication wiring. -
Page 49: Wayne Data Distribution Box Connection To Dpc Board
Doc. No.: M1700 Rev.: 14 Page 49 of 75 NOTE: For more than four (4) pump loops use the manufacturer’s distribution box. Pump communication conduit is not required if the manufacturer's distribution box is located near the remote DPC enclosure. 6. -
Page 50: Gilbarco D-Box Connection To Dpc Board
Doc. No.: M1700 Rev.: 14 Page 50 of 75 3.1.6.2 Gilbarco D-Box Connection to DPC Board Gilbarco Universal Distribution Box connected to DPC interface. Make sure that the Gilbarco is setup for current loop. Connect the cable (P/N "12-3004" on page 47) from CN 4 of the DPC Interface to Port 4 on the FSC3000 controller. -
Page 51: Install A Dpc Interface In A Terminal Pedestal (For Wayne And Gilbarco)
Doc. No.: M1700 Rev.: 14 Page 51 of 75 3.1.7 Install a DPC Interface in a Terminal Pedestal (for Wayne and Gil- barco) F M S P a r t N u m b e r 2 0 - 4 4 1 9 - D P C DANGER: To prevent the possibility of electrical shock, de-energize the AC Power Supply before you do the installation procedure shown below. -
Page 52: Pedestal Mount Dpc Kit Installation (Fms P/N 20-4419-Dpc)
Doc. No.: M1700 Rev.: 14 Page 52 of 75 3.1.7.2 Pedestal Mount DPC Kit Installation (FMS P/N 20-4419-DPC) Part # Part Description 20-0612 Electronic Pump Handle Monitor Assembly 20-1618 Cable, PCM Master 12-3004 Cable, RJ45 to RJ45 54-0439 DPC Jumper Setup Label 1. - Page 53 Doc. No.: M1700 Rev.: 14 Page 53 of 75 2. Prepare and install the 20-1618 Power Cable. a. Remove the connector from CN12 of the DPC interface board. Attach the gray and orange wires from the power supply cable (P/N: 20-1618) to the connector. Put the assembled connector back on to CN12 of the DPC interface.
- Page 54 Doc. No.: M1700 Rev.: 14 Page 54 of 75 3. Connect the 12-3004 RJ45 Cable: a. Connect one end of the cable to the CN4 Connector of the DPC interface board. b. Put the other end of the cable through an open knockout hole in the bottom of the terminal. c.
-
Page 55: Install A Dpc Interface For Gasboy
Doc. No.: M1700 Rev.: 14 Page 55 of 75 3.1.8 Install a DPC Interface for Gasboy® Part # Part Description 51-0357 Universal Mounting Plate 50-0008 8-32 KEPS Nuts 75-2036 Isolated Converter (RS-232 to RS 422/485) 20-1519-04 RJ45 to DB9 Cable Assembly 07-3004 Power Supply 50-2144... -
Page 56: Dpc Interface For Gasboy Pedestal Installation
Doc. No.: M1700 Rev.: 14 Page 56 of 75 IMPORTANT: Polarity is important, refer to Gasboy documentation for correct wiring specifications. 5. Make sure that the isolated switch settings are set as shown in the diagram above (Keep the factory settings). - Page 57 Doc. No.: M1700 Rev.: 14 Page 57 of 75 Install the DPC Interface 1. Attach the Isolated Converter (75-2036) to the mounting plate (51-0357) with two (2) of the 1-inch self- lock adhesive fasteners (50-2144). 2. Attach the gray and orange wires from the power supply cable (P/N: 20-1618) to the Power and ground terminals of the isolated converter as shown in the illustration.
-
Page 58: Physical Configuration
Doc. No.: M1700 Rev.: 14 Page 58 of 75 Put the other end of the cable through an open knockout hole in the bottom of the terminal. The routing of the cable should be around the inside of the terminal so it is out of the way of internal components. -
Page 59: Software Configuration
Doc. No.: M1700 Rev.: 14 Page 59 of 75 3.1.10 Software Configuration DPC configuration was completed during installation. 3.1.11 Testing There is no preliminary testing that can be done with the DPC. The DPC will only be able to be verified when configuration of the FSC3000 is complete. -
Page 60: Dispenser Terminal Control (Dtc)
Doc. No.: M1700 Rev.: 14 Page 60 of 75 3.2 Dispenser Terminal Control (DTC) DTC (Dispenser Terminal Control) utilizes the dispenser's built-in card terminal in lieu of a fuel island terminal and will emulate the fuel island terminal for each fueling position connected to the system. DTC control requires DPC electronic pump control to function and uses the same conduit wiring. -
Page 61: Diagrams
Doc. No.: M1700 Rev.: 14 Page 61 of 75 3.2.3 Diagrams 3.2.3.1 Wayne DTC 3.2.3.2 Gilbarco DTC... -
Page 62: Gilbarco Secure Prompts Dtc
Doc. No.: M1700 Rev.: 14 Page 62 of 75 3.2.3.3 Gilbarco Secure Prompts DTC... -
Page 63: Dtc Installation
Doc. No.: M1700 Rev.: 14 Page 63 of 75 3.2.4 DTC Installation 3.2.4.1 DTC Remote Enclosure Installation 1. Install the enclosure on a wall with four (4) fasteners (not supplied). The enclosure must be no further than 50' (15.24 m) from the FSC3000 controller. 2. -
Page 64: Physical Configuration
Doc. No.: M1700 Rev.: 14 Page 64 of 75 For Gilbarco CRIND installation: RJ45 cable between the CN4 port of the DPC board to the CN3 (COM3) port of the DTC board (refer to Physical Configuration for correct connections for different installations). -
Page 65: Gilbarco Crind-Specific
Doc. No.: M1700 Rev.: 14 Page 65 of 75 3.2.5.2 Gilbarco CRIND-specific Direct connect to CRIND loops. Connect the 12-3046 RJ45 cable from the CN3 port of the DTC board to CN4 of the DPC board. Attach the CRIND communication loop wires to terminal blocks CN5 of the DPC board. If connecting more than four (4) dispensers, connect loop one (1) to the Gilbarco D-Box using the supplied cable as shown below. -
Page 66: Software Configuration
Doc. No.: M1700 Rev.: 14 Page 66 of 75 3.2.6 Software Configuration For DTC software configuration, please refer to the M1702 Dispenser Terminal Control Software Configuration Guide located on the OPW-FMS website at www.opwglobal.com/opw-fms. -
Page 67: Section 4 Maintenance & Troubleshooting
Doc. No.: M1700 Rev.: 14 Page 67 of 75 Section 4 Maintenance & Troubleshooting Though the FSC3000-based card systems are designed for years of trouble-free use, you should perform the following routine maintenance items at the intervals shown to maximize their service life. 4.1 FSC3000 (Remote Only) Maintenance Make sure FSC cables are secure and FSC3000 has adequate ventilation. -
Page 68: Remote Enclosures
Doc. No.: M1700 Rev.: 14 Page 68 of 75 4.3 Remote Enclosures Cabinet and Door For outside units, wipe down the cabinets with warm water, a mild detergent (dish soap) and a nonabrasive cloth. DO NOT power-wash or even use a garden hose to rinse off the system! It is allowable to apply a retail car wax to protect the finish of the cabinet. -
Page 69: Appendix A - Pump Control Test Checklist
Verify Quantity restriction is set up properly Set up test card for each quantity restriction and verify card can only pump the restricted quantity Verify if pump is equipped with OPW AVI nozzle reader that pump can be authorized with tag Pump Control 2 Position... - Page 70 Verify Quantity restriction is set up properly Set up test card for each quantity restriction and verify card can only pump the restricted quantity Verify if pump is equipped with OPW AVI nozzle reader that pump can be authorized with tag Pump Control 4 Position...
- Page 71 Verify Quantity restriction is set up properly Set up test card for each quantity restriction and verify card can only pump the restricted quantity Verify if pump is equipped with OPW AVI nozzle reader that pump can be authorized with tag Pump Control 6 Position...
- Page 72 Verify Quantity restriction is set up properly Set up test card for each quantity restriction and verify card can only pump the restricted quantity Verify if pump is equipped with OPW AVI nozzle reader that pump can be authorized with tag Pump Control 8 Position...
- Page 73 Doc. No.: M1700 Rev.: 14 Page 73 of 75 Revisions Revision # Effective Software Version Key Changes Initial release 8/1/10 9/24/10 4/29/11 1/5/12 12/6/13 DTC, DPC Install update 2/28/14 DPC, DTC general update Reconfigure/reorganize sections for clarity, employ ANSI standards 8/10/15 for safety communication, improve graphic elements, removed obsol-...
- Page 74 Doc. No.: M1700 Rev.: 14 Page 74 of 75 NOTE: It is possible that older software versions might not support all features...
-
Page 75: Warranty
The sole liability of OPW Fuel Management Systems, for any breach of warranty, shall be as set forth above. OPW Fuel Management Systems does not warrant against damage caused by accident, abuse, faulty or improper installation or operation.
Need help?
Do you have a question about the Petro Vend FSC3000 and is the answer not in the manual?
Questions and answers