Table of Contents
Advertisement
Quick Links
Advertisement
Table of Contents

Related Manuals for iLumin SC-RP

Summary of Contents for iLumin SC-RP
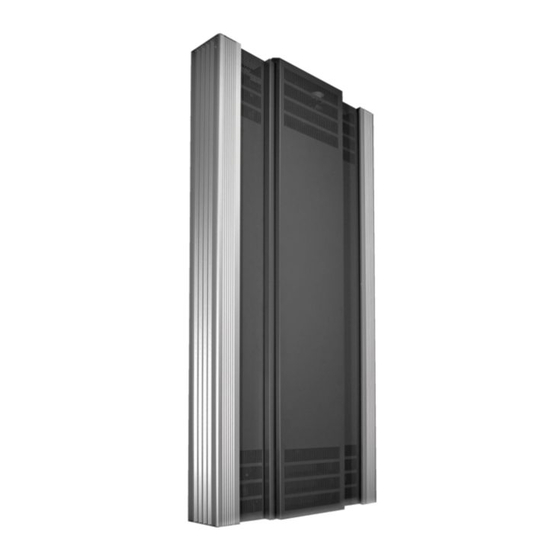
- Page 1 SC-RP/SC-RPB Switched Relay Controllers Programming Guide & User Manual...
-
Page 2: Table Of Contents
Contents Important Information 8: Configure Scene Values 9: Edit the Emergency Scene Introduction 10: Connect and Configure Contact Inputs Welcome 11: Configure Wallstations using the Product Overview Wallstation Wizard Terminology used in this Guide 12: Verify each Wallstation 13: Enable the Timeclock Basic Control Panel Operation 14: Configure the Time, Date, Coordinates Using the Control Panel... -
Page 3: Important Information
Important Information • Do not discard this programming guide. Please keep for future reference. • Please read and follow all warnings given in this guide. • Always disconnect all power before wiring. • Use only as intended and at the listed voltage. •... -
Page 4: Introduction
Introduction Welcome The iLumin Switched Relay Controller from Cooper Lighting Solutions has been designed to provide flexibility in both installation and operation. Each model in the product family can accept a variety of industry standard control options including iCANbus, DMX, Ethernet, and RS485. Similarly, every model can drive a wide range of lighting loads, from incandescents to dimmable fluorescents, from non-dim apparatus to DALI (Canada and Mexico only) digital modules. - Page 5 For SC-RPB (Relay Panels with Circuit Breakers) 120V - 18 - RPB - 3P - ML - 20 - S - 12 - 3 - HF1 Interior Options Product 0, 0-10V Dimming Channels Source 12, 0-10V Dimming Channels 24, 0-10V Dimming Channels Number of Two Pole Relays (two pole relays count as 2 single pole relays) Voltage 0 to 24...
-
Page 6: Terminology Used In This Guide
A compact fold out console which is contained For example, a hotel restaurant has breakfast, lunch within the front panel door of the SC-RP and SC- and evening sittings. There are four Zones: Ceiling RPB Switch Relay Controller. The control panel has spots, wall washers, chandeliers and table lights. - Page 7 A/V equipment or shades. Device Any iLumin equipment. For example, an Ineo is a Device. A Switched Relay Controller is also a De- vice. Node Any iLumin Device connected to the iCAN network.
-
Page 8: Basic Control Panel Operation
Basic Control Panel Operation Using the Control Panel Each Switched Relay Controller provides a control panel to make programming and operation as straightforward as possible. To access the control panel, open the main panel door on the front of the unit. Numeric keypad for menu navigation Cooper Lighting Solutions... -
Page 9: Menu Navigation
Accessing the operation menu Menu Navigation During normal service of the Switched Relay Controller, Within the control panel menu system, use the following the control panel screen shows only the time, date and buttons to navigate: device number. Press to select an item or to save changes. -
Page 10: Accessing The Menus
Accessing the Menus During normal operation, the control panel screen shows Cooper Lighting Solutions 21:56 only the time, date and device number ð August 14, 2008 Device 255 - 129 To access the menus 1. Press the button to display the Select Access Select Access Level Level menu ð... - Page 11 Configuration menu layout Configuration Menu Configure Outputs Wallstation Wizard Scene Edit Emergency Scene Edit Configuration Configure Outputs Output x Standard Type see page 20 Set Area/Zone see page 21 HF Curve see page 21 Min/Max see page 22 Operation at Min see page 22 Startup Action see page 22...
-
Page 12: Commissioning An Installation
Commissioning an Installation This section presents the required steps for commissioning a new installation or modifying an existing installation. Commissioning Steps: STEP ACTION PAGE iCANnet control wiring Power down the Switched Relay Controller, remove door and visually inspect all wiring and components Wire the Switched Relay Controller Replace door on the Switched Relay Controller and power the unit... -
Page 13: 1: Icannet Control Wiring
Step 1: iCANnet control wiring Objective: To identify the layout of the CAN network (also known as iCANnet) and connect the SCRP Switched Relay Controller (and other devices) to it. Verify the electrical characteristics of the network and terminate the end devices. To identify the CAN network wiring layout To wire all devices to the CAN network 1. - Page 14 To terminate end devices 1. Locate the iCAN termination jumper on the control board of the SCRP Switched Relay Controller. It is next to one of the two iCAN connectors. 2. Set the jumper according to the position of the SCRP Switched Relay Controller within the CAN network layout: •...
- Page 15 1. Remove the outer bolts that hold the panel door in place and carefully lift off the panel door cover. For SC-RP 1. Locate the main breaker that feeds the SCRP Switched Relay Controller 2. Turn off the main breaker.
-
Page 16: 3: Supply Wiring
Step 3: Power up the Switched Relay Controller Supply Wiring Wiring flow The SCRP Switched Relay Controller range has been de- signed to provide a clear layout and logical progression for all power circuits. The circuit hot conductors enter at the top panel and connects directly to the “Line”... - Page 17 Load Wiring High voltage load wiring Each load channel is served by a dedicated relay card. For each card, load connections are made using a two terminal screw block connector. Available at the connection block are line and load connections. Total load per channel The load on each channel must not exceed 16A.
-
Page 18: 4: Replace Door On The Switched Relay Controller And Power The Unit
1. Replace the front panel door and tighten the outer bolts that hold the panel door in place To Power the Switched Relay Controller For SC-RP 1. Locate the main breaker that feeds the Switched Relay Controller. 2. Turn ON the main breaker. -
Page 19: Current Draw Of Its Load
Step 5: Energize each Output one at a time to determine the location, type and current draw of its load. Objective: To confirm the location, type and current of the loads attached to each Output, prior to commissioning. To apply power to each Output and determine the location and type of the load WARNING: Before applying power to any Output, check that the associated load wiring and load(s) are in a safe condition and are ready to be energized. -
Page 20: 6: Configure Output Behaviors
Step 6: Configure Output behaviors Objective: To configure each Output to properly control the connected load type. To configure the behavior of an Output 1. From the Configuration menu, highlight the ‘Configure Output number HF (low voltage) curve Existing Area Outputs’... - Page 21 Options when configuring Output behaviors There are various options available to configure the behaviors of each Output to suit their connected loads. These pages summarize all of the options. Standard Type HF Curve Use this option to quickly configure all of the default This option defines the relationship of the low voltage settings for a particular type of load connected to an (0-10V) Output to the dimmer level.
- Page 22 Min/Max Operation at Min Allows you to define the minimum and/or maximum For a 0-10V load connected to the optional HF card dimming levels. Both settings are expressed as per- accessory. This option determines what the Output should do when the chosen Minimum level is reached. centages of the total standard dimming range.
-
Page 23: 7: Verify Proper Control Of Each Output Using The Output Override Option
Step 7: Verify proper control of each Output using the Output Override option Objective: To prove that each Output can be controlled by dimming commands. To use the Output Override option Operation Menu Help Output Override Timeclock Manager Power Data 1. -
Page 24: 8: Configure Scene Values
Step 8: Configure Scene Values Objective: Configure the Scene value for each Output. To set local Scene Value To select a Scene 1. From the Configuration menu, highlight the ‘Scene 1. From the Operation menu, highlight the ‘Output Over- Override - Options Edit’... -
Page 25: 9: Edit The Emergency Scene
Step 9: Edit the Emergency Scene Objective: To configure the desired Output levels for the Emergency Scene. The Emergency Scene is pre-configured to set all Output levels to 100% or on. If you do not need to edit the Emergency Scene as part of your commissioning process, then go straight to Step 10. To edit the Emergency Scene What is the Emergency Scene? 1. -
Page 26: 10: Connect And Configure Contact Inputs
Step 10: Connect and Configure Contact Inputs Objective: To connect and configure the volt-free inputs that allow event triggers from devices and other building systems to invoke appropriate reactions from the SCRP Switched Relay Controller. To connect contact inputs Controller will enter the special Emergency State. While in this state, the levels configured for the 1. -
Page 27: 11: Configure Wallstations Using The Wallstation Wizard
Step 11: Configure wallstations using the Wallstation Wizard Objective: Use the Wallstation Wizard to quickly locate WS 1 Set Up wallstations and program them directly from the SCRP control panel. If you do not need to configure wallstations Quick Set Up Advanced as part of your commissioning process, then go straight to Step 12. - Page 28 Wallstation Wizard Layout Wallstation Wizard The diagram summarizes the Please identify general layout and navigation of Each entry will be marked Wallstations the various screens within the with an asterisk once it has been configured via wizard. the Wallstation Wizard. Wallstation announce Select Wallstation...
-
Page 29: 12: Verify Each Wallstation
Step 12: Verify each Wallstation Step 13: Enable the Timeclock Objective: To confirm the configuration of each Objective: Enable the timeclock on one SCRP Switched wallstation. Relay Controller. To verify a wallstation Note: We recommend using only one SCRP Switched Relay Controller Timeclock to control all of the devices on a Segment. -
Page 30: 14: Configure The Time, Date, Coordinates And Daylight Saving Time
Step 14: Configure the Time, Date, Coordinates and Daylight Saving Time Objective: To ensure that the SCRP Switched Relay Controller has the correct time and location related settings. To set the time and date To set the location and time zone 1. - Page 31 Step 14 (continued) To ‘Set Manually’ 3. Press the button to begin editing, whereupon the 1. Use the buttons to highlight the “Set highlight will appear on the ‘Start’ entry. Manually’ option and press the button.. Note: The ‘DST Rules’ option has the following settings: ‘Man- Coordinates ual’, ‘Disabled’, ‘EEC’, ‘Europe’...
-
Page 32: 15: Configure Timeclock Events
Step 15: Configure Timeclock Events Objective: To configure automated events based either upon fixed times or variable occurrences such as dawn and dusk relative to the global location of the installation. To view, create and edit timeclock events 4. Press the button to begin editing the required event number. - Page 33 Step 15 (continued) Event options Type Action This option determines whether the event should be The list of actions are collected into two groups: ‘Basic’ based on an absolute time (‘Time’) or a variable oc- and ‘Advanced’ (there are links from one group to the currence (‘Astro’) such as dawn or dusk.
-
Page 34: 16: Configure Ethernet
Step 16: Configure Ethernet Objective: Configure Ethernet To configure Ethernet settings 1. From the Configuration menu, highlight the ‘Ethernet Settings’ option and press the button. The cur- rent settings will be displayed: Ethernet Settings IP Addr 0.0.0.0 IP Mask 0.0.0.0 Gateway 0.0.0.0 AABBCCDDEEFF Restore Defaults... -
Page 35: 17: Configure Dmx
Step 17: Configure DMX Objective: Configure DMX to allow DMX consoles to control the SCRP Switched Relay Controller Outputs. To map Outputs to DMX channels b. To change from the default of ‘DMX when Present’, press the button to to toggle thru the control DMX Output Mapping allows you assign the SCRP Out- hierarchy options: puts to any DMX control channels between 1 and 512. -
Page 36: 18: Configure Passwords
Step 18: Configure passwords Commissioning complete If you have followed and completed all relevant steps Objective: To configure passwords for the Operation within this guide then the installation should be and Configuration sections of the menu to prevent commissioned. unauthorized access. To configure passwords CONGRATULATIONS! Your SCRP Switched Relay Con- troller is now fully commissioned and ready for use. -
Page 37: Other Useful Features
Other Useful Features During normal operation, or when commissioning, there are a number of other useful features available within the menu system. Other useful features • Overriding Outputs page 38 Allows you to override any Output individually, or all Outputs collectively, from their current dimmed or switched levels. -
Page 38: Overriding Outputs
Overriding Outputs Viewing Power Data On occasions it may be necessary to override the levels The Power Data section provides useful feedback and of one or more Outputs. This option provides the ability confirmation of the total power demanded within the to affect Outputs individually or all of them collectively. -
Page 39: Choose Communications
Choose Communications Restore Default Settings This option allows you to enable/disable any of the con- The Restore Defaults option allows you to quickly clear trol communication methods used by the SCRP Switched all configuration settings from the SCRP Switched Relay Relay Controller. -
Page 40: Appendix 1
Placing Wallstations into Announce Mode To assist with identification within complex lighting systems, some iLumin wallstations have an ‘Announce Mode’ where they transmit their identity across the CAN network for a short period. The way in which ‘Announce Mode’ is invoked varies between products. -
Page 41: Index
Index Address Latitude Scene IP setting 34 coordinate input 30 creating/editing 24 Area Location select 24 terminology 6 configuration 29 terminology 6 Longitude Scene 132 editing 25 coordinate input 30 Set Zone Commissioning for Output 19 list of tasks 10 Standard Type Configuration menu Mask... - Page 42 Peachtree City, GA 30269 P:770-486-4800 www.cooperlighting.com All products manufactured by Cooper Lighting Solutions and identified with the iLumin/iLight brand are warranted to be free from defects in material and workmanship and shall conform to and perform in accordance with Seller’s written specifications.
Need help?
Do you have a question about the SC-RP and is the answer not in the manual?
Questions and answers