Table of Contents
Advertisement
Quick Links
Advertisement
Table of Contents

Related Manuals for Owlstone Medical Breath Biopsy 1.0


Summary of Contents for Owlstone Medical Breath Biopsy 1.0
- Page 1 1.0 Breath Biopsy® Collection Kit Support Pack: User Guide 01-0967...
-
Page 2: Table Of Contents
1 Contents Contents Introduction Safety Instructions Identification of Parts Breath Biopsy Cartridge Assembly Breath Biopsy Cartridge Disassembly Maintenance instructions Table of Symbols Contacts and Support ©Owlstone Medical Ltd. 2018 - 2019 95-0009-001 10 July 2019 Page 2 of 18... -
Page 3: Introduction
Wear clean nitrile examination gloves when handling the Breath Biopsy Cartridge as chemicals from your hands can affect the results and may lead to cross contamination. ©Owlstone Medical Ltd. 2018 - 2019 95-0009-001 10 July 2019 Page 3 of 18... -
Page 4: Identification Of Parts
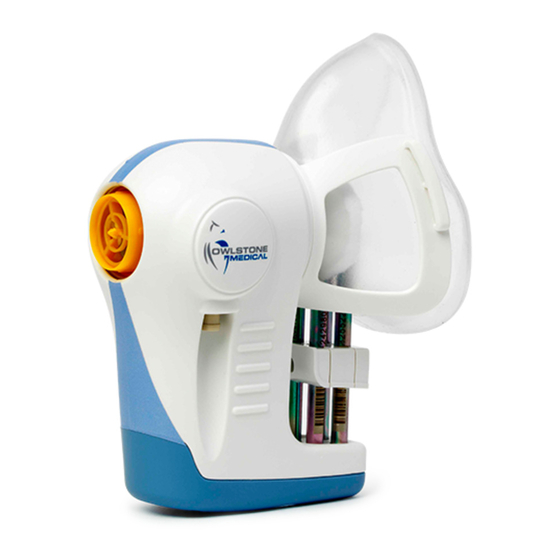
If you encounter any problems with the equipment or this procedure, please contact Owlstone Medical Ltd immediately using the contact details below 4 Identification of Parts 4.1 Parts Supplied in this Support Pack... - Page 5 As part of 00-0130 1.0 Breath Biopsy Collection Kit, you will receive the components of a Breath Biopsy Cartridge. This is supplied assembled and ready to use for breath collection. This part consists ©Owlstone Medical Ltd. 2018 - 2019 95-0009-001 10 July 2019 Page 5 of 18...
- Page 6 The 50-1949 sorbent tubes are supplied preconditioned by the tube manufacturer. Before first use, the user should confirm that the tubes have been conditioned appropriately for the intended application. ©Owlstone Medical Ltd. 2018 - 2019 95-0009-001 10 July 2019 Page 6 of 18...
-
Page 7: Breath Biopsy Cartridge Assembly
Use only conditioned and blanked tubes. Each tube in a kit has its own location. The standard hole position numbering and part orientation description used within OML is shown below. ©Owlstone Medical Ltd. 2018 - 2019 95-0009-001 10 July 2019 Page 7 of 18... - Page 8 Once all tubes have been loaded the 01-0622 Tube Clamp Assembly (Tube Holder) can be fitted. ©Owlstone Medical Ltd. 2018 - 2019 95-0009-001 10 July 2019 Page 8 of 18...
- Page 9 The Travel End Cap may need to be applied with some force to ensure it is fitted all the way onto the tubes. Tighten the 01-0622 Tube Clamp Assembly (Tube Holder) using the torque screwdriver ©Owlstone Medical Ltd. 2018 - 2019 95-0009-001 10 July 2019 Page 9 of 18...
- Page 10 If the Breath Biopsy Cartridge does not fit through, push the Travel End Caps together with your palms. ©Owlstone Medical Ltd. 2018 - 2019 95-0009-001 10 July 2019 Page 10 of 18...
- Page 11 Then fit a cable tie if required and tighten it to avoid the end caps being removed during transport. A bubble wrap bag can be used to protect the Cartridge Assembly during any handling. ©Owlstone Medical Ltd. 2018 - 2019 95-0009-001 10 July 2019 Page 11 of 18...
-
Page 12: Breath Biopsy Cartridge Disassembly
Black debris in the bottom of the hole will also probably indicate that the Travel End Cap should be cleaned using mechanical cleaning, by removing the o-ring first, and the o-ring should be changed at the same time. ©Owlstone Medical Ltd. 2018 - 2019 95-0009-001 10 July 2019 Page 12 of 18... - Page 13 Do not push through into the metal surface as you could scratch this which can mean the seal is less effective. Pull the o-ring forward and then upwards to remove. ©Owlstone Medical Ltd. 2018 - 2019 95-0009-001 10 July 2019...
- Page 14 “banana” shape as shown above, right This o-ring is then inserted as shown above, and finally pushed home into the inset groove using the 74-0053 o-ring Insertion Tool. ©Owlstone Medical Ltd. 2018 - 2019 95-0009-001 10 July 2019...
- Page 15 Note: The o-rings supplied with this kit have been pre-baked. Any o-rings not supplied by Owlstone Medical should also be baked to reduce the contaminants they hold. This is done by arranging them on a clean, stainless steel try, slightly overlapping to decrease the area touching the tray.
- Page 16 Bake in a clean oven at 180C for 12-16 hours preferably with carbon scrubbed or “zero air” flowing through the oven to remove the contaminants that evolve from the end caps and o-rings. ©Owlstone Medical Ltd. 2018 - 2019 95-0009-001 10 July 2019...
-
Page 17: Table Of Symbols
European Union countries Fragile, handle Use-by date with care Storage Temperature Humidity Limit Limit DO NOT dispose of in household waste (WEEE Directive) ©Owlstone Medical Ltd. 2018 - 2019 95-0009-001 10 July 2019 Page 17 of 18... -
Page 18: Contacts And Support
Milton Road technical and safe use Cambridge CB4 0GJ questions relating United Kingdom this manual, contact us Tel: +44 (0) 1223 428200 Or email support@owlstone.com ©Owlstone Medical Ltd. 2018 - 2019 95-0009-001 10 July 2019 Page 18 of 18...
Need help?
Do you have a question about the Breath Biopsy 1.0 and is the answer not in the manual?
Questions and answers