
Related Manuals for aerione AER-PUR808


Summary of Contents for aerione AER-PUR808
- Page 1 USER MANUAL Multistage Air Sanitizer AER-PUR808 Model: Please Read Manual Completely Before Using...
- Page 2 Thank you for purchasing the Multistage Air Sanitizer If you have any questions or concerns, please reach out to us at aerione@aerione.com. We hope you enjoy your new air purifi er!
-
Page 3: Table Of Contents
Table of Contents Package Contents Package Contents Air Purifi er Specifi cations Pre-Filter (pre-installed) Safety Instructions Cold Catalyst+Activated Carbon Filter (pre-in- stalled) 7-Stage Cleaning Anti Bacterial+High Effi ciency HEPA 13 Filter Getting to Know your Air (pre-installed) Purifi er Humidifi er Mesh (pre-installed) Control Buttons Remote Control Unit Status Indicator... -
Page 4: Safety Instructions
SAFETY INSTRUCTIONS General Safety • To avoid electrical shock or fi re, do • Do not pick up or move the machine not allow water, fl ammable cleaners, while it is running. When moving or or any liquid enter the unit. storing, do not pull the power cord. - Page 5 SAFETY INSTRUCTIONS (CONT.) Mandatory • Should following • Should following conditions occur, turn off the machine circumstances arise, please turn off immediately (as electrical shock, the machine power immediately and sparks, or smoke may occur): contact the service department: A switch does not work. Strange noises or vibrations during operation.
-
Page 6: 7-Stage Cleaning
7-STAGE CLEANING The fi rst stage uses a screen with light plastic fi lter material to stop and capture dusts, pollen, pet dander, mold Low temperature catalyst fi lter that Low te tempe mperature c atalyst fi lter that pores, soot, and other hazardous air helps to destroy formaldehyde, helps to destroy formaldehyde, particles that may cause allergies and... -
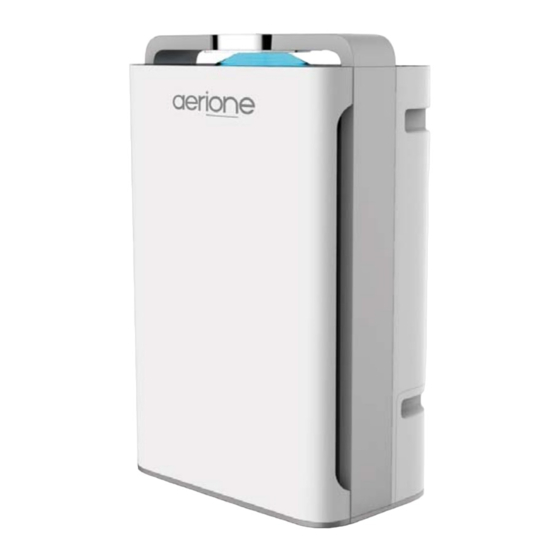
Page 7: Getting To Know Your Air Purifier
GETTING TO KNOW YOUR AIR PURIFIER Front Cover Control Panel Air Intake Handle Grip Particulate Sensor Humidifi er Unit Air Outlet Air Quality Indicator Front Back Side... -
Page 8: Control Buttons
CONTROL BUTTONS A reminder feature to indicate what fi lter needs Turns the unit on or off . to be cleaned or replaced. Machine is GREEN when on and RED when on standby. After every 320 hrs, this icon will fl ash to indicate that fi lter #1 requires cleaning. -
Page 9: Status Indicator
STATUS INDICATOR Digital Display Digital Display • Airborne fi ne particle count in real time (PM2.5) • Remaining time of operation when timer is activated (hours). • Hours the current fi lter is in use (0 to 1500 hrs). Air Quality Indicator Thru a built-in sensor, PM2.5 air particulate count is measured and the resulting air quality condition visually displayed thru the AQ lamp’s changing of colors. -
Page 10: Getting Started
GETTING STARTED Installing the Filters Open the front cover then pull out fi lters one at a time. Remove plastic packaging from all three fi lters Reinstall front cover. Re-install in sequence the 3 fi lters with the Antibacterial/HEPA fi lter fi rst (fan side), the Activated Carbon/Cold Catalyst second, then the Pre-Filter last (front cover side). - Page 11 Preparing for Humidifi cation Pull the water tank from the lower side of the unit. Remove the plastic packaging on the humidifying fi lter. Insert into the container the humidifying fi lter. Remove the water inlet rubber cover. Add cold water to the tank, fi lling up to about 80%.
-
Page 12: During Installation
DURING INSTALLATION For a more eff ective air circulation, place the product on a hard fl at surface with at least 30 cm clearance from any wall. Make sure that there are no object to obstruct air fl ow thru the inlet or exhaust vents. -
Page 13: Using Your Purifier
USING YOUR PURIFIER Manual Mode Auto Mode When power button is pressed, Press to turn on the air sanitizer. click on to change to the The buttons will all light up desired motor speed which at the together with to indicate that the unit is in same time will turn off to exit automatic mode. - Page 14 USING YOUR PURIFIER (CONT.) Remote Control The air purifi er comes together with a remote control unit that uses regular button sized lithium batteries. Please remove battery when this unit will not be used over an extended period of time. Note: •...
- Page 15 USING YOUR PURIFIER (CONT.) Step 2: Connect to Wi-FI • Select the Wi-Fi thru which the machine can connect to the internet, and enter the Wi-Fi password. Note: Only 2.4GHz Wi-Fi networks are supported at the moment. • While the machine is on standby (i.e., power OFF but plugged into power outlet), press and hold the “Ionizer”...
-
Page 16: Keeping Things Clean
KEEPING THINGS CLEAN Cleaning the Filters PRE-FILTER (Filter #1) Clean the surface with a vacuum cleaner or wash with water to remove large particles like hair, dander, dust, soot, and pollen that may be entangled. Frequency: twice per month. 2-IN-1 COMPOSITE 1 (FILTER #2) Gently clean both sides with a vacuum cleaner. - Page 17 Use only offi cial Aerione fi lter replacements to Note: maintain proper operation of your air sanitizer.
- Page 18 KEEPING THINGS CLEAN (CONT.) Cleaning the Anion Generator When you hear a creaking sound, this may indicate a dusty anion generator. To clean, regularly brush off the dusts around the head using a #1 or #2 paint brush. Cleaning the Air Particle Sensor Approximately once every two months, wipe the lens with a cotton swab dipped in water to remove any dirt as moisture or tobacco smoke residue may cause it to no longer work properly.
-
Page 19: Troubleshooting
TROUBLESHOOTING Problem Possible Solution Unit will not turn on or respond Make sure that unit is plugged to a power outlet. to button controls. Make sure that power cable is not damaged. Close the front cover properly. Be sure that the unit is fl at on the ground. Unit may be in child lock mode (see page 8). -
Page 20: Warranty Information
• Improper or non-conformance to AERIONE will repair, or at its option, provide an maintenance recommendations equivalent item or replace, the defective product to include use of non offi cial during the stated warranty period. -
Page 21: Customer Support
77 City Centre Drive, Suite 501, E Tower Mississauga, ON, L5M 6R1, Canada Email: aerione@aerione.com Please have your order invoice and order ID ready before contacting Customer Support AER-PUR808 User Manual V1R4. Please check our website for the latest available version... - Page 22 NOTES...
- Page 24 www.aerione.com...
Need help?
Do you have a question about the AER-PUR808 and is the answer not in the manual?
Questions and answers