Table of Contents
Advertisement
Quick Links
Advertisement
Table of Contents

Related Manuals for Nonstop Station E

Summary of Contents for Nonstop Station E
- Page 1 Setup & Usage Guide nonstopproducts.com...
-
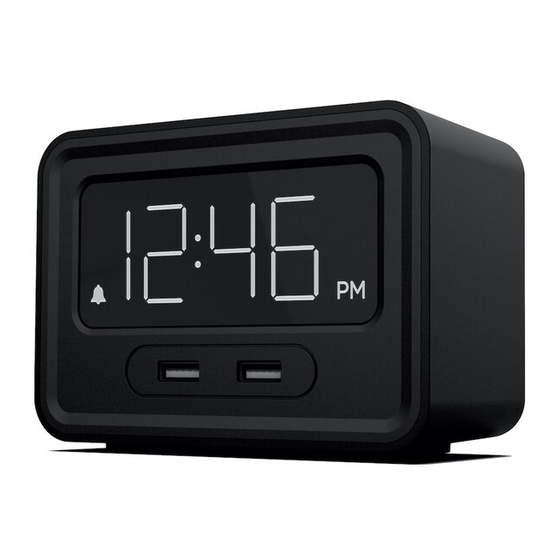
Page 2: Interface & Display
Interface & Display Alarm On/Off Slide Screen Brightness Alarm Hour Set Alarm Minute Set Snooze Alarm Indicator Time Display USB CHARGING PORTS (2.0A) -
Page 3: Specifications
USB Charging 1. Plug the AC / DC (120 V AC) power cord into the The Station E features dual USB charging ports power outlet on the AC wall. Your clock will turn on. (2 X 2A) on the front of the unit which are designed to It's ready to use now. -
Page 4: Setting The Date And Time
Setting the Date & Time Setting the Alarm To set the time, simply press the HR button and MIN 1. On the top of the clock, press both "SNOOZE" and button to change the alarm time. "DIMMER" together to enter year setting mode, with the display will begin flashing "20 ", and then Slide the ALARM switch to the "ON"... -
Page 5: Safety Precautions
SAFETY PRECAUTIONS been spilled or objects have fallen into the apparatus, the Some of the following information may not apply to your apparatus has been exposed to rain or moisture, does not particular product; however, as with any electronic product, precautions should be observed during handling and usvve. -
Page 6: Fcc Statements
Supplier’s Declaration of Conformity • Reorient or relocate the receiving antenna. Product Name: Station E • Increase the separation between the equipment and Model number: NSE receiver. • Connect the equipment into an outlet on a circuit Responsible party: different from that to which the receiver is connected. - Page 7 CAUTION RISK OF ELECTRIC SHOCK DO NOT OPEN CAUTION: TO REDUCE THE RISK OF ELECTRIC SHOCK, DO NOT REMOVE COVER (OR BACK). NO USER-SERVICEABLE PARTS INSIDE. REFER SERVICING TO QUALIFIED SERVICE PERSONNEL. DANGEROUS VOLTAGE: The lightning flash with arrowhead symbol, within an equilateral triangle is intended to alert the user to the presence of uninsulated dangerous voltage within the product’s enclosure that may be of sufficient magnitude to constitute a risk of electric shock to persons.
- Page 8 Nonstop Inc. All Rights Reserved.