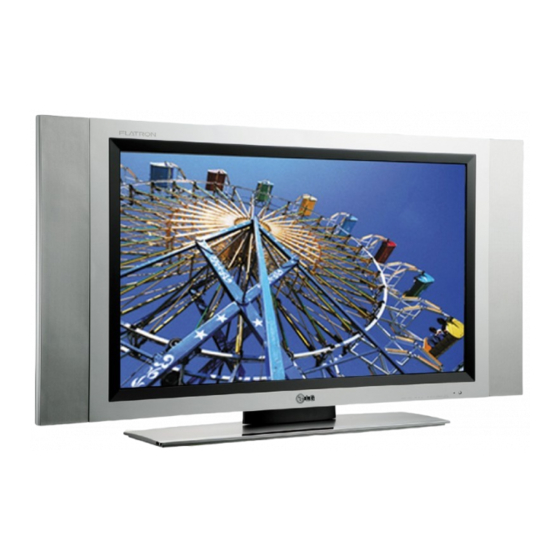
LG L3200TF User Manual
Hide thumbs
Also See for L3200TF:
- User manual (59 pages) ,
- Specifications (2 pages) ,
- Brochure & specs (64 pages)
Table of Contents
Advertisement
Quick Links
Table of Contents
Installation
and
Connection
Input
How to dajust the OSD(On Screen Display) Screen
Selection
and Tracking
Miscellaneous
Product Specifications
When Watching DVI-D(HDCP) from the VCR/DVD/Set-top Box
is a trademark of SRS Labs,Inc.
technology is incorporated under license from SRS Labs,Inc.
i
A1
A4
A5
A8
A9
A10
A11
A11
A13
A14
A15
A16
A17
A24
A25
A26
A28
A29
A35
A36
A38
A49
A51
A54
Advertisement
Table of Contents

Subscribe to Our Youtube Channel
Related Manuals for LG L3200TF


Summary of Contents for LG L3200TF
-
Page 1: Table Of Contents
Table of Contents Safety Precautions Installation Accessories Using the Remote Control Connection To arrange cables in order - Optional Connecting the Speakers - Optional Name and Function of the Parts Connecting to External Devices When Connecting to your PC Connecting the VCR / DVD Connecting the HDTV (720p/1080i) Connecting the DVD (480i) When Watching DVI-D(HDCP) from the VCR/DVD/Set-top Box... -
Page 2: Safety Precautions
Safety Precautions Please read these safety precautions carefully before using the monitor. If you ignore the warning message, you may be seriously injured or there is a possibility of Warning accident or death. Caution If you ignore the caution message, you may be slightly injured or the product may be damaged Precautions in installing the Monitor Warning Keep away from heat sources like electrical heaters. - Page 3 Electrical Power Related Precautions Warning Make sure to connect the power cable to the grounded current. - You may be electrocuted or injured. Use the rated voltage only. - The product can be damaged, or you may be electrocuted. During a thunder or lightning storm, unplug the power cable or signal cable. - You may be electrocuted or a fire can break out.
- Page 4 Safety Precautions Caution Do not shock the monitor when moving it. - You may be electrocuted or the monitor can be damaged Do not dispose the product-packing box. Use it when you move. Make the panel face forward and hold it with both hands to move. - If you drop the monitor, the damaged monitor can cause electric shock or fire.
-
Page 5: Accessories
Accessories Please check the accessories in the product package. * The monitor and the accessories can be different from the figures shown here. Desktop Stand Type Free Mount Type Monitor Remote Controller/ Batteries User's Guide/ DVI-D Signal Cable 15-pin D-Sub Signal Driver CD/Cards Cable Power Cord... -
Page 6: Using The Remote Control
Using the Remote Control Name of the Remote Controller Buttons Power On/Off Button Sleep Button Mute button When watching TV/AV / S-Video / Component 1 / Component 2 • Input Select Button - The monitor will be automatically turned off •... - Page 7 • Input Select Button • TV/AV Button If you press the button once, This button will be enabled only the following Input Signal when you selected the TV/AV Window will appear. Select signal. The signal type will be the signal type you want changed with the following order.
- Page 8 Using the Remote Control SWAP Button You can swap the main screen and the sub-screen when the PIP/POP/PBP function is used. SWAP SWAP When 'Input Signal 1' comes on in the main screen, only 'Input Signal 2' can be displayed on the sub-screen. On the contrary, if the main screen displays 'Input Signal 2', the sub-screen can display 'Input Signal 1' only.
-
Page 9: To Arrange Cables In Order - Optional
To arrange cables in order - Optional * Applicable only for models that support the stand Disassemble the stand cover. The cover may be easily disassembled by pressing down on the base as shown in the figure. Stand cover After connecting the cables, correctly position the stand cover into the holes on the stand. -
Page 10: Connecting The Speakers - Optional
Connecting the Speakers - Optional * Applicable only for models that support the speakers Use the screws to secure the speakers on the rear side of the monitor as shown in the below figure. When the speaker is installed. -
Page 11: Name And Function Of The Parts
Name and Function of the Parts Rear View Back Cap - Open the back cap before you install the monitor. Power Connector : Connect the power cord Wired Remote Control Port RS-232C Serial Ports PC Signal Inputs PC Sound Jack : Connect the audio cable to the *LINE OUT jack of the PC sound card. -
Page 12: Connecting To External Devices
Connecting to External Devices When Connecting to your PC First of all, see if the computer, monitor and the peripherals are turned off. Then, connect the signal input cable. When connecting with the DVI signal input cable. When connecting with the D-Sub signal input cable. (IBM compatible PC) When connecting with the D-Sub signal input cable. - Page 13 Turn on power by pressing the power button on the monitor. Power button Turn on the PC. Select an input signal. Press the SOURCE button on the remote controller to select the input signal. Or, press the SOURCE button at the front side of the monitor. When connecting with a DVI-D signal input cable.
-
Page 14: Connecting The Vcr / Dvd
Connecting to External Devices Connecting the VCR / DVD Connect the video cable as shown in the below figure and then connect the power cord (See page A11). When connecting with a RCA cable. Connect the input terminal with a proper color match. •... -
Page 15: Connecting The Hdtv(720P/1080I)
Connecting the HDTV(720p/1080i) Connect the video/audio cable as shown in the below figure and then, connect the power cord (See page A11). Connect the input terminal with a proper color match. • Monitor HDTV Receiver Select an input signal. Press the SOURCE button on the remote controller to select the input signal. Or, press the SOURCE button at the front side of the monitor. -
Page 16: Connecting The Dvd(480I)
Connecting to External Devices Connecting the DVD(480i) Connect the video/audio cable as shown in the below figure and then, connect the power cord (See page A11). Connect the input terminal with a proper color match. • Monitor DVD Receiver Select an input signal. Press the SOURCE button on the remote controller to select the input signal. - Page 17 Connecting to DVI-D(HDCP) from the DVD/SET-TOP BOX Connect the video/audio cable as shown in the below figure and then connect the power cord (See page A11). Monitor DVI-D RCA-PC Signal Cable Audio Cable VCR/DVD/Set-top Box Select an input signal. Press the SOURCE button on the remote controller to select the input signal. Or, press the SOURCE button at the front side of the monitor.
-
Page 18: Connecting The Tv
Connecting to External Devices Connecting the TV See if the antenna cable is connected at the rear side of the monitor and then, connect the power cord (see page A11). Rear Side of the Monitor Antenna Cable (optional) Select an input signal. Press the SOURCE button on the remote controller to select the input signal. -
Page 19: Connecting Av Outputs A18
Connecting AV Qutputs Connect to the external device if you record the broadcasting. When you set the input signal of the main screen as 'AV (CVBS)', you can transmit the signal that you're watching to the AV output terminal. Monitor Video/TV/Monitor... -
Page 20: Selecting And Adjusting The Screen
Selecting and Adjusting the Screen Name of the Buttons in the Screen Adjustment Unit • Press this button to turn on the power. Press this button again to Power Button turn it off. • This Indicator lights up green when the display operates normally(on Power Indicator mode). - Page 21 Name of the Buttons in the Screen Adjustment Unit [For PC Analog signal] AUTO/SELECT Button [Other signals] • The current signal and mode information will be displayed. SOURCE Button • Select the input signal Television Composite Video S-Video Separate Video Component 1 HDTV Component 2...
- Page 22 Selecting and Adjusting the Screen OSD Menu Icon Function Description Set/Selects the channel. (available only when watching TV) STATION Adjusts screen brightness, contrast and color that you prefer. PICTURE Adjusts the audio function. SOUND Adjusts the timer function. TIMER Adjusts the screen status according to the circumstances. SPECIAL Adjusts the screen video.
-
Page 23: A22
How to adjust the OSD (On Screen Display) screen Save Move where Exit from the Pops up Move where Select a Select a Adjust the status adjustment the menu you want to menu icon you want to menu icon menu screen. screen adjust adjust... -
Page 24: Set/Selects The Channel When Using The Vcr/Dvd/Hdtv/Tv A23
Selecting and Adjusting the Screen Set/Selects the channel when using the VCR/DVD/HDTV/TV EZ Scan To automatically search the available TV channels. To Start Press button to start automatic programming. all available TV channels are searched and stored automatically. To stop auto CH progress, press the MENU or SET button. •... -
Page 25: Adjusting Screen Color
Adjusting Screen Color EZ Video TV/AV/S-Video/Component 1/ Component 2 input only The EZ Video function automatically adjusts the screen image quality depending on the AV/TV usage environment. • Dynamic : Select this option to display with a sharp image. • Standard : The most general and natural screen display status. •... -
Page 26: Adjusting The Audio Function
Selecting and Adjusting the Screen Adjusting Screen Color RGB PC / DVI PC input only • 6500K/9300K Selecting a factory setting color set. 6500K: Slightly reddish white. 9300K: Slightly bluish white. • User : Select this option to use the user-defined settings. Contrast To adjust the contrast of the screen. -
Page 27: Adjusting The Timer Function
Adjusting the timer function Clock Auto The time is set automatically through from a PBS broadcast signal. The PBS channel signal includes information for the correct time and daylight saving time. 1) Press the MENU button and then use button to select the TIMER menu. 2) Press the button and then use button to select the Clock menu. - Page 28 Selecting and Adjusting the Screen Adjusting the timer function Setting is available, however, operation is only Off / On Timer allowed upon TV input The off timer automatically switches the set to standby at the pre-set time. 1) Press the MENU button and then use button to select the TIMER menu.
-
Page 29: Selecting The Options
Selecting the options Input If you press the button once, the following Input Signal Window will appear. Select the signal type you want using the button. Child Lock Use the buttons to select On or Off. The TV can be set up so that it can only be used with the remote control. -
Page 30: To Adjust The Caption & V Chip Function
Selecting and Adjusting the Screen Selecting the options Set ID You can assign a unique Set ID NO (name assignment) to each monitor when several monitors are connected for display. Specify the number (0~99) using the button and exit. Use the assigned Set ID to individually control each monitor using the Monitor Control Program. - Page 31 Selecting the options (To adjust the CAPTION & VCHIP function - Optional) Caption Use the buttons to select captions. [Remote Control] Press the CAPTION button repeatedly to display the caption option as shown below. Press the SET button to select the caption option. EZ Mute * EZ Mute : If sound is on, the caption will be off.
- Page 32 Selecting and Adjusting the Screen Selecting the options (To adjust the CAPTION & VCHIP function - Optional) V-CHIP rating and categories - Rating guidelines are provided by broadcast station. Most television programs and television movies can be blocked by TV rating and/or individual categories. Movies that have been shown at the theaters or direct-to-video movies use the Movies Rating System(MPAA) only.
- Page 33 Selecting the options (To adjust the CAPTION & VCHIP function - Optional) Content Block CONTENT Categories : - Dialogue(sexual dialogue) : Applies to TV-PG&Above, TV-14. - Language(adult language) : Applies to TV-PG&Above, TV-14&Above, TV-MA. - Sex Scene(sexual situations) : Applies to TV-PG&Above, TV-14&Above, TV-MA. - Violence : Applies to TV-PG&Above, TV-14&Above, TV-MA.
- Page 34 Selecting and Adjusting the Screen Selecting the options (To adjust the CAPTION & VCHIP function - Canadian Only) V-CHIP rating and categories (Optional) - Canadian Rating System - Rating guidelines are provided by broadcast station. Most television programs and television movies can be blocked by TV rating and/or individual categories.
- Page 35 Closed Captions - Optional Closed captioning is a process which converts the audio portion of a television program into written words which then appear as subtitles on the television screen. Closed captions allow viewers to read the dialogue and narration of television programs. Using Closed Captions Captions are the subtitles of the dialogue and narration of television programs.
-
Page 36: Adjusting Screen Clock/Phase And Position
Selecting and Adjusting the Screen Adjusting Screen CLOCK/PHASE and Position To select the image size of the screen. <RGB PC / DVI PC input only> <TV/AV/S-Video/Component 1, 2 input only> * When the component 1 input signal is 720p or 1080i, the spectacle function is not supported. Auto- This button is for the automatic adjustment of the screen position, clock and phase. -
Page 37: Adjusting Pip/Pop/Pbp Mode (Multiple Screen) Functions
Adjusting PIP/POP/PBP Mode (Multiple Screen) Functions On/Off After selecting PIP in the PIP On/Off menu, the following menu items can be adjusted. After selecting POP in the POP On/Off menu, the following menu items can be adjusted. After selecting PBP in the PBP On/Off menu, the following menu items can be adjusted. - Page 38 Selecting and Adjusting the Screen Adjusting PIP/POP/PBP Mode (Multiple Screen) Functions Position To adjust the position to PIP screen. Swap To switch the main-screen and sub- screen in PIP/POP/PBP mode. SWAP SWAP...
-
Page 39: Controlling The Multiple Monitors (Rs-232C Protocol)
Controlling the Multiple Monitors (RS-232C protocol) Use this method to connect several monitors to a single PC. You can control several monitors at a time by connecting them to a single PC. Connecting the cable Connect the RS-232C cable as shown in the picture. * The RS-232C protocol is used for communication between the PC and monitor. - Page 40 Controlling the Multiple Monitors (RS-232C protocol) Command Reference List COMMAND 1 COMMAND 2 DATA (Hexa) 01. Power 00H - 01H 02. Input Select 00H - 08H 03. Aspect Ratio 01H - 06H 04. Screen Mute 00H - 01H 05. Volume Mute 00H - 01H 06.
- Page 41 Transmission / Receiving Protocol OK Acknowledgement [Command2][ ][Set ID][ ][OK][Data][x] * The Monitor transmits ACK (acknowledgement) based on this format when receiving normal data. At this time, if the data is data read mode, it indicates present status data. If the data is data write mode, it returns the data of the PC computer.
- Page 42 Controlling the Multiple Monitors (RS-232C protocol) Transmission / Receiving Protocol 02. Input Select (Command : b) (Main Picture Input) G To select input source for the Set. You can also select an input source using the SOURCE button on the remote control. Transmission [k][b][ ][Set ID][ ][Data][Cr] Data 0 : TV...
- Page 43 Transmission / Receiving Protocol 04. Screen Mute(Command : d) G To select screen mute on/off. Transmission [k][d][ ][Set ID][ ][Data][Cr] Data 0 : Screen mute off (Picture on) 1 : Screen mute on (Picture off) Acknowledgement [d][ ][Set ID][ ][OK][Data][x] 05.
- Page 44 Controlling the Multiple Monitors (RS-232C protocol) Transmission / Receiving Protocol 07. Contrast (Command : g) G To adjust screen contrast. You can also adjust the contrast in the Picture menu. Transmission [k][g][ ][Set ID][ ][Data][Cr] Data Min : 00H ~ Max : 64H Refer to ‘Real data mapping’...
- Page 45 Transmission / Receiving Protocol 09. Color (Command : i) (TV, AV only) GTo adjust the screen color. You can also adjust the color in the Picture menu. Transmission [k][i][ ][Set ID][ ][Data][Cr] Data Min : 00H ~ Max : 64H (Hexadecimal code) Acknowledgement [i][ ][Set ID][ ][OK][Data][x]...
- Page 46 Controlling the Multiple Monitors (RS-232C protocol) Transmission / Receiving Protocol 12. OSD Select (Command : l) GTo control OSD on/off to the set. Transmission [k][l][ ][Set ID][ ][Data][Cr] Data 0 : OSD Off 1 : OSD On Acknowledgement [l][ ][Set ID][ ][OK][Data][x] Data 0 : OSD Off 1 : OSD On 13.
- Page 47 Transmission / Receiving Protocol 15. PIP Position(Command : q) G To adjust PIP position. Transmission [k][q][ ][Set ID][ ][Data][Cr] Data 0 : Bottom of the right side on screen 1 : Bottom of the left side on screen 2 : Top of the left side on screen 3 : Top of the right side on screen Acknowledgement [q][ ][Set ID][ ][OK][Data][x]...
- Page 48 Controlling the Multiple Monitors (RS-232C protocol) Transmission / Receiving Protocol 17. ACC(Command : u) GTo adjust the screen color temperature. Transmission [k][u][ ][Set ID][ ][Data]][Cr] Data 0 : Normal (9300K) 2 : Warm (6500K) 1 : Cool 3 : User PC : 0, 2, 3 AV : 0, 1, 2 Acknowledgement...
- Page 49 Transmission / Receiving Protocol 20. Tune Command(command : m a) GTune channel to following physical number. Transmission [m][a][ ][Set ID][ ][Data0][ ][Data2][ ][Data3][Cr] Data 0 : Air : 02H ~ 45H, Cable : 01H, 0EH ~ 7DH 1 : 0 2 : 0 3 : High ->...
-
Page 50: Ir Codes
IR Codes How to connect G Connect your wired remote control to Remote Control port on the Monitor. Remote Control IR Code G Output waveform single pulse, modulated with 37.917KHz signal at 455KHz Carrier frequency FCAR = 1/Tc = fosc/12 Duty ratio = T1/TC = 1/3 G Configuration of frame •1st frame... - Page 51 Code(Hexa) Function Note R/C Button R/C Button R/C Button VOL( R/C Button VOL( POWER ON/OFF R/C Button(Power On/Off) POWER ON Discrete IR Code(Only Power On) POWER OFF Discrete IR Code(Only Power Off) MUTE R/C Button Number Key 0 R/C Button Number Key 1 R/C Button Number Key 2...
-
Page 52: Troubleshooting
Troubleshooting No image is displayed G Is the monitor power cord connected? • See if the power cord is properly connected to the outlet. G Is the power indicator light on? • See if the power switch is turned on. G Power is on, power indicator is green but •... - Page 53 The screen image looks abnormal. G Is the screen position wrong? • D-Sub analog signal – Press the “AUTO” button in the remote controller to automatically select the optimal screen status that fits into the current mode. If adjustment is not satisfactory, use the Position OSD menu.
- Page 54 Troubleshooting The audio function does not work. G No sound? • See if the audio cable is connected properly. • Adjust the volume. • See if the sound is set properly. G No sound is available when the • See if the Sound is set to On in the PIP/POP/PBP PIP/POP/PBP mode is engaged.
- Page 55 Specifications The product specifications can change without prior notice for product improvement. LCD Panel [32 inch] 32 inches (80.04 cm) TFT (Thin Film Transistor) LCD (Liquid Crystal Display) Panel Visible diagonal size: 80.04 cm 0.5025 mm (Pixel Pitch) [37 inch] 37 inches (94.03 cm) TFT (Thin Film Transistor) LCD (Liquid Crystal Display) Panel Visible diagonal size: 94.03 cm...
- Page 56 Specifications The product specifications can change without prior notice for product improvement. Dimensions &Weight Width x Height x Depth [32 inch] [1] 80.30 cm (31.61 inches) x 54.00 cm (21.26 inches) x 18.00 cm (7.09 inches) [2] 80.30 cm (31.61 inches) x 49.30 cm (19.4 inches) x 9.99 cm (3.93 inches) [3] 96.40 cm (37.95 inches) x 54.00 cm (21.26 inches) x 18.00 cm (7.09 inches) [4] 96.40 cm (37.95 inches) x 49.30 cm (19.4 inches) x 9.99 cm (3.93 inches) [37 inch]...
- Page 57 The product specifications can change without prior notice for product improvement. Video Signal Max. Resolution RGB PC : 1600 X 1200 @60Hz DVI PC : 1360 X 768 @60Hz – It may not be supported depending on the OS or video card type. Recommended Resolution RGB PC : WXGA 1360 X 768 @60Hz DVI PC : WXGA 1360 X 768 @60Hz –...
- Page 58 Specifications PC Mode – Preset Mode Horizontal Vertical Horizontal Vertical Preset mode Frequency Frequency Frequency Frequency Preset mode (kHz) (Hz) (kHz) (Hz) 31.469 640 x 350 VESA 1024 x 768 60.123 31.468 720 x 400 VESA 1024 x 768 68.68 31.469 640 x 480 VESA...
Need help?
Do you have a question about the L3200TF and is the answer not in the manual?
Questions and answers