Table of Contents
Advertisement
Available languages
Available languages
Quick Links
Advertisement
Table of Contents

Related Manuals for Kora DTR-3340


Summary of Contents for Kora DTR-3340
- Page 1 INDICE (Italiano)
- Page 2 IMPORTANTI INFORMAZIONI SULLA SICUREZZA Leggere attentamente le seguenti istruzioni. Conservare questo manuale per consultazioni future. Seguire attentamente tutte le istruzioni. Non utilizzare mai il dispositivo in ambienti umidi o vicino ad acqua. Non esporre mai l’apparato a schizzi d’acqua. ...
- Page 3 L’alimentatore, se non si utilizza la presa USB della TV, deve essere inserito saldamente nella spina a muro/presa. Ogni collegamento va fatto solo ed esclusivamente a dispositivo spento. Per uso interno. Non utilizzare il prodotto nel caso di cavo danneggiato. ...
-
Page 4: Installazione
"DVBT" Digitale Terrestre ed è compatibile con le specifiche dello "Switch Off 2021/23" secondo il nuovo standard DVBT2/HEVC a 60Hz e 10 bit. Con Kora DTR-3340 è possibile ricevere tutti i canali del Digitale Terrestre sia in bassa che in Alta definizione. - Page 5 Coupon di Garanzia e WEEE e avvertenze di uso dell’alimentatore Nel caso in cui il contenuto non sia quello sopradescritto, contattare il proprio rivenditore immediatamente. 1.3 Telecomando Remoto Sezione Controllo TV (dopo programmazione) STAND-BY[BLU]: Permette la commutazione tra la modalità...
- Page 6 INFO: Visualizza le informazioni sul canale corrente. Premere più volte per avere informazioni aggiuntive. CH+/CH-: Permette la navigazione in un menu o di cambiare canale. VOL+/VOL-: Permette la navigazione in un menu o di alzare/abbassare il livello del volume.
- Page 7 2. Premere e mantenere premuto il tasto SET del [Telecomando DECODER]. Si accenderà la luce rossa con una bassa intensità (a seconda del modello di telecomando il led rosso può essere posizionato sotto il tasto blu ON/OFF o a fianco alla sua destra), mantenendo premuto il tasto per altri 10 secondi circa questa aumenterà...
- Page 8 1.4 Cablaggio e Configurazione Installazione batterie Rimuovere il coperchio dal retro del telecomando, sfilandolo verso il basso, ed inserire 2 batterie AAA (non incluse) all'interno del comparto, assicurandosi che le polarità rispettino quelle indicate. Il telecomando va utilizzato puntandolo verso il ricevitore IR che andrebbe posizionato nella parte frontale del televisore.
- Page 10 Prima installazione Una volta effettuati tutti i collegamenti, e dopo averne attentamente controllato l’esattezza, è possibile accendere la TV e quindi il dispositivo tramite il telecomando in dotazione. Verrà visualizzata la schermata per la prima configurazione. Spostare adesso il cursore, tramite Alto/Basso [CH+/CH-] sulle varie opzioni: ...
- Page 11 Riproduzione Una volta inserita la memoria premere il tasto USB, per visualizzarne il contenuto. Selezionare il file del video da riprodurre (quello con l’icona Play a sinistra) e toccare OK. Premere Stop per interrompere la riproduzione. Premere ripetutamente il tasto Exit per tornare alla visualizzazione in diretta.
-
Page 12: Configurazione Avanzata
2. CONFIGURAZIONE AVANZATA In questo capitolo verranno spiegate tutte le voci presenti nel menu OSD del dispositivo. Premendo il tasto MENU è possibile accedere, tramite la freccia Dx/Sx [Vol+/Vol-], ai seguenti menu. Premere OK per entrare nel singolo menu. Programma [Modifica canali, Guida programmi, Ordina, LCN, Volume] ... - Page 13 Per cancellare un canale invece fare quanto segue. Spostarsi sul canale desiderato e premere il tasto OK (evidenziato con un rettangolo blu) e poi 1, poi OK, verrà visualizzata una X rossa alla destra del nome del canale. Se si desidera spostarsi su un altro canale e ripetere l’operazione.
- Page 14 2.3 Ricerca Per accedere al menu, premere il tasto MENU e poi, tramite la freccia Dx/Sx [Vol+/Vol-] selezionare Ricerca, utilizzare tasti freccia Alto/Basso [CH+/CH-] per navigare nel menu (Modalità Ricerca, Canali in chiaro, Ricerca Automatica, Ricerca manuale, Paese, Alimentazione Antenna) e premere OK per entrare nel sottomenu della voce selezionata o premere la freccia Dx/Sx [Vol+/Vol-] per cambiarne direttamente, ove possibile, le impostazioni.
- Page 15 ore) per permettere al dispositivo di spegnersi dopo 3 ore di non utilizzo e consentire così un importante risparmio sui costi energetici. Impostazione Timer: È possibile impostare diversi timer di visualizzazione (il dispositivo si accende e visualizza il canale selezionato) o editare quelli esistenti. ...
- Page 16 Controllo Blocco: Una volta digitata la password è possibile attivare il blocco del menu (Menu Lock(Blocco Menu)=Acceso) per richiedere la password ad ogni accesso in alcune sezioni del menu (salvare con cura la password digitata) o il blocco dei canali (Channel Lock(Blocco Canale) su Acceso). È inoltre possibile cambiare, digitandola 2 volte, la password.
- Page 17 Internet: È possibile accedere al lettore RSS o alle previsioni Meteo (entrambe disponibili solo quando si utilizza una scheda USB WIFI connessa al router domestico). Non tutti i file Video/Audio sono supportati. Il dispositivo è in grado di riprodurre, tramite il player integrato, file video codificati tramite i protocolli HEVC ed H.264.
-
Page 18: Domande Frequenti
3. DOMANDE FREQUENTI Problematica Probabile Causa Soluzione Nessuna immagine è Dispositivo spento Accendere dispositivo. Alimentazione Collegare l’alimentazione visualizzata a Video sul dispositivo non collegata. accendere dispositivo. Errore di Input sulla TV. Selezionare sulla l’ingresso video corretto è collegato dispositivo. La schermata mostra Il cavo dell’antenna non è... - Page 19 playback di video da USB. Viene riprodotto Il canale selezionato è una Premere TV/Radio per esclusivamente suono RADIO. commutare la modalità di ma nessuna immagine. funzionamento. Il telecomando funziona Orientamento errato. Puntare il telecomando male. verso l’extender IR. Distanza Ridurre la distanza a non eccessiva/Presenza più...
-
Page 20: Supporto Offerto
L’accesso ad ogni menu Password dimenticata. La password di default è ed anche il reset del “000000”. Super- dispositivo è password “873543” possibile poiché si è permette di accedere al cambiata la password e dispositivo ed effettuare non la si ricorda più. il reset alle condizioni iniziali. - Page 21 IMPORTANT SAFETY INFORMATION ● Carefully read the following instructions. ● Keep this manual for future reference. ● Follow all instructions carefully. ● Never use the device in humid environments or near water. Never expose the device to splashes of water. ●...
- Page 22 ● For internal use. ● Do not use the product in the case of a damaged cable. ● Take to a repair center. ● It is not a toy. ● Keep out of reach of children. ● The appliance must not be used by persons with reduced physical, sensory or reduced mental abilities or lack of experience and knowledge, unless they are under adult supervision or adequate instructions have been provided.
-
Page 23: Installation
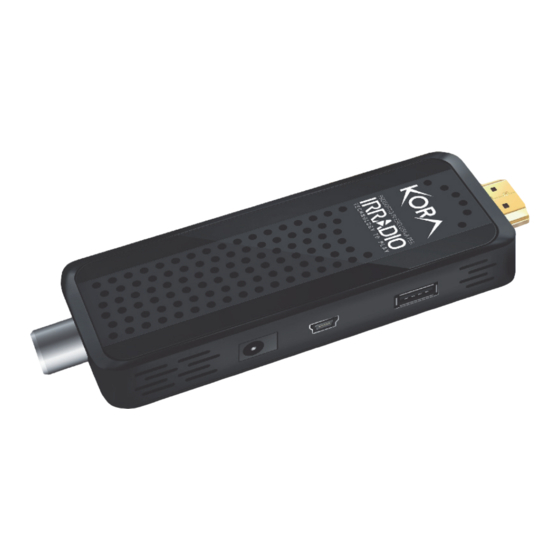
Kora DTR 3340 also integrates the Media Player function allowing playback of Photos and Movies directly from a USB memory. Auto Learning remote controller. Kora DTR-3340 can be powered directly from the TV's USB port or via a standard USB charger. -
Page 24: Remote Control
1.3 Remote Control TV Control ● STANDBY[Blue]: Allows switching between the ON and STANDBY modes (TV). ● AV/TV: Allows to select the Input (TV) ● VOL + / VOL-: Allows raising / lowering the volume level on TV. ● SET: Learning function DVBT2 Control ●... - Page 25 ● SUBT: Allows the selection of the audio / subtitle stream in video playback from USB or in DVBT mode (if available). ● FAV: Displays the list of favorite channel lists. ● MUTE: Allows you to disable / reactivate the volume. ●...
- Page 26 1.4 Wiring and Setup Battery Installation Remove the cover from the back of the remote control and insert 2 AAA batteries (not included) into the compartment, making sure that the polarities match those indicated. The remote control must be used pointing it at the IR receiver located on the front panel of the device no more than 4 meters away.
-
Page 28: First Installation
First installation Once all the connections have been made it is possible to turn on the TV and then the device via the supplied remote control. The display will show the writing ON. In this menu you can: ● [OSD Language] press the Vol-/Vol+ buttons to select the language used by the device. -
Page 29: Advanced Configuration
2. ADVANCED CONFIGURATION This chapter explains all the items in the OSD menu of the device. By clicking the MENU button you can access the following menus using the arrow [Vol+/Vol-]: ● Program [Channel Edit, Program Guide, Sort, LCN, Volume Scope] ●... - Page 30 2.2 Picture To access the menu, press the button MENU and then, using the arrow [Vol+/Vol-], select Picture. Using the arrow [CH+/CH-] you can select the sub-menu (Aspect Ratio, Resolution, TV Format, OSD Settings, Panel Setting) and press OK to open the selected item or using the [Vol+/Vol-] you can directly change the settings.
- Page 31 ▪ Sleep(hour): You can select the hours of operation before switching to standby mode. When the device switches to low-power mode, the display shows the current time (to remove the time display, set the Auto Standby Time to Off). ▪ Timer Setting: You can set different viewing timers (the device turns on and displays the selected channel) or edit existing ones.
- Page 32 ▪ Software Upgrade: The device can be updated simply via USB memory. You can download the firmware on the website, at the product page. Read the file attached to the FW to perform the correct update. The use of an incorrect update file can lead to the blocking of the device invalidating the warranty.
- Page 33 Below is a list of the playable files: ● Video Codec: MPEG-2/4 (H.264), VC-1, AVS, AVS+, VPS, HEVC (H.265) ● Audio Codec: MPEG-1I MPEG-2 layerl/ll, MP3, AAC-LC, WMA, HE- AAC, WMA, AC-3(Dolby Digitai) E-AC-3 (Dolby Digital Plus), IEC958 SPDIF ● File Type: TS, MPG, MP4, AVI, MKV, FLV, DIVX ●...
-
Page 34: Frequently Asked Questions
3. FREQUENTLY ASKED QUESTIONS Problem Probable Cause Solution No image is displayed on Device off. Turn the device ON. the TV to Video. Power supply device Connect the power supply and is not connected. switch on the device. The Input Error on Select (TV) the correct video input device. - Page 35 MicroSD maximum files) and NTFS. connected Format the memory in NTFS. device? Pressing the CH + / CH- The decoder is Press FAV button and move to keys will not show all displaying the the "ALL". Press OK. channels but only a channels of a few, why? selected list (via the...
Need help?
Do you have a question about the DTR-3340 and is the answer not in the manual?
Questions and answers