Table of Contents
Advertisement
Available languages
Available languages
Quick Links
π
H-7860, H-7861
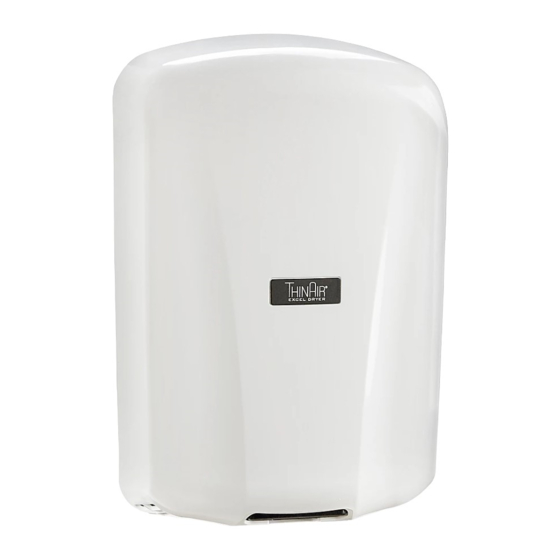
THINAIR
HAND DRYER
®
TOOLS INCLUDED
Tamperproof Wrench
WARNING! For proper electrical connections,
check the local building codes. The dryer must
be installed by a qualified, licensed electrician.
Check that the electrical supply corresponds to that
shown on the rating sticker of the unit. If the dryer is
connected to any electrical supply other than what is
stated on the rating sticker of unit, permanent damage
or improper, unsafe operation may result.
Make sure electricity is turned off at the main panel
before installing, maintaining or cleaning this hand
dryer. Dryer must be installed in accordance with
current local wiring and building regulations.
1.
Disconnect the power source previously brought to
the hand dryer location.
2. Lift cover up to remove from base plate. Use the
tamperproof wrench to remove the tamperproof bolt
on bottom of cover lifting upwards to remove cover
from baseplate.
3. If electrical wiring entry is to be made from the rear,
remove the appropriate pre-formed knockout on
the base plate.
a. For H-7860 only: If entry is to be made from the
side, knock out the pre-formed area on the
right side of cover for supply connection using
knockout gasket. A rigid conduit must be used.
4. Select the appropriate mounting height for dryer
and fastener. (See Figure 1) There should be no
obstruction between the hand dryer and the floor. If
mounting over a counter top, distance from counter
to dryer must be 15" minimum.
PAGE 1 OF 12
1-800-295-5510
uline.com
Knockout Gasket
(For H-7860 Only)
PRE-INSTALLATION WIRING
INSTALLATION
Pour le français, consulter les pages 9-12.
Do not wire this hand dryer into the lighting circuit. It
must be protected by an independent circuit.
The dryer is intended to be permanently connected to a
power supply and must be properly grounded.
SAFETY
Troubleshooting and inside maintenance must be
performed by qualified service personnel.
Do not use any power wash equipment for cleaning on
or near this unit.
Do not use the dryer for drying hair.
Do not obstruct air inlets or outlets.
Figure 1
MOUNTING HEIGHTS
(FLOOR TO BOTTOM OF UNIT)
Men's
45" (114 cm)
Ladies'
43" (109 cm)
Teenagers'
41" (104 cm)
Small Children
35" (89 cm)
Handicapped
37" (94 cm)
CAUTION! Do not use the base plate as a guide
when drilling. Make sure no pipe work (gas,
water, air) or any electrical cables or wires are
located directly behind the area to be drilled.
Para Español, vea páginas 5-8.
RECOMMENDED FASTENER
Masonry Wall
1/2" expansion
sleeve with 1/4"
lag bolt
Hollow Wall
1/4" wing type
toggle bolt
Wooden Wall
1/4" lag screw
with washer
0121 IH-7860
Advertisement
Table of Contents

Related Manuals for U-Line THINAIR H-7860

Summary of Contents for U-Line THINAIR H-7860
- Page 1 Para Español, vea páginas 5-8. Pour le français, consulter les pages 9-12. π H-7860, H-7861 1-800-295-5510 uline.com THINAIR HAND DRYER ® TOOLS INCLUDED Tamperproof Wrench Knockout Gasket (For H-7860 Only) PRE-INSTALLATION WIRING WARNING! For proper electrical connections, Do not wire this hand dryer into the lighting circuit. It check the local building codes.
-
Page 2: Maintenance
INSTALLATION CONTINUED 8⁄" Figure 2 6½" 3¼" Surface Mount Knockout Gasket Surface Electrical Inlet 11⁄" (1) 7/8" Dia. Holes 13⁄" 13⁄" 8⁄" 3¼" Electrical Inlets (2) 7/8" Dia. Holes 1⁄" 3⁄" 4" 6¼" 5. Attach base plate at the four corners to smooth wall. 9. -
Page 3: Troubleshooting
TROUBLESHOOTING OPERATING ISSUE RECOMMENDATIONS Dryer does not turn on. 1. Check power to unit and connections. Verify dryer is receiving voltage at terminal block. 2. Check RED service LED light for the following: A. Light is ON: Place hands under sensor. If light stays on, then replace sensor. - Page 4 TROUBLESHOOTING CONTINUED CODES Flashing red LED light displays codes in the sensor behind air outlet. Normal operation will be indicated by the red LED being on when not drying and off when hands are under the sensor. DRYER MAINTENANCE CODES CODE OPERATING ISSUE RECOMMENDATIONS...
-
Page 5: Instalación
π H-7860, H-7861 800-295-5510 uline.mx THINAIR SECADOR ® DE MANOS HERRAMIENTAS INCLUIDAS Llave a Prueba Junta de la Tapa Ciega de Alteraciones (Solo para H-7860) CABLEADO PREVIO A LA INSTALACIÓN ¡ADVERTENCIA! Para hacer las conexiones No conecte el secador de manos al circuito de iluminación. eléctricas adecuadas, revise los códigos locales Debe estar protegido en un circuito independiente. -
Page 6: Mantenimiento
CONTINUACIÓN DE INSTALACIÓN 8⁄" Diagrama 2 6½" 3¼" Superficie de Instalación de la Junta de la Tapa Ciega Superficie de 11⁄" la Entrada Eléctrica (1) 13⁄" Orificios de 7/8" de Diám. 13⁄" 8⁄" 3¼" Entradas Eléctricas (2) Orificios de 7/8" de Diám. -
Page 7: Solución De Problemas
SOLUCIÓN DE PROBLEMAS PROBLEMA DE RECOMENDACIONES FUNCIONAMIENTO El secador no enciende. 1. Revise la corriente de la unidad y las conexiones. Verifique que la secadora esté recibiendo el voltaje adecuado en el bloque terminal. 2. Revise la luz ROJA de servicio LED por alguna de las siguientes condiciones: A. - Page 8 CONTINUACIÓN DE SOLUCIÓN DE PROBLEMAS CÓDIGOS La luz LED roja parpadeando indica los códigos en el sensor detrás de la salida del aire. El funcionamiento normal se indicará con la LED roja encendida cuando no esté secando y apagada cuando haya manos debajo del sensor.
-
Page 9: Installation
π H-7860, H-7861 1-800-295-5510 uline.ca THINAIR – SÈCHE-MAINS OUTILS INCLUS Clé inviolable Joint détachable (pour H-7860 seulement) CÂBLAGE AVANT INSTALLATION AVERTISSEMENT! Vérifiez le code du bâtiment Ne raccordez pas le sèche-mains au circuit d'éclairage. ARRÊT en vigueur pour un branchement électrique Il doit être protégé... -
Page 10: Entretien
INSTALLATION SUITE 8 ⁄ po Figure 2 6 ½ po 3 ¼ po Surface de montage pour joint détachable Surface d'entrées 11 ⁄ po électriques, trous 13 ⁄ po 13 ⁄ po de 7/8 po de diamètre (1) 8 ⁄ po 3 ¼... -
Page 11: Dépannage
DÉPANNAGE PROBLÈME RECOMMANDATIONS Le sèche-mains ne 1. Vérifiez l'alimentation électrique et les connexions de l'appareil. Vérifiez que s'allume pas. l'appareil reçoit la tension au bloc de jonction. 2. Vérifiez le voyant d'entretien à DEL ROUGE pour les points suivants : A. - Page 12 DÉPANNAGE SUITE CODES Le voyant DEL rouge clignotant affiche les codes dans le capteur derrière la sortie d'air. Le DEL rouge s'allume pour indiquer un fonctionnement normal lorsque l'appareil ne sèche pas et reste éteint lorsque les mains sont placées sous le capteur. CODES D'ENTRETIEN DU SÈCHE-MAINS CODE PROBLÈME...
Need help?
Do you have a question about the THINAIR H-7860 and is the answer not in the manual?
Questions and answers