UniData Communication Systems WPU-7800 Global Admin Manual
Hide thumbs
Also See for WPU-7800 Global:
- User manual (61 pages) ,
- User manual (60 pages) ,
- User manual (60 pages)

Related Manuals for UniData Communication Systems WPU-7800 Global


Summary of Contents for UniData Communication Systems WPU-7800 Global
- Page 1 WPU-7800 Global Admin’s Manual UniData Communication Systems, Inc VoIPon www.voipon.co.uk sales@voipon.co.uk Tel: +44 (0)1245 808195 Fax: +44 (0)1245 808299...
- Page 2 Inc. Other referenced trademarks are trademarks (registered or otherwise) of the respective trademark owners. This document is confidential and proprietary to UniData Communication Systems Inc. No part of this document may be reproduced, stored, or transmitted in any form by any means without the prior written permission of UniData Communication Systems Inc.
- Page 3 Manual Introduction Before use, kindly read this “Administrator Manual” thoroughly to have an understanding of the contents After reading, place it within reach at all times such as at the side of this product. This manual is for administrator who has working knowledge of fundamental terms and concepts of computer networking, converged voice and data networks to include LANs, WANs, and IP switching and routing.
- Page 4 Safety Precautions Since this is provided to make safe and right use of WPU-7800G to prevent any accidents or risks, be sure to carefully read it, follow instructions, and keep it where it is easily noticed. Warning This mark is intended to warn users of the risk of a serious injury or death when they violate instructions.
- Page 5 Be sure to use designated batteries and accessories only for WPU-7800G provided by our company. If you use unauthorized batteries or accessories, it can reduce the life of WPU- 7800G, cause explosions, or damage them. In this case, you cannot have free services. Be careful for conductors such as necklaces, keys, and coins not to contact battery terminals (metal section).
- Page 6 Correctly install WPU-7800G in compliance with instructions. Otherwise, it can cause an abnormal operation of WPU-7800G, or reduce their life. Be aware of radio interference. Since this radio equipment can have radio interference, services related to life safety are not provided. Do not install WPU-7800G in places exposed to direct sunlight, and on carpets or cushions.
- Page 7 Keep in mind that WPU-7800G can produce much heat while using for a long time. Do not install WPU-7800G in heavily shaking places. It can cause performance degradation, or reduce the life of products. After using WPU-7800G for a long time, they can produce a weak sound due to their liquid crystal protective vinyl covering the speaker.
-
Page 8: Table Of Contents
Contents Chapter 1 Basics ..........................9 WPU-7800G at a Glance ......................9 Basic Key Function........................10 Chapter 2 Administrator Menu and Changing Password ..............11 Chapter 3 Network ..........................12 Seaching an Available Access Point..................12 Creating a new Access Point ....................13 Deleting Registered Access Point ................... - Page 9 Chapter 6 Diagnostic ......................... 23 Diagnose Network ......................23 Diagnose WLAN ......................24 DSP Test ........................26 LCD/LED Test ......................... 26 Speaker Test ......................... 27 Ping test ........................27 Chapter 7 Auto Provisioning Guide ....................29 General Sequence of Autoprovisioning ................29 Setting Auto Provisioning Server Address ................
-
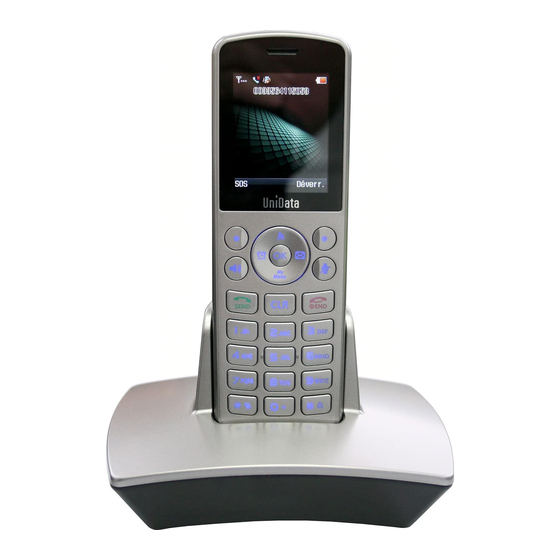
Page 10: Chapter 1 Basics
Basics WPU-7800G at a Glance Earphone Jack UniData VoIPon www.voipon.co.uk sales@voipon.co.uk Tel: +44 (0)1245 808195 Fax: +44 (0)1245 808299... -
Page 11: Basic Key Function
Basic Key Function Key Name Icon Basic functions Navigation Key – In the idle state, this button opens Navigation key each function. Within a menu or a list, you can use this as direction keys. Soft keys(Selection) – the function of an individual Left selection key button is depicted in the display depending on status. -
Page 12: Administrator Menu And Changing Password
Admin Menu and Changing Password Press the left selection key to enter menu in standby mode Press the direction key ▲▼◄► to go to settings section and press the Admin Menu Default administrator password is 000000 and user password is 0000 Administrator can only change the Administrator password and User password. -
Page 13: Chapter 3 Network
Network Searching an available Access Point ◄ ( Press → → 3. WLAN Search Or Press AP search key to shortcuts to search an available Wi-Fi Access Points Select an access point from the list that you will connect then press If you using password for connect to AP then select configuring security as 64-bits WEP and Enter the password into line number 1, then press... -
Page 14: Creating A New Access Point
Creating a new Access Point If there is no AP that you’re connecting for from the list, you can refresh the search or add access point. L → ◄ ( Press ) → 3. WLAN Search Or Press AP search key to shortcuts to search an available Wi-Fi Access Points Select “Menu”... -
Page 15: Deleting Registered Access Point
Deleting Registered Access Point WPU-7800G supports to delete saved Access Point. In WLAN search mode, select Menu then 4.Delete to remove Wi-Fi Access Point. After confirm with entering administrator password, select “Yes”, it will be deleted. Press the AP search key to enter WLAN search mode in Standby mode Select an access point from the list that you will delete then... -
Page 16: Changing Priority Access Point
Changing Priority Access Point The higher position of Access Point in the registered screen has higher priority when connect automatically Press the AP search key to enter WLAN search mode in Standby mode Select the Access Point from the registered list that you want to change priority, press Left selection key then select Up or Down in menu to change the position for priority. -
Page 17: Authentication
Authentication If you and your Access Point are using 802.1x authentication then select “Yes” to configure. Enter your ID and Password for authentication and select your types of authentication among the mode list. Certification Manager In case of EAP-TLS, Select “Certs manger” in administrator menu. ◄... -
Page 18: Tcp/Ip
TCP/IP WPU-7800G supports DHCP and manual IP. You can select “DHCP” automatically or “Manual IP” manually to configuring network using the direction key ▲▼◄► in network setup screen. IP, Net mask, Gateway and DNS should be entered in case of using manual IP in network setup. VoIPon www.voipon.co.uk sales@voipon.co.uk Tel: +44 (0)1245 808195 Fax: +44 (0)1245 808299... -
Page 19: Chapter 4 Voip
VoIP SIP Setting ◄( → → 9. Admin Menu → Enter Password → 5. VoIP setting Select “5.VoIP setting” in System mode Display name: type the display name of phone User name: type phone number or user name registered in SIP. Auth. -
Page 20: Qos
Qos: Quality of Service ◄( → → 9. Admin Menu → Enter Password → 8. QoS → 1.VoIP Select “8.QoS” in System menu Select “VoIP” in QoS menu Enter Signal DSCP and Voice DSCP. VoIPon www.voipon.co.uk sales@voipon.co.uk Tel: +44 (0)1245 808195 Fax: +44 (0)1245 808299... -
Page 21: Coder
Coder ◄ ( → → 9. Admin Menu → Enter Password → 9. Coder → 1.VoIP WPU-7800G supports G.711-ALaw-64K, G.729 and G729 codec. Select “9. Coder” in System menu Select “VoIP” in Coder menu Press the key to set Multi-frame. Select the coder type you wish to set. -
Page 22: Sip Outbound Proxy
SIP Outbound Proxy ◄ ( → → 9. Admin Menu → Enter Password → 10. SIP Outb Proxy → 1.VoIP Select “10. SIP Outb Proxy” in System menu. Select “VoIP” in SIP Outb Proxy menu Put the SIP Outbound Proxy. VoIPon www.voipon.co.uk sales@voipon.co.uk Tel: +44 (0)1245 808195 Fax: +44 (0)1245 808299... -
Page 23: Chapter 5 Time
Time ◄ ( → → 7. Time You can set the date and time automatically and manually. To set Current time automatically select Current time > Time Sever > Start otherwise must set current time manually. To use NTP server, select Time server and Input the NTP IP in NTP Server1 and Server2. -
Page 24: Chapter 6 Diagnostic
Diagnostic Diagnose Network ◄( → → 9. Admin Menu → Enter Password → 3. Diagnostic → 1.Diagnose network Select “Diagnostic” in System menu then select Diagnose Network, WLAN to diagnostic that you need. Results of Diagnose Network It shows Network Status as WLAN, TCP/IP, and Packet Error Rate between Gateway and DNS. It takes about three to five seconds to finish all the processes, and all input key shall be inactive until finish the diagnose network. -
Page 25: Diagnose Wlan
Diagnose WLAN ◄ ( → → 9. Admin Menu → Enter Password → 3. Diagnostic → 2.Diagnose WLAN While diagnose WLAN, cannot receive the call while scan WLAN network. Results of the Diagnose WLAN The diagnosis of wireless communication surroundings is possible to find out the connection from WPU-7800G to AP, the units of AP around and inside of the present-connected channel, and variables of the surroundings through diagnosing the status of wireless local area Each output information is automatically updated once per one minute, AP status around can... - Page 26 FC : Tx Failed Count - Increments when a MSDU is not successfully transmitted RC : Retry Count - Increments when a MSDU is successfully transmitted after one or more retransmissions MRC : Multiple Retry Count - Increments when a MSDU is successfully transmitted after more than one retransmission FDC : Frame Duplicate Count - Increments when a frame is received that the Sequence Control field is indicating a duplicate count...
-
Page 27: Dsp Test
DSP Test ◄ ( → → 9. Admin Menu → Enter Password → 3. Diagnostic → 3.DSP TEST Select “4. DSP TEST” in Diagnostic mode. Using Direction ▲▼◄► key to diagnose the Digital Signal Processing of the phone. LCD/LED Test ◄( →... -
Page 28: Speaker Test
Speaker Test ◄( → → 9. Admin Menu → Enter Password → 3. Diagnostic → 5.Speaker TEST Select “6. Speaker TEST” in Diagnostic mode. Using Direction ▲▼◄► key to diagnose the speaker of the phone. Ping Test ◄( → → 9. Admin Menu → Enter Password → Ping Test Select “2. - Page 29 Send the ping through the Gateway, DNS server, APS address and Manual input. DNS server APS server Manual Input VoIPon www.voipon.co.uk sales@voipon.co.uk Tel: +44 (0)1245 808195 Fax: +44 (0)1245 808299...
-
Page 30: Auto Provisioning Guide
Auto-Provisioning Guide General Sequence of Auto-provisioning WPU-7800G supports Auto-provisioning to configure update firmware. Below picture is interoperation between phone and servers. ① VoIP phone connect to the nearest Wi-Fi Access Point. ② Phone request IP address to the registered DHCP server ③... -
Page 31: Setting Auto Provisioning Server Address
Setting Auto provisioning Server Address There are two way to set Auto provisioning Server address. The first one is input address in menu via the key pad; another one is getting the address by DHCP server with the bootp option 66. Select “4. - Page 32 2. Follow screen prompts to enter the password for Web Configuration tool and then click <OK> 3. You can store frequently used phone number and names in the phonebook. You can also import or export saved information between PC and WPU-7800G. 4.
-
Page 33: Setting The .Ini File In Autoprovisioning Server
To define the settings please refer to appendix file for configuration entry. Setting the .ini file in Auto-Provisioning Server You use the value of two Statements after modifying according to each condition. Make sure that sever IP will be root directory of auto-provisioning server. You can use the “e1_Common.ini”... - Page 34 [TIME] NTP_Refresh_Interval = 7200 NTP_Server1 = 203.248.240.103 NTP_Server2 = 203.254.163.74 [SIP] Local_Port = 5060 [BASIC_CALL] Use_Call_Waiting = 1 Session_Expire = 1800 Remove_DASH_On_Alias = 1 [MWI] Use_MWI = 1 Use_Subscribe = 1 Subscribe_Server = Subscribe_Expire = 3600 VMS_Alias = [WIFI] Enable_Check_Server_Cert = 0 Force_Enable_Short_Preamble = 0 [WIFI_SCAN] Scan_Channel_List = 1,2,3,4,5,6,7,8,9,10,11,12,13...
- Page 35 [NETWORK1] Enable = 1 SIP_Outbound_Proxy = SSID = VoIP Enable_DHCP = 1 Address = 0.0.0.0 Netmask = 255.255.255.0 Gateway = 0.0.0.0 DNS1 = 0.0.0.0 DNS2 = 0.0.0.0 Security = 2 WEP_Bits = 0 Default_WEP_Key = 1 WEP_Key1 = WEP_Key2 = WEP_Key3 = WEP_Key4 = Post_Authentication_Mode = 0...
- Page 36 Jitter_Buffer_Size = 60 Payload_Type = 8,18,0 Multiframe = 2,2,2 [NETWORK2] Enable = 0 SIP_Outbound_Proxy = SSID = wifi Enable_DHCP = 1 Address = 0.0.0.0 Netmask = 255.255.255.0 Gateway = 0.0.0.0 DNS1 = 0.0.0.0 DNS2 = 0.0.0.0 Security = 1 WEP_Bits = 0 Default_WEP_Key = 1 WEP_Key1 = 123456789a WEP_Key2 =...
- Page 37 DiffServ_Media = 46 WMM = 1 Jitter_Buffer_Size = 60 Payload_Type = 8,18,0 Multiframe = 2,2,2 [NETWORK3] Enable = 0 SIP_Outbound_Proxy = SSID = VoIP Enable_DHCP = 1 Address = 0.0.0.0 Netmask = 255.255.255.0 Gateway = 0.0.0.0 DNS1 = 0.0.0.0 DNS2 = 0.0.0.0 Security = 2 WEP_Bits = 0 Default_WEP_Key = 1...
- Page 38 PMK_LifeTime = 43200 PMK_Max_Count = 32 DiffServ_Signal = 46 DiffServ_Media = 46 WMM = 1 Jitter_Buffer_Size = 60 Payload_Type = 8,18,0 Multiframe = 2,2,2 [NETWORK4] Enable = 0 SIP_Outbound_Proxy = SSID = VoIP Enable_DHCP = 1 Address = 0.0.0.0 Netmask = 255.255.255.0 Gateway = 0.0.0.0 DNS1 = 0.0.0.0 DNS2 = 0.0.0.0...
- Page 39 WPA_PSK_Key 5ae4b848d871fdcba8dda23716245901b0e5ea8047b06e4445e94d96ec27ee23 Use_WPA_PSK_Key_Hex_Mode = 1 Proactive_Key_Caching = 1 PMK_LifeTime = 43200 PMK_Max_Count = 32 DiffServ_Signal = 46 DiffServ_Media = 46 WMM = 1 Jitter_Buffer_Size = 60 Payload_Type = 8,18,0 Multiframe = 2,2,2 [SOUND] Bell_ID = 0x1 Bell_Volume = 6 Effects_Button_ID = 0x00010101 Effects_Button_Volume = 4 Effects_PowerOn_ID = 0x00030001 Effects_PowerOn_Volume = 4...
- Page 40 [PROVISION] Firmware_Version = Firmware_Name = Phonebook_Name = e1_00:00:00:00:00:00(replace you phone MAC).ini( Configuration Entry) [USER_ACCOUNT] Displayname = Phone_Number = User_ID = User_Password = [SERVER_SETTINGS] 1st_Proxy = 2nd_Proxy = Domain_Realm = Register_Expire = 3600 Please refer to Appendix of ini configuration file. VoIPon www.voipon.co.uk sales@voipon.co.uk Tel: +44 (0)1245 808195 Fax: +44 (0)1245 808299...
-
Page 41: Firmware Upgrade
Firmware Upgrade There are two ways to set Firm ware update. The first one is input address in menu via the key pad; another one is upgraded by Auto-provisioning server automatically. ◄ ( → → 9. Admin Menu → Enter Password → 6. Firmware upgrade Select “6.Firmware Upgrade”...
Need help?
Do you have a question about the WPU-7800 Global and is the answer not in the manual?
Questions and answers