Table of Contents
Advertisement
Available languages
Available languages
Quick Links
Advertisement
Table of Contents

Related Manuals for FRAM FCD-V8T2B

Summary of Contents for FRAM FCD-V8T2B
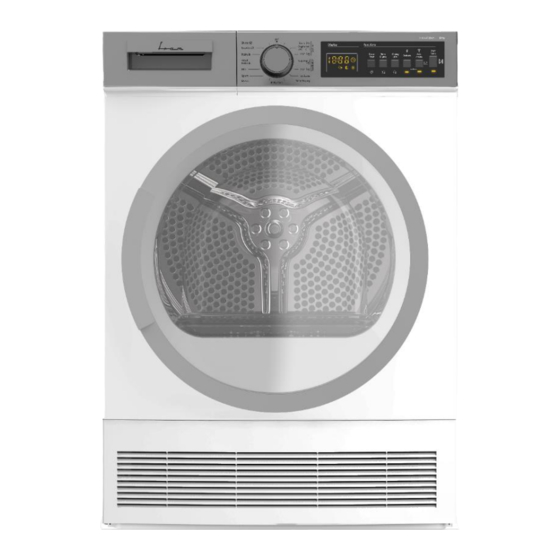
- Page 1 USCĂTOR DE RUFE PRIN CONDENSARE FCD-V8T2B Capacitate: 8 kg Clasa energetică: B...
-
Page 2: Avertismente Privind Siguranța
Vă mulţumim pentru achiziţionarea acestui produs F R A M ! INTRODUCERE Înainte de a utiliza acest aparat, citiți cu atenție manualul de instrucțiuni și păstrați-l pentru consultări ulterioare. Acest manual este conceput pentru a vă oferi toate instrucţiunile necesare referitoare la instalarea, utilizarea şi întreţinerea aparatului. - Page 3 • Dacă este necesară montarea / dezasamblarea în caz de instalare sub un blat, aceasta trebuie efectuată de un agent autorizat de service. • Înainte de instalare, verificaţi ca aparatul să nu prezinte semne vizibile de deteriorare. Nu instalaţi niciodată un produs deteriorat. •...
- Page 4 Un cablu de alimentare/ștecher deteriorat poate provoca incendiu sau poate provoca electrocutarea. Dacă se deteriorează trebuie înlocuit. Acest lucru trebuie efectuat numai de personal califcat . Pentru a evita riscul de incendiu sau șocul electric, nu utilizați prelungitoare, prize multiple sau adaptoare pentru a conecta uscătorul la rețeaua de alimentare.
- Page 5 ATENȚIE: Nu opriţi niciodată un uscător înainte de sfârşitul ciclului de uscare, cu excepţia cazului în care toate articolele sunt îndepărtate rapid şi întinse astfel încât căldura să fie disipată. ATENȚIE: Asiguraţi-vă că animalele de companie nu intră în uscător. Verificaţi interiorul uscătorului înainte de a-l utiliza.
- Page 6 Tabelul corespunzător de instalare pentru mașina de spălat și uscătorul de rufe Mașină de spălat Uscător de rufe 46-49 (Adâncime) 37-42 cm 42-45 cm 50-56 cm 57-63 cm ✓ ✓ ✓ ✓ 52,5 cm ✓ ✓ ✓ 56 cm ✓ ✓...
- Page 7 Conectare la furtunul de evacuare a apei 1. Trageţi şi scoateţi capătul furtunului din spatele uscătorului. Nu folosiţi nicio unealtă pentru a scoate furtunul. 2. Montaţi un capăt al furtunului de evacuare a apei, care este prevăzut cu produsul, la fanta din care aţi scos furtunul.
-
Page 8: Descrierea Produsului
IMPORTANT: Utilizarea aparatului la tensiuni sub cele nominale, va reduce durata de viaţă şi performanţa acestuia. Instalarea sub un blat • Lăsaţi cel puţin 3 cm spaţiu între pereţii laterali şi cei din spate ai produsului şi partea inferioară a plăcii de lucru atunci când instalaţi produsul sub un blat. -
Page 9: Pregătirea Rufelor
PREGĂTIREA RUFELOR Sortarea rufelor de uscat Urmaţi instrucţiunile de pe etichetele rufelor de uscat. Doar articolele uscate care au o declaraţie/simbol care indică „se pot usca într-un uscător". Nu utilizaţi produsul cu sarcini de încărcare şi tipuri de rufe, altele decât cele indicate la punctul : “Capacitate de încărcare”... - Page 10 • Hainele s-ar putea să se încurce în timpul procesului de spălare. • Separaţi-le una de alta înainte de a le pune în uscător. • Scoateţi toate obiectele din buzunarele hainelor şi procedaţi în felul următor: • Legaţi cordoanele şorţului sau utilizaţi un sac pentru rufe. •...
-
Page 11: Panoul De Control
PANOUL DE CONTROL 1. Buton de selectare a programului 2. Indicator electronic şi funcţii suplimentare AFIȘAJ ELECTRONIC Indicator electronic și funcții suplimentare... -
Page 12: Tabel De Programe
Simboluri de afișaj: TABEL DE PROGRAME Apăsaţi butonul Start/Pause (Start/Pauză) pentru a porni programul. LED-ul Start/Pause care indică pornirea programului şi LED-ul Uscare se va aprinde. În timpul programului Odată ce uşa a fost închisă, apăsaţi tasta Start/Pauză (Start/Pause) pentru a relua programul. Nu deschideţi uşa de încărcare când programul rulează. -
Page 13: Time Drying
CUPBOARD DRY SYNTHETICS Încărcătură(kg) Viteza de centrifugare(rpm) Durata (Min.) Valoarea aproximativă a umidităţii rămase % IRON DRY SYNTHETICS Încărcătură(kg) Viteza de centrifugare(rpm) Durata (Min.) Valoarea aproximativă a umidităţii rămase % DELICATE Încărcătură(kg) Viteza de centrifugare(rpm) Durata (Min.) Valoarea aproximativă a umidităţii rămase % TIME DRYING Încărcătură(kg) Viteza de centrifugare(rpm) - Page 14 EXPRESS 29' Încărcătură(kg) Viteza de centrifugare(rpm) 1200 Durata (Min.) Valoarea aproximativă a umidităţii rămase % SHIRTS 12' Încărcătură(kg) Viteza de centrifugare(rpm) 1200 Durata (Min.) Valoarea aproximativă a umidităţii rămase % Valori consum de energie Spălare aparat Valoarea Valori consum Încărcătură Program viteză...
-
Page 15: Pornirea Programului
Descriere Opțiune Pentru a selecta durata de uscare, apăsaţi butonul Timp uscare. Prin apăsarea lungă a butonului (Timp uscare) modificaţi timpul de uscare în mod continuu. Prin Timp uscare apăsarea butonului Start/Pauză porniţi uscarea. Există o opţiune de blocare pentru copii pentru a evita modificarea fluxului programului atunci când tastele sunt apăsate în timpul programului. - Page 16 Program Descriere Acest program usucă îmbrăcăminte din material mixt, bumbac- sintetice care nu decolorează, pentru a fi gata de purtat. Reîmprospătarea lânii ajută textilele din lână să elimine excesul de apă după spălare prin aplicarea unor temperaturi scăzute şi mişcări blânde Wool Refresh ale tamburului.
- Page 17 1. Deschideţi uşa de încărcare. 2. Trageţi filtrul de scame pentru a-l scoate. 3. Folosiţi-vă mâinile şi o cârpă moale pentru a curăţa scamele. 4. Închideţi şi reaşezaţi filtrul de scame. După utilizarea pe o perioadă mai lungă de timp a uscătorului pot apărea depuneri pe filtru. Se recomandă curăţarea acestuia cu apă...
- Page 18 Dacă procesul de uscare este finalizat, deschideţi uşa de încărcare şi aşteptaţi să se răcească. 1. Deschideţi plinta şi eliberaţi cele 2 încuietori ale condensatorului 2. Țineţi condensatorul de piesa din plastic şi trageţi-l afară. 3. Curăţaţi-l cu duşul şi aşteptaţi ca apa să se scurge. 4.
-
Page 19: Specificaţii Tehnice
11. SPECIFICAŢII TEHNICE Marca FRAM Nume model FCD-V8T2B Înălțime Min: 845 mm / Max: 855 mm* Lățime 596 mm Adâncime 609mm Capacitate (max.) 8 kg** Greutatea netă (cu ușă din plastic) 36,5 kg Greutatea netă (cu ușă din sticlă) 38,9 kg... - Page 20 PROBLEMĂ MOTIV SOLUȚIE Suprafaţa filtrului de scame poate fi Spălaţi filtrul cu apă călduţă. înfundată. Condensatorul de căldură poate fi Curăţaţi condensatorul de căldură înfundat. Deschideţi uşile/ferestrele pentru a Grilajele de ventilaţie din faţa Procesul de uscare durează mult preveni creşterea prea mare a maşinii ar putea fi închise.
- Page 21 PROBLEMĂ MOTIV SOLUȚIE Este posibil ca uşa de încărcare să nu Asiguraţi-vă că uşa de încărcare fie închisă corespunzător. este bine închisă. Programul a fost întrerupt fără S-ar putea să fi existat o pană de Apăsaţi tasta Start/Pause pentru a niciun motiv.
- Page 22 13. AVERTISMENTE AUTOMATE DE DEFECȚIUNE ȘI SOLUȚII Uscătorul dumneavoastră de rufe este prevăzut cu un sistem încorporat de detectare a defecţiunilor, indicate printr-o combinaţie de lumini intermitente de funcţionare. Cele mai des întâlnite coduri de eroare sunt arătate mai jos COD DE EROARE SOLUȚİE Goliţi rezervorul de apă;...
- Page 23 14. FIȘĂ PRODUS FIȘĂ PRODUS USCATOR PRIN CONDENSARE FCD-V8T2B Brand FRAM Model FCD-V8T2B Capacitate nominală (kg) Tip de uscător de rufe Condensator Clasa de eficienţă energetică Consum anual de energie (kWh) Uscător de rufe automat cu tambur sau uscător de rufe neautomat cu tambur Automat Consumul de Energie al programului standard de bumbac la sarcină...
-
Page 24: Date Tehnice
DATE TEHNICE Informaţiile tehnice se află pe plăcuţa cu date tehnice a aparatului şi pe eticheta energetică. Codul QR de pe eticheta energetică furnizată împreună cu aparatul oferă un link web către informaţiile din baza de date EPREL cu privire la performanţele aparatului. Păstraţi eticheta energetică... -
Page 25: Condenser Dryer
CONDENSER DRYER FCD-V8T2B Loading capacity: 8kg Energy class: B... -
Page 26: Safety Information
Thank you for choosing this Fram product! INTRODUCTION Before using the appliance, please read carefully this instruction manual and keep it for future reference. This instruction manual is designed to provide you with all required instructions related to the installation, use and maintenance of the appliance. -
Page 27: Electrical Safety
• Remove all objects from pockets such as lighters and matches. • The appliance must not be installed behind a lockable door, a sliding door or a door with a hinge on the opposite side to that of the tumble dryer, if it prevents the door from being fully opened. WARNING: In the appliance enclosure or in the built-in structure, keep ventilation openings clear of obstruction. -
Page 28: Product Safety
• Do not leave children unattended near the machine. • Children might lock themselves in the machine resulting in risk of death. • Do not allow children to touch the glass door during operation. The surface becomes extremely hot and may cause skin damage. -
Page 29: Installation
• Lint filters must be cleaned after each use as indicated in Cleaning the Lint Filter. • Lint filters must be dried after wet cleaning. Wet filters might cause malfunction during the drying process. • Lint accumulation must not to be allowed around the tumble dryer (not applicable for appliances intended to be vented to the exterior of the building) IMPORTANT: The clearance between the dryer and the floor should not be reduced with objects such as carpets, wood or panel, otherwise, sufficient air intake cannot be ensured for the machine. - Page 30 • The operating temperature of the dryer is +5°C to +35°C. If operated out of this temperature range, the performance of the dryer will be affected negatively and the product will be damaged. • Be careful when carrying the product since it is heavy. Always wear safety gloves. •...
-
Page 31: Product Description
• Your dryer is set to 220-240 V and 50 Hz. • The mains cable of the dryer is equipped with a special plug. This plug must be connected to an earthed socket protected by a fuse of 16 Amperes as indicated on the type plate. The fuse current rating of the power line where the outlet is connected must also be 16 amperes. -
Page 32: Preparing The Laundry
PREPARING THE LAUNDRY Sorting the Laundry to be Dried • Follow the instructions on the labels of the laundry to be dried. Only dry items that have a statement/symbol that indicates "they can be dried in a dryer". • Do not operate the product with load amounts and laundry types other than those given in “Load Capacity”. - Page 33 • The clothes may have become entangled during the washing process. Separate them from each other before placing them in the dryer. • Remove all objects in the pockets of the clothes and apply the following: • Tie fabric belts, apron laces etc. to each other or use a laundry bag. •...
-
Page 34: Control Panel
CONTROL PANEL 1. Program Selection Knob 2. Electronic indicator and additional functions PROGRAM SELECTION KNOB Electronic Indicator and Additional Functions... -
Page 35: Program Selection
Display symbols PROGRAM SELECTION EXTRA DRY COTTON Load(kg) Washing machine spin speed(rpm) 1000 Duration (Min.) Approximate amount of remaining humidity % CUPBOARD DRY COTTON Load(kg) Washing machine spin speed(rpm) 1000 Duration (Min.) Approximate amount of remaining humidity % IRON DRY COTTON Load(kg) Washing machine spin speed(rpm) 1000... - Page 36 BABY CARE Load(kg) Washing machine spin speed(rpm) 1000 Duration (Min.) Approximate amount of remaining humidity % DUVET Load(kg) Washing machine spin speed(rpm) Duration (Min.) Approximate amount of remaining humidity % SPORT Load(kg) Washing machine spin speed(rpm) Duration (Min.) Approximate amount of remaining humidity % Load(kg) Washing machine spin speed(rpm) 1000...
- Page 37 Energy consumption values Approximate Energy Washing machine amount of Program Load (kg) consumption spin speed remaining values (kWh) humidity Cotton cupboard dry 1000 4,68 Cotton iron dry 1000 Cotton iron dry 1,58 Power consumption in the "off mode" (W) Power consumption in the "on mode" PL (W) The Cotton Cupboard Dry program is the standard drying program that can be run with a full or half load and for which the information is given on the label and product receipt.
- Page 38 Starting the Program The Start/Pause LED will flash during program selection. Press the Start/Pause button to start the program. The Start/Pause LED that indicates that the program has started and the drying LED will come on. Program Description This program dries thick and multi-layer fabrics, such as cotton towels, bedsheets, pillowcases, bathrobes, at a normal temperature to allow you to Cotton Extra Dry place them in a closet.
-
Page 39: Cleaning And Care
IMPORTANT: Do not open the loading door while the program is running. If you have to open the door, do not keep it open for a long time. IMPORTANT: If you do not take out the laundry after the program has ended, the 1-hour Anti Crease phase will automatically be activated. - Page 40 Emptying the Water Tank 1. Pull the drawer cover and carefully take out the tank. 2. Empty the water in the tank. 3. If there is lint accumulated on the discharge cap in the tank, clean it with water. 4. Refit the water tank. IMPORTANT: Never remove the water tank when the program is running.
- Page 41 Cleaning the Humidity Sensor Inside the machine, there are humidity sensors that detect whether the laundry is dry or not. To clean the sensors: 1. Open the loading door of the machine. 2. If the machine is still hot due to the drying process, wait for it to cool down. 3.
-
Page 42: Technical Specifications
11. TECHNICAL SPECIFICATIONS Brand FRAM Model name FCD-V8T2B Height Min: 845 mm / Max: 855 mm* Width 596 mm Depth 609 mm Capacity (max.) 8 kg** Net weight (with plastic door) 36,5 kg Net weight (with glass door) 38,9 kg... - Page 43 PROBLEM REASON SOLUTION The laundry that comes out hot at the end of the drying process generally feels more humid. Check the care labels on the The program used might not laundry items, select a be suitable for the type of suitable program for the type laundry.
-
Page 44: Automatic Fault Warnings And What To Do
PROBLEM REASON SOLUTION The lint filter might be Clean the filter. unclean. The filter seat might be The filter cleaning warning symbol is on. Clean the filter seat. clogged by lint. There might be a layer that Wash the filter with causes obstruction on the lukewarm water. -
Page 45: Product Fiche
14. PRODUCT FICHE PRODUCT FICHE CONDENSER DRYER FCD-V8T2B Brand FRAM Model FCD-V8T2B Rated capacity (kg) Type of Tumble dryer Condenser Energy efficiency class Annual energy consumption (kWh) Model type (automatic / non-automatic) Automatic Energy Consumption of the standard cotton programme at full load (kWh) 4.68... -
Page 46: Customer Care And Service
CUSTOMER CARE AND SERVICE Always use original spare parts. When contacting our Authorized Service Centre, ensure that you have the following data available: Model and Serial Number. The information can be found on the rating plate. Subject to change without notice. TECHNICAL DATA The technical information is situated in the rating plate on the internal side of the appliance and on the energy label. - Page 47 FRAM is a registered trademark of Network One Distribution SRL. Other brands and product names are trademarks or registered trademarks of their respective holders. No part of the specifications may be reproduced in any form or by any means or used to make any derivative such as translation, transformation, or adaptation without permission from NETWORK ONE DISTRIBUTION.
Need help?
Do you have a question about the FCD-V8T2B and is the answer not in the manual?
Questions and answers