Table of Contents
Advertisement
Available languages
Available languages
Quick Links
Manuale per il collegamento e l'uso - Installation and operation manual
Manuel pour le raccordement et l'emploi - Installations-und Benutzerhandbuch
Manual para el conexionado y el uso - Εγχειρίδιο σύνδεσης και χρήσης
EAM7
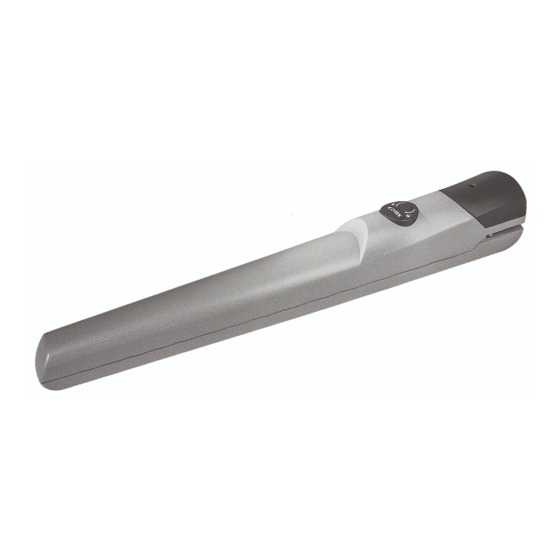
Attuatore per cancelli battenti EKKO 204D
Operator for swing gates EKKO 204D
Opérateur pour portails battants EKKO 204D
Actuador para cancelas batientes EKKO 204D
Drehtorantrieb EKKO 204D
Εκκινητής για ανοιγόμενες καγκελόπορτες EKKO 204D
EKKO 204D
Advertisement
Chapters
Table of Contents

Related Manuals for Elvox EAM7


Summary of Contents for Elvox EAM7
- Page 1 Manuale per il collegamento e l’uso - Installation and operation manual Manuel pour le raccordement et l’emploi - Installations-und Benutzerhandbuch Manual para el conexionado y el uso - Εγχειρίδιο σύνδεσης και χρήσης EAM7 Attuatore per cancelli battenti EKKO 204D Operator for swing gates EKKO 204D Opérateur pour portails battants EKKO 204D...
- Page 2 • Indicare chiaramente sul cancello, porta, serranda o barriera che sono comandati a distanza mediante apposito cartello. • La ELVOX s.p.a. non può essere considerata responsabile per eventuali danni causati qualora vengano installati dei dispositivi e/o componenti incompa- tibili ai fini dell’integrità del prodotto, della sicurezza e del funzionamento.
- Page 3 EKKO Predisposizione impianto: 2x1 mm + RG58 2x0,5 mm 4x0,5 mm 2x0,5 mm 2x2,5 mm +3x0,5 mm (encoder) 2x2,5 mm +3x0,5 mm (encoder) 3x2,5 mm 110/230V c.a. Legenda A - Attuatore lineare B - Centrale di comando C - Lampeggiante con antenna D - Radiocomando 2 canali E - Coppia di fotocellule Selettore...
- Page 4 EKKO Limiti d’impiego Peso anta (Kg) Lunghezza anta (metri) Prima di procedere all’installazione dell’automatismo, controllare: - le cerniere siano robuste e efficienti e che non vi siano forti attriti - che la misura Y non sia superiore al valore indicato nella tabella delle quote di installazione. In tal caso è necessario intervenire sul pilastro in modo da raggiungere tale misura - la lunghezza dei cavi di alimentazione dei motoriduttore, non sia superiore ai 15 metri - che ci siano presenti e ben fissate le battute d’arresto meccanico in chiusura.
- Page 5 EKKO Inclinazione staffa Posizione staffa Posizione del fulcro di rotazione (R ) Distanza da lato colonna a fulcro di rotazione (S) espressa in mm 0 - 1 A - B 0 - 1 A - B 0 - 1 B - C 0 - 1 B - C 0 - 1...
- Page 6 EKKO Assemblaggio della staffa a pilastro: Fissaggio del motoriduttore alla staffa a pilastro: Applicare il motoriduttore alla staffa : - Svitare la vite F, quindi rimuovere il carter C - Interporre la rondella R posandola sulla staffa - Infilare il motoriduttore - Bloccare il motoriduttore per mezzo della vite V e del dado ( non serrare troppo il dado , controllare la rotazione del motoriduttore non deve presentare attriti) Questa è...
- Page 7 EKKO - Applicare la staffa trascinamento anta al perno del motoriduttore, bloccandola con la vite V, interponendo la rondella R1 e R2 come indicato nella figura 15. La rondella R1 liscia, va posizionata sopra la rondella R2 zigrinata. Si consiglia di lubrificare il perno prima di inserirlo nella staffa di trascimnamento. Portare l’anta in posizione di completa chiusura, verificare con una livella, che il motoriduttore sia in posizione perfettamente orizzontale, quindi segnare i due punti per la foratura dell’anta 45 mm...
- Page 8 EKKO Ora il motoriduttore è sbloccato ed è possibile aprire e chiudere manualmente l’anta. Verificare con alcune manovre complete che la forcella scorra regolar- mente su tutta la corsa. Regolazione del finecorsa meccanico: sono presenti nel fondo del motoriduttore due fermi meccanici, uno per l’arresto dell’anta in apertura e uno per la chiusura. Con l’anta sbloccata , portare l’anta nella posizione di apertura desiderata, allentare il fermo meccanico A e portarlo in appoggio al perno.
- Page 9 EKKO Manuale utente Operazione di sblocco manuale: girare la copertura di 180°, inserire la chiave e girare in senso antiorario di 90°, anta può essere spinta manualmente, richiudere la copertura. Per bloccare nuovamente l’anta reinserire e girare la chiave in senso orario. - In caso di mancata alimentazione di rete, la batteria tampone garantisce per un periodo limitato il funzionamento dell’automazione.
- Page 10 è stata dichiarata conforme, se del caso, alle disposizioni della Direttiva 2006/42/CE. Dichiara che la documentazione tecnica pertinente è stata costituita da Elvox SpA, è stata compilata in conformità all’allegato VIIB della Direttiva 2006/42/CE e che sono stati rispettati i seguenti requisiti essenziali: 1.1.1, 1.1.2, 1.1.3, 1.1.5, 1.1.6, 1.2.1, 1.2.2, 1.2.6, 1.3.1, 1.3.2, 1.3.3, 1.3.4, 1.3.7, 1.3.8, 1.3.9, 1.4.1, 1.4.2, 1.5.1, 1.5.2, 1.5.4, 1.5.5, 1.5.6, 1.5.7, 1.5.8, 1.5.9, 1.6.1.,...
-
Page 11: Table Of Contents
• Clearly indicate with an appropriate sign on the gate, rolling door, window or barrier that they are remotely operated. • ELVOX s.p.a. denies all liability for damage incurred when devices and/or components are used that are incompatible in terms of product integrity, safety and operation. -
Page 12: System Set-Up
EKKO System set-up: 2x1 mm + RG58 2x0.5 mm 4x0.5 mm 2x0.5 mm 2x2.5 mm +3x0.5 mm (encoder) 2x2.5 mm +3x0.5 mm (encoder) 3x2.5 mm 110/230V a.c. Linear operator B - Control unit C - Flashing light with aerial D - 2-channel remote control E - Pair of photocells Selector G - Electrical lock... -
Page 13: Limitations Of Use
EKKO Limitations of use Weight of gate leaf (kg) Length of gate leaf (metres) Before installing the automation, check that: - the hinges are sturdy and efficient and there is no strong friction - the measurement Y is no greater than the value shown in the table of installation dimensions. In this case it is necessary to work on the cable riser in order to reach this measurement - the length of the gear motor power supply cables does not exceed 15 metres - there are the mechanical stops for closing which are properly secured. - Page 14 EKKO Bracket angle Bracket position Position of the rotation pivot (R) Distance from column side to rotation pivot (S) in mm 0 - 1 A - B 0 - 1 A - B 0 - 1 B - C 0 - 1 B - C 0 - 1 C - D...
-
Page 15: Securing The Gear Motor
EKKO Assembling the pillar bracket: Securing the gearmotor to the pillar bracket: Fit the gearmotor to the bracket: - Unscrew the screw F, then remove the casing C - Insert the washer R putting it on the bracket - Insert the gearmotor - Lock the gearmotor with the screw V and nut (do not overtighten the nut, check the rotation of the gearmotor that must have no friction) This is the correct position of the pin for fastening the gate leaf drive bracket, proceed as follows: - Assemble the bracket as shown... - Page 16 EKKO - Fit the gate leaf drive bracket to the pin of the gearmotor, locking it with the screw V, placing washer R1 and R2 in between as shown in Figure 15. The smooth washer R1, has to be placed above the knurled washer R2. It is recommended to lubricate the pin before inserting it into the drive bracket. Move the gate leaf into the fully closed position, check with a spirit level that the gearmotor is in a perfectly horizontal position, then mark the two points for drilling the gate leaf 45 mm...
- Page 17 EKKO Now the gearmotor is unlocked and you can open and close the gate leaf manually. Check with some complete movements that the fork runs smoothly along its full travel. Adjusting the mechanical limit stop: In the bottom of the gearmotor there are two mechanical stops, one for stopping the gate leaf on opening and one for closing. With the gate leaf unlocked, move the gate leaf into the required open position, loosen the mechanical stop A and take it to rest on the pin.
-
Page 18: User Manual
EKKO User Manual Manual unlocking operation: turn the cover 180°, insert the key and turn 90° anticlockwise, the gate leaf can be pushed manually, close the cover. To re-lock the gate leaf, insert and turn the key clockwise. - In the event of mains power failure, the back-up battery ensures the operation of the automation system for a limited period. Should the battery be flat or missing, manually unlock the motor, open the door, insert the unlocking key and turn anticlockwise;... - Page 19 Note: The contents of this declaration match what was declared in the latest revision of the official declaration that was available before this manual was printed. This text has been adapted for editorial purposes. A copy of the original declaration can be requested from Elvox SpA...
- Page 20 • Signaler clairement la commande à distance par une pancarte posée sur le portail, la porte, le volet ou la barrière. • ELVOX s.p.a. n'est pas responsable des dommages causés par l'installation de dispositifs et/ou de composants incompatibles avec l'intégrité de l'appareil, sa sécurité...
- Page 21 EKKO Préparation de l'installation 2x1 mm + RG58 2x0,5 mm 4x0,5 mm 2x0,5 mm 2 x 2,5 mm + 3 x 0,5 mm (encodeur) 2 x 2,5 mm + 3 x 0,5 mm (encodeur) 3 x 2,5 mm 110/230 Vca Légende Actionneur linéaire B - Centrale de commande...
- Page 22 EKKO Limites d'utilisation Poids du van- tail (kg) Longueur du vantail (mètres) Avant d'installer l'automatisme, vérifier : - que les charnières sont solides et efficaces et qu'il n'existe pas de frottement important - que la mesure Y n'est pas supérieure à la valeur indiquée dans le tableau des cotes d'installation (dans ce cas, intervenir sur le poteau pour atteindre la bonne mesure) - que la longueur des câbles d'alimentation des motoréducteurs ne dépasse pas 15 mètres - que les butées d'arrêt mécaniques sont présentes et bien fixées en ouverture et en fermeture.
- Page 23 EKKO Inclinaison de la Position de la patte Position de l'axe de rotation (R) Distance entre la colonne et l'axe de rotation (S) en mm patte de fixation de fixation 0 - 1 A - B 0 - 1 A - B 0 - 1 B - C 0 - 1...
- Page 24 EKKO Assemblage de la patte de fixation au poteau Fixation du motoréducteur à la patte de fixation sur le poteau Appliquer le motoréducteur à la patte de fixation - Desserrer la vis F puis enlever le carter C - Interposer la rondelle R et la poser sur la patte de fixation - Enfiler le motoréducteur - Bloquer le motoréducteur avec la vis V et l'écrou (ne pas trop serrer l'écrou, vérifier que la rotation du motoréducteur ne présente pas de frottement).
- Page 25 EKKO - Appliquer la patte d'entraînement du vantail à l'axe du motoréducteur et la bloquer avec la vis V, interposer les rondelles R1 et R2 comme l'indique la figure 15. La rondelle lisse R1 doit être placée sur la rondelle R2 moletée. Il est conseillé de graisser l'axe avant de l'introduire dans la patte d'entraînement. Placer le vantail en position de fermeture complète, vérifier avec un niveau que le motoréducteur est parfaitement horizontal puis marquer les deux points pour le perçage du vantail.
- Page 26 EKKO Le motoréducteur est débloqué, il est maintenant possible d'ouvrir et de fermer manuellement le vantail. Vérifier en faisant quelques manœuvres complètes que la fourche coulisse régulièrement sur toute la course. Réglage du fin de course mécanique En bas du motoréducteur se trouvent deux arrêts mécaniques : un pour l'arrêt du vantail en ouverture et l'autre pour la fermeture. Placer le vantail débloqué dans la position d'ouverture souhaitée, desserrer l'arrêt mécanique A et le placer en appui sur l'axe.
- Page 27 EKKO Manuel utilisateur Déblocage manuel : tourner le couvercle de 180°, introduire la clé et la tourner de 90° dans le sens inverse des aiguilles d'une montre ; il est maintenant possible de pousser le vantail à la main ; refermer le couvercle. Pour bloquer à nouveau le vantail, réintroduire la clé et la tourner dans le sens des aiguilles d'une montre.
- Page 28 Remarque : le contenu de cette déclaration correspond à la dernière révision de la déclaration officielle disponible avant l'impression de ce manuel. Ce texte a été adapté aux nécessités éditoriales. Une copie de la déclaration originale peut être demandée à Elvox SpA.
- Page 29 • Coloque un cartel que indique claramente que la cancela, la puerta, el cierre enrollable o la barrera se acciona a distancia. • ELVOX s.p.a. declina toda responsabilidad por posibles daños causados por la instalación de dispositivos y/o componentes incompatibles a efectos de la integridad del producto, la seguridad y el funcionamiento.
- Page 30 EKKO Preinstalación: 2x1 mm + RG58 2x0,5 mm 4x0,5 mm 2x0,5 mm 2x2,5 mm +3x0,5 mm (encoder) 2x2,5 mm +3x0,5 mm (encoder) 3x2,5 mm 110/230 Vca Leyenda Actuador para cancelas batientes B - Centralita de mando C - Luz rotativa con antena D - Mando a distancia 2 canales E - Pareja de fotocélulas Selector...
- Page 31 EKKO Límites de uso Peso de la hoja (kg) Longitud de la hoja (metros) Antes de montar el automatismo, compruebe: - que las bisagras sean fuertes y estén en buen estado y que no se produzcan fricciones - que la medida Y no sea superior al valor indicado en la tabla de cotas de montaje. En este caso es necesario actuar en el pilar para alcanzar dicha medida - que la longitud de los cables de alimentación del motorreductor no sea superior a 15 metros - que los topes mecánicos de cierre estén colocados y correctamente sujetos.
- Page 32 EKKO Inclinación soporte Posición soporte Posición del fulcro de rotación (R) Distancia del lado de la columna al fulcro de rotación (S) en mm 0 - 1 A - B 0 - 1 A - B 0 - 1 B - C 0 - 1 B - C 0 - 1...
- Page 33 EKKO Montaje del soporte en el pilar: Fijación del motorreductor al soporte en el pilar: Coloque el motorreductor en el soporte: - Suelte el tornillo F y retire la tapa C - Coloque la arandela R en el soporte - Introduzca el motorreductor - Bloquee el motorreductor con el tornillo V y la tuerca (no apriete demasiado la tuerca y compruebe la rotación del motorreductor que no tiene que presentar fricciones) Esta es la posición correcta del perno para la fijación del soporte de arrastre de la hoja, proceda como se indica a continuación:...
- Page 34 EKKO - Coloque el soporte de arrastre de la hoja en el perno del motorreductor, fijándolo con el tornillo V, interponiendo las arandelas R1 y R2 como se indica en la figura 15. La arandela R1 lisa debe colocarse sobre la arandela R2 moleteada. Se recomienda engrasar el perno antes de introducirlo en el soporte de arrastre.
- Page 35 EKKO Ahora el motorreductor está desbloqueado y es posible abrir y cerrar manualmente la hoja. Compruebe con algunas maniobras completas que la horquilla se deslice correctamente por toda la carrera. Regulación del tope mecánico: en el fondo del motorreductor hay dos topes mecánicos, uno para la parada de la hoja en apertura y el otro para el cierre. Con la hoja desbloqueada, lleve la misma a la posición de apertura deseada, suelte el tope mecánico A y apóyelo en el perno.
- Page 36 EKKO Manual del usuario Desbloqueo manual: gire la tapa 180°, introduzca la llave y gire 90° en sentido contrario a las agujas del reloj; si la hoja se puede empujar manualmente, vuelva a cerrar la tapa. Para volver a bloquear la hoja, introduzca y gire la llave en el sentido de las agujas del reloj. - En caso de interrupción del suministro eléctrico, la batería tampón garantiza el funcionamiento de la automatización durante un tiempo limitado.
- Page 37 Nota: el contenido de esta declaración corresponde a lo declarado en la última revisión de la declaración oficial disponible antes de imprimir este manual. El presente texto ha sido adaptado por razones editoriales. Se puede solicitar a Elvox SpA la copia de la declaración original.
- Page 38 • An Tor, Tür, Rolltor oder Schranke ist mit einem Schild deutlich darauf hinzuweisen, dass sie ferngesteuert werden. • Die Firma ELVOX s.p.a. haftet nicht für eventuelle Schäden, falls Geräte und/oder Bauteile eingebaut werden, die nicht mit dem Produkt, der Sicherheit und dem Betrieb kompatibel sind.
-
Page 39: Anlagenauslegung
EKKO Anlagenauslegung: 2x1 mm + RG58 2x0,5 mm 4x0,5 mm 2x0,5 mm 2x2,5 mm +3x0,5 mm (Encoder) 2x2,5 mm +3x0,5 mm (Encoder) 3x2,5 mm 110/230 V AC Legende A - Linearantrieb B - Steuergerät C - Blinkleuchte mit Antenne D - 2-Kanal-Funkfernsteuerung E - Lichtschrankenpaar Schlüsselschalter G - Elektroschloss... -
Page 40: Einsatzgrenzen
EKKO Einsatzgrenzen Flügelgewicht (kg) Flügelbreite (Meter) Vor Installation des Antriebs fallen folgende Kontrollen an: - die Scharniere müssen robust und funktionstüchtig, darüber hinaus darf keine übermäßige Reibung vorliegen - das Maß Y darf den in der Tabelle mit Installationsmaßen angegebenen Wert nicht übersteigen. Ggf. am Pfeiler eingreifen, um dieses Maß zu erzielen - die Versorgungskabel des Getriebemotors darf nicht länger sein als 15 Meter - die mechanischen Endanschläge in Schließposition müssen installiert und einwandfrei befestigt sein. - Page 41 EKKO Neigung der Position der Position des Drehpunkts (R) Abstand von Pfostenseite bis zum Drehpunkt (S), ausgedrückt in mm Halterung Halterung 0 - 1 A - B 0 - 1 A - B 0 - 1 B - C 0 - 1 B - C 0 - 1 C - D...
-
Page 42: Befestigung Des Getriebemotors
EKKO Montage der Pfostenhalterung: Befestigung des Getriebemotors an der Pfostenhalterung: Getriebemotor an der Halterung anbringen: - Die Schraube F lösen, dann das Gehäuse C entfernen - Die Unterlegscheibe auf die Halterung legen - Den Getriebemotor einsetzen - Den Getriebemotor mit der Schraube V und der Mutter fixieren (die Mutter nicht zu fest anziehen, beim Drehen des Getriebmotors darf es zu keinen Reibungen kommen) Dies ist die korrekte Position des Zapfens für die Befestigung des Torflügel-Mitnehmerarms. - Page 43 EKKO - Den Mitnehmerarm des Torflügels am Zapfen des Getriebemotors anbringen und mit der Schraube V fixieren, dabei die Unterlegscheiben R1 und R2 ein- setzen wie auf Abbildung 15 dargestellt. Die glatte Unterlegscheibe R1 wird auf die Rändelscheibe R2 gelegt. Es wird empfohlen, den Zapfen einzufetten, bevor er in den Mitnehmerarm gesteckt wird.
- Page 44 EKKO Nun ist der Getriebemotor entriegelt und der Torflügel kann von Hand geöffnet oder geschlossen werden. Tor ein paar Mal vollständig öffnen und schließen, um zu prüfen, ob die Gabel über den gesamten Laufweg korrekt gleitet. Einstellung des mechanischen Endanschlags: Am Getriebemotor befinden sich zwei mechanische Arretierungen, eine zum Anhalten des Torflügels in geöffneter Stellung, die andere zum Anhalten des Torflügels in geschlossener Stellung.
-
Page 45: Bedienungsanleitung
EKKO Bedienungsanleitung Manuelle Entriegelung: Die Abdeckung um 180° drehen, den Schlüssel einstecken und um 90° gegen den Uhrzeigersinn drehen. Der Torflügel kann von Hand geschoben werden. Abdeckung wieder schließen. Zum Verriegeln des Torflügels Schlüssel wieder einstecken und im Uhrzeigersinn drehen. - Bei Stromausfall gewährleistet die Pufferbatterie den Betrieb des Torantriebs für eine begrenzte Zeit. - Page 46 Maschine eingebaut werden soll, den Bestimmungen der Richtlinie 2006/42/EG entspricht. Er erklärt, dass die zur Maschine gehörende technische Dokumentation von Elvox SpA entsprechend Anhang VII Teil B Richt- linie 2006/42/EG erstellt wurde und folgenden grundlegenden Sicherheitsanforderungen entspricht: 1.1.1, 1.1.2, 1.1.3, 1.1.5, 1.1.6, 1.2.1, 1.2.2, 1.2.6, 1.3.1, 1.3.2, 1.3.3, 1.3.4, 1.3.7, 1.3.8, 1.3.9, 1.4.1, 1.4.2, 1.5.1, 1.5.2, 1.5.4, 1.5.5, 1.5.6, 1.5.7, 1.5.8,...
- Page 47 • Τοποθετήστε στην καγκελόπορτα, στην πόρτα, στο ρολό καταστημάτων ή στο σύστημα μπάρας μια πινακίδα που αναφέρει ότι ο χειρισμός του μηχανισμού γίνεται από απόσταση. • Η ELVOX s.p.a. δεν μπορεί να θεωρηθεί υπεύθυνη για τυχόν ζημιές που προκαλούνται στην περίπτωση που εγκατασταθούν μη συμβατοί μηχανισμοί ή/ και εξαρτήματα σε ό,τι αφορά την ακεραιότητα του προϊόντος, την ασφάλεια και τη λειτουργία.
- Page 48 EKKO Προδιαμόρφωση εγκατάστασης: Γ 2x1 mm + RG58 2x0,5 mm 4x0,5 mm 2x0,5 mm 2x2,5 mm +3x0,5 mm (κωδικοποιητής) 2x2,5 mm +3x0,5 mm (κωδικοποιητής) 3x2,5 mm 110/230V c.a. Λεζάντα Γραμμικός εκκινητής B - Κεντρική μονάδα ελέγχου C - Φλας με κεραία D - Τηλεχειριστήριο...
- Page 49 EKKO Όρια χρήσης Βάρος φύλλου (Kg) Μήκος φύλλου (μέτρα) Πριν προχωρήσετε στην εγκατάσταση του αυτοματισμού, ελέγξτε τα εξής: - οι μεντεσέδες είναι ανθεκτικοί, λειτουργούν αποτελεσματικά και δεν υπάρχουν σημεία έντονης τριβής - η διάσταση Y δεν υπερβαίνει την τιμή που αναφέρεται στο πίνακα διαστάσεων εγκατάστασης, διαφορετικά, πρέπει να γίνουν εργασίες στην κολόνα, ώστε να...
- Page 50 EKKO Κλίση βάσης Θέση βάσης Θέση στροφέα (R) Απόσταση από την πλευρά της κολόνας έως το στροφέα (S) σε mm 0 - 1 A - B 0 - 1 A - B 0 - 1 B - C 0 - 1 B - C 0 - 1 C - D...
- Page 51 EKKO Συναρμολόγηση βάσης με κολόνα: Στερέωση του κινητήρα με μειωτήρα με στη βάση με κολόνα: Τοποθετήστε τον κινητήρα με μειωτήρα στη βάση: - Ξεβιδώστε τη βίδα F και, στη συνέχεια, αφαιρέστε το κάλυμμα C - Εισαγάγετε ενδιάμεσα τη ροδέλα R τοποθετώντας την πάνω στη βάση - Περάστε...
- Page 52 EKKO - Τοποθετήστε τη βάση κίνησης του φύλλου στον πείρο του κινητήρα με μειωτήρα, ασφαλίζοντάς την με τη βίδα V και τοποθετώντας ενδιάμεσα τη ροδέλα R1 και R2, όπως φαίνεται στην εικόνα 15. Η ροδέλα R1 είναι λεία και πρέπει να τοποθετείται πάνω από τη σαγρέ ροδέλα R2. Συνιστάται να λιπαίνετε τον πείρο...
- Page 53 EKKO Ο κινητήρας με μειωτήρα θα απασφαλιστεί και μπορείτε να ανοίξετε και να κλείσετε χειροκίνητα το φύλλο. Ελέγξτε με μερικές πλήρεις κινήσεις εάν η διχάλα κινείται κανονικά σε όλη τη διαδρομή. Ρύθμιση μηχανικού τερματικού διακόπτη διαδρομής: Στο κάτω μέρος του κινητήρα με μειωτήρα υπάρχουν δύο μηχανικοί τερματικοί διακόπτες, ένας για τη διακοπή της κίνησης του φύλλου στο άνοιγμα και ένας στο...
- Page 54 EKKO Χειροκίνητη λειτουργία Διαδικασία χειροκίνητης απασφάλισης: περιστρέψτε το καπάκι 180°, τοποθετήστε το κλειδί και περιστρέψτε αριστερόστροφα 90°. Το φύλλο μπορεί να μετα- κινηθεί χειροκίνητα. Κλείστε το καπάκι. Για να ασφαλίσετε ξανά το φύλλο, τοποθετήστε ξανά και περιστρέψτε το κλειδί δεξιόστροφα. - Σε...
- Page 55 μορφώνεται (εάν είναι απαραίτητο) με τις διατάξεις της οδηγίας 2006/42/ΕΚ. Δηλώνει ότι η σχετική τεχνική τεκμηρίωση έχει συνταχθεί από την Elvox SpA σύμφωνα με το παράρτημα VIIB της οδηγίας 2006/42/ΕΚ και ότι έχουν τηρηθεί οι παρακάτω ουσιώδεις απαιτήσεις: 1.1.1, 1.1.2, 1.1.3, 1.1.5, 1.1.6, 1.2.1, 1.2.2, 1.2.6, 1.3.1, 1.3.2, 1.3.3, 1.3.4, 1.3.7, 1.3.8, 1.3.9, 1.4.1, 1.4.2, 1.5.1, 1.5.2, 1.5.4, 1.5.5, 1.5.6, 1.5.7, 1.5.8, 1.5.9, 1.6.1., 1.6.2, 1.7.1, 1.7.2,...
- Page 56 Vimar SpA: Viale Vicenza, 14 36063 Marostica VI - Italy Tel. +39 0424 488 600 - Fax (Italia) 0424 488 188 S6I.EAM.700 02 15 04 Fax (Export) 0424 488 709 VIMAR - Marostica - Italy www.vimar.com...
Need help?
Do you have a question about the EAM7 and is the answer not in the manual?
Questions and answers