Table of Contents
Advertisement
Quick Links
Advertisement
Table of Contents

Related Manuals for CytoSMART Omni


Summary of Contents for CytoSMART Omni
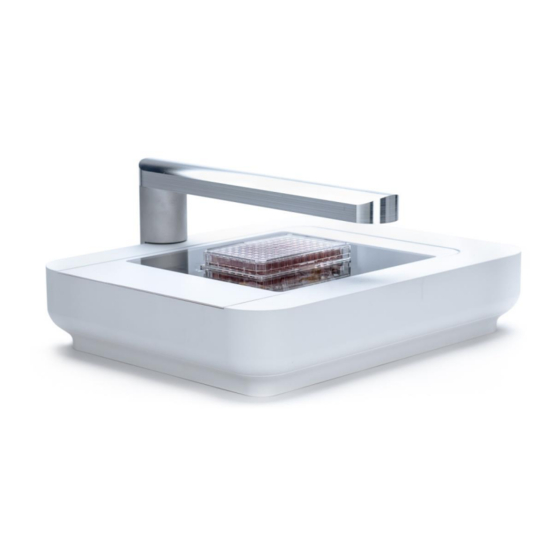
- Page 1 ® CytoSMART Omni Instruction manual...
-
Page 2: Table Of Contents
Table of Contents Safety information ............................3 1. Introduction .............................. 4 How easy the CytoSMART® Omni works ....................4 Ideal circumstances for cell cultures ......................4 System overview ............................4 2. Getting started ............................5 ® 3. Setting up the CytoSMART Omni ...................... -
Page 3: Safety Information
Safety information To avoid damage or malfunction of the CytoSMART® Omni: • Be sure to set this device on a firm, stable and horizontal surface. The device may break or cause injury if it falls. • Shut down the device immediately if it produces smoke, a strange odor or unusual noise. Continued use may lead to fire. -
Page 4: Introduction
How easy the CytoSMART® Omni works The CytoSMART® Omni can be installed within several minutes and requires minimal training. Hardware and software work together like a charm. The system consists of the CytoSMART® Omni, an automated live-cell imager, which operates inside a CO -incubator. -
Page 5: Getting Started
2. Getting started The content of the CytoSMART® Omni package contains: 1. CytoSMART® Omni 2. USB cable 3. Power adapter 4. CytoSMART® Omni Instruction manual 5. CytoSMART® Omni quick starter guide 6. License key Remember, if you ever have any questions regarding your purchase, please visit https://www.cytosmart.com/support... -
Page 6: Setting Up The Cytosmart ® Omni
® 3. Setting up the CytoSMART Omni It is really easy to set up the CytoSMART® Omni. All you need are these items: • An incubator • The CytoSMART® Omni • USB-cable • Power-adapter for the Omni • Omni adapter plate •... -
Page 7: Registration Of The Device
T-flask. Registration of the Device Before you can use the CytoSMART® Omni, you must register it. This only needs to be done the first time you use the CytoSMART® Omni. 1. Start the preinstalled CytoSMART® Omni app by double clicking on the icon on the desktop (fig. 4). - Page 8 7. Register your device by entering the license key. Congratulations, you have now successfully registered and activated your CytoSMART® Omni!
-
Page 9: Performing An Experiment
4. Performing an experiment Before you can start an experiment, you need to place your culture vessel on the CytoSMART® Omni. In case you are using a well plate, place it with well A1 in the corner of the adapter plate (fig. 3B). -
Page 10: Focusing On The Cells
Once you have selected your well plate size, an image of the well plate appears on the right side of the screen (fig. 10A). In case you have selected “Other”, a light blue rectangle will appear (fig. 10B). Click on a certain spot on the blue well plate image/rectangle to move the camera to that position, a red cross will appear indicating the current position of the camera. -
Page 11: Starting An Experiment
If you want to be notified when there is an internet connection issue, tick the “Alert me with SMS”-checkbox. fig. 13. Set the experiment parameters in the “Settings Omni experiment” page. -
Page 12: During The Experiment
After approximately one minute of inactivity, the app will go in sleep mode (fig. 15). Even though the app is in sleep mode, the CytoSMART® Omni will continue scanning your cells according to your settings. fig. 15. Sleep mode while a scan is being made. - Page 13 fig. 16. Sleep mode in-between scans. In case you would like to check your cells or adjust the focus level between scans, tap or click on the screen (fig. 16) to go to the Experiment page (fig. 17). The camera and LED will turn on so you can navigate through your well plate and adjust the focus level if necessary.
-
Page 14: Ending An Experiment
18. Stop experiment window. Select “Stop experiment” to confirm. Once the experiment has stopped, you are led to the Experiment page (fig. 8) so you can start a new experiment or stop the Omni app. -
Page 15: Appending A Scan To An Experiment
5. Appending a scan to an experiment In case you would like to combine several single scans into one experiment, you can add a scan to an existing experiment containing one or more single scans. First, select the correct culture vessel and focus on you cells as explained above. Subsequently, click on the gray “Extend experiment”... -
Page 16: Connecting To The Cloud
6. Connecting to the Cloud One of the coolest features of the CytoSMART® Omni is that the experiment results can be accessed through the CytoSMART® Cloud, so you can monitor the progress of the experiment in real time. If you want to access the cloud, you need a PC, tablet or other device with a web browser, an active internet connection and your CytoSMART®... -
Page 17: Experiment Overview
fig. 24. Project overview in tile mode (A) and list mode (B). a) Switch between the modes using the tile and list icon. b) Search projects, c) create a new project, d) open project and e) advanced features. Experiment overview After selecting a project, you will get access to an overview of all experiments assigned to that project (fig. -
Page 18: Map View Page
fig. 25. Overview of all experiments within a project in tile mode (A) and list mode (B). a) Switch between the modes using the tile and list icons. b) Search experiments, c) project details, d) share the project, e) open experiment and f) advanced features. Map view page In the map view page (fig. -
Page 19: Edit Areas
• Use the brightness slider on the bottom right (fig. 26f) to adjust the brightness of the image. In case colony analysis was selected upon the start of the experiment, some extra features are available in the map view: • The number of colonies in each area is displayed in circles on the map view (a in fig. - Page 20 • Grouped areas can be moved, copied and pasted in the same way as individual areas. • All manipulations to the areas can be undone or redone using the undo and redo buttons on the top right (fig. 28b). • Edit the names of the shapes in the area list (fig.
-
Page 21: Graph Pane
Graph pane In the graph pane (fig. 31), the analyzed data (confluence, scratch area & migration speed, count, size and circularity of colonies) is plotted against the duration of the experiment. Download the graph(s) using the buttons on the bottom left. Tick the check boxes on the bottom right to calculate and plot the average and standard deviation of the selected areas. -
Page 22: Area Page
Area page Select the area you would like to visualize in the drop down menu below the scan overview area and click the “Show” button. You will be led to the Area page (fig. 34). You reach the area page by clicking on the area in the map view (see above). -
Page 23: Cleaning And Troubleshooting
Do not use acetone to clean the CytoSMART® Omni. Also, do not autoclave the CytoSMART® Omni, this will result in damage to the electronics. The CytoSMART® Omni does not need regular maintenance. Do not perform any repairs or service on the device yourself. Contact CytoSMART® if a problem should arise, via support@cytosmart.com... - Page 24 Please contact CytoSMART with the proxy details (IP- adress and password) and our support team will help you configure the right proxy settings.
- Page 25 3. The background is too bright. If there is not enough contrast between the well plate and the background, the wells cannot be detected. Make sure the CytoSMART® Omni is in a closed incubator and start a new experiment.
-
Page 26: Technical Specification
Culture flask types T25 – T225, hyperflask and triple flasks Other labware Anything transparent and lower than 55 mm Data storage Online in the CytoSMART® Cloud Operating environment 5-40°C, 20-95% humidity Support Via mail and live chat Minimal system requirements Windows 10 2.4 GHz i5 CPU... -
Page 27: Warranty
9. Warranty The CytoSMART® Omni is covered by warranty - if the device is properly used and installed - for a period of one year (1 year) from the date of purchase. If any defects occur during this warranty period, CytoSMART®...
Need help?
Do you have a question about the Omni and is the answer not in the manual?
Questions and answers