
Related Manuals for Behringer C210


Summary of Contents for Behringer C210
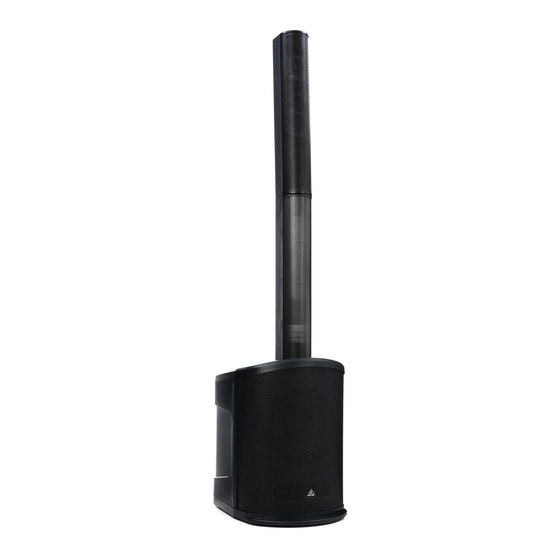
- Page 1 Quick Start Guide C210 200 Watt Powered Column Loudspeaker with an 8" Subwoofer, 4 High Frequency Drivers, Bluetooth Audio Streaming, LED Lighting and Remote Control A54-00002-39792...
-
Page 2: Legal Disclaimer
C210 1. Read these instructions. 15. The apparatus shall be connected Important Safety to a MAINS socket outlet with a Instructions 2. Keep these instructions. protective earthing connection. 3. Heed all warnings. 16. Where the MAINS plug or an 4. Follow all instructions. -
Page 3: Limited Warranty
Tannoy, Turbosound, TC Electronic, de mantenimiento que aparecen en la Un enchufe polarizado tiene dos polos, TC Helicon, Behringer, Bugera, documentación adjunta. Por favor, uno de los cuales tiene un contacto Auratone and Coolaudio are lea el manual. -
Page 4: Garantía Limitada
Tannoy, Turbosound, TC Electronic, ni démonter le panneau arrière. 17. Cómo debe TC Helicon, Behringer, Bugera, L’intérieur de l’appareil ne possède deshacerse de este Auratone y Coolaudio son marcas aucun élément réparable par aparato: Este símbolo... -
Page 5: Garantie Limitée
Quick Start Guide contacts plus une mise à la terre 17. Mise au rebut Turbosound, TC Electronic, TC Helicon, Behringer, Bugera, Auratone et servant de sécurité. Si la prise du bloc appropriée de ce Coolaudio sont des marques ou d’alimentation ou du cordon d’ali- produit: Ce symbole marques déposées de Music Tribe... - Page 6 Ihrer Sicherheit. Falls das mitgelieferte weist darauf hin, das TC Electronic, TC Helicon, Steckerformat nicht zu Ihrer Steckdose Produkt entsprechend Behringer, Bugera, Auratone und passt, wenden Sie sich bitte an der WEEE Direktive (2012/19/EU) und Coolaudio sind Warenzeichen oder einen Elektriker, damit die Steckdose...
-
Page 7: Beschränkte Garantie
Quick Start Guide eingetragene Warenzeichen der exposto à chuva nem à humidade. Verifique particularmente nas fichas, Music Tribe Global Brands Ltd. Além disso, não deve ser sujeito a nos receptáculos e no ponto em que o © Music Tribe Global Brands Ltd. salpicos, nem devem ser colocados em cabo sai do aparelho. -
Page 8: Garantia Limitada
Todas as marcas são propriedade de seus respectivos donos. Midas, Klark Teknik, Lab Gruppen, Lake, Tannoy, Turbosound, TC Electronic, TC Helicon, Behringer, Bugera, Auratone e Coolaudio são marcas ou marcas registradas do Music Tribe Global Brands Ltd. © Music Tribe Global Brands Ltd. - Page 9 Quick Start Guide...
- Page 10 C210 C210 Hook-up (EN) Step 1: Hook-Up (ES) Paso 1: Conexión (FR) Étape 1 : Connexions SD card, Bluetooth and USB connection (DE) Schritt 1: Verkabelung Tarjeta SD, Bluetooth y conexión USB Carte SD, connexions Bluetooth et USB SD-Speicherkarte, Bluetooth- und USB-Verbindung Conexão USB, Bluetooth e Cartão SD...
- Page 11 Quick Start Guide Mic/Instrument connection Conexión de micro/instrumento Connexion Mic/Instrument Mikrofon/Instrumenten-Anschluss Conexão para microfones/instrumentos...
- Page 12 C210 C210 Controls (17) (16) (15) (10) (14) (14) (13) (13) (12) (12) (11) (11) (19) (20) (18)
- Page 13 Quick Start Guide (EN) Step 2: Controls (14) SD/MMC jack allows you to play back digital audio files IN 2 jack accepts microphone signals over balanced cables stored on SD (Secure Digital) or MMC (MultiMedia Card) with ¼" TRS connectors. flash memory cards.
- Page 14 C210 C210 Controls (ES) Paso 2: Controles (13) La toma SD/MMC le permite reproducir ficheros de Las tomas combo LINE/INST aceptan señales de entrada a audio digital almacenados en tarjetas de memoria flash través de conectores XLR, TRS de 6,3 mm balanceados o TS SD (Secure Digital) o MMC (MultiMedia Card).
- Page 15 Quick Start Guide (FR) Étape 2 : Réglages (13) Le connecteur SD/MMC permet de lire des fichiers audio L’entrée combinée LINE/INST est compatible avec les stockés sur une carte mémoire SD (Secure Digital) ou connecteurs symétriques XLR ou Jack 6,35 mm TRS ainsi MMC (MultiMedia Card).
- Page 16 C210 C210 Controls (DE) Schritt 2: Bedienelemente (13) SD/MMC-Buchse: Zum Abspielen digitaler Audiodateien, LINE/INST: Diese Kombibuchse akzeptiert die auf SD (Secure Digital)- oder MMC (MultiMedia Card)- Eingangssignale, die über XLR-, symmetrische Flash Memory Cards gespeichert sind. 6,3 mm TRS- oder unsymmetrische 6,3 mm TS-Stecker empfangen werden.
- Page 17 Quick Start Guide (PT) Passo 2: Controles (14) O jack SD/MMC permite a reprodução de arquivos de O jack IN 2 aceita sinais de microfones através de cabos áudio digitais armazenados em cartões de memória flash balanceados com conectores TRS de ¼" . SD (Secure Digital) ou MMC (MultiMedia Card).
-
Page 18: Step 3: Getting Started
C210 C210 Getting started (EN) Step 3: Getting Place the speaker in your Turn the LEVEL control up to desired location. around the 50% position. started Set all controls as shown: Make overall volume TREBLE and BASS knobs to adjustments using the their centered position at MASTER knob. -
Page 19: Paso 3: Puesta En Marcha
Quick Start Guide (ES) Paso 3: Puesta en Coloque el altavoz en la Suba el control LEVEL hasta ubicación que quiera. que quede más o menos al marcha 50% de su recorrido. Realice los ajustes del Ajuste todos los controles de volumen global con el la siguiente forma: los mandos mando MASTER. -
Page 20: Étape 3 : Mise En Œuvre
C210 C210 Getting started (FR) Étape 3 : Mise en Placez l’enceinte à l’endroit Placez le potentiomètre LEVEL souhaité. en position centrale. œuvre Effectuez les réglages comme Réglez le volume général avec indiqué : TREBLE et BASS en le potentiomètre MASTER. -
Page 21: Schritt 3: Erste Schritte
Quick Start Guide (DE) Schritt 3: Erste Stellen Sie den Lautsprecher Stellen Sie den LEVEL-Regler am gewünschten Ort auf. auf circa 50 % ein. Schritte Stellen Sie die Regler wie folgt Stellen Sie die ein: TREBLE- und BASS-Regler Gesamtlautstärke mit dem auf die Mitte (12 Uhr). -
Page 22: Passo 3: Primeiros Passos
C210 C210 Getting started (PT) Passo 3: Primeiros Coloque o alto-falante no Aumente o controle LEVEL até local desejado. a posição 50% Passos aproximadamente. Configure todos os controles Faça ajustes gerais do volume conforme indicado: botões usando o botão MASTER. - Page 23 Quick Start Guide...
-
Page 24: Specifications
C210 Specifications Amplifier Maximum output power* 200 W Type Class-D Speaker Woofer 1 x 8" (200 mm) LF driver Tweeters 4 x 2.75" (82 mm) MF drivers Analog Audio Connections Line in 1 x XLR / ¼" TRS combo jack, balanced Impedance 20 kΩ, balanced / 10 kΩ, unbalanced... - Page 25 Quick Start Guide Power Supply, Voltage (Fuses) USA / Canada 120 V~, 60 Hz (T 3.15 A L 250 V) UK / Australia / Europe 220-240 V~, 50/60 Hz (T 3.15 A L 250 V) Korea / China 220-240 V~, 50/60 Hz (T 3.15 A L 250 V) Japan 100 V~, 50/60 Hz (T 3.15 A L 250 V) Power consumption @ 1⁄8 max power output...
- Page 26 “Support” de nuestra página web dans la liste, essayez de résoudre votre at behringer. com. Alternatively, please behringer. com. En caso de que su país no problème avec notre “aide en ligne” submit an online warranty claim at aparezca en ese listado, acceda a la sección que vous trouverez également dans la...
- Page 27 Sollte Ihr Land nicht aufgelistet sein, seu país listado abaixo de “Suporte” prüfen Sie bitte, ob Ihr Problem von em behringer. com. Se seu país não estiver unserem „Online Support“ gelöst werden na lista, favor checar se seu problema pode kann, den Sie ebenfalls auf behringer.
- Page 29 Quick Start Guide...
- Page 30 C210...
- Page 31 Quick Start Guide...
- Page 32 We Hear You...
Need help?
Do you have a question about the C210 and is the answer not in the manual?
Questions and answers