Table of Contents
Advertisement
Quick Links
Advertisement
Table of Contents

Related Manuals for Thor Kitchen HEW3001

Summary of Contents for Thor Kitchen HEW3001
- Page 1 COOK LIKE USE AND CARE MANUAL...
- Page 2 USE AND CARE MANUAL 30 INCH PROFESSIONAL ELECTRIC WALL OVEN HEW3001...
-
Page 3: Table Of Contents
Contents Maintaining your appliance Important safety instructions Self-cleaning Important safety instructions Care and cleaning of the oven Install instructions Using Sabbath Removing the oven door Location requirements Replacing the oven doo Install instructions Troubleshooting 「 Information codes Introducing your new oven Warranty Overview Energy saving tips... - Page 4 Important safety instructions Read and follow all instructions before using your oven to prevent the risk of 心 CAUTIO N fire,electric shock,personal injury,or damage when using the oven. 」 To reduce the risk of fire,explosion,electric shock,or personal i n u ry when using your This guide does not cover all possible conditions that may occur.
- Page 5 Important safety instructions Always disconnect the power to the appliance before servicing by STATE OF CALIFORNIA PROPOSITION 65 WARNING (US ONLY) removing the fuse or switching off the circuit breaker. rs:] • WARNING : This product contains chemicals known to the State of Do not enter the oven.
- Page 6 (!) • • If there is a fire in the oven during self-cleaning,tum the oven off and Use only dry potholders. Placing moist or damp potholde on hot 飞 wait for the fire to go out. Do not force the door open.The introduction of surfaces may result in bums from steam.
- Page 7 Important safety instructions ELECTRICAL SAFETY WARNING (!) • Use only the factory installed flexible power cord to connect to the power • Ensure that the appliance is switched off before replacing the lamp to avoid supply Do not use a 3rd party power supply cord kit. the possibility of electric shock.
- Page 8 OVEN (!)• 因 Use care when opening the door. Let hot air or steam escape before DO NOT TOUCH THE HEATING ELEMENTS OR INTERIOR SURFACES OF THE OVEN. Heating elements may be hot even you remove food from or put food into the oven.
- Page 9 Important safety instructions 心 CAUTION 压] • Do not attempt to operate the oven during a power failure. If the power fails, Do not use any(X)mmercial oven cleaner or oven liner protective(X)ating always tum the oven off. If the oven is not turned off and the power returns, of any kind in or on the outside of the oven.
- Page 10 CRITICAL INSTALLATION WARNINGS 巳 Do not cut or remove the ground prong from the power cord under any ARNING circumstances. • This appliance must be installed by a qualified technician or service • company. Connect the oven to a circuit that provides the co ect amperage.
- Page 11 Important safety instructions CRITICAL USAGE WARNING • 心 Always observe safety precautions when using your oven. Never try to CAUTION repair the oven on your own - there is dangerous voltage inside. If the • If the appliance is flooded by any liquid,please contact your nearest oven needs to repaired, contact an authorized Thorkitchen serv ice Thorkitchen service center.
- Page 12 • 区 Do not touch the power cord with wet hands. Do not insert fingers,foreign substances, or metal objects such as pins or • This may result in electric shock. needles into inlets, outlets, or holes. If foreign substances are inserted into any of these holes, contact your product provider or nearest •...
- Page 13 Important safety instructions (Sl • Do not heat food wrapped in paper from magazines, newspapers, etc. USAGE CAUTIONS • This may result in fire. 心 CA UTION • (!) • Do not open the door when the food in the oven is buming.
- Page 14 (!) • • Takecare when heating liquids such as water or other beverages. Do not put your face or body dose to the appliance while CXX)king or • Make sure to stir during or after cooking. when opening the door just after CXX)king. •...
-
Page 15: Important Safety Instructions
Important safety instructions (Sl • Do not use sealed containers. Remove seals and lids before cooking. CRITICAL CLEANING WARNINGS Sealed containers can explode due to the build up of pressure even 心 CA UTION after the oven has been turned off. (!) •... -
Page 16: Install Instructions
Location requirements Product dimension IMPORTANT: Observe all governing codes and ordinances. • Cabinet opening dimensions that are shown must be used. Given dimensions provide minimum dearance with oven. • Recessed installation area must provide complete enclosure around the recessed portion of the oven. •... - Page 17 Installation instructions Installation instructions Oven installed in Cabinet Remove and replace oven door A.24"(61cm) cutout depth B.27-3/5(70cm) recommended cutout height. IMPORTANT: Use two hands to remove oven door. C.28-1/2(72.5cm) cutout width Prior to removing the oven door, prepare a surface where you will place it. 4"(61cm) Min.cabinet depth This surface should be flat and covered with a soft blanket, or use the comer 6"(91.4cm)Min.
- Page 18 Replace oven door Remove oven door 心 1. Open the oven door. CAUTIO N 2. Locate the oven door hinge lock in 曲 The door is very heavy. You may need help I ng the door high enough to both come of the oven door, and 飞...
- Page 19 Installation instructions Installation instructions Lower the oven door to the fully Electrical Connection Options Chart open position. If the oven door does not open to a full 90°, repeat steps If your home has. Go to section: 1 through Locate the oven door hinge locks in the oomers of the oven door, and i e Cable from Home Power Supply 「...
- Page 20 Installation instructions 4-Wire Cable from Home Power Supply 3-Wire Cable from Home Power Supply - U.S. Only IMPORTANT: Use the 4-wire cable from home power supply in the U.S. IMPORTANT: Use the 3-wire cable from home power supply where local where local codes do not allow grounding through neutral, New Branch circuit codes permit a 3-wire connection.
- Page 21 Install oven handle 3 Lay the door handle against to the oven door and fit it on the 1 How to install Handles For Thor KO Models connection part. 2 • Handle Helde • 「 Installation 「 ench, 1' Handle 4 Use the wrench to get the door handle holder tight 2 Connect the handle to the handle holders.
-
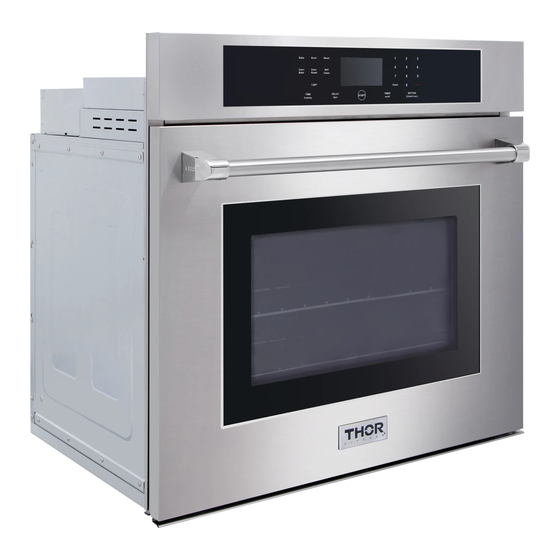
Page 22: Introducing Your New Oven
Introducing your new oven Before you begin Clena the oven thoroughly before using it for the first time.Then,remove the Overview accessories, set the oven to Bake, and then run the oven at 400 °F for 1 hour. There will be a distinctive odor. This is normal. Ensure your kitchen is well ventilated during this conditioning period. -
Page 23: Operating The Oven
Operating the oven The oven control panel START: Use to st art any cooking or deaning function in the oven. READ THE INSTRUCTIONS CAREFULLY BEFORE USING THE OVEN. For satisfactory use of your oven, become familiar with the various features Timer On/0 Use to se t or cancel the kitchen timer. -
Page 24: Setting The Clock
Operating the oven Setting the clock Control Lockout The dock must be set to the correct time of day for the automatic oven timing Control Lockout lets you lock the buttons on the touch pad they cannot be functions to work properly. activated accidently. -
Page 25: Timed Cooking
Operating the oven Time cooking Delay Start In limed Cooking mode, the oven turns on imm atelyand cooks for the length of 的 With Delay Start, the oven's timer turns the oven on and off at times you select in time you select. -
Page 26: Minimum And Maximum Settings
Minimum and maxim um settings Using the oven racks All the features listed in the table below have minimum and maximum time or Oven rack positions Recommended rack position for cooking temperature settings. A beep will sound each time a pad on the control panel is pressed and the entry is accepted. -
Page 27: Using The Oven Racks
Operating the oven Before using the racks Rack and Pan placement Each rack has stops that need to be placed oorrectly on the supports. These Centering baking pans in the oven as much stops will keep the rack from ooming(X)mpletely out. as possible will produce better results. -
Page 28: Baking
Operating the oven Baking Convection baking The oven can be programmed to bake at any temperature from 150 °F to 550 °F. By using the Convection Bake, you will be Baking temperature and time will vary depending on the ingredients and the size and able to cook faste.rConvection baking uses a shape of the baking pan used. -
Page 29: Convection Roasting
Convection roasting How to set the oven for convection baking Convection roasting is good for cooking large tender cuts of meat uncovered. Heat TouchBake comes from the top heating element. The convection fan circulates the heated air Enterthe temperature you want, 400 °F, using the number pad. -
Page 30: Bro 由 Ng
Broiling Keep Warm will keep(X)()ked food warm for serving up to 3 hours after(X)()king has finished. After 3 hours, the feature will shut off automatically. You can use the Keep Warm feature without any other(X)()king operations or you can set it to activate after a timed or delay timed(X)()king operation. -
Page 31: Temp Probe
_ 3.Select the desired cooking function (Bake or Convection Roast) and temperature 4.TouchSETTING to into Temp. Probe (probe signal will display in panel) 5.Set the desired internal temperature using the number pad. (The default temperature is 150 °F). 100 °F to 200 °F 6.lf you want to use Cook li Delay Start,... - Page 32 Temp Probe table Temp Adjust The temperature in the oven has been calibrated at the factory.When first using the oven, 140 °F sure to follow recipe times and temperatures. If you think the oven is too hot or too cool, you can(X)rrect the temperature in the oven.
-
Page 33: Using Options
Operating the oven Maintaining your appliance Self-cleaning Sound On/0 行 Using Sound On/OFF, you can set the oven controls to operate silently. This self-cleaning oven uses high temperatures (well above cooking temperatures) to bum off leftover grease and residue completely or reduce them to a finely powdered How to tum the sound on or ash that you can wipe away with a damp doth. -
Page 34: Care And Cleaning Of The Oven
Maintaining your appliance Before a self-cleaning cycle How to run a self-cleaning cycle Select the length of time for the self-cleaning operation, hours. Touch Self Clean'2J3/5h · We recommend venting your kitchen with an open once for a 3 hour dean time, twice for a 5 hou dean time, or 3 times for a 2 hour dean time 「... -
Page 35: Using Sabbath
Using Sabbath Self-cleaning You can use the Sabbath feature with baking only. The oven temperature may be set higher o |ower Cleaning painted parts and decorative trim 「 after se 切 ng the Sabbath feature(The oven temperature ad 」 ustment feature should be used only during ·... -
Page 36: Removing The Oven Door
Maintaining your appliance Removing the oven doors Oven door &CAUTION • Use soap and water to thoroughly clean the top, sides, and front of the oven door. Rinse • The door is very heavy. Be careful when removing and lifting the door •... -
Page 37: Replacing The Oven Doo
4.Partially dose the door to engage the door latch 3.Holdthe door at a 45° angle, and then align the locks door hinges with the slots in the lower front of the The door will stop at this point. oven cavity. Slowly insert the door, making sure... -
Page 38: Troubleshooting
Troubleshooting Troubleshooting OVEN Thorkitchen works hard to ensure that you don't have problems with your new electric oven. If you run into unexpected trouble, look first for a so lution in the tables below. Make sure the electrical The oven is not completely you're still having trouble after trying the suggested solution, call Thorkitchen plugged into the electrical plug is inserted into a... - Page 39 Refer to the section on Refer to the Broiling The oven controls have not operating the oven on page The serving size may not be recommendation guide for been set properly appropriate. serving sizes on page and then try again. Reposition the rack to provide proper clearance between the See the Broiling...
- Page 40 Troubleshooting Steam 1s When using the convection The oven temperature is too Allow the oven to cool and coming out of feature, it is normal to see high to start a self-clean then reset the controls. the vent steam coming out of the operation.
-
Page 41: Information Codes
Information codes main circu 1.The temperature sensor (k-type thermocouple ) Replace temperature When oven under 1.The electronic components of i cuit board 仆 Replace the circuit board 「 b oard can not detect may be damaged and circuit open sensor (k-type thermocouple) preheat, broken... -
Page 42: Warranty
Warranty and Service Warrant & Service This product has been manufactured by Thor Group, 4651 E Airport Drive, California 91761 For Customer Service, please call (877) 288 - 8099 For the most up to date warranty and service policy, please refer to our website WWW.THORKITCHEN.COM/WARRANTY-REGISTRATION For in-warranty service requests, please visit our website at WWW.THORKITCHEN.COM/SERVICE... - Page 43 WELCOME TO THE CLUB You chose THOR Kitchen to enhance your culinary journey and we’re stoked to have you in the club. Think of it as a secret society of really savvy people, such as yourself, choosing professional power and performance at an affordable price.
Need help?
Do you have a question about the HEW3001 and is the answer not in the manual?
Questions and answers