Table of Contents
Advertisement
Quick Links
non-contractual photos
The Carry'Dog Instruction Manual
April 2021
Compatible with the AddBike and the AddBike+
This manual will teach you how to assemble/disassemble and use the
Carry'Dog module correctly. It is imperative you read this manual entirely to
keep your bike and the Carry'Dog in good condition.
Please keep this document.
1
Advertisement
Table of Contents

Subscribe to Our Youtube Channel
Related Manuals for AddBike Carry'Dog


Summary of Contents for AddBike Carry'Dog
- Page 1 The Carry’Dog Instruction Manual April 2021 Compatible with the AddBike and the AddBike+ This manual will teach you how to assemble/disassemble and use the Carry’Dog module correctly. It is imperative you read this manual entirely to keep your bike and the Carry’Dog in good condition.
- Page 2 The AddBike+ is a new concept that replaces your bike’s front wheel in order to turn into a handy three-wheeled bike, perfect for moving around in big cities. It consists of a two-wheeled base that allows you to transport light loads and attach different modules specifically designed for the AddBike+.
-
Page 3: Table Of Contents
Table of Contents General Warning Carry’Dog glossary Contents of the Carry’Dog module Installing the Carry’Dog Using the Carry’Dog Uninstalling the Carry’Dog module Cleaning Warranty Assistance in case of problems... -
Page 4: General Warning
Please keep this manual for future reference. It is also important to take into account the directions for use of the AddBike+ and that of the bike on which you are installing the AddBike+. The AddBike Company disclaims all liability in case of non-compliance with the instructions in this Instruction Manual and in case of modification of the product by the user. -
Page 5: Carry'dog Glossary
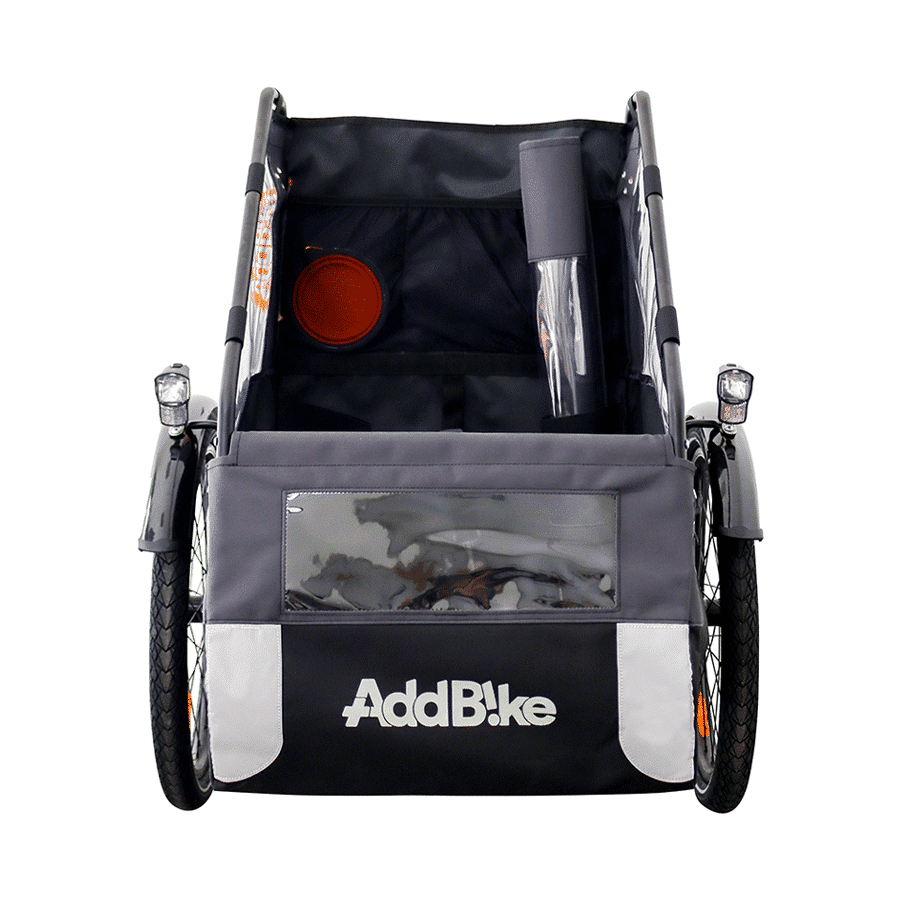
1. Carry’Dog glossary Illustration 1 - Carry'Dog glossary... -
Page 6: Contents Of The Carry'dog Module
● The user guide for the Carry’Dog module. ● Before assembling the Carry'Dog module on your bike, remember to check that the product is in good general condition (no scratches, no bent parts). 3. Installing the Carry’Dog The Carry’Dog module must be installed and uninstalled as explained. - Page 7 M5x20. Refer to the image below. Illustration 3 – Fixing the compact slat to the front tubes Unscrew the 2 screws as shown below, situated on the AddBike+ seat. Follow with ● the screws on each side of the AddBike backrest;...
- Page 8 Insert the front tubes of the compact slat into the seat of the AddBike+. Make sure that ● the screw holes are in line. Illustration 5 - Inserting the front tubes into the seat...
- Page 9 Screw in the previously removed screws located in the seat of the AddBike+, by ● inserting them through the holes in the front tubes; Illustration 6 – Screws to be put back on the seat Install the textile shell: ●...
- Page 10 Illustration 7 - Insertion of the textile At the back of the module, hook the 3 textile straps around the backrest of the AddBike+, ● starting with the bottom one; Tighten the fabric on both sides, centering the fabric on the backrest as much as possible.
- Page 11 Slide the two upper tubes through the elastic straps of the textile following the ● direction of the arrow shown in Illustration 9; Illustration 9 - Inserting the upper tubes into the textile straps Remember to insert the end of the upper tubes into the last upper elastic strap before continuing.
- Page 12 Insert the top tubes into the holes in the backrest and front tubes at the same time. If ● they do not match, you have positioned the top tube in the wrong direction; Illustration 11 - Inserting the upper tubes into the backrest Screw the previously removed backrest screws by inserting them through the holes ●...
- Page 13 (vertical) as shown in Illustration 13; Illustration 13 – Tightening the straps Follow by tightening the last strap on the backrest of the AddBike+; Tighten the fabric on both sides, centering the fabric on the backrest as much as possible.
- Page 14 Illustration 14 – Tighten straps on the backrest of the AddBike+ Slide the crossbar into the hem of the front textile cover; ● Illustration 15 - Inserting the crossbar into the hem of the textile cover...
- Page 15 ● and fix it to the rest of the structure using the BHC M5x30 screws supplied; Illustration 16 - Installation of the cross bar Assemble the front textile with the shell of the Carry'Dog using the Velcro fasteners ● provided...
- Page 16 Illustration 17 – Assembly of the front textile on the module ● Assemble the floor mat at the bottom of the Carry'Dog by attaching the four press studs provided; Illustration 18 – Assembly of the floor mat...
- Page 17 Assemble the cover by attaching it to the module using the press studs and Velcro ● fasteners shown in illustration 19; Illustration 19 – Location of buttons and Velcro...
- Page 18 Illustration 20 – Assembly of the textile shell and the cover If you wish to use the Carry'Dog without its cover, do not attach it to the textile. You can then roll the cover up and place it at the bottom of the Carry’Dog, keeping it in place with the elastic straps (see Illustration 21).
- Page 19 Illustration 21 – Storage elements of the Carry’Dog...
-
Page 20: Using The Carry'dog
Once inside, encourage the pup to get in a seated position by giving verbal instructions or with treats. After a while, help him to get out of the Carry'Dog. It mustn’t jump over the crossbar You should repeat this exercise until your furry friend feels comfortable with the Carry’Dog. -
Page 21: Uninstalling The Carry'dog Module
We advise you to remove the textile parts, especially the floor mat for easier cleaning. 7. Warranty The warranty of the Carry'Dog module is valid for 2 years after purchase. The product must be kept and used in accordance with its instructions. Any damage resulting from improper use, insufficient maintenance or normal wear and tear is excluded from the guarantee. - Page 22 Postal address: 61 cours de la République 69100 VILLEURBANNE, FRANCE You may order additional user guides from AddBike. This user guide has been created with the utmost care. If you have any complaints, unclarity and/or suggestions, we would immensely appreciate the...
Need help?
Do you have a question about the Carry'Dog and is the answer not in the manual?
Questions and answers