Table of Contents
Advertisement
Quick Links
Non-contractual photos
User and Installation Guide
Carry'Dog Module
September 2020
Applicable to the AddBike and the AddBike+
This document indicates the correct practices to be respected during the use and
assembly/disassembly of the Carry'Dog module. It is imperative to read this document in its
entirety in order to keep your bike, your AddBike, and your Carry'Dog in good working
condition for as long as possible.
Please keep this document.
Advertisement
Table of Contents

Subscribe to Our Youtube Channel
Related Manuals for AddBike Carry’Dog


Summary of Contents for AddBike Carry’Dog
- Page 1 This document indicates the correct practices to be respected during the use and assembly/disassembly of the Carry’Dog module. It is imperative to read this document in its entirety in order to keep your bike, your AddBike, and your Carry’Dog in good working condition for as long as possible.
- Page 2 Welcome to the family of AddBikers! There is no need to invest in expensive and large cargo bicycles. With the AddBike you can quickly and easily turn your own bike into a compact cargo bike.
-
Page 3: Table Of Contents
Table of Contents General Warning ............................. 4 Lexicon of the Carry’Dog module ....................5 Contents of the Carry’Dog module ....................6 Installing the Carry’Dog ........................6 Using the Carry’Dog ..........................20 Uninstalling the Carry’Dog module ....................21 Cleaning ..............................21 Warranty .............................. -
Page 4: General Warning
Using the Carry’Dog Module The Carry’Dog module is designed to be used on the AddBike produced by our company. Do not try to install or use this module on other cargo bikes or on a classic bike. The Carry’Dog module is not designed to be stored outdoors for prolonged periods. It must be... -
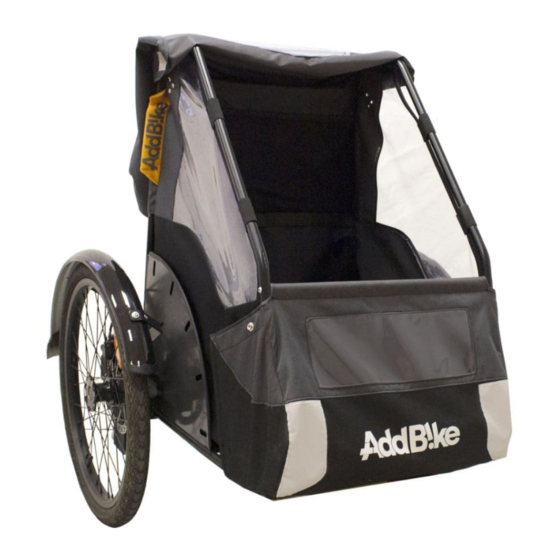
Page 5: Lexicon Of The Carry'dog Module
2. Lexicon of the Carry’Dog module Figure 1 - Lexicon of the Carry'Dog module... -
Page 6: Contents Of The Carry'dog Module
Improper installation can lead to accidents that could cause serious injury. We advise you to add the Carry’Dog module to your AddBike only when the latter is properly installed on your bike so as to make this module easier to assemble. - Page 7 You should end up with the result shown in figure 3; Figure 3 – Fixing the compact slat to the front tubes Remove the screws on both sides of the compact plate of the AddBike seat. The same •...
- Page 8 Insert the front tubes into the holes of the seat and line up the screw holes of both parts; • Figure 5 - Insertion of front tubes into the seat...
- Page 9 Replace the previously removed seat screws by inserting them through the holes in the • front tubes; Figure 6 – Screws to be put back on the seat Install the textile shell: • Slide on the black textile straps Position the rear of the textile in front of the backrest...
- Page 10 Figure 7 - Insertion of the textile At the back of the module, hook the 3 textile straps around the backrest of the AddBike, starting • with the bottom one; Tighten the fabric on both sides, centering the fabric on the backrest as much as possible.
- Page 11 Thread the two upper tubes through the elastic straps of the textile in the direction of the • arrow shown in figure 9; Figure 9 - Inserting the upper tubes into the textile straps Remember to insert the end of the upper tubes into the last upper rigid strap before assembling the rest of the structure.
- Page 12 Figure 11 - Inserting the upper tubes into the backrest Replace the previously removed backrest screws by inserting them through the holes in • the upper tubes; Figure 12 – Screws to be replaced on the backrest First hook the upper strap on the back of the module, then hook the leash retaining strap •...
- Page 13 Figure 13 – Tightening the straps Finally tighten the last strap on the backrest of the AddBike; Tighten the fabric on both sides, centering the fabric on the backrest as much as possible No cables from the AddBike should be caught in the strap clamps.
- Page 14 Figure 14 – Tightened straps on the backrest of the AddBike Slide the crossbar into the sheath of the front textile cover; • Figure 15 - Inserting the crossbar into the sheath of the textile cover...
- Page 15 Position the crossbar between the two holes at the front of the module between the upper • and front tubes and fix it to the rest of the structure using the BHC M5x30 screws supplied; Figure 16 - Installation of the cross bar Assemble the front textile with the shell of the Carry'Dog using the Velcro fasteners •...
- Page 16 Figure 17 – Assembly of the front textile on the module Assemble the floor mat in the bottom of the Carry'Dog by attaching the four press studs • provided; Figure 18 – Assembly of the floor mat...
- Page 17 Assemble the cover by attaching it to the module using the press studs and Velcro • fasteners shown in figure 19; Figure 19 – Location of buttons and Velcro...
- Page 18 Figure 20 – Assembly of the textile shell and the cover If you wish to use the Carry'Dog without its cover, simply do not attach it to the textile. You can then roll the cover up and place it in the bottom of the box, attaching it in place with the elastic straps (see Figure 21).
- Page 19 You will find in Figure 21, all of the different storage elements in which to place the accessories of your Carry'Dog such as the bowl and the rolled-up cover. Pockets bowl Leash/ harness attachment loop Elastic straps Rolled-up cover Figure 21 – Storage elements of the Carry’Dog...
-
Page 20: Using The Carry'dog
Before making journeys with your dog in the Carry’Dog, we advise you to accustom your dog to this form of travel. Here are a few tips that may help you: Park your AddBike using the parking brake, the tilting-wheels lock and/or the kickstand of your bike. -
Page 21: Uninstalling The Carry'dog Module
9. Assistance in case of problems If a problem occurs with your Carry'Dog, please contact the AddBike company (support@addbike.fr) or your dealer. We will help you as much as possible in order to solve the problem as soon as... - Page 22 You can consult a list of retailers of AddBike products, trained in their assembly and maintenance, on www.add-bike.com.
- Page 24 61 cours de la République 69100 VILLEURBANNE, FRANCE You may order additional user guides from AddBike. This user guide has been drafted with the utmost care. If you have any proposals to improve the clarity of this document, we would appreciate it if you...
Need help?
Do you have a question about the Carry’Dog and is the answer not in the manual?
Questions and answers