
Related Manuals for Menzi Muck IHI 12VXE


Summary of Contents for Menzi Muck IHI 12VXE
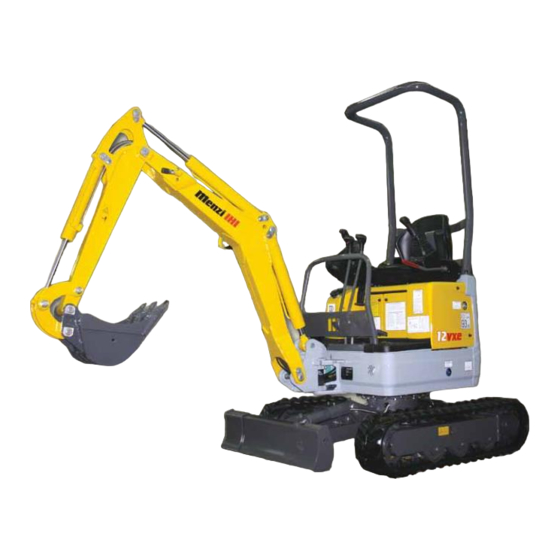
- Page 1 Menzi IHI 12vxe Operator’s manual Menzi Muck AG Telefon +41 (0)71 727 12 12 9451 Kriessern/Switzerland Fax +41 (0)71 727 12 13 www.menzimuck.com info@menzimuck.com...
- Page 2 ! ! ! ! " #$$ $ " #$$ $ " #$$ $ " #$$ $ $% $% $% $%& & & & $) *$*$)+...
- Page 3 SCHEDULED MAINTENANCE Proper maintenance is essential to long service life and optimal operation. IHIMER has scheduled a series of controls and work to be done at our authorised service centres. WARNING: Scheduled services are required by the Manufacturer. Failure to observe this requirement voids the warranty.
- Page 4 JOB N° 2 SERVICE JOB (*) notes : ____________________________________________________________________________ ______________________________________________________________________________________________ ______________________________________________________________________________________________ ______________________________________________________________________________________________ ______________________________________________________________________________________________ STAMP AND SIGNATURE DONE AT HOURS : ________ DATE : _________________ _____________________________ JOB N° 3 SERVICE JOB (*) notes : ____________________________________________________________________________ ______________________________________________________________________________________________ ______________________________________________________________________________________________ ______________________________________________________________________________________________ ______________________________________________________________________________________________ STAMP AND SIGNATURE DONE AT HOURS : ________ DATE : _________________ _____________________________...
- Page 5 JOB N° 6 SERVICE JOB (*) notes : ____________________________________________________________________________ ______________________________________________________________________________________________ ______________________________________________________________________________________________ ______________________________________________________________________________________________ ______________________________________________________________________________________________ STAMP AND SIGNATURE DONE AT HOURS : ________ DATE : _________________ _____________________________ JOB N° 7 SERVICE JOB (*) notes : ____________________________________________________________________________ ______________________________________________________________________________________________ ______________________________________________________________________________________________ ______________________________________________________________________________________________ ______________________________________________________________________________________________ STAMP AND SIGNATURE DONE AT HOURS : ________ DATE : _________________ _____________________________...
- Page 6 JOB N° 10 SERVICE JOB (*) notes : ____________________________________________________________________________ ______________________________________________________________________________________________ ______________________________________________________________________________________________ ______________________________________________________________________________________________ ______________________________________________________________________________________________ STAMP AND SIGNATURE DONE AT HOURS : ________ DATE : _________________ _____________________________ JOB N° 11 SERVICE JOB (*) notes : ____________________________________________________________________________ ______________________________________________________________________________________________ ______________________________________________________________________________________________ ______________________________________________________________________________________________ ______________________________________________________________________________________________ STAMP AND SIGNATURE DONE AT HOURS : ________ DATE : _________________ _____________________________...
- Page 7 DECLARATION OF CONFORMITY (ORIGINAL) (Directive 2006/42/EC , Annex II, 1A) 2) Manufacture: IHIMER S.p.A. 3) Address: località CUSONA - 53037 SAN GIMIGNANO (SI) - ITALY 4) Technical file compiled by: IHIMER S.p.A. Technical department manager 5) Address: località CUSONA - 53037 SAN GIMIGNANO (SI) - ITALY 6) Hereby we declare that the machine category: EARTH-MOVING MACHINERY / HYDRAULIC EXCAVATOR 12VXE...
- Page 8 IITALIAN GERMAN (Traduzione) (Ubersetzung) DICHIARAZIONE “CE” DI CONFORMITÁ EG-KONFORMITÄTSERKLÄRUNG (Direttiva 2006/42/CE,allegato II, 1A) (Direktive 2006/42/EG, Nachtrag II, 1A) Fabbricante: Hersteller: Indirizzo: Adresse: File tecnico compilato da: Direttore tecnico IHIMER S.p.A. Technische Datei erstellt von: Technischer Leiter IHIMER S.p.A. Indirizzo: Adresse: Dichiara che la macchina categoria: escavatore idraulico Erklärt hiermit, dass die Maschine-Kategorie : bagger Tipo :...
- Page 9 FOREWORD This manual provides all the procedures and instructions required for operating, checking and servicing the excavator. The procedures are designed to ensure the best productivity, efficiency and safety. Bear in mind the following rules: • Keep the manual on board the machine in the provided compartment or in the pocket in the operator’s seat.
-
Page 10: Table Of Contents
CONTENTS FOREWORD CONTENTS SAFETY INFORMATION 1. SAFETY MEASURES GENERAL INFORMATION ..........................1-1 GETTING ON AND OFF THE MACHINE......................1-5 BEFORE STARTING THE ENGINE........................ 1-6 STARTING THE ENGINE ..........................1-6 BEFORE OPERATING THE MACHINE......................1-7 MANEUVERING THE EXCAVATOR ......................1-8 DRIVING SAFELY............................ - Page 11 4. ANALYSING FAULTS TROUBLESHOOTING ............................ 4-1 5. HYDRAULIC SYSTEM DIAGRAM HYDRAULIC CIRCUIT DIAGRAM ........................5-1 6. ELECTRICAL CIRCUIT DIAGRAM ELECTRIC SYSTEM DIAGRAM ........................6-1 7. SPECIFICATIONS GENERAL SPECIFICATIONS ........................7-1 DIMENSIONS OF MACHINE .......................... 7-3 WORK AREA ..............................7-4 WEIGHT DIAGRAM – RANGE - HEIGHT ....................... 7-6...
-
Page 12: Safety Information
SAFETY INFORMATION This manual is a safe, practical guide to the safe operation and control of the machine. The machine has been designed and manufactured for digging and loading earth, inerts and similar material, small demolitions and restructuring. It is mainly used in construction and earth moving in general. It can also be used for agriculture to perform all those jobs requiring working in small spaces. -
Page 13: Safety Measures
SAFETY MEASURES SAFETY WARNINGS this section explains the safety warnings in the manual and posted on the machine itself. Check the plates bearing these warnings from time to time. If they are damaged, clean or replace them. For replacements, contact your dealer with the code number (see spare parts catalogue). Note that the provided safety warnings cannot cover all types of hazard encountered in using the machine. - Page 14 SAFETY MEASURES FAMILIARISE YOURSELF WITH Wrong! INSTRUCTIONS AND WARNINGS. This manual and the plates and stickers on the machine give the information required for operating it safely and properly. The user must familiarise himself with this information; failure to do so may result in serious accidents.
- Page 15 SAFETY MEASURES CHECK YOUR EXCAVATOR Right! Before starting work, walk around and check the excavator and make sure that there are no persons or obstacles in the work area. Right! NEVER TAKE ANYTHING Right! GRANTED Today, as you start work, do not assume that everything is OK, only because it was all OK yesterday evening.
- Page 16 SAFETY MEASURES Right! BE CAREFUL OF PUBLIC UTILITY LINES AND PIPES Before starting work, inspect the work area. identify all gas, service, sewer, overhead and underground electrical lines, and any other obstacles and hazards. The worksite supervisor is responsible for marking the locations of all underground utility lines to prevent accidents.
-
Page 17: Getting On And Off The Machine
SAFETY MEASURES MAINTAIN GOOD VENTILATION Do not use the machine for indoor works. Take all precautions to vent exhaust gas externally before starting the engine if working in a hole in the ground, tunnel or trench. In such a place, the air trends to stagnate. Breathing exhaust gas is very dangerous. -
Page 18: Before Starting The Engine
SAFETY MEASURES 1-3 BEFORE STARTING THE ENGINE Right! Put in neutral TAKE THE FOLLOWING PRECAUTIONS Make sure that there are no persons or obstacles in the work area. Put the gear into neutral. Make sure the levers are in NEUTRAL before starting the engine. -
Page 19: Before Operating The Machine
SAFETY MEASURES 1-5 BEFORE OPERATING THE MACHINE Right! IMMEDIATELY AFTER STARTING THE ENGINE Check all instruments. • Make sure the work area is safe. • Operate all levers to check them. • Listen for strange noises. • Check the accelerator lever. •... -
Page 20: Maneuvering The Excavator
SAFETY MEASURES Wrong! 1-6 MANEUVERING THE EXCAVATOR ALWAYS WORK IN OBSERVANCE OF SAFETY REGULATIONS. Take great care when operating the machine. Operating the machine jerkily can damage it and reduce its efficiency. Always observe regulations governing safety in the workplace. OPERATE THE CONTROL LEVERS Wrong! PROPERLY... - Page 21 SAFETY MEASURES BEWARE OF ELECTRICAL LINES AND CABLES Take care not to touch or even come close to overhead cables with the machine’s arm. Check the machine’s maximum height and radius of action. If working in the vicinity of overhead cables, keep a distance from them of at least 5 metres.
- Page 22 SAFETY MEASURES DO NOT ALLOW ANYONE TO CLIMB UP ONTO THE MOVING PARTS OR Wrong! THE LOAD ITSELF Hydraulic excavators are designed for digging and are not equivalent to cranes. Digging tools can fall to the ground in numerous circumstances. Hence: DO NOT lift, slew or lower loads while anyone is beneath them, and do not permit anyone to climb onto the digging tools while they are moving.
- Page 23 SAFETY MEASURES LOADING A TRUCK Wrong! If possible, load trucks from the rear or sides. Dropping the load from a “considerable height” directly into the truck is very hazardous. Use the bucket’s tipping motion to empty it. NEVER pass the load over the truck’s cab. ALWAYS check that the driver is not inside the cab and is out of the unloading area.
- Page 24 SAFETY MEASURES Right! ALWAYS USE A FLAG MAN Only use signals which are familiar to everyone. Always follow the signals given by a single person. DO NOT GIVE RIDES Wrong! The excavator is single-person machine and only one person may be at the controls at any time. Do not transport persons or allow them to climb up while the machine is working.
- Page 25 SAFETY MEASURES Wrong! DO NOT BANG THE BUCKET AGAINST THE SIDES OF THE DIG Take care not to bang the bucket against the sides of the dig. This can happen when the machine is being loaded and loaded alternately. Move the bucket slowly and carefully.
- Page 26 SAFETY MEASURES Wrong! DO NOT OVERLOAD THE MACHINE Do not overload any of the hydraulic cylinders to the extent of tripping a safety valve. Such overloads overheat the hydraulic fluid and reduce the service life of the hydraulic componentry. Wrong! BREAKAGES DUE TO FALLS Do not apply digging force to such an extent that the rear of the machine lifts off the ground and then drops back...
- Page 27 SAFETY MEASURES USING THE MACHINE TO BREAK Wrong! A PATH CAN CAUSE DAMAGE Do not advance or retreat with the bucket touching the ground or dug into it to level it. SHOVEL STABILISER WHEN WORKING Wrong! When digging, the shovel can be used as a stabiliser. Proceed as follows: Lower the shovel and check that it is firmly in •...
- Page 28 SAFETY MEASURES TOPS PROTECTS Wrong! OPERATOR AGAINST CRUSHING WHEN TIPPING OVER The machine is equipped either with a standard TOPS cab (Tip Over Protection System) or standard TOPS roof. ALWAYS fasten your seat belt when using the machine. Never jump out of cab NEVER jump out of the machine if it tips over;...
- Page 29 SAFETY MEASURES SOLID SUPPORT FOR SAFE OPERATION Right! Level the ground in the work area to provide a stable support for the machine. If you have to operate the machine on the verge of a road or on a slope, make sure to check the slope/roughness of the ground and the machine’s equilibrium to avoid it slipping or tipping over.
- Page 30 SAFETY MEASURES CHECK YOUR SUPPORTS WHILE Wrong! SLEWING Check the level of the stabilizers when slewing to prevent the machine tipping over. TAKE CARE WHEN OPERATING MACHINE WITH TRACKS Wrong! SIDEWAYS Since the width of each track is less than its length, the vehicle is less stable laterally than along its length.
- Page 31 SAFETY MEASURES OPERATING LIMITS Wrong! The machine should be run on flat ground, but if digging on sloping ground, make sure that the tracks are in line with the slope and not across it. If you have to work on soft, rough or sloping ground, take the greatest care not to tip the machine over.
- Page 32 SAFETY MEASURES HANDLING LOADS Right! One person must assume the responsibility for all aspects of lifting loads. In particular, he is responsible for: the operator, machine, other persons, stability of the load and the work area. He must also evaluate risks, be familiar with procedures...
- Page 33 SAFETY MEASURES LIFTING TILTING LOWER STRUCTURE Wrong! It is dangerous to raise the machine too high and in the wrong direction. If you attempt to raise the machine too high or incorrectly, levering against the ground with the arm to the side of the excavator, the tracks may raise off the ground and the machine tip over.
-
Page 34: Driving Safely
SAFETY MEASURES 1-7 DRIVING SAFELY ALWAYS MONITOR DIRECTION OF TRAVEL Wrong! ALWAYS check in which direction the superstructure of the machine is turned before operating the travel lever. The machine can easily move in the opposite direction if the superstructure is turned backwards. Right! OVERHEAD CLEARANCE ALWAYS look out for overhead obstacles and make... - Page 35 SAFETY MEASURES TAKE GREAT CARE WHEN Right! DRIVING ON SLOPES. When moving on slopes, keep the bucket at 200 to 300 mm (A) off the ground. If the machine starts to slip or tip over, immediately lower the bucket and stop the machine.
- Page 36 SAFETY MEASURES DRIVING SPECIAL CONDITIONS Wrong! If the ground is very rough or covered with rocks, drive very slowly. Check the travel speed with the engine speed. NEVER drive in such a way as to strain the tracks or the machine itself. Right! CORRECT POSITION OF DRIVE WHEEL...
-
Page 37: Towing
SAFETY MEASURES Wrong! STEER SLOWLY In conditions (non-emergency) ALWAYS steer as gradually as possible. Steering suddenly or around the machine’s own axis when stationary can reduce its service life. Steer slowly to avoid overloading the drive wheel, especially on uneven, loose ground. 1 - 8 TOWING TOWING THE MACHINE If the machine gets stuck in soft ground and cannot be... -
Page 38: Transport
SAFETY MEASURES 1 - 9 TRANSPORT Right! PRECAUTIONS WHEN LOADING/ UNLOADING THE EXCAVATOR ALWAYS load and unload the dumper on level ground. ALWAYS use ramps which are strong, wide, long and thick enough for the machine. Remove any ice, snow or loose material from the ramps and truck load bed before loading the machine. -
Page 39: Parking
SAFETY MEASURES 1 - 10 PARKING Wrong! SLOPES AND EMBANKMENTS NEVER LEAVE THE MACHINE PARKED on or near to an embankment, or on the edge of a dig or quarry. They may collapse under its weight. Moe the machine away from such dangerous areas when it is to left unused for a period of time. -
Page 40: Maintenance
SAFETY MEASURES 1 - 11 MAINTENANCE Right! SCHEDULED MAINTENANCE Maintenance may be hazardous if the proper precautions are not observed. Maintenance staff must be aware of the risks and observe the safety procedure. Before doing maintenance or repair work, consult the instruction manual. Before servicing the machine, shut off the engine. - Page 41 SAFETY MEASURES BEWARE CRUSHING Wrong! SHEARING HAZARDS Before ANY adjustments or service, stop the engine and immobilise the machine. NEVER LEAN WINDOWS The operator must keep all parts of his body inside the Wrong! cab. Wrong! The excavator arm may fall if the control levers are actuated accidentally.
- Page 42 SAFETY MEASURES Wrong! FIRE AND EXPLOSIONS Always keep fuel, lubricants and cooling fluids away from heat and flames. Many such fluids are extremely flammable. NEVER refuel or grease the machine with the engine running. NEVER SMOKE while refueling. DO NOT SMOKE while refuelling or in the vicinity of Right! flammable materials.
- Page 43 SAFETY MEASURES ALWAYS DISCHARGE RESIDUAL PRESSURE WHEN Wrong! DISASSEMBLING HYDRAULIC UNIONS Before disconnecting a hydraulic line, make sure that: the arm is lowered to the ground; the engine is off; all pressurized air has been discharged from the hydraulic reservoir; the control levers have been moved back and forth several times to lower the pressure in the cylinders.
- Page 44 SAFETY MEASURES BEWARE ROTATING MOVING PARTS Wrong! DO NOT approach moving or rotating parts like belts and fans. Do not approach any objects to moving or rotating parts. Doing so can result in serious accidents. Wrong! BE CAREFUL OF HOT PARTS OF THE ENGINE.
-
Page 45: Safety Labels And Signs
SAFETY MEASURES 1-12 SAFETY LABELS AND SIGNS The machines bear various safety plates and lables. We describe their locations and the hazards they warn of in this section. Make sure that all safety labels are legible. Clean and replace illegible signs. When cleaning the labels use a cloth, water and soap Do not use solvents or petrol. - Page 46 SAFETY MEASURES Symbol Warning, Symbol Warning, illustrated explanation illustrated explanation Warning! sign indicates electrocution hazard if the Read manual before machine is used close to operating, servicing electrical lines. transporting the machine. Always maintain the safety distance given in the manual. The sign indicates the hazard of The sign indicates the hazard impact or crushing if the machine...
- Page 47 SAFETY MEASURES Symbol Warning, Symbol Warning, illustrated explanation illustrated explanation sign indicates electrocution hazard due to high voltage lines. Refer to the manual for safety measures The sign indicates the burn hazard due to radiator water hydraulic fluid radiator/reservoir are opened when the fluids in question are still hot.
-
Page 48: Operating Instructions
OPERATING INSTRUCTIONS 2 - 1 DESCRIPTIONS (1) Bucket (13) Silencer (25) Control valve (2) Bucket attachment (14) Diesel engine (26) Track roller (3) Arm attachment (15) Radiator (27) Slewing engine (4) Tooth (16) TOPS roof (28) Fifth wheel (5) Bucket cylinder (17) Air cleaner (29) Track tensioner (6) Arm... -
Page 49: Instruments And Controls
OPERATING INSTRUCTIONS 2 - 2 INSTRUMENTS AND CONTROLS (S) Instrument panel (21) Shovel / carriage expand lever (12) Worklamp switch (22) LH lever (13) Buzzer (23) RH lever (14) Engine starter (24) Travelling pedals (15) Engine throttle lever (25) Arm slew control button (16) Control locking lever (26) Carriage expand button (17) Double speed button... - Page 50 OPERATING INSTRUCTIONS (S) INSTRUMENT PANEL (1) Engine oil pressure warning lamp. (2) Battery charge warning lamp. (3) Glowplugs preheating warning lamp. (4) Engine water temperature warning lamp. (5) Fuel reserve warning lamp. (6) Hydraulic fluid temperature warning lamp. (7) Air cleaner warning lamp. (8) Worklight warning lamp (9) Fuel level.
- Page 51 OPERATING INSTRUCTIONS (5) F UEL RESERVE WARNING LAMP The lamp turns on when the fuel gauge (9) is in the red. Top up the tank immediately. (6) H YDRAULIC FLUID TEMPERATURE WARNING LAMP The lamp turns on to indicate the hydraulic fluid is too hot. The machine may have been used too heavily for too long or the cooling circuit radiator may be dirty.
- Page 52 OPERATING INSTRUCTIONS 3. SWITCHES (12) W ORKLIGHT Pressing switch turns the arm worklight on. Press it the opposite way to switch it off. The worklight warning lamp (8) turns on and off with the worklight itself. Interruttore faro Worklight switch Horn Clacson (13) H...
- Page 53 OPERATING INSTRUCTIONS 4. MACHINE CONTROLS (15) E NGINE THROTTLE LEVER Decelerate ( Push the lever forwards to reduce the engine speed. Accelerate ( Pull the lever back to increase engine speed. Throttle lever Leva acceleratore (16) LH CONTROL LOCK LEVER WARNING HEN GETTING ON OR OFF THE MACHINE MAKE SURE...
- Page 54 OPERATING INSTRUCTIONS (18) T (LH) RAVEL LEVER Trasferimento Backwards travel Trasferimento (19) T (RH) RAVEL LEVER indietro Forwards travel in avanti WARNING EFORE USING CONTROLS CHECK DIRECTION OF THE CARRIAGE OTE THAT THE LEVERS OPERATE IN REVERSE WHEN THE SHOVEL IS AT THE REAR LWAYS TRAVEL WITH THE SHOVEL AT THE FRONT Forwards travel...
- Page 55 OPERATING INSTRUCTIONS (22) LH LEVER Slew superstructure and control arm. 5 Gasket 3 Slew turret right Extend arm: 1 Arm Push lever forwards extended Retract arm: Pull lever back. 2 Arm Slew right: retracted 4 Slew turret left Move lever to right. Slew left: Move lever to left.
- Page 56 OPERATING INSTRUCTIONS (25) A RM SLEW CONTROL BUTTON Arm slew 1 Slew arm right button (R) The LH lever mounts the arm slew button. To slew the arm, use the turret slew functions. Slew arm right: 2 Slew arm left Press the button (R) and move the lever to the right.
- Page 57 OPERATING INSTRUCTIONS (28) C ONTROL PANEL Locked WARNING HEN GETTING ON OR OFF THE MACHINE MAKE SURE THE LEVER LOCK. IS SET TO Unlocked UNLOCK, F IT IS SET TO THE UPPER SECTION OF THE MACHINE MAY SLEW SWING AROUND AND CAUSE SERIOUS ACCIDENTS Locked: Pull the lever (16) up, and lift the control panel (28), to lock the machine.
-
Page 58: Controls Before Starting Up
OPERATING INSTRUCTIONS 2 - 3 CONTROLS BEFORE STARTING UP Every day, before starting up, run the following checks. General inspection Check for : loose fasteners (arm split pin, bucket tooth bolts, fifth wheel bolts, travel drive gear bolts, lower and upper roller, etc.), dirt (heat exchanger, dust indicator, sludge filter, etc.) , oil/coolant leaks, broken/worn parts. -
Page 59: Starting The Engine
OPERATING INSTRUCTIONS 2 - 4 STARTING THE ENGINE Locked Once the above checks have been run, you may start the Bloccata engine. STARTING AT NORMAL TEMPERATURE WARNING Sbloccata Unlocked 1 Do not run the starter motor for more than 15 sec. a time. -
Page 60: Using The Battery And Cables To Start
OPERATING INSTRUCTIONS 2 - 5 USING THE BACKUP BATTERY AND CABLES TO START WARNING THE BATTERY CAN EMIT FLAMMABLE FUMES - EXPLOSION HAZARD When using another machine for starting make sure the two machine are not in contact with each other. Always connect the positive (+) of he machine’s battery with the positive (+) of the backup battery and the negatives (-) with each other. -
Page 61: Preheating The Machine
OPERATING INSTRUCTIONS 2 - 6 PREHEATING THE MACHINE WARNING Run the engine at low speed until the oil pressure warning lamp goes out. If this doesn’t happen within 10 seconds, stop the engine and resolve the problem before starting the engine again. -
Page 62: Control Levers
OPERATING INSTRUCTIONS 2 - 7 CONTROL LEVERS type A levers - ISO functions CONTROLS MOVEMENT OF CONTROLS MOVEMENT OF MACHINE Raise 1 Alza 2 Abbassa Lower Raise 1 Alza RH control lever Leva operativa LARGE destra 2 Abbassa Lower 2 Rilascia Release Leva operativa RH control lever... - Page 63 OPERATING INSTRUCTIONS type A levers - ISO functions CONTROLS MOVEMENT OF CONTROLS MOVEMENT OF MACHINE Arm slew Slew right button (R) 1 Rotazione a Right pivot turn destra SLEW Slew left 2 Rotazione Left pivot turn a sinistra Press the button (R) and slew the arm with the LH lever Raise 1 Alza...
- Page 64 OPERATING INSTRUCTIONS 2 - 8 OPERATION OF THE AUXILIARY HYDRAULIC CIRCUIT FOR SPECIAL ACTUATORS AND INTERCHANGEABLE EQUIPMENT WARNING ’ O SELECT ANY HYDRAULIC HAMMER FORK OR SPECIAL ACTUATOR APPLICABLE TO THE MACHINE BODY CONSULT WITH YOUR LOCAL DEALER PRECAUTIONS WHEN USING SPECIAL ACTUATORS AND INTERCHANGEABLE EQUIPMENT. HEN USING INTERCHANGEABLE EQUIPMENT MAKE SURE THE EQUIPMENT S OPERATION AND...
- Page 65 OPERATING INSTRUCTIONS WARNING Port B (PF ½) Porta B (PF ½) (return) (ritorno) The single action hoses are located on both sides of the small arm (see diagram). To use the actuators, connect the high pressure (delivery) hose to port “A” and the low pressure (return) hose to port “B”.
-
Page 66: Moving The Machine
OPERATING INSTRUCTIONS 2 - 9 MOVING THE MACHINE WARNING O PREVENT ACCIDENTS • AKE SURE NO ONE IS WORKING ABOVE OR IN THE IMMEDIATE VICINITY OF THE MACHINE UPERVISE THE MACHINE THROUGHOUT ALWAYS CHECK THE ORIENTATION OF THE TURRET BEFORE OPERATING THE TRAVEL LEVERS •... - Page 67 OPERATING INSTRUCTIONS Steer STEERING forwards To steer, operate the levers as follows. Steer backwards 1. Steering left Push the RH lever (1) forwards to turn left when travelling forwards, and back to turn left when travelling backwards. LH track stationary TURN LEFT Steer forwards...
- Page 68 OPERATING INSTRUCTIONS TRAVEL PEDALS The travel levers are equipped with pedals for operation Travel levers with hands free. This is useful for moving the machine while digging. HIGH SPEED TRAVEL WARNING Travel pedals O NOT CHANGE THE TRAVEL SPEED WHEN DRIVING DOWNHILL NEVER DOUBLE...
-
Page 69: Retracting/Expanding The Carriage
OPERATING INSTRUCTIONS 2 - 10 RETRACTING/EXPANDING THE CARRIAGE Contracting and expanding the carriage This machine is equipped with a spanner mechanism (expansion/retraction). Use the spanner mechanism as indicated below. 1. Place the arm to the rear of the machine (drive motor side). -
Page 70: Lowering The Arm When The Engine Is Off
OPERATING INSTRUCTIONS 2 - 11 LOWERING THE ARM WHEN THE ENGINE IS OFF WARNING F YOU SWITCH OFF THE ENGINE OR EXPERIENCE A HYDRAULICS MALFUNCTION WITH THE ARM RAISED • SAFE THE MACHINE BY LOWERING THE ARM TO THE GROUND AKE SURE THE AREA IS CLEAR BEFORE LOWERING THE ARM MANUALLY •... -
Page 71: Lifting The Machine
OPERATING INSTRUCTIONS 2 - 13 LIFTING THE MACHINE WARNING IFTING THE MACHINE INCORRECTLY CAN CAUSE DAMAGE INJURY AND DEATH SE ADEQUATE STEEL ROPES AND EQUIPMENT FOR LIFTING HE LIFTING CABLES MUST BE LONG • ENOUGH TO AVOID CONTACT WITH THE MACHINE ITSELF ALONG THEIR LENGTH SE LIFTING EQUIPMENT ABLE TO SUPPORT THE WEIGHT OF THE MACHINE •... -
Page 72: Loading And Unloading The Machine
OPERATING INSTRUCTIONS 2 - 14 LOADING AND UNLOADING THE MACHINE DANGER OAD AND UNLOAD THE MACHINE ON LEVEL STABLE GROUND • SE RAMP WHICH IS SUFFICIENTLY LONG WIDE AND THICK TO SUPPORT THE WEIGHT OF THE MACHINE • O PREVENT SKIDDING ON THE RAMPS AND SLIDING ABOUT DURING TRANSPORT CLEAN ALL GREASE •... -
Page 73: Precautions When Using Rubber Tracks
OPERATING INSTRUCTIONS 2 - 15 PRECAUTIONS WHEN USING RUBBER TRACKS DANGER UBBER TRACKS CAN BE DAMAGED OR WORN BY ADVERSE WORKING CONDITIONS T IS THUS IMPORTANT TO ACCOUNT FOR THE WORKING CONDITIONS AND OPERATIVITY OF THE MACHINE STRUCTURE OF RUBBER TRACKS Rubber breakage The figure to the right shows the structure of rubber... -
Page 74: Driving Through Low Openings
OPERATING INSTRUCTIONS 2 - 16 DRIVING THROUGH LOW OPENINGS If you have to drive through a low opening, you can fold down the top of the TOPS without removing it completely. FOLDING DOWN THE UPPER SECTION OF THE TOPS Perno 1.
Need help?
Do you have a question about the IHI 12VXE and is the answer not in the manual?
Questions and answers