Table of Contents
Advertisement
Available languages
Available languages
Quick Links
Altura Stroller
Avila Stroller
Models 01900, 01951, CV042 & CV069
User Guide
Questions? Comments?
Missing Parts? Contact us:
OR
www.coscojuvenile.com
©2009 Dorel Juvenile Group.
All Rights Reserved. Todos derechos
reservados.
www.djgusa.com (800) 544-1108
www.coscojuvenile.com
Made in CHINA. Hecho en CHINA.
Styles and colors may vary.
Los estilos y los colores pueden variar.
Distributed by (distribuido por) Dorel Juvenile
Group, Inc.,
Spanish Guide: page 13
2525 State St., Columbus, IN 47201-7494
Guía en español: página 13
Dorel Distribution Canada,
873 Hodge, St. Laurent, QC H4N 2B1
10/18/09 4358-4433E
Advertisement
Table of Contents

Related Manuals for Cosco Altura


Summary of Contents for Cosco Altura
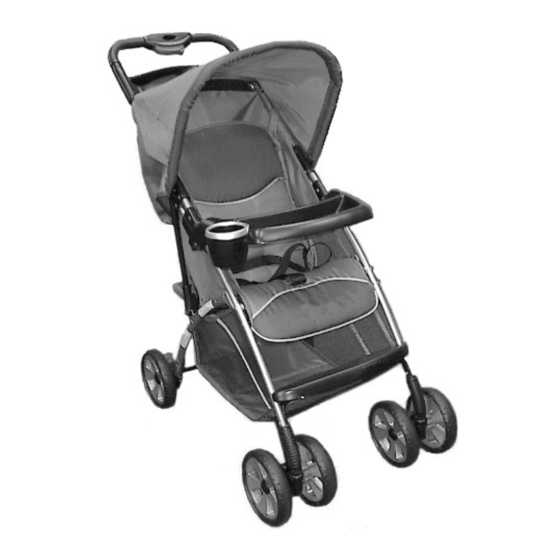
- Page 1 Altura Stroller Avila Stroller Models 01900, 01951, CV042 & CV069 User Guide Questions? Comments? Missing Parts? Contact us: www.coscojuvenile.com ©2009 Dorel Juvenile Group. All Rights Reserved. Todos derechos reservados. www.djgusa.com (800) 544-1108 www.coscojuvenile.com Made in CHINA. Hecho en CHINA. Styles and colors may vary.
- Page 2 WARNING FOR THE SAFETY OF YOUR CHILD, PLEASE READ THE FOLLOWING WARNINGS AND ASSEMBLY INSTRUCTIONS AND KEEP FOR FUTURE REFERENCE. • Adult assembly required. • CAUTION: Keep small parts away from children during assembly. • NEVER LEAVE CHILD UNATTENDED. ALWAYS keep child in view when in stroller.
-
Page 3: Parts List
Parts List Styles and colors may vary. 1 Rear axle 2 Hubcaps 2 Front wheels 2 Rear wheels Child’s tray 4 Washers 2 Cotter pins Parent’s tray... - Page 4 Keep these instructions for future use • Lay out and identify all parts. • Hardware for rear wheel assembly is located on axle. • Do not return this product to the place of purchase. If any parts are missing, call Consumer Relations at (800) 544-1108.
-
Page 5: Assembling Your Stroller
Assembling Your Stroller 4. Insert handle into frame. Both sides must be inserted at the same time until they click. Pull on each handle to make sure handles are securely snapped into fittings. NOTE: Stroller was disassembled for shipping purposes only, once assembled stroller must not be taken apart. -
Page 6: Install Rear Wheels
Assembling Your Stroller Assemble Stroller Frame 7. Hook D-rings onto each side of the stroller frame. Install Rear Wheels NOTE: Hardware for rear wheel assembly is located on axle. 1. Remove cotter pin and one washer from axle leaving one washer on the axle. With the spokes facing out, slide a wheel onto the axle. -
Page 7: Install Front Wheels
Assembling Your Stroller 3. Turn stroller upside down. Hold the axle assembly with the brakes toward the handlebars. Push onto frame until buttons “snap” into place (Figure 4). Button Install Front Wheels 1. Slide front wheel onto frame tube. Wheel will click when installed properly (Figure 1). - Page 8 Assembling Your Stroller Install Parent’s Tray 1. Open canopy. Snap parent’s tray onto handlebar tubes. Install Child’s Tray 1. Guide tray tabs into slots on stroller frame. Push until tray clicks into place. 2. To remove tray, pull out finger tabs on both sides and slide tray out.
-
Page 9: Using Your Stroller
Using Your Stroller To Use Brakes 1. Step down onto red levers on both rear wheels. To park stroller, BOTH BRAKES MUST BE LOCKED. Lift up levers to unlock brakes. To Adjust Seat Position 1. Unbuckle recline strap behind backrest. 2. - Page 10 Using Your Stroller To Use Restraint System WARNING • NEVER LEAVE CHILD UNATTENDED. ALWAYS keep child in view when in stroller. • AVOID SERIOUS INJURY from falling or sliding out. ALWAYS use seat belt. Check frequently to make sure it is secure. Belts must be threaded exactly as shown.
-
Page 11: To Use Canopy
Using Your Stroller 3. To tighten straps, pull out bottom loop (B) then pull on strap end. To loosen straps, pull out top loop (C) then pull out on buckle. If the straps should come out of the buckle, rethread as shown. To Use Canopy 1. -
Page 12: To Fold Stroller
Using Your Stroller To Fold Stroller 1. Lock rear brakes and remove your baby. Close canopy. Slide the red button on handlebar to the left and squeeze. 2. Hold the button in and push the handlebar down. 3. Hook red tab on the left of the handlebar onto post stroller frame tube. - Page 13 Stroller Care and Maintenance • To clean stroller fabric and seat pad, use a sponge or damp cloth with cold water and mild soap. Air dry only. Do not use harsh household cleaners or bleach to clean stroller. • Restraint and crotch straps should be surface washed and air dried only. Do not place in washing machine or dryer.
-
Page 14: One-Year Limited Warranty
One-Year Limited Warranty Dorel Juvenile Group, Inc. warrants to the original purchaser that this product (Altura/ Avila Stroller), is free from material and workmanship defects when used under normal conditions for a period of one (1) year from the date of purchase. Should the product contain defects in material or workmanship Dorel Juvenile Group, Inc., will repair or replace... - Page 15 Altura Carriola Avila Carriola Modelos 01900, 01951, CV042 & CV069 Guía del usuario ¿Preguntas? ¿Comentarios? ¿Faltan piezas? Comuníquese con nosotros: www.coscojuvenile.com ©2009 Dorel Juvenile Group. All Rights Reserved. Todos derechos reservados. www.djgusa.com (800) 544-1108 www.coscojuvenile.com Made in CHINA. Hecho en CHINA.
- Page 16 ADVERTENCIA POR LA SEGURIDAD DE SU HIJO, POR FAVOR LEA LAS SIGUIENTES ADVERTENCIAS E INSTRUCCIONES DE ENSAMBLE, Y GUÁRDELAS PARA CONSULTA FUTURA. • El armado debe ser realizado por un adulto. • PRECAUCIÓN: Durante el armado, mantenga las piezas pequeñas fuera del alcance de los niños.
-
Page 17: Lista De Piezas
Lista de piezas Los estilos y colores pueden variar. 2 Tapones de cubos 1 Eje trasero 2 Ruedas delanteras 2 Ruedas traseras Charola para el niño 4 Arandelas Charola para los padres 2 Pasadores de chaveta... - Page 18 Guarde estas instrucciones para consulta futura • Presente todas las piezas e identifíquelas. • Los elementos de ferretería para el armado de las ruedas traseras se encuentran en el eje. • No devuelva este producto al lugar donde lo compró. Si faltara alguna pieza, llame a Consumer Relations al (800) 544-1108.
- Page 19 Cómo ensamblar su carriola 4. Inserte el asa en el armazón. Ambos lados deben insertarse simultáneamente hasta que encajen en su lugar con un clic. Jale cada una de las asas para asegurarse que estén bien encajadas en su lugar. NOTA: La carriola se desarmó...
- Page 20 Cómo ensamblar su carriola Ensamble el armazón de la carriola 7. Enganche los anillos en D a cada lado del armazón de la carriola. Instale las ruedas traseras NOTA: Los elementos de ferretería para el armado de las ruedas traseras se encuen- tran en el eje.
- Page 21 Cómo ensamblar su carriola 3. Voltee la carriola boca abajo. Sostenga el ensamble del eje con los frenos hacia las asas del manubrio. Empuje contra el armazón hasta que los botones encajen en su lugar (Figura 4). Boton Instale las ruedas delanteras 1.
- Page 22 Cómo ensamblar su carriola Instale la charola para los padres 1. Abra la capota. Encaje la charola para los padres en los tubos del asa del manubrio. Instale la charola para el niño 1. Guíe las lengüetas de la charola dentro de las ranuras del armazón de la carriola.
-
Page 23: Uso De La Carriola
Uso de la carriola Para usar los frenos 1. Pise las palancas rojas de ambas ruedas traseras. Para estacionar la carriola, AMBOS FRENOS TIENEN QUE ESTAR PUESTOS. Levante las palancas para soltar los frenos. Para ajustar la posición del asiento 1. - Page 24 Uso de la carriola Para usar el sistema de cinturones ADVERTENCIA • NUNCA DEJE AL NIÑO SIN SUPERVISIÓN. SIEMPRE mantenga al niño a la vista cuando esté en la carriola. • EVITE UNA LESIÓN GRAVE por caída o resbalamiento. SIEMPRE use el cinturón de seguridad.
- Page 25 Uso de la carriola 3. Para apretar las correas, saque el lazo inferior (B) y luego jale el extremo de la correa. Para aflojar las correas, saque el lazo superior (C) y luego saque correa en la hebilla. Si las correas se salen de la hebilla, vuelva a pasarlas tal como se muestra.
-
Page 26: Para Plegar La Carriola
Uso de la carriola Para plegar la carriola 1. Ponga los frenos traseros y saque al bebé. Cierre la capota. Deslice hacia la izquierda el botón rojo del asa del manubrio y apriete. 2. Mantenga el botón apretado y empuje hacia abajo el asa del manubrio. -
Page 27: Piezas De Repuesto
Cuidado y mantenimiento de la carriola • Para limpiar la tela de la carriola y la almohadilla del asiento utilice una esponja o paño húmedo, agua fría y jabón suave. Secar al aire únicamente. No utilice limpiadores para el hogar abrasivos o blanqueadores para limpiar la carriola. •... -
Page 28: Garantia Limitada De Un Año
Garantia limitada de un año Dorel Juvenile Group, Inc. garantiza al comprador original que este producto (Altura / Avila Carriola) estará libre de defectos de material y mano de obra cuando se utilice bajo condiciones normales durante un periodo de un (1) año a partir de la fecha de compra. Si el producto tuviese defectos de material o mano de obra, Dorel Juvenile Group, Inc.
Need help?
Do you have a question about the Altura and is the answer not in the manual?
Questions and answers