Advertisement
Quick Links
Advertisement

Related Manuals for KneeRover Deluxe


Summary of Contents for KneeRover Deluxe
- Page 1 KneeRover® Deluxe Knee Cycle User Manual...
-
Page 2: Ongoing Maintenance
We recommend saving the tools that are provided with your KneeRover® product, as you may need them to provide ongoing maintenance. With rou- tine use, nuts and bolts on the KneeRover® knee walker can become loose. To ensure safe operation of your KneeRover® scooter, it is important to periodi- cally inspect for loose nuts and bolts and re-tighten as appropriate. - Page 3 KneeRover® Deluxe Knee Cycle - Tools & Parts List: The following tools and parts are included with your KneeRover® Deluxe Knee Cycle. Please follow assembly instructions for your specific KneeRover® model, using the tools and parts provided. Assembly videos for your KneeRover® model can also be found at: https://kneerover.com/pages/assembly-video...
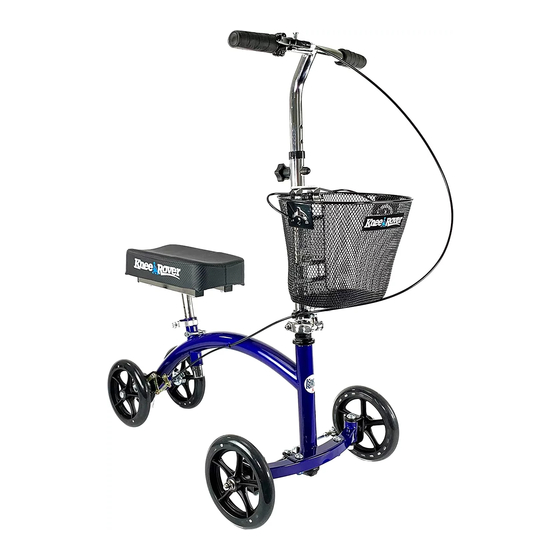
- Page 4 KneeRover® Deluxe Knee Cycle Set Up Instructions: Please follow the step by step instructions on the following pages to properly assemble your KneeRover® scooter. The diagram below identifies the key components of the scooter to aid with assembly. Visit https://kneerover.com/pages/assembly-video for assembly videos.
- Page 5 Step 1: Front Axle Assembly Please take your time to carefully complete all steps before operating your new KneeRover® scooter. First, place the front axle with 7.5” wheels under the scooter frame, ensuring the round bolts by the wheels are facing up (Top). Align the axle and frame holes, insert front axle bolts and tighten completely using the allen wrench provided (Bottom).
- Page 6 Step 2: Tie Rod Assembly The tie rod ends are already attached to the spindles/wheels. Bring the left tie rod (square hole) and place over the black guide and the right tie rod (round hole) under the black guide. Insert the bolt into the top tie rod so the head of the bolt is sitting flush (Top Left).
- Page 7 Step 3: Steering Column Assembly Raise the steering column up by pushing the clamp lever to the left allowing the column to raise all the way up (Top Left and Right). Raise the clamp lever upward in to the “U” slot and tighten by turning it clockwise (Bottom Left). Finally, push clamp lever down firmly to secure the steering column (Bottom Right).
- Page 8 Step 4: Handle Bar Assembly Please make sure the brake line is not twisted and the brake handle is facing forward. Insert the handle bar into the steering column (Left). Raise the handle bar to a comfortable position and insert the height adjustment knob into the hole and tighten (Right).
- Page 9 Step 6: Knee Platform Assembly The knee platform is designed to be used with either the right or left leg. Insert the knee platform post into the receptacle tube (Top Left). Next, set the knee platform at your desired height for use by inserting the locking pin through the aligned holes (Top Right).
- Page 10 Brake and Parking Brake Operation Your KneeRover® knee walker comes equipped with a Brake Lock/Parking Brake. To engage the brake, squeeze the brake lever on the handle bar. To apply the parking brake, squeeze brake handle firmly and while squeezing the brake handle press the silver button to engage the lock.
-
Page 11: Warranty
What is Covered? While the frame is covered for the life of the KneeRover®, some parts of the scooter are subject to normal wear and tear and depending on the use, may not last the lifetime of the scooter. The applicable warranty coverage for all parts are listed below. - Page 12 KneeRover® Knee Walker Safety Instructions: The following safety instructions and warnings are provided to educate the user on how to safely operate a knee walker. Knee Walkers are mobility devices designed to provide increased mobility during recovery from foot/ankle/lower leg surgery or injury.
- Page 13 Only use accessories and replacement parts authorized by the KneeRover® brand. Accessories designed by other manufacturers have not been tested by KneeRover® and are not recommended for use with KneeRover® products. As a reminder, this is a mobility / walking aid, not a recreational device.
- Page 14 SAFETY INSTRUCTIONS FOR OPERATING KNEE WALKER: As with any new physical activity, practice and common sense are necessary for successful use of the knee walker. Before operating the knee walker at normal walking speed, practice maneuvering and making turns at slow rates of speed to get familiar with the knee walker and how to best maintain balance.
- Page 15 DO NOT operate on inclines above 15 degrees (slight incline). Use Extreme Caution when operating the knee walker on any slopes, as there is risk of losing balance. It is best to avoid slopes. Only mount or dismount your knee walker on a level surface. DO NOT attempt to reach for objects while the knee walker is in motion.
- Page 16 Amazon or ebay, we would greatly appreciate a review once you’ve had a chance to use your new KneeRover® scooter. We hope we’ve earned a 4 or 5 star review - if not, please give us the opportunity to help you before leaving a review.
Need help?
Do you have a question about the Deluxe and is the answer not in the manual?
Questions and answers