
Subscribe to Our Youtube Channel
Related Manuals for Apex Digital Apex DT502


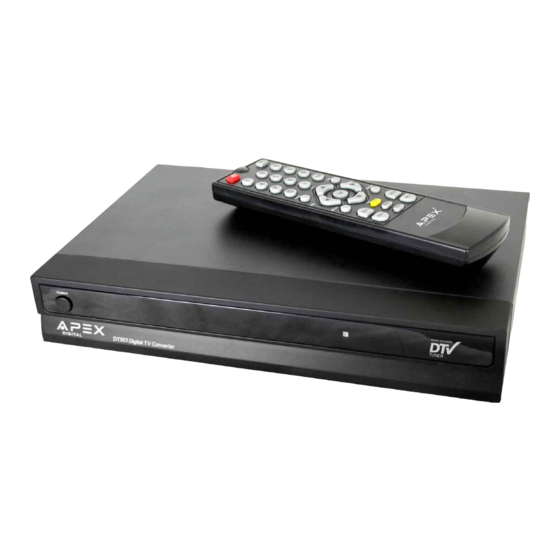
Summary of Contents for Apex Digital Apex DT502
- Page 1 ® Ver 1.4 6/08 s i m p l y r e m a r k a b l e ™ Digital TV Converter Box Caja Convertidora de TV Digital WITH Conversion Analogica DT502 User's Manual Manual del Usuario...
-
Page 2: Important Safety Information
Important Safety Information - TO PREVENT FIRE OR SHOCK HAZARD, DO NOT USE THIS PLUG WITH AN EXTENSION CORD, RECEPTACLE OR OTHER OUTLET UNLESS THE BLADES CAN BE FULLY INSERTED TO PREVENT BLADE EXPOSURE. - TO PREVENT FIRE OR SHOCK HAZARD, DO NOT EXPOSE THIS APPLIANCE TO RAIN OR MOISTURE. The lightning flash with arrowhead symbol, within an equilateral triangle, is intended to alert the user... - Page 3 Important Safety Information Read these instructions. Keep these instructions. Heed all warnings. Follow all instructions. Do not use this apparatus near water. Clean only with dry cloth. Do not block any ventilation openings. Install in accordance with the manufacturer’s instructions. Do not install near any heat sources such as radiators, heat registers, stoves or other apparatus (including amplifiers) that produce heat.
-
Page 4: Introduction / What's In The Box? / Specifications
Introduction Thank You for purchasing the DT502 digital TV converter box. It has been designed to bring you many years of viewing enjoyment from digital TV broadcasts when connected to a television that does not incorporate a digital tuner. Enjoy crystal clear quality that is free of ghosting and snowy interference. -
Page 5: Table Of Contents
Table of Contents Important Safety Information Introduction / What’s In The Box? / Specifications Table of Contents Remote Control Battery Installation... Remote Control Functions... Front / Rear Panel Overview... Connection to TV... Analog Pass-Through Quick Setup... Connection to Stereo... Zoom Functions... Quick Start Guide... -
Page 6: Remote Control Battery Installation
Remote Control Battery Installation Remote Control Battery Installation Remove the battery compartment cover. Load two fresh “AAA” batteries into the battery compartment. Make sure the batteries are inserted properly, matching polarity by referring to the symbols “+ -” marked in the battery compartment. Close the battery compartment cover. -
Page 7: Remote Control Functions
Remote Control Functions MUTE CH + MENU EXIT VOL - VOL + RECALL DISPLAY CH - GUIDE FAV + ZOOM SIGNAL FAV - ® ON / Standby Press to turn your converter box ON and Standby mode. Number Press to enter channel numbers and passwords. Sub Channel Selector Press to enter a sub channel number. -
Page 8: Front / Rear Panel Overview
Front & Rear Panel Overview DT502 (front view) Power ON / Standby (Green light - On) (Red light - Standy) Remote control sensor DT502 (rear view) TV out (RF Output) Channel 3/4 (Analog Pass-through) Antenna IN (RF Input) Channel 3/4 Switch Composite Video Output S-Video Output Audio (L/R) Output... -
Page 9: Connection To Tv
Connection to TV Composite (using supplied AV cables) ANTENNA IN TV OUT VIDEO CH 3 CH 4 S-VIDEO CH 3/4 & Analog Pass-Through yellow To TV Video Input To TV Audio L/R Input (using supplied audio cables) S Video ANTENNA IN TV OUT VIDEO CH 3... -
Page 10: Analog Pass-Through Quick Setup
The DT502 is equipped with a shared analog pass-through and it provides a way for you to receive analog broadcast without using a splitter. The TV Out (RF Out) serves both as the Channel 3/4 output and as the analog pass-through output. The output from this connector depends on if the unit is On (active) or it is in Standby (sleep) mode. -
Page 11: Connection To Stereo
Connection to Stereo You may connect the unit to your stereo system using the following method: Rear panel subject to modification white To Dolby Surround Equipped Receiver (L + R Audio Input) Front Left Front Right Speaker Speaker Center Channel Dolby Surround Connection Example Surround Left... -
Page 12: Zoom Functions
Due to the nature of digital broadcasts, the normal image displayed on your television may appear as a “windowbox” or “letterboxed” image. This is a normal condition based on signal transmission and programming. Press the ZOOM button on the remote control to minimize or eliminate the black bars on your TV display, if desired. -
Page 13: Quick Start Guide
Quick Start Guide Once all connections are made, follow this Quick Start Guide to begin viewing digital channels immediately. It is recommended that you read the entire manual to familiarize yourself with all of the functions avail- able to you. Installation Guide (Initial Setup Menu) When the converter box is turned on for the first time or has been reset to factory default, the Installation Guide will be displayed automatically. -
Page 14: On-Screen Menu (Guide)
On-Screen Menu - Guide The On-Screen Menu display is for accessing and setting up preferences for the DT502 Guide Guide menu consists of three options; Simple Guide, Full Guide and Reminder List. To display the correct information on Simple Guide, Full Guide, and Reminder List, your “Time Zone”... -
Page 15: On-Screen Menu (Channel)
On-Screen Menu - Channel The On-Screen Menu display is for accessing and setting up preferences for the DT502 Channel Channel category consists of two options; Auto Scan and Manual Channel Set Auto Scan Auto Scan Guide Channel Current Frequency: 803.00 MHz Setup Total Channels Found: Progress... -
Page 16: On-Screen Menu (Setup)
On-Screen Menu - Setup The On-Screen Menu display is for accessing and setting up preferences for the DT502 Setup Setup category consists of 7 options; Screen Setting, System Setting, Parental Control, Closed Caption, Time Zone, Smart Antenna, and Factory Default Screen Setting Screen Setting Guide... - Page 17 On-Screen Menu - Setup The On-Screen Menu display is for accessing and setting up preferences for the DT502 Parental Control (V-Chip) Guide TV rating Movie (MPAA) rating Channel Setup Info Select EXIT Exit MENU Previous Page TV-Y TV Rating Appropriate for all children TV-Y7 Allow All Appropriate for all children 7 and older...
- Page 18 On-Screen Menu - Setup The On-Screen Menu display is for accessing and setting up preferences for the DT502 Closed Caption (con’t) Closed Caption Guide Caption Type Customization Caption Size Standard Channel Foreground Color White Foreground Opacity Full Setup Background Color Blue Background Opacity Full...
-
Page 19: On-Screen Menu (Info)
On-Screen Menu - Info The On-Screen Menu display is for accessing and setting up preferences for the DT502 Info Info Menu displays the system information, software version, hardware version, and loader version. Display Bar 4-2 WX-Plus Eye Witness News Rating Info TV-PG EXIT Signal Bar... -
Page 20: Troubleshooting Guide
Troubleshooting Guide Check for a possible solution to a symptom before contacting a customer service representative. We recommend visiting our website at: www.apexdigitalinc.com for additional updates. *Antennaweb.org provides personalized information for choosing antenna type and orientation for your particular. Symptom Cannot receive certain channels through the antenna. -
Page 21: Legal Notice
FCC Part 15 This device complies with Part 15 of the FCC Rules. Operation of this product is subject to the following two\conditions: (1) this device may not cause harmful interference, and (2) this device must accept any interferencereceived, including interference that may cause undesired operation. -
Page 22: Limited Warranty
1YEAR PARTS / 90 DAY LABOR LIMITED WARRANTY WHO IS COVERED? Limited One (1) Year Parts Warranty - Apex Digital warrants the parts in this product against defects in material or workmanship for a period of one (1) year from the date of original retail purchase. - Page 23 ® Ver 1.4 6/08 s i m p l y r e m a r k a b l e ™ Digital TV Converter Box Caja Convertidora de TV Digital WITH Conversion Analogica DT502 User's Manual Manual del Usuario...
-
Page 24: Información Importante De Seguridad
Información importante de seguridad - PARA EVITAR INCENDIOS O DESCARGAS ELÉCTRICAS, NO UTILICE ESTE ENCHUFE CON CABLES DE EXTENSIÓN, TOMAS ELÉCTRICAS U OTROS TOMACORRIENTES SALVO QUE LAS CLAVIJAS PUEDAN INTRODUCIRSE COMPLETAMENTE PARA IMPEDIR SU EXPOSICIÓN. - PARA EVITAR INCENDIOS O DESCARGAS ELÉCTRICAS, NO EXPONGA ESTE DISPOSITIVO A LA LLUVIA NI A LA HUMEDAD. - Page 25 Información importante de Leer las instrucciones. Guardar las instrucciones. Prestar atención a todas las advertencias. Seguir todas las instrucciones. No utilizar este dispositivo cerca del agua. 6. Limpiar únicamente con un paño seco. 7. No obstruir ningún orificio de ventilación. Instalar según las instrucciones del fabricante.
-
Page 26: Introducción / ¿Qué Viene En La Caja? / Especificaciones
Introducción Gracias por comprar el conversor de TV digital DT502. Está diseñado para brindar muchos años de funcionamiento, para poder disfrutar de transmisiones de televisión digital cuando se lo conecta a un televisor que no cuenta con un sintonizador digital. nítida, libre de la interferencia de fantasmas y lluvia. -
Page 27: Índice
Información importante de seguridad……………….……... Introducción / ¿Qué viene en la caja? / Especificaciones…... Índice……………………………………………………………... Instalación de la batería del control remoto... Funciones del control remoto…………………………………... Visión general del panel frontal/trasero... Conexión al televisor..Configuración rápida de conversión analógica... Conexión al equipo de audio………………………….……... Funciones de zoom…………………………………..…….…... -
Page 28: Instalación De La Batería Del Control Remoto
Instalación de la batería del control remoto Instalación de la batería del control remoto Quitar la tapa del compartimento de las baterías. Colocar dos baterías “AAA” nuevas. Asegurarse de que las baterías se coloquen correctamente, con la polaridad correcta, según los símbolos “+ -” estampados en el compartimento. -
Page 29: Funciones Del Control Remoto
Funciones del Control Remoto MUTE CH + MENU EXIT VOL - VOL + RECALL DISPLAY CH - GUIDE FAV + ZOOM SIGNAL FAV - ® 1 ON / Standby (Encendido / modo de espera) Presionar para encender el conversor o dejarlo en modo de espera. 2 Number (Número) Presionar para ingresar números de canales y contraseñas. -
Page 30: Visión General Del Panel Frontal/Trasero
Visión general del panel frontal/trasero DT502 (vista frontal) ON / Standby (Encendido/modo de espera) (luz verde - encendido) (luz roja - modo de espera) Sensor del control remoto DT502 (vista trasera) TV out (Salida RF) Canal 3/4 (Conversión analógica) Antenna IN (Entrada RF) Interruptor canal 3/4 Salida de Video compuesta Salida S-Video... -
Page 31: Conexión Al Televisor
Conexión al televisor Compuesta (utilizando los cables AV provistos) ANTENNA IN TV OUT VIDEO CH 3 CH 4 S-VIDEO CH 3/4 & Analog Pass-Through yellow A la entrada de video del televisor A la entrada de audio del televisor L/R (izq./der.) S Video (utilizando los cables de audio provistos) ANTENNA IN TV OUT... -
Page 32: Configuración Rápida De Conversión Analógica
El DT502 cuenta con un modo analógico compartido que le brinda la posibilidad de recibir transmisión analógica sin utilizar un divisor. La salida de TV (salida RF) funciona como salida de canales 3 y 4, y como la salida para el modo analógico. La salida de este conector depende de si el aparato está en el modo encendido (activo) o en el modo en espera (suspendido). -
Page 33: Conexión Al Equipo De Audio
Conexión a estéreo Puede conectar el aparato a su sistema estéreo utilizando el siguiente método: Panel trasero sujeto a modificaciones Al receptor equipado con sonido envolvente Dolby (Salida de audio L + R) Parlante envolvente Parlante envolvente white Parlante envolvente Center Channel Ejemplo de conexión de sonido envolvente Dolby... -
Page 34: Funciones De Zoom
Funciones del Zoom Debido a las transmisiones digitales, la imagen normal que aparece en su televisor puede tener un "formato de ventana" o un "formato de buzón". Ésta es una condición normal que depende de la señal de transmisión y progra- mación. -
Page 35: Guía De Inicio Rápido
Guía de inicio rápido Una vez que se han realizado todas las conexiones, seguir esta guía de inicio rápido para comenzar a ver canales digitales de inmediato. Se recomienda leer todo el manual para conocer todas las funciones disponibles. Guía de Instalación (Menú Inicial de Instalación) Cuando se encienda el conversor por primera vez, o cuando se reestablezcan las configuraciones de fábrica, se mostrará... -
Page 36: Menú En Pantalla (Guía)
Menú en pantalla - Guía El menú en pantalla sirve para acceder y configurar las preferencias del conversor DT502 Guía El menú Guía tiene tres opciones: Simple Guide (guía simple), Full Guide (guía completa) y Reminder List (lista de recordato- rios). -
Page 37: Menú En Pantalla (Canal)
Menú en pantalla - Canal El menú en pantalla sirve para acceder y configurar las preferencias del conversor DT502 Canal La categoría del canal tiene dos opciones: Auto Scan (exploración automática) y Manual Channel Set (fijación manual del canal) Auto Scan (exploración automática) Auto Scan Guide Channel... -
Page 38: Menú En Pantalla (Instalación)
Menú en pantalla – Configuración El menú en pantalla sirve para acceder y configurar las preferencias del conversor DT502 Configuración La categoría de configuración consiste de 7 opciones: Screen Setting (configuración de pantalla), System Setting (configuración del sistema), Parental Control (control de padres), Closed Caption (subtitulado), Time Zone (zona horaria), Smart Antenna (antena inteligente) y Factory Default (configuración de fábrica) - Page 39 Menú en pantalla – Configuración (cont.) El menú en pantalla sirve para acceder y configurar las preferencias del conversor DT502 Control de padres (V-Chip) (cont.) Guide TV rating Movie (MPAA) rating Channel Setup Info Select EXIT Exit MENU Previous Page TV-Y TV Rating Para todos los niños...
- Page 40 Menú en pantalla – Configuración (cont.) El menú en pantalla sirve para acceder y configurar las preferencias del conversor DT502 Closed Caption (subtitulado) (cont.) Closed Caption Guide Caption Type Customization Caption Size Standard Channel Foreground Color White Foreground Opacity Full Setup Background Color Blue...
-
Page 41: Menú En Pantalla (Información)
Menú en pantalla - Información El menú en pantalla sirve para acceder y configurar las preferencias del conversor DT502 Info El menú Info (información) muestra la información del sistema, las versiones del software, hardware y cargador. . Barras de visualización 4-2 WX-Plus Eye Witness News Rating Info... -
Page 42: Guía De Identificación Y Solución De Problemas
Guía para la solución de problemas Si detecta un problema, consulte las posibles soluciones antes de comuni- carse con el representante de servicio de atención al cliente. Le recomen- damos que visite nuestro sitio web www.apexdigitalinc.com para obtener actualizaciones. *El sitio Antennaweb.org proporciona información personalizada para elegir el tipo de antena y la dirección para su localidad en particular. -
Page 43: Aviso Legal
Parte 15 de las normas de la FCC Este dispositivo cumple con la parte 15 de las normas de la FCC. La operación de este producto está sujeta a las siguientes dos condiciones: (1) Este dispositivo no puede causar una interferencia perjudicial y (2) este dispositivo debe aceptar cualquier interferencia que reciba, incluso interferencia que pueda causar un funcionamiento no deseado. -
Page 44: Garantía Limitada
Conservar la caja y el envoltorio original en caso de que su equipo necesite servicio técnico. El cliente es responsable de los costos de enviar el equipo a Apex Digital. Llamar al Servicio de Atención al Cliente, o enviar un correo electrónico para obtener instrucciones detalladas sobre dónde enviar el producto para su reparación.
Need help?
Do you have a question about the Apex DT502 and is the answer not in the manual?
Questions and answers