Table of Contents
Advertisement
Quick Links
Advertisement
Table of Contents

Related Manuals for Fakopp DynaTree


Summary of Contents for Fakopp DynaTree
- Page 1 Manual for the DynaTree dynamic root evaluation system 2018.
-
Page 2: Table Of Contents
Table of Contents Introduction............................2 The pulling test..........................3 The DynaTree dynamic root evaluation system................4 How does DynaTree work?......................5 Some considerations concerning the measurement.................7 The distance between the measured tree and the anemometer...........7 Wind velocity..........................7 Statistical approach........................7 Multiple measurements.......................8 Advantages and disadvantages....................8 System components.........................9... -
Page 3: The Pulling Test
The pulling test Figure 1: Schematic of the pulling test. The pulling test is based on affixing a cable at approximately mid-height on the tree to be evaluated, and applying a moderate load, while measuring the inclination at the base of the trunk. The induced inclination is very moderate (less than .25 degrees), to make sure that the test itself does not damage or start uprooting the tree. -
Page 4: The Dynatree Dynamic Root Evaluation System
The DynaTree dynamic root evaluation system It would be much simpler to use the loads that arise from the actual wind rather than a loaded cable, to assess the tree’s safety in a high wind situation. There are, however, two interrelated problems that makes this very complicated: 1. -
Page 5: How Does Dynatree Work
The DynaRoot system takes advantage of this statistical relationship. How does DynaTree work? Figure 3: Components of the DynaTree system... - Page 6 The DynaTree system consists of four components (see Figure 3): 1. Anemometer: an instrument for measuring wind velocity at or near the tree to be evaluated. The closer to the better, but, depending on wind velocity DynaRoot may provide reliable data even with measurements taken several kilometres / miles away.
-
Page 7: Some Considerations Concerning The Measurement
Figure 5: An important condition for DynaRoot to be applicable is a sufficiently large wind speed. Some considerations concerning the measurement The distance between the measured tree and the anemometer The intensity of the wind gusts may be different from location to location, even within a relatively small area. -
Page 8: Multiple Measurements
Figure 6: Relationship between averaging time and the resulting correlation coefficient The time interval may be specified in the software when evaluating. 10 minutes provides the best results; however, this also means that long measurement periods are required to collect enough data points. -
Page 9: System Components
Issue Pulling test DynaTree Required equipment Cable, ratchet, load cell, ladder, Anemometer, inclinometer, inclinometer (approx. 50 kg) extensiometers (approx. 10 kg) Load Static Realistic Time required 1-3 hrs / tree 3 hrs / several trees SF calculation Crown area, drag factor and... -
Page 10: Extensiometer
Extensiometer • LVDT extensiometers • Dimensions: 30x30x270 mm (closed) • Span: 250 mm • Sampling rate: 1 Hz • Resolution 0.3 μm • Power source 2 pcs. of 9 V batteries... -
Page 11: Dynatree Software
DynaTree software • Simple yet efficient software for determining the safety factor • Automatic merging of wind velocity, extension and inclination data • Diagram, critical wind pressure, correlation coefficient and safety factor calculation • Runs under MS Windows. -
Page 12: Operation Guide
Operation guide DynaRoot system should be used on days with at least 25 km/h (15 mph) wind gust velocities. Setting up the measurement involves mounting the inclinometer(s) on the tree(s) root collar to be assessed, and erecting the anemometer in the vicinity of the trees. Inclinometer setup •... - Page 13 Figure 8: Buttons of the control panel • record data for a suitably long period of time (the longer the better. The minimum is 1 hr, but 3 hrs are recommended.) • hit STOP on the control panel and wait for the recording to finish. (approx 1-2 s, until the SD led (3) goes off).
-
Page 14: Anemometer Setup
Anemometer setup Assemble the anemometer tower, attach the anemometer on the top, and erect the tower. Wind velocity readings are sent to, and data is collected at the instrument box located at the bottom of the tower. Starting and stopping the data collection, recording and transferring data happens much the same way as described above at the inclinometer. -
Page 15: Transferring Data From The Sd Card To A Different Device
The DynaTree evaluation software will automatically know how to interpret the format of these files so there is no need to do any preliminary conversions. After the data acquisition phase you need to transfer the data stored on the SD card in the instrument box to your mobile device or your PC for further analysis. - Page 16 Since this method has the slight disadvantage of having to open the case of the instrument, Fakopp Enterprise offers a second solution that utilizes wireless communication technology. Transferring data wirelessly to an external device with a wireless network interface consists of 1.
- Page 17 Figure 9: Go to Settings / Wi-Fi to see the available Wi-Fi networks. Select the network with SSID DDAR-XX:XX:XX:XX:XX:XX, where the part after the hyphen is a unique MAC address. In the concrete example shown on the picture below, it is the sequence 5E:CF:7F:1B:43:52. Evidently, if you purchased two different HPI recorders, then both will have different SSIDs associated to them.
- Page 18 Figure: Enter the passphrase Ddar-123.
- Page 19 Figure 11: The status message 'Obtaining IP address...' should appear below the network name.
- Page 20 Figure 12: When the connection is successful, then the previous message changes to 'Connected'. Once the connection to the WiFi network of the instrument is established, we are ready to transfer/delete files using a suitable FTP client. We are going to demonstrate this process on Android platform using the FTP client program named Turbo FTP .
- Page 21 Figure 13: Press the menu icon on the top left. It might be possible that the menu panel is already active in which case this step can be omitted.
- Page 22 Figure 14: Select 'Create a new account' from the menu.
- Page 23 Figure 15: Select 'FTP'.
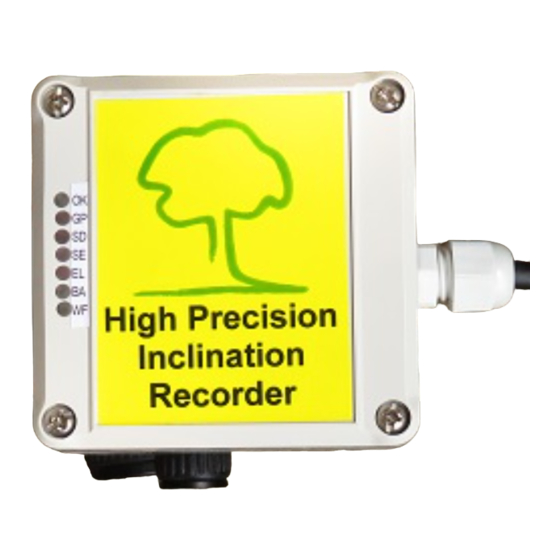
- Page 24 Figure 16: Enter an arbitrary name in the 'Connection Name' field. In this example we named our connection 'hpi recorder', which is an abbreviation of High Precision Inclination Recorder.
- Page 25 Figure 17: Enter 'ddar' in the 'Username' field.
- Page 26 Figure 18: Enter 'ddar9876' in the 'Password' field.
- Page 27 Figure 19: Enter the IP address '192.168.4.1' in the Host field.
- Page 28 Figure 20: Turn passive mode off.
- Page 29 Figure 21: Press the 'DEFAULT LOCAL FOLDER' button to set the location where the files on the SD card will be saved.
- Page 30 Figure: Browse to the desired folder on your device and press '[scale=0.4](0,.35) - (.25,0) - (1,.7) - (.25,.15) - cycle;SELECT'. In the example below, we've selected the folder called 'hpidata'.
- Page 31 Figure 23: Press the save icon on the top right.
- Page 32 Figure 24: Press the menu icon again. A new connection named 'hpi recorder' should appear in the list. Press it to activate the FTP connection to your instrument..
- Page 33 Figure 25: The list of files on the SD card of the instrument should appear in the 'REMOTE' pane of the application.
- Page 34 Figure 26: The list of files on the SD card of the instrument should appear in the 'REMOTE' pane of the application. In order to download the files they must be selected first. Press the menu icon at the top right…...
- Page 35 Figure 27: ...and choose 'Select all' from the dropdown menu.
- Page 36 Figure 28: Press the download icon to initiate the download process.
- Page 37 Figure 29: After the process is complete the downloaded files immediately appear in the 'LOCAL' pane of the application. Optionally, press the waste bin icon for deleting the selected files from the SD card in the instrument. We highly recommend to empty your SD card before using your instrument again to avoid confusions.
- Page 38 Figure 30: If the waste bin icon was pressed in the previous step then all files from the 'REMOTE' pane of the application disappears, i.e. the SD card in your instrument is empty.
-
Page 39: Analysis Using The Dynatree Software
In the rest of this subsection we will assume that data is successfully transferred from the inclinometer(s), extensiometers and the anemometer to a PC that runs MS Windows and has the DynaRoot-DynaTree software installed. After starting the program, first enter the options menu on the top left corner. See Figure for a screenshot of the menu. - Page 40 Figure 32: The data window The evaluation window (see Figure 33) displays the location of the tree, which you can also verify in google map by clicking the Show in browser link. The software displays the average wind direction, the starting time and duration of the measurement, and the statistical window length.
- Page 41 Figure 33: The evaluation window...
- Page 42 The measured wind velocity (converted to wind pressure) and inclination data points are displayed in a diagram, along with the tangential curve fitted on the values. (You will typically see only a small section of the curve that looks linear.) The software calculates the critical wind pressure and its error and the correlation coefficient.
-
Page 43: Transferring Data Wirelessly On Windows
Transferring data wirelessly on Windows On Windows, the list of available WiFi networks should look similar to the one presented on figure Figure 36: The DDAR-5E:CF:7F:1B:43:52 WiFi network appearing on a Windows desktop. The user should left click on it and enter the passphrase ’Ddar-123’ when asked for it. On Windows platform, we recommend to use Total Commander for establishing the FTP connection. -
Page 44: Footnotes
4. Press OK. 5. Press the icon again, select “dynaroot” from the list of saved connections and press “Connect”. If the authentication was successful then the content of the SD card will be visible in one of the panes of Total Commander. Figure 37: At first, press the ’FTP’...
Need help?
Do you have a question about the DynaTree and is the answer not in the manual?
Questions and answers