Table of Contents
Advertisement
Quick Links
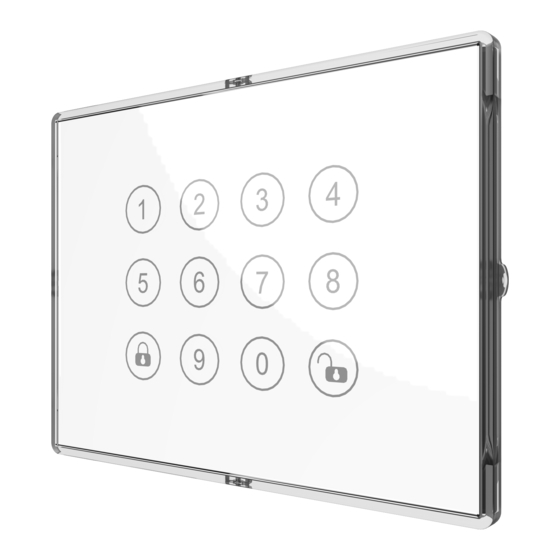
PSK01 Smart Keypad
The PSK01 support Z-Wave
report key status and setup Arm/ Disarm.
This product can be included and operated in any Z-Wave
network with other Z-Wave
manufacturers and/or other applications.
The devices Built-in rechargeable Lithium-ion battery and using
DC 5V(Micro USB) charge.
TM
Multi-Functions Smart Switch to
TM
certified devices from other
CAUTION
– replacement of a battery with an incorrect type that can defeat
a safeguard (for example, in the case of some lithium battery
types);
– disposal of a battery into fire or a hot oven, or mechanically
crushing or cutting of a battery, that can result in an explosion;
– leaving a battery in an extremely high temperature surrounding
environment that can result in an explosion or the leakage of
flammable liquid or gas;
– a battery subjected to extremely low air pressure that may
result in an explosion or the leakage of flammable liquid or gas
The marking information is located at the bottom of the
apparatus.
Specification
Rated Voltage (
Lithium-ion battery)
Rated Voltage (
TM
Operating Temperature
Storage Temperature
Location
RF Range (distance)
1
rechargeable
DC3.7V~4.2V
Micro USB)
DC5V / 1A
0°C - 40°C (85% humidity)
-20 C - 60°C
IP44 (indoor and outdoor)
Minimum 40M in door and 100M
in outdoor, line of sight
Advertisement
Table of Contents

Related Manuals for Philio PSK01


Summary of Contents for Philio PSK01
- Page 1 Specification rechargeable Rated Voltage ( DC3.7V~4.2V Lithium-ion battery) The PSK01 support Z-Wave Multi-Functions Smart Switch to Micro USB) Rated Voltage ( DC5V / 1A report key status and setup Arm/ Disarm. This product can be included and operated in any Z-Wave Operating Temperature 0°C - 40°C (85% humidity)
-
Page 2: Troubleshooting
868.40 MHz, 869.85 MHz (EU) Frequency Range 908.40 MHz, 916.00 MHz (US) 920.9MHz, 921.7MHz, 923.1MHz For Instruction to http:// www.philio-tech.com (TW/KR/Thai/SG) RF Maximum Power +5dBm ** Specifications are subject to change and improvement without notice. Troubleshooting Symptom Cause of Failure... - Page 3 *If Z-Wave configuration3 being set as 1:RAND ON Green and Blue LED Indicator on the periphery Whenever PSK01 wakes up from sleeping, no more than four digits of random keys will light on. Users have to press Blue and Green LED Indicator on the buttons those random keys one by one, and it will go to ...
- Page 4 mode will change to Entry control mode. Manual control (Entry Control mode) Charging LED Indication function description 1. In charging period, edge LED will be on as blue light. 2. When charging is finished, edge LED will be off. 1.ENTER PC 3.
-
Page 5: Function Description
1. Have Z-Wave Controller entered inclusion 3.type User code then Enter mode. *code length is 4~10 digit 2. .ENTER PC then (default programming code is 0000) ex: type 0000 then enter then type 2 then type 3. After add successful, the device buzzer will user code beep twice reset... - Page 6 note: User code ID range is 1~30, Code present on the product providing SmartStart User code Status 0x01, User code length is 4~10, inclusion. No further action is required and the SmartStart product will be added automatically Remove 1. Z-Wave Controller use Command Class User within 10 minutes of minutes On in the network user code...
-
Page 7: Z-Wave Configuration
Battery The interval time for report automatic battery report, 0 means to turn off this function, the default value is 12 scales, the time of each scale Can be set by Config No.5 Z-Wave configuration Notice 1: Always remove a Z-Wave device before trying to add it Name Valid description to a Z-Wave network. -
Page 8: Installation Steps
B. Remove the double-sided adhesive release paper on the bracket and stick it on the wall surface. Highest granted Security Class Device Reset Locally C. Push up the PSK01 and remove it. If necessary, lock it. Highest granted Security Class Association Highest granted Security Class... -
Page 9: Tamper Switch
B. Use two removal holes to remove the panel C. Remove the screw cover D. Install the PSK01 body to the WALL BOX and lock the screws. E. Install the screw cover back F. Install the outer frame. When installing, pay attention to the CAUTION Risk of explosion if battery is replaced by an incorrect type. - Page 10 (1) This device may not cause harmful interference, and Philio Technology Corporation (2) This device must accept any interference received, including 8F., No.653-2, Zhongzheng Rd., Xinzhuang Dist., New Taipei City interference that may cause undesired operation.
Need help?
Do you have a question about the PSK01 and is the answer not in the manual?
Questions and answers