
Related Manuals for VLUV PIL


Summary of Contents for VLUV PIL
- Page 1 DE - WICHTIGE HINWEISE EN - IMPORTANT INFORMATION FRA - REMARQUES IMPORTANTES ITA - NOTE IMPORTANTI PTG - NOTAS IMPORTANTE NLD - BELANGRIJKE OPMERKINGEN ES - NOTAS IMPORTANTES...
-
Page 2: Wichtige Hinweise
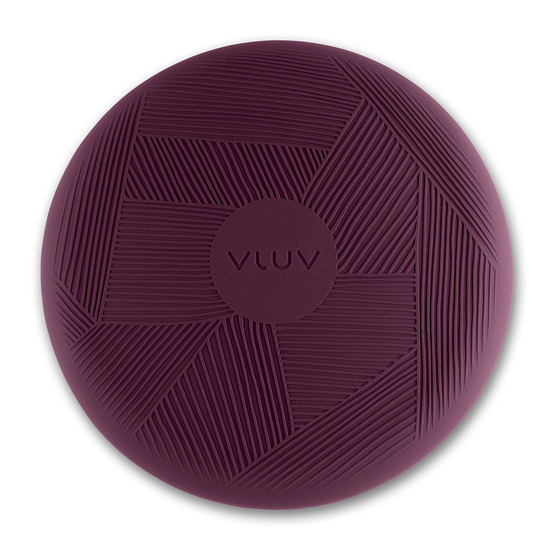
Zu starkes Aufpumpen vermeiden. • Das Kissen PIL&PED ist stets mit der rutschfesten Unterseite nach unten zeigend zu verwenden. Die Unterlage (Stuhl, Hocker oder Bank) muss als solches stabil und sicher sein. Die Auflagefläche sollte zumindest dem Umfang des Balancekissens entsprechen. - Page 3 Sitz, in Rücken- Seit- oder Bauchlage sind die Einsatzmöglichkeiten des Balancekissens vielfältig. Auf dem beiliegenden Übungsposter können Sie viele Anregungen finden. Legen Sie das Balancekissen auf eine ebene, glatte Unterlage. Stellen Sie sich barfuß (VLUV PIL&PED) oder in Socken (VLUV PED) auf das Balancekissen, um Beschädigungen durch Schuhe zu vermeiden.
- Page 4 Ziehen Sie die Ventilnadel nach Beendigung wieder heraus. Kissens anzupassen. Aufpumpen: (PIL&PED: Öffnen Sie die Kissenhülle und entnehmen Sie das PVC-Sitzkissen.) Schrauben Sie die Ventil- REINIGUNG DES KISSENBEZUGS VLUV PIL nadel auf die Pumpe, bis diese fest sitzt. Anschließend wird die Spitze vorsichtig VOLLSTÄNDIG in das Ventilloch gesteckt.
- Page 5 SERVICE UND KONTAKT 1. SAFETY INSTRUCTIONS Wir stellen unsere VLUV Produkte mit höchsten Qualitätsstandards her. Dennoch kann es hin und wie- der zu Defekten oder Beschädigungen kommen, die durch Herstellungs- oder Materialfehler entstehen •...
- Page 6 We recommend switching between different seating options from time to time. Place the VLUV PIL&PED cushion ideally in the middle of an office chair, a stool or a bench, with the black non-slip surface facing down. Make sure that the entire cushion sits on the chair’s surface. The VLUV PED PVC balance cushion can be used on both sides.
- Page 7 Inflate: (PIL&PED: Open the cushion cover and take out the PVC seating cushion) Screw the valve needle to the pump until it’s tightly fixed. Put the tip into the valve hole IN ITS ENTIRETY. Stick the needle directly CLEANING THE CUSHION COVER VLUV PIL into the small hole in the middle.
-
Page 8: Remarques Importantes
Contact your retail partner in the first instance and explain the situation. He will definitely be able to • Évitez un gonflage excessif. assist you. In special circumstances, you can reach our service team via email at info@vluv.de. • Le coussin PIL/PED doit toujours être utilisé avec le dessous antidérapant vers le bas. - Page 9 Vous trouverez de nombreuses suggestions sur l’affiche d’exercices ci-jointe. Placez le coussin d’équilibre sur une surface plane et lisse. Placez-vous pieds nus (VLUV PIL/PED) ou en chaussettes (VLUV PED) sur le coussin d’équilibre pour éviter les dommages causés par les chaussures.
- Page 10 Gonflage : (PIL/PED : ouvrez la housse du coussin et retirez le coussin d’assise en PVC) Vissez l’aiguille sur la pompe jusqu’à ce qu’elle soit bien serrée. Insérez ensuite soigneusement la pointe ENTIÈREMENT dans le trou NETTOYAGE DE LA HOUSSE DE COUSSIN VLUV PIL de la valve.
-
Page 11: Note Importanti
1x cuscino propriocettivo in PVC VLUV PED Protégez le coussin du froid à partir de -5 °C et de la chaleur à partir de +40 °C. 1x rivestimento in tessuto VLUV PIL (con il set di cuscini propriocettivi PPV-01.36 PIL/PED) • Veuillez stocker le coussin horizontalement. - Page 12 Posizionare il cuscino VLUV PIL/PED con il lato inferiore nero e antiscivolo il più centrato possibile su una sedia da ufficio, uno sgabello o una panca. Assicurarsi che l’intero cuscino poggi sulla base. Il cusci- no propriocettivo in PVC VLUV PED può...
- Page 13 Estrarre lo spillo al termine dell’operazione. Gonfiare: (PIL/PED: Aprire il rivestimento e togliere il cuscino in PVC) Avvitare lo spillo a valvola alla pompa. Inserire la punta COMPLETAMENTE nel foro della valvola con la dovuta cautela. Inserire lo spillo solo PULIZIA DEL RIVESTIMENTO DEL CUSCINO VLUV PIL direttamente nel piccolo foro centrale.
-
Page 14: Âmbito De Fornecimento
Produciamo i nostri prodotti VLUV secondo i più alti standard di qualità. Ciò nonostante, possono • Não exceder a capacidade máxima de carga de 200 kg. verificarsi problemi o danni causati da difetti di fabbricazione o del materiale. Su tutti i prodotti VLUV si • Evitar o enchimento excessivo. - Page 15 (ver também o ponto 4) VLUV PIL/PED: A face inferior do revestimento da almofada é fornecido com uma camada de sili-cone antiderrapante. Especialmente em superfícies de plástico de cor clara ou de couro artificial, certifi- que-se de que a camada de silicone não provoca danos ou descoloração.
- Page 16 ATENÇÃO: • A PIL pode ser lavada num ciclo suave a 30 graus. Para isso, abra completamente o fecho na lateral Não é permitido o enchimento excessivo da almofada com ar acima dos 10 cm de diâmetro. e retire a almofada interna. Vire o revestimento da almofada do avesso, antes de o lavar.
- Page 17 ASSISTÊNCIA TÉCNICA E CONTACTO 1. VEILIGHEIDSAANWIJZINGEN Fabricamos os nossos produtos VLUV com os mais elevados padrões de qualidade. No entanto, ocasionalmente, podem existir defeitos ou danos provocados por defeitos de fabrico ou de mate-rial. Para todos os produtos VLUV, aplicam-se as normas legais de garantia do seu país.
-
Page 18: Belangrijke Opmerkingen
Probeer zoveel mogelijk een ontspannen, rechtophouding aan te nemen en blijf experimenteren met austoel, kruk of bank. Zorg ervoor dat het hele kussen op de zitting rust. Het VLUV PED pvc-balanskus- het bewegingsbereik dat dit product u biedt. Idealiter wordt met korte tussenpozen op het balanskus- sen kan aan beide zijden worden gebruikt. - Page 19 • PIL kan worden gewassen op een fijnwasprogramma op 30 graden. Om dit te doen, opent u de rits aan de zijkant volledig en verwijdert u het binnenkussen. Draai het kussenovertrek binnenstebuiten voordat u hem wast.
-
Page 20: Notas Importantes
1x cojín de equilibrio de PVC VLUV PED Beschermen tegen kou van -5 C° en warmte boven +40 C°. 1x funda de tela VLUV PIL (para el juego de cojines de equilibrio PPV-01.36 PIL/PED) • Horizontaal opbergen. 1x bomba manual con aguja de válvula •... - Page 21 Coloque el cojín VLUV PIL/PED con la parte inferior negra y antideslizante lo más céntrica posible en el lentamente. Recomendamos cambiar de asiento de vez en cuando.
- Page 22 Inflado: (PIL/PED: abra la funda del cojín y quite el cojín de asiento de PVC). Enrosque la aguja de válvula en la bomba hasta que esté fija. A continuación, inserte con cuidado la punta en el agujero de la válvula POR COMPLETO.
- Page 23 No se asume ninguna garantía en caso de desgaste del color. SERVICIO Y CONTACTO Fabricamos nuestros productos VLUV con los estándares de calidad más altos. No obstante, de vez en cuando puede haber defectos o daños causados por errores de fabricación o de material. Se aplican las normas de garantía legales de su país a todos los productos VLUV.
- Page 25 HOCK Design e.K. Kölner Straße 45 · 51766 Engelskirchen · Germany P +49 (0) 2262 70 75 16-0 info@vluv.de · www.vluv.de...
Need help?
Do you have a question about the PIL and is the answer not in the manual?
Questions and answers