
Related Manuals for GERMANICA GEO80CP


Summary of Contents for GERMANICA GEO80CP
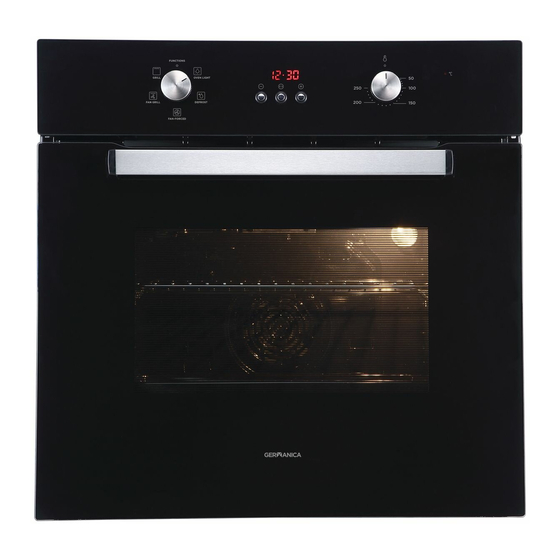
- Page 1 80L ELECTRIC OVEN GEO80CP INSTRUCTION MANUAL Please read this manual carefully before using, and keep it for future reference.
-
Page 3: Table Of Contents
CONTENTS General Safety Product Overview Installation Getting Started Cleaning and Maintenance FAQs Specifications Customer Helpline Last Page... -
Page 4: General Safety
GENERAL SAFETY IMPORTANT INFORMATION Read this manual thoroughly before you start using the Electric Oven. The safety precautions instructions reduces the risk of fire, electric shock and injury when correctly complied to. Please follow all instructions and take notice of all warnings. Pay close attention to messages that follow this safety alert symbol or the words DANGER, WARNING... - Page 5 GENERAL SAFETY INSTRUCTIONS (Cont.) WARNING! THE INSTALLATION OF THIS PRODUCT CAN ONLY EVER BE INSTALLED BY A LICENCED ELECTRICIAN. DO NOT IN ANY WAY TRY TO INSTALL THIS PRODUCT YOURSELF. To reduce risk of fire, electric shock or injury, always follow these basic precautions and accident prevention measures when using this appliance, including the below: NOTE: This appliance should be installed by an authorised electrician else warranty will be void.
- Page 6 GENERAL SAFETY INSTRUCTIONS (Cont.) USAGE CONDITIONS AND RESTRICTIONS • Supervision over children is to ensure that they do not play with the appliance. Never allow them to use, play with or crawl inside the appliance. Cleaning and maintenance must not be done by children. •...
- Page 7 GENERAL SAFETY INSTRUCTIONS (Cont.) OVEN SAFETY • Oven door must stay closed when using the grill function • While cooking, dont place pans or cookware on the base of your oven. Make sure to always place items on shelves provided. •...
-
Page 8: Product Overview
PRODUCT OVERVIEW... - Page 9 PRODUCT OVERVIEW (Cont.) FUNCTION SELECTOR There are 4 options when deciding what to use: GRILL OVEN LIGHT This function is used This mode turns on a for grilling, use the seperate light. Useful when full width baking tray cleaning out the oven. as this can easily be positioned at the right level away from the...
-
Page 10: Installation
INSTALLATION Before installing your appliance, read all safety instructions in this manual, especially the sections on electrical safety and installation. UNPACKING • When unpacking the appliance, be sure to keep all the packaging materials until you have made sure your new appliance is undamaged and in good working order. - Page 11 INSTALLATION (Cont.) IMPORTANT INSTALLAER ADVICE • Before connecting oven, make sure supply voltage corresponds with your mains supply voltage. WARNING!: This appliance must be earthed. INSTALLATION 1 Slide the oven through the cabinet aperture, align and secure. 2 Fix your oven with the 2 screws and washers as indicated in the figure to the right.
- Page 12 INSTALLATION (Cont.) ELECTRICAL CONNECTION • Before connecting oven, make sure supply voltage corresponds with your mains supply voltage. WARNING!: This appliance must be earthed. • This appliance comes pre-terminated with supply cord and plug. Below connection information is for reference only. •...
- Page 14 INSTRUCTIONS SWITCHING OFF/ON • To switch on the oven you need to set the required oven function and cooking temperature (or manual) mode. • To switch off the oven, set both FUNCTION and TEMPERATURE control knobs to the [o] position for OFF.
- Page 15 INSTRUCTIONS (cont.)
- Page 16 GETTING STARTED (Cont.)
- Page 17 GETTING STARTED (Cont.) • To cancel a setting and enter manual cooking mode: Press the button and hold it for more than 3 seconds. • To cancel the setting and return the time to standby mode: Press the and + buttons at the same time and hold for 3 seconds. •...
- Page 18 GETTING STARTED (Cont.) SET COOKING DURATION (dur) This function allows you to set a countdown time (max. 10 hours) after which the oven turns off automatically. • Place the food to be cooked in the oven, close the door and set the cooking function and oven temperature.
- Page 19 GETTING STARTED (Cont.) SETTING FULLY AUTOMATIC DELAYED COOKING The delayed cooking function is a convenient feature you can use when you are at home and want to set the oven to come on at a time in the future and switch off after a set cooking duration.
-
Page 20: Getting Started
GETTING STARTED BEFORE FIRST TIME USE • The best way is to make sure you are familiar with everything about the oven first before using this. Pay attention to everything in this manual in particular the safety instructions and cautions. •... -
Page 21: Cleaning And Maintenance
CLEANING & MAINTENANCE CLEANING THE OVEN • After each use, make sure to clean the oven thoroughly. This will prevent residual food stuffs becoming baked on the oven chamber surfaces, which will make the residues more difficult to remove. • Remove the oven rack and baking/drip tray from the oven before cleaning. Clean the oven cavity only with warm, soapy water, using either a sponge or soft cloth, then dry with a dry cloth. - Page 22 CLEANING & MAINTENANCE (cont.) REMOVING THE OVEN DOOR FOR CLEANING Removing the oven door and the glass panel inside the door enables full access to the entire oven cavity for easier cleaning and maintenance. • Before you start, place some soft, padded material on the floor or benchtop. •...
- Page 23 CLEANING & MAINTENANCE (cont.) REPLACING THE OVEN LIGHT BULB When the lamp in the oven fails and needs replacement, proceed as follows. (Bulb replacement is not covered by warranty.) • Unscrew and remove the glass lamp cover by turning it anticlockwise (3). Washthe lamp cover and wipe it dry.
-
Page 24: Faqs
FAQS If experiencing issues with your oven and isn’t operating correctly please check the following pages for solutions to the problems. If none of the solutions offered help solve the problem with your appliance then please contact our call centre at info@ayonz.com DO NOT ATTEMPT TO REPAIR THE APPLIANCE YOURSELF. -
Page 25: Specifications
SPECIFICATIONS... -
Page 28: Customer Helpline
CUSTOMER HELPLINE: info@ayonz.com DISTRIBUTED BY: Ayonz Pty Ltd...
Need help?
Do you have a question about the GEO80CP and is the answer not in the manual?
Questions and answers