Table of Contents
Advertisement
Advertisement
Table of Contents

Summary of Contents for Wolverine F2D-Super
- Page 1 Manufacturers’ warranties may not apply in all cases, depending on factors such as use of the product, where the product was purchased, or who sold the product. Please review the warranty carefully, and contact the manufacturer if you have any questions.
-
Page 2: Table Of Contents
Before Using the Converter ... 1 Having Difficulty Using This Product ... 4 Package Contents ... 4 Functions of Keys ... 5 Connect F2D-Super to TV ... 5 Getting Started... 6 1. Attach power ... 6 2. Use Built-in Memory ... 6 3. -
Page 3: Introduction
12. Convert Film to Digital File ... 13 13. Playback and Edit Converted Image Files ... 14 14. Connect F2D-Super to Computer to Upload Image Files ... 16 Upload Image Files to PC and Delete the Uploaded Files ... 16 Technical Support ... - Page 4 Warranty will be voided if the device is mishandled. Please take care in handling the device. Wolverine Data is not responsible for consequential damages, including loss of data. Always back up all data.
-
Page 5: Having Difficulty Using This Product
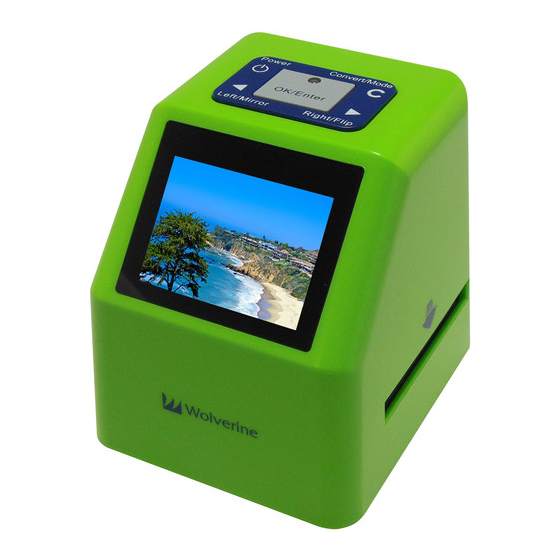
Plug the 3.5 mm end of the video-out cable (not included) to the back of F2D-Super and RCA end to TV video-in connecter to view images on TV screen. The viewer of the F2D-Super will turn dark, menu and images will appear only on TV screen. -
Page 6: Getting Started
2. Press Left key to highlight YES then press OK. 5. Mode Selection F2D-Super has 6 modes and are listed below. Press Left or Right keys to change the mode then press OK/Enter key to execute the selection. You can always press Mode key to bring back the previous menu or... -
Page 7: Set Film Type
Film Type - Selects type of film to convert, refer to Film Type Table on page 9 Delete All - Deletes all files in the internal memory or the inserted SD/SDHC card Convert - Converts film to digital image Playback - Reviews all converted images stored in memory USB MSDC - Communicates with PC or Mac to upload converted images files to a computer Language - Sets menu in English or Japanese... -
Page 8: Insert Proper Adapter Into Slot
Negative Adapter then place appropariate Insert accordingly (see diagram below), and snap close the adapter tightly to avoid jamming when inside the F2D-Super. Warning: Using improper Adapter or Insert will result cropped image or black areas on image. -
Page 9: Edit Image Orientation
Ensure the Film Type setting is correct, or you will see X-ray- like image on the viewer. The film type setting will remain until changed. Insert Super 8 film with Push in negative film and pereferated Push in slide until flushed check the image from holes at top with the edge of Adapter... -
Page 10: Playback And Edit Converted Image Files
"FULL" icon on screen means the memory is full. Upload the converted digital files to a computer, refer to item 14 on page 16. Then delete all files from the memory of F2D-Super. Playback Mode Playback and Edit Converted Image Files Press Mode key twice to go back to Home menu. -
Page 11: Connect F2D-Super To Computer To Upload Image Files
14. Connect F2D-Super to Computer to Upload Image Files Plug small end of the USB cable to F2D-Super and the big end to USB port on the computer. Insert SD/SDHC memory card if not using the internal memory. Power on F2D-Super. -
Page 12: Specifications
Language: English and Japanese Caution This device complies with part 15 of the FCC Rules. Changes of modifications not expressly approved by Wolverine Data could void the user 's authority to operate the equipment. One-Year Limited Warranty (United States Only) Wolverine Data manufactures its hardware products from parts and components that are new or equivalent to new in accordance with industry-standard practices. -
Page 13: Warranty Exclusions
(except as specifically noted); accessories or parts added to a Wolverine Data system after the system is shipped from Wolverine Data or its resellers; accessories or parts that are not installed in the Wolverine Data factory. During the one-year period, beginning on the invoice date, Wolverine Data will repair or replace products returned to Wolverine Data's facility. -
Page 14: Other Limitations
In no event shall wolverine data be liable, whether in contract or tort (including negligence) for damages in excess of the purchase price of the...


Need help?
Do you have a question about the F2D-Super and is the answer not in the manual?
Questions and answers