Table of Contents
Advertisement
Available languages
Available languages
Quick Links
Advertisement
Table of Contents

Related Manuals for DHS Fitness DHS 5450

Summary of Contents for DHS Fitness DHS 5450
- Page 1 BANDA DE ALERGARE CU DISPLAY SLIM DHS 5450 MANUALUL UTILIZATORULUI Cititi toate instructiunile cu atentie inainte de a folosi acest produs. Pastrati acest manual de utilizare pentru referinta viitoare.
- Page 2 INSTRUCTIUNI IMPORTANTE DE SIGURANTA Inainte de a incepe antrenamentul periodic si intensiv, consultati doctorul. Acest consult este necesar pentru persoanele cu varsta mai mare de 35 ani sau cu probleme de sanatate. Trebuie sa respectati intotdeauna instructiunile de siguranta, in caz contrar nu ne asumam responsabilitatea eventualelor accidentari.
-
Page 3: Instructiuni De Asamblare
16. Zona de siguranta ce trebuie lasata in spatele benzii de alergat este de: 1000*2000MM INSTRUCTIUNI DE ASAMBLARE Cand deschideti cutia produsului, veti gasi urmatoarele piese componente in cutie: PARTI componente pe care le gasiti in cutie: DES. Specification Specification Nos Cadru principal Cheie cu surubelnita Imbus... - Page 4 INSTRUCTIUNI DE ASAMBLARE PASUL 1 Deschideti cutia, scoateti piesele mentionate mai sus si asezati cadrul principal pe o suprafata plana. PASUL 2 Fixati cadrul computerului pe suportul superior drept si stang folosind imbusul de 5mm(45), surubul M8*16 (50) si saiba de blocare(51), folosind imaginea din stanga ca referinta.
- Page 5 PASUL 3 Impingeti suportul computerului precum si picioarele benzii de alergare asa cum indica sagetile. Atentie: Prindeti cu mana suportul superior si picioarele benzii pentru a evita caderea si/sau accidentarea. Notice: Support the upright with hand to avoid falling down to have any hurt. PASUL 4: Folosind imbusul 5#, prindeti piciorul drept al benzii de alergare de cadrul...
- Page 6 PASUL 5: Folositi surubelnita inclusa pachet si surubul(67) pentru a fixa aparatoarea(34) baza picoarelor. Repetati operatiunea si pentru partea dreapta. Nota: aparatoarea de la baza piciorului se va fixa printr-un click apoi se poate prinde cu surubul din pachet. PASUL 6: Plasati magnetul de siguranta (44) in locasul destinat, sub ecranul computerului.
- Page 7 INSTRUCTIUNI DE PLIERE/DEPLIERE Pliere Ridicati suprafata de alergare in pozitia A, pana cand auziti sunetul de fixare a telescopului (B). Depliere Sustineti putin cu mana suprafata de alergare(A) spre display si in acelasi timp impingeti locul de imbinare a telescopului(B) in directia indicate in ilustratie.
-
Page 8: Parametrii Tehnici
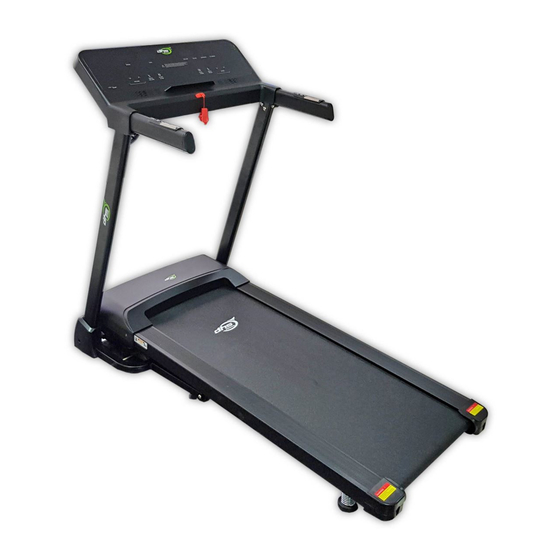
PARAMETRII TEHNICI Conform indicatilor de pe DIMENSIUNE 1592*760*1200 mm PUTERE PRODUS (mm) eticheta Conform indicatilor de pe DIMENSIUNE PUTERE 960*760*1350 mm MAXIMA PLIAT (mm) eticheta DIMENSIUNE INTERVAL 450*1200 mm 0.8-12KM/H SUPRAFATA DE VITEZA ALERGARE (mm) 50.5kg GREUTATE NETA Viteza, Timp, Distanta, Calorii, Puls ECRAN LED METODA DE IMPAMANTARE Acest produs trebuie impamantat. -
Page 9: Functii Butoane
GHID OPERATIONAL 1. ECRANUL SPEED (VITEZA): Indica viteza TIME (TIMP): Indica timpul de alergare DIST (DISTANTA): Indica distanta parcursa CAL (CALORII): Indica caloriile INCL (Inclinatie): arata gradul de inclinare INCLINAREA, PULSUL, DISTANTA SI CALORIILE ARSE sunt indicate de ledul aprins in dreptul acestora. - Page 10 3. FUNCTII PRINCIPALE Apasati butonul de pornire, ecranul se va lumina, banda va pregatita pentru utilizare. 3.1 PORNIRE RAPIDA (MANUALA): Asezati magnetul de siguranta, apasati butonul “START”, banda va porni la cea mai joasa viteza in 3 secunde, apasati “SPEED +,-” pentru reglarea vitezei. Apasati butonul “STOP” sau scoateti direct magnetul de siguranta pentru a opri banda de alergare.
- Page 11 vizualiza greutatea și înălțimea pentru a fi verificate dacă sunt sau nu corecte. Indicele de constituție (grăsime) evaluează o persoană în înălțime și greutate și nu este proporțională cu grăsimea aplicabilă oricărui bărbat și femeie și împreună cu alți indicatori de sănătate pentru ajustarea greutății grăsimii. Grăsimea ideală...
- Page 12 11. TIPUL DE DATE AFISATE SI VALORILE POSIBILE VALORI VALORI PROGRAM IMPLICIT SETARE IMPLICITA POSIBILE IMPLICITE SPEED(viteza) 0.8-12KM/h -------- -------- -------- INCLINE(inclinare) -------- -------- 1—15% TIME(timp) 0:00—99:59 30:00 30:00 5:00---99:00 DISTANCE(distanta) 0.00KM—99.9KM 1.00KM -------- 0.5KM—99.9KM CALORIES(calorii 0Kcl—999Kcl 50Kcl -------- 10Kcl—990Kcl arse) 12.
- Page 13 INSTRUCTIUNI ANTRENAMENT INCALZIRE Daca aveti varsta peste 35 de ani sau aveti probleme de sanatate si este prima oara cand folositi bada de alergare pentru antrenament, va rugam sa consultati medicul inainte de inceperea antrenamentului. Inainte sa folositi banda de alergare va rugam cititi cu atentie instructiunile de utilizare pentru a sti foarte bine cum se porneste si se opreste, cum se regleaza viteza,etc.iar in acest timp nu stati asezat pe covorul de alergare in timp ce reglati banda.
- Page 14 FRECVENTA EXERCITIULUI Program ciclic de antrenamnet: 3-5 ori/saptamana, 15-60 minute/exercitiu. Creati-va programul de exercitiu profesional nu doar pentru hobby. Puteti controla intensitatea exercitiului prin reglarea vitezei si a inclinarii benzii de alergat. Va recomandam sa nu reglati inaltimea benzii la inceputul antrenamentului; reglarea inclinarii este metoda cea mai eficienta de crestere a intensitatii exercitiului.
- Page 15 INSTRUCTIUNI DE INCALZIRE Incalzirea este o parte foarte importanta a antrenamentului, care trebuie realizata la inceputul fiecarei sesiuni de exercitii. Efectuati 5-10 minute de exercitii de incalzire pentru a va pregati corpul pentru antrenament prin intinderea muschilor. Respectati urmatoarele instructiuni ale exercitilor de incalzire si relaxare –...
- Page 16 REGLAREA COVORULUI DE ALERGARE Atentie: INTOTDEAUNA SCOATETI BANDA DE ALERGARE DIN PRIZA ELECTRICA INAINTE DE CURATARE SAU DE REPARARE. Curatare: Curatarea generala a benzii, ii va prelungi viata. Pastrati banda curata prin stergerea de praf periodica. Stergeti cu atentie partea expusa a covorului de alergare si pe partea laterala.
- Page 17 CENTRAREA COVORULUI DE ALERGARE Asezati banda de alergare pe o suuprafata neteda. Utilizati banda la o viteza de aprox. 6-8 KM/H, verificati conditia de alergare. Daca covorul de alergare se misca spre dreapta, trageti blocajul de siguranta si rotiti 1/4 in sensul acelor de ceasornic boltul drept de reglaj, apoi porniti banda de alergare doar dupa centrarea covorului de alergare.
- Page 18 PARTI COMPONENTE...
- Page 19 LISTA PARTILOR COMPONENTE DESCRIERE SPEC. CANT Descriere SPEC. CANT Cadrul principal Buton Start /stop Cadru baza Cheie de siguranta Picior stanga Imbus 5 mm Picior dreapta Ulei siliconic Maner display Cheie cu surubelnita S=13、14、15 Suport baza inclinare Inel magnetic Benzi laterale Fir maro Suprafata alergare Surub...
-
Page 20: Rezolvarea Problemelor
REZOLVAREA PROBLEMELOR PROBLEMA SOLUTIONARE EROARE 1. Verificati daca computerul si firele Mesaj de eroare la conexiunea placii de baza sunt conectate corect. intre computer(display) si placa 2. Verificati daca circuitul placii de baza de baza inferioara(de langa este asezat bine contacte, motor). - Page 21 MOTORIZED TREADMILL WITH SLIM DISPLAY USER’S MANUAL Read all instruction carefully before use this product. Retain this owner’s manual for the future’s reference.
-
Page 22: Safety Instruction
Safety instruction Warning: Now here we suggest that you should consult with your physician or health professional before starting your workout, especially for the age up to 35 old or once-health problem people. We take no responsible for any troubles or hurts if you don’t following our specification. Treadmill will be carefully assembled and covered the motor shield, then connect to the power. -
Page 23: Fixing Tools
Assembly Instructions When you open the carton, and you will find the below parts in the carton : PART LIST DES. Specification Nos. Specification Wrench with screw Main frame driver 5#Allen wrench Silicone oil Bolt M8*42 Left base cover Bolt M8*16 Right base cover Lock washer... - Page 24 STEP 1 : 1. Open the carton, take out the above spare parts, put the Main Frame on the level ground. STEP 2 : 1. Hold on the Computer frame and use the 5# Allen wrench(45), M8*16 bolt (50) and lock washer(51), fix the computer frame onto the right and left upright.
- Page 25 STEP 3 1. Push up the Computer and L&R uprights. Notice: Support the upright with hand to avoid falling down to have any hurt. STEP 4: 1.Use 5# Allen wrench,firstly lock upright onto base frame by M8*45 bolt (55) and lock washer ( 51) , then lock upright onto base frame by bolt M8*16 (50) and lock washer (51).
-
Page 26: Folding Instruction
Folding Instruction STEP 5: 1. Use the wrench with screw driver lock the left base cover (34) onto base frame by bolt (67) . 2. The right side is same as the left side. NOTE: the base cover need to buckle onto the base frame before fix it . - Page 27 Pulling up: Pull up the base frame at position (A) till hearing the sound that the air pressure bar (B) is locked into the round tube. Pulling down: Support place A with hand, kick the place of air pressure bar, then the base frame will fall down automatically (Please keep anybody and any pet away the machine when falling down).
-
Page 28: Technical Parameter
Technical Parameter As the rating label BUILT UP 1592*760*1200mm POWER SIZE (mm) showing As the rating label FOLDABLE Maximum output 960*760*1350mm power SIZE(mm) showing RUNNING 450*1200 0.8-12KM/H SURFACE SPEED RANGE SIZE (mm) 50.5kg NET WEIGHT 4 LED WINDOW W Speed, Time, Distance, Calories, Pulse ITH WHITE BACK LIGHT Grounding Methods... -
Page 29: Display Window
Operation Guide 1. DISPLAY WINDOW: SPEED: Show speed TIME: Show time DISTANCE.: Show distance CAL.: Show calories PULSE: Show heart beat INCLINE/ PULSE: When show incline section, INCL will light, the window will show incline section;When PULSE light in the window, it will show the heart beat data; BUTTON FUNCTION “START”... -
Page 30: Count Down Mode
3.2 COUNT DOWN MODE: Press the ‘ MODE’ button, it can choose time countdown mode, distance count down mode, calories countdown mode, and the window will show the default data and glitter. At the same time, press SPEED ▲/▼) to set the data. Press ‘ START ’ button, the machine will run at the lowest speed, +/-- INCLINE ▲/▼... - Page 31 5.1 Data display and set range default range mark SEX(-1-) 1(MALE) 0=MALE 1=FEMALE 10—99 AGE(-2-) 170 CM 100—240 CM HEIGHT(-3-) 70KG 20—160KG WEIGHT(-4-) 5.2 BMI reference <19 THIN 19--26 NORMAL 26--30 OVER WEIGHT >30 6. SLEEP FUNCTION: Stopped for more than 10 minutes without any operation, the system completed all showed off into the body of sleep state.
- Page 32 11. RUNNING DATA DISPLAY AND SETTING RANGE DEFAULT MODE DISPLAY RANGE DEFAULT PROGRAM SETTING DEFAULT SPEED 0.8-12KM -------- -------- -------- INCLINE -------- -------- 1—15% TIME 0:00—99:59 30:00 30:00 5:00---99:00 DISTANCE 0.00KM—99.9KM 1.00KM -------- 0.5KM—99.9KM CALORIES 0Kcl—999Kcl 50Kcl -------- 10Kcl—990Kcl 12. PROGRAM TABLE TIME Setting time/20= interval running time PRO.
-
Page 33: Exercise Instructions
EXERCISE INSTRUCTIONS Warm up stage: If you are over 35 years old, or not very healthy, also it’s your first time exercise, please consult with your doctor or professional person. Before you use the motorized treadmill, please learn how to control the machine, know well how to start, stop, adjust the speed and so on, don’t stand on the machine at this time. - Page 34 determine the velocity of movement, the intensity of exercise. Please stop at once, If you feel chest tightness, chest pain, irregular heart beat, breath difficulty, dizziness or other discomfort during exercise. You should consult with your physician or health professional as keep going. You can choose the normal walking speed or the jogging speed ,if you always take workout with treadmill.
- Page 35 WARM UP INSTRUCTION Before exercise, it is better to do stretching exercises. Warm muscles stretch more easily, so the first of 5 ~ 10 minutes to warm up. Then in accordance with the following methods to stop and do stretching exercises - do five times, each leg every time 10 seconds or more time to do it again after the end of the exercise.
-
Page 36: Running Belt Adjustment
RUNNING BELT ADJUSTMENT Warning: ALWAYS UNPLUG THE TREADMILL FROM THE ELECTRICAL OUTLET BEFORE CLEANING OR SERVICING THE UNIT. Clean: General cleaning or the unit will greatly prolong the treadmill. Keep treadmill clean by dusting regularly. Be sure to clean the exposed part of the deck on either side of the walking belt and also the side rails. - Page 37 CENTER THE RUNNING BELT ●Place treadmill on a level surface. Run Treadmill at approximately 6-8KM/H, checking the running condition. If the belt has drifted to the right, pull out of the save clock and switch, turn the right adjusting bolt 1/4 turn clockwise, then start running until centering the belt.
- Page 38 Exploded Parts Diagram...
-
Page 39: Part List
Part list DESCRIPTION SPECS. DESCRIPTION SPECS. Main frame 5#Allen wrench 5 mm Base frame Silicone oil Left upright tube Wrench with screw driver S=13、14、 Right upright tube Magnetic ring Computer bracket Brown single wire Bolt M8*16 Incline Bracket running board Lock washer Running belt Bolt... -
Page 40: Troubleshooting
TROUBLE SHOOTING Fault Code Main reason Solution 1. Check the connection wire between The wire from computer to computer and control board was bottom control board did not well connected. connected well 2. Make sure the IC on the control board was well inserted.
Need help?
Do you have a question about the DHS 5450 and is the answer not in the manual?
Questions and answers