
Related Manuals for Heath Heathkit SB-104A


Summary of Contents for Heath Heathkit SB-104A
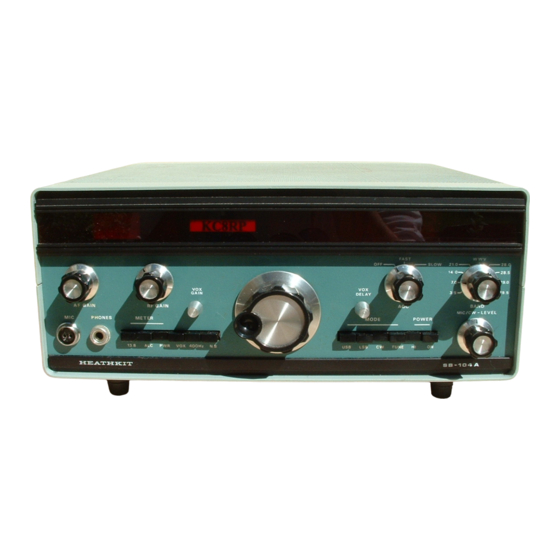
- Page 1 S I N G L E S I D E B A N D T R A N S C E I V E R M o d e l S B - 1 0 4 A Assembly 595.1992.o� HEATH COMPANY • B E N T O N HARBOR,...
- Page 2 HEATH COMPANY PHONE DIRECTORY T echn ica l P hone Numbers followin direct lines to 8. 00 A.M. 12P.M. 1.00 P.M. 4.30 P.M., E S T, W eek da ys Only Audio , v ery Cr edit Replacement Parts C locks...
- Page 3 Copyright 1977 H E A T H C O M P A N Y Heath Company A l l R i g h ts Reserved B E N T O N HARBOR, M I C H I G A N...
- Page 4 I E E E TABLE OF CONTENTS 1-73 1-76 1 - 5 1-76 1 - 7 1-83 1-86 1 - 1 1 1 - 9 1 1-95 1 - 1 8 1 - 1 9 1 - 1 0 5 1-22 1 - 1 1 0 1 - 2 5...
- Page 5 I N T R O D U C T I O N power. approximately 100 watts t o the antenna. However, can be instantly switched operation, which ca s e minimum watt delivered antenna. Transceiver: Broadbanding eliminates necessity "peak" circuits Band switch and select the desired frequency.
- Page 6 Page 1-4 C E EESEE...
- Page 7 PARTS P A C K A G I N G PARTS PACK IEHAT'HKIT'...
- Page 8 Page 1-6 IESE...
- Page 9 A S S E M B L V N O T E S principal sections -- the circuit boards and the chassis. The circuit boards certain subassemblies will be built first, resistor color code explained "Kit Builders and then laid aside, s o each one b e available when soldering iron will make the kit easier t o assemble and there number.
- Page 10 Page 1-8 IESE...
- Page 11 C I R C U I T B O A R D A S S E M B L V 1/4" instructed, installed Most circuit boards identified their part number. push silver for 1 0 % tolerance resistors. HEATHKIT...
- Page 12 Page 1 - 1 0 E I E E E...
- Page 13 V A R I A B L E F R E Q U E N C Y O S C I L L A T O R (V FO) EXTENDER BOARD P A R T S L I S T step.
- Page 14 C E I E E H QTY. Resistors (cont'd.) CAPACITORS Mica Disc 5 1 0 N1500 .001 F � I .005 . 0 1 F Other Capacitors • INDUCTORS...
- Page 15 G EN I E DIODES-TRANSISTORS • J2 / four ways. listed. METAL PARTS €...
- Page 16 Page 1 - 1 4 0TY. HARDWARE # 4 Hardware #6 Hardware screw screw Other Hardware spacer / 6" spac 7/8" spacer Drive Attaching Hardware 6 3 2 x 1 " s c r e w # 6 flat 7/16" spacer Spring washer CONNECTORS boa d...
- Page 17 C .E I E E E aTY. MISCELLANEOUS Vernier drive Vernier drive (short shaft) _" (tube) � � <¢ PARTS FROM PACK #10 (parts In the shipping carton) 85-1205-7 85-1206-3 85-1465 13'-8 1/2" Small bare w i r e 340-2 Large bare w i r e 340-3 12'-4 1/4"...
- Page 18 Page EEESEE 0TY. Parts From Pack # 1 0 (cont'd.) t r 4 r t 4 4 t t t ' 4 ( 4 i ¥¢ for part number.) Operation and for part number.) from it Now copy the numbers onto the space provided illustration above.
- Page 19 Page 1 - 1 7 IEEE S T E P - B Y - S T E P A S S E M B L Y EXTENDER C I R C U I T BOARD on one D E P R E S S £ D l A C �...
- Page 20 XTENDER BLOCK E X T E N D E R B L 0 C K extender pins. fit. Detail 1-2A PICTORIAL 1-2...
- Page 21 Page 1-19 OSCILLATOR CIRCUIT BOARD C O N T I N U E • S T A R T « circuit )5-7) as shown. complete each band mark o n the circuit board. in the ord er listed. 1206: 1 50 0 (brown-green-brown). {"<••-·- - •...
- Page 22 Page 1-20 foil. I N S U L A T I O N N1500 m i ca . C1216: 15 disc. NOTES: C1203: 50 p F disc o t h e rw i se o ff e x cess lead lengths. xcess lead length, Only o ne e nd o f each wire will...
- Page 23 1-21 IHA1HI1T CIRCUIT BOARD CHECKOUT 1/8". •...
- Page 24 " "" Gett ± E t BUFFER CIRCUIT BOARD NOTE: When y o u install a diode, always band mark o n t h e c i r cu i t board. circuit board (#85 (orange-orange-red). RR1227: 3900 9 (orange-white-red). �: (red-red-orange).
- Page 25 Page 1-23 zeeii{HEATHKIT « S T A R T • SAX..(#417-234). bott om th e si n k must n o t b el ow s h o e" Ce). 1 205: 2N36384 (#417-234). holes a s shown. T R A N S I S T O R e3_;sono v u °...
- Page 26 Page 1-24 E ES E O S C I L L A T O R C I R C U I T B O A R D at20 , & " < R1232: 2000 , variable. Solder install sure c o n t r o l pushed down tight against...
- Page 27 GEIEEE • • 0 " " " �- � -, : , , 7/16" �·•iifJ� FLAT W A S H ER � � U• ,;;;"' 6-32 X 7/8" THREADED� � � 6?..- S P A C ER � • � ) <...
- Page 28 1-26 G E E± S E E 1 - 1 0 { ·1 1 - 1 0 A Save the remaining fish paper for use later. 1 - 1 0 1 · 1 1 • PICTORIAL 1 - 1 0 "6-32 3/8"...
- Page 29 B U F F E R C I R C U I T B 0 A R D O S C I L L A T O R C I R C U I T 8 0 A R D L O C K W A S H ER �...
- Page 30 EEESE V A R I A B L E C O L ""Q{Cl205 C 1 2 0 6 C l 2 0 7 C E M EN T c 1 2 0 3 ° ) c 1 + C 1 2 1 6 several hours for the cement t o set.
- Page 31 Page 1-29 IESE C H A S S I S • -�� - -----' • 7 i @ w g 4) a> c o o » g y s M E T A L S C R E W Detail 1-128 + 6 3 / s S H E E T M E T A L...
- Page 32 E ESE# PART C R I M P A N D S O L D ER C R I M P C O N N E C T O R H O U S I N G Detail 1 - 1 2 E 150'E Detail 1-12D l "...
- Page 33 T R A N S M I T T E R A U D I O / R E G C I R C U I T B O A R D P A R T S L I S T pa rts called step.
- Page 34 EEESEE Resistors (cont'd.) 6-224 yellow) 6-684 R218 CAPACITORS Disc C2 04 Electrolytic �...
- Page 35 Other DIODES 56-16 56-19 ZD202 56-56 0206, TRANSISTORS-INTEGRATED CIRCUITS identification in one o f th e following four ways: different or missing.) type • one shown. circuit " circuit • z i t...
- Page 36 Page 0TY. MISCELLANEOUS _" 207-80 connector :t---_--- 475-10 PART FROM PACK # 1 0 85-1580-5 circuit board one is not front cover. pricing information, refer List."...
- Page 37 Page 1-35 C. E I E E E S T E P - B Y - S T E P A S S E M B L Y TRANSMITTER AUDIO/REG CIRCUIT BOARD G O O D SOLDER C O N N E C T I O N S , Y O U MUST KEEP...
- Page 38 Page 1-36 E L ES T E NUMBER DRAWING 8 A N D £ D ■ r " � .. . •..· . · . • • 0207 0206. wire been installed, u s e small press down against 1"...
- Page 39 Page 1-37 E Z ± N U M B E R I D E N T I F I C A T I O N s t ep s performed D R A W I N G board ( v i o t e t - g r e e n brown) kkk] 252.
- Page 40 Page 1-38 IDENTIFICATION DRAWING Th e steps performed in this Pictorial are in this area o f the circuit board. < C O N T I N U E NOTE: When y ou install electrolytic and tan talurn capacitors, b e sure t o m a t ch the posi tive ( +) capacitor lead (or color dot) wit h the positive m a rk on t h e circuit board.
- Page 41 Page 1-39 .E IE EE IDENTIFICATION DRAWING < C O N T I N U E with th e circuit board. Bend th e "C" lead F L A T $ 1 0 f 9'// H i e . " f r n stal l f ou r MPSA20 transistors (#417-801) 0205 X29A829...
- Page 42 Page 1-40 E I E E E e.: 2 E IDENTIFICATION Install tw o IC's follows. Position th e ridge d o t ov er band DRAWING screened o n the circuit board. Th e n i n se r t th e leads into...
- Page 43 H F O / P R E M I X E R C I R C U I T B O A R D P A R T S L I S T f or QTY. RESISTORS, 1/2-Watt CATHIT" 1.-41...
- Page 44 E I E E E Resistors (cont'd.) k 9) CAPACITORS Mica...
- Page 45 IESE a TY. Disc C443 , €446 .e8 5 INDUCTORS 45-73 RFC401, RFC402 inductor 45-27 err e bead 475-10 �...
- Page 46 E E S E QTY. NOTE: HEATH PART NUMBERS ARE STAMPED MOST DIODES. DIODES-TRANSISTORS ° • CRYSTALS...
- Page 47 Page 1-45 [ 8& OT¥. DESCRIPTION HEATH CIRCUIT Component No. MISCELLANEOUS Board puller 207-80 Circuit board 432-124 connector PART FROM PACK # 1 0 Circuit board 85-1418-4 order replacement part, always include PART NUMBER. Use the Parts Order Form furnished with this kit.
- Page 48 Page 1-46 E EE5 E H S T E P - B Y - S T E P A S S E M B L Y HFO/PREMIXER CIRCUIT BOARD HFO/Premixer P o s i ti o n t h e ci r c u i t b o a r d wi th...
- Page 49 Page 1-47 EESERE PART N U M B E R I D E N T I F I C A T I O N DRAWING band mark o n the circuit board. Solder th e t o the c u t o ff I a 3 Prepare [l i,...
- Page 50 Page 1-48 IEEE this area of the circuit board. IDENTIFICATION PART DRAWING NUMBER C O N T I N U E O Install nine 1000 (brown-black-red) R436, R431. resistors at: R432. R418. R413. R409. R406. R 40 1 . R 4 1 2 . Solder the leads t o the...
- Page 51 Page 1-49 .E I E S L E area IDENTIFICATION DRAWING 8439: 2 2 92 443: R442. (yellow-violet-orange). o ff R425: 3300 (orange-orange-red). 4700 R426: R437. � = � : : - : : - : � : : ~ : ; ,_ � _ 428.
- Page 52 Page 1-50 Z5 E E The steps performed in this Pictorial are in this area of the circuit board. PART IDENTIFICATION N U M B E R DRAWING C O N T I N U E C435. Install f o u r disc capacitors a t :...
- Page 53 Page 1-51 ESEE area PART IDENTIFICATION ' I ; DRAWING < C O N T I N U E NOTE: following NOTE: Install owing transistors in ner shown or with ou line board. rrect ated fo il B , and C . Solder eac h l ead t o the foil a nd cut o ff th e excess lead length.
- Page 54 Page 1-52 E E E steps performed Pictorial are in C O N T I N U E thus area of the c i r c u i t boar PART I D E N TIF ICATION DRAWING mount each crystal its correct location, a minimum amount of heat and solder...
- Page 55 Page 1-53 £ s performed this area o f In this Pictorial are ircuit b o a r d. PART IDENTIFICATION NUMBER DRAWING N O T E · A pictorial, solode 'components %~""° e excess tea leads and cut off -----, N T I N U E Position...
- Page 56 Page 1-54 E ESE Mount board pullers o n th e foil side p" C u t letter from t h e terminal onto circuit board location shown, CIRCUIT BOARD CHECKOUT Unsoldered connections. ransistors f o r the proper type and tall t Diodes f o r...
- Page 57 C O N V E R T E R , D I S P L A Y , A N D C O U N T E R C I R C U I T B O A R D S P A R T S L I S T RESISTORS 1/4-Watt...
- Page 58 Page 1-56 EEESEE aTY. CAPACITORS Disc 5 pf C85 6 €853, C854, Other Capacitors 25-56 A R E S T A M P E D N O TE : H E A TH P A R T N U M B E R S M O S T D I O D E S .
- Page 59 O f rn shed w th th s kit. e is va la " e lac t Parts" inside the rear cover of this Manual. Your Warranty is located inside front cover. pricing information, refer separate "Heath Parts Price List."...
- Page 60 Page 1-58 YI E A T H r T S T E P - B Y - S T E P A S S E M B L Y CONVERTER CIRCUIT BOARD S T A R T « ert er ci rcu i t boa rd (85- shown.
- Page 61 Page 1-59 NOTE: B ef o r e y ou install electrolytic l ook capa cit or , a n d i d en tify t h e leads. On e l e ad wi ll h a v e a plus m a rk ht .
- Page 62 E ESE E S H I EL D c 8 5 3 . 00I F E E D T H R O U G H » c A P A ~ T O R # 6 1 3 / 8 " S H E E T �...
- Page 63 Page 1-61 EESTEE DISPLAY CIRCUIT BOARD C O N T I N U E with side" "foil 00 92 , 1/4-watt, (red-red-red) ·; 1ss. {id. + r e R153. � I R152. L-" � R 1 5 1 . M A R K •"--�...
- Page 64 Page 1-62 E I EE E KEEP YOUR S O L D E R I N G I R O N TIP C L E A N C O N T I N U E < (#432-121) 1/4-watt resistors (brown-black-orange). I f 7/a m e size 1 u r g e...
- Page 65 Page 1-63 E ES E designated sockets. Se e Detail 4-74 circuit board. NOTE: Before you install a n IC. first b e sure the pins are straight. Then down tows pins. shown below a t A, and roll over until the pins are at right angles o r are bent in slightly a s shown a t B.
- Page 66 Page 1-64 A t location A i n the Pictorial, G O O D S O L D E R C O N N E C T I O N S , Y O U M U S T K E E P T H E S O L D E R I N G I R o N...
- Page 67 Page 1-65 PART NUMBS R IDENTIFICATION DRAWING COUNTER CIRCUIT BOARD Pictorial NOTES: following P ict o r i al s area eac h P i c t o r i a l sh ow s t h e m a tc h th e b a nd ed e n d...
- Page 68 Page 1-66 GENESEE PART ■ IDENTIFICATl::MBEA DRAWING The steps performed in this Pictorial are in this area o ft the circuit board. bare wire S T A R T « NOTE: Solder the wires and jumpers a s a r e installed th e following s t e p s .
- Page 69 Page 1-67 ESE ± PART NUMBER IDENTIFICATION DRAWING r577T □ 0� � NOTE, install a ferrite bead, pu s h a J101. Pono bead U?-- Solder each group o f beads i t i s instal- '/fft8Eyt o t o E R '{ff/an,ff/// %',= ·...
- Page 70 Page 1-68 E I ES E Pictorial NOTES: over wire jumpers i n the following elevate the socket. Before you start solder each socket, count pins foil side 7 ge t ! H A L F - M O O N M A R K p [ C T O R 4 A L 4 - ] 2...
- Page 71 Page 1-69 that ridges ainst circuit board. L oo k at th e ro w connector toward center the circuit board. Solder the tabs t o the foil. D E P R E S S E D C O N T A C T C O M P O N E N T �...
- Page 72 Page 1-70 PART NUMBER ■ /__o.era erformed i n will install IC's. y o u The steps board. P? " ~~cent this area o f tl re ch t h e pin I f mo o n KEEP YOUR boa r , See Detail ...
- Page 73 Page 1-71 PART NUMBER IDENTIFICATION 1 2N2369 417-154). A ,, t r a n s i s t o r DRAWING transistor ba .. " k c ~,, y with t a b« e circuit bo r a ~ ~ ," " 9 t h i n e i nt o t h e hoy%...
- Page 74 Page 1-72 E I ES E Mount board pullers on the foil side o f th e circuit board a t holes A and Position female part in the circuit boa r d hole. Then push male part through the female part t o •...
- Page 75 VFO FILTER A N D D R I V E R C I R C U I T BOARDS PARTS LIST away RESISTORS 1/2-Watt 1--+ ange 6-392 white-red) 22 k0 (red-red 6-223 R 1 2 5 1 , R1252 rrATrYT 1-73...
- Page 76 "" " [EEi Other Resistors g y e e ( or ange- Orange-s 90 3 CAPACITORS Disc Other Capacitors DIODES-TRANSISTORS 2» 7 / 1wis~ti.sir transistor...
- Page 77 IESE INDUCTORS HARDWARE MISCELLANEOUS connector Thermal compound PARTS FROM PACK # 1 0 available, s e e "Replacement Parts" inside rear cover this Manual. Your Warranty is located inside front cover. pricing information, refer separate "Heath Parts Price List."...
- Page 78 Page 1-76 IEESEE S T E P - B Y - S T E P A S S E M B L Y C U I T H E C A B L E A C C O R D I N G T H E D I M E N S I O N S B E L O W .
- Page 79 Page 1-77 E E S E D R I V E R CIRCUIT BOARD < C O N T I N U E PART NUMBER wf f (#56-26). GOOD S O L D E R C O N N E C T I O N S , MUST KEEP T H E...
- Page 80 Page 1-78 ESE E (#45-82). C912: disc. coils inserting the pins into the correct holes in circuit board. Solder the leads t o the f oi l and cut o f f the excess lead lengths. P os i ti on electrolytic capacitors wi t h the posi tiv e l ead as shown.
- Page 81 Page 1-79 E E EE I E < C O N T I N U E CAUTION: CD "O" "O" "O" 7.s5#] 0 U ' s 1 D E 0 R I N G foil A foil C O L L E C T O R R94: 470 , '"�, 902:.
- Page 82 Page 1-80 EESEE C O N T I N U E t h e f ou r l oa ds e ac h th e PT6619 transistors (417-830)t0 3/16. Mount tr a ns l st or threaded st u d a n d l eads on t h e foll...
- Page 83 --�- ± · - - - - - . C I R C U I T BOARD CHECKOUT ( + )
- Page 84 .IESE NOTE POSITION OLES /4" [ s o ] the same manner. secure the circuit board t o the each location. important y ou follow exactly instructions F I S H P A P E R Detail 6-6A Heat, Sink Assembly Start a transistor nut onto each transistor stud a t D...
- Page 85 ALC/OUTPUT FILTER C I R C U I T BOARD PARTS LIST away 0TY. RESISTORS 8 0 1 , R805, RR806 R809 R803 black 6-103 R807 Other Resistors 1-watt (brown 1-18-1 R802 green-brown) 1-83 rATIH.IT...
- Page 86 C E L E S T E 0TY. CAPACITORS Mica Other Capacitors electrolytic INDUCTORS ils u ...
- Page 87 C E L EST E • MISCELLANEOUS �- · : . • fiber connector « " e PART FROM PACK # 1 0 rear cover this Manual. Your Warranty is located inside front cover. pricing information, refer separate "Heath Parts Price List."...
- Page 88 Page 1-86 C E 7S E E S T E P - B Y - S T E P A S S E M B L Y The steps performed in this Pictorial are in this area o f the circuit board. PART S T A R T «...
- Page 89 Page 1-87 EZ5LEE « S T A R T NOTE: i t s leads t he d o w n onto board. each IDENTIFICATION L804; (40-1967) (40-1966). 1.28 H coil ( 4 0 - 1 9 6 9 ) (+40-1870. _Lbd,[% ..,-, L- --:! :-...
- Page 90 Page 1-88 E E SE coil C O N T I N U E < NOTE: each t he following steps th e eyelet. (It i s a fit.) Push eyelet through th e center holes i n the circuit board. the leads Th en eyelet...
- Page 91 Page 1-89 EEESER area the circuit board. S T A R T peaking ( # 4 0 ■ � . AA , i ll uMBE · · · • · . - ( \ , peaking 40 coil wh i t e ] r ed dots).
- Page 92 Page 1-90 E E ESE E The steps performed in this Pictorial are in this area o f the circuit board. switch lugs carefully turn rotors both PART switch wafers so the index notches are in the position shown, You may (S.-1) Push (#63-723).
- Page 93 C A R R I E R GENERATOR/XTAL F I L T E R C I R C U I T B O A R D PARTS LIST QTY. • RESISTORS, 1/4-Watt 1-91 HEATHKIT...
- Page 94 H E A T I I T QTY. Resistors, 1/4-Watt (cont'd.) CAPACITORS Mica 33 pF 20-160 064 5 56 pF 20-78 C618, C633, 0637, 0642 7 5 pF 20-110 C6 09 8 2 pF 20-141 €613, 063 4, €63 8, 084 3 94 pF 20-176...
- Page 95 INDUCTORS peaking c il 40-486 L 605 toroid coil :J.------- 6.5pH coil DIODES 1N458 (may marked yellow-green-gray) NO TE : HEATH PART NUMBERS ARE ST A M P E D ON MOST DIODES. white r w ) � � •...
- Page 96 06 08, 06 1 1 , 0613 MISCELLANEOUS connector bead 4 -40 PARTS FROM PACK # 1 0 available, s ee "Replacement Parts" inside the rear cover this Manual. Your Warranty i s located inside front cover. pricing information, refer List." separate "Heath Parts Price...
- Page 97 Page 1-95 E ESE S T E P - B Y - S T E P A S S E M B L Y t h e car ri er generator/crystal fi tt e r circuit ( # 8 5 - 1 58 1 - 6 ) Then pr oceed wi th t h e...
- Page 98 Page 1-96 tEIE IDENTIFICATION ■ DRAWING g r a y jumper w i r e . 2-3/8" gr a y jumper wi r e . Solder the wires t o the foil and cut o ff the excess ends. NOTE: When y ou install a diode, always 0605.
- Page 99 Page 1-97 GHEE NUMBER ■ brown), mm , ] 5600 R609: 1000 (brown-black·red), � - - i . - - , .. .- -- 2 7 k Q2 ·- -· � · R616: 2 7 k 2 ange). · · ·...
- Page 100 Page 1-98 IEESEE I D E N T I F I C A T I O N this area o f the circuit board. Install 3 3 00 (orange-orange-red) R658: (orange-orange RR638: 6 8 0 Q2 (blue-gray-brown). 648: (orange-orange brown) 639.
- Page 101 Page 1-99 IDENTIFICATION DRAWING PART NUMBER in this Pictorial Th e s t e p s p e r f o rm¢ ■ this area o f the circuit board. K E E P Y O U R F disc capacitors at: S O L D E R I N G Install sev e n...
- Page 102 Page 1-100 E I EE E «ENTIFICATION DRAWING The steps performed in this Pictorial are in this area o f the circuit board. NOTE: Wh en y ou install a ferrite bead, use a 1 " small bar e wi r e t o m ou nt t h e b ea d t o 0612: 105 mica.
- Page 103 Page 1 - 1 0 1 EIEESLEE IDENTIFICATION DRAWING Ii--:�:. . I N # ° C O N T I N U E NOTE: • • NOTE: th e 9- - . ] the fl at with w i th - - + [r - - - - - - - - - - - - - - >...
- Page 104 Page 1-102 E ES E ± I D E N T I F I C A T I O N DRAWING ■ PART «f ■ (#404.283) lockwashers a n d nuts. Th e n solder lugs L O C K W A S H E ; � ·...
- Page 105 f" (hEE part pe rt, through th e female location shown, kit, following steps should disregarded. IMPORTANT: I f y o u a r e n o t installing t h e F i l i ESSEI install th e CIRCUIT BOARD CHECKOUT Unsoldered connections.
- Page 106 Page 1-104 IESE...
- Page 107 R E C E I V E R I F / A U D I O C I R C U I T BOARD PARTS LIST RESISTORS 1/2-Watt HI HATHCT 1-105...
- Page 108 IESE RESISTORS (cont'd.) 6-155 -green RR576 6-185 R581 1.8 M (brown gray-green) 6-335 (orange- orange-green) 1-86 5. 6 10% (green MM), blue-green-silver)
- Page 109 C .E I ES E E a T Y. DESCRIPTION HEATH CIRCUIT Component No. Other Resistors red-silver-gold) 2 0 k 0 , 1 % , 1/4-watt CAPACITORS Mica Disc .001 F .05 F C54 5 Mylar 4F Mylar Electrolytic . 68...
- Page 110 Page 1-108 G E I S E R NOTE: H E A T H PART NUMBERS ARE STAMPED MOST DIODES. DIODES 56-6 56-59 < • TRANSISTORS $-fr INTEGRATED CIRCUiT LM3900...
- Page 111 - %= 4-40 ::J--- PART FROM PACK # 1 0 board n o t available, s e e "Replacement Parts" inside t h e fr o n t cover. pricing information, r e f e r separate "Heath Parts Price List."...
- Page 112 Page 1 - 1 1 0 IEEE S T E P - B Y - S T E P A S S E M B L Y < C O N T I N U E osition the receiver IF audio circurt boar d Install twenty-four circuit...
- Page 113 Page 1 - 1 1 1 I E : = area of cert I D E N T I F I C A T I O N N U M B E R 2702 (red-violet-brown} l==ff. . 4 7 9 y el l o w violet btaci.
- Page 114 Page 1 - 1 1 2 FIZER steps performed in this Pictorial are in this area o f the circuit board 1500 (brown-green-red), 4700 (yellow-violet-red) 3900 {orange-white-red). Form leads k .2 (brown-green-orange) resistor shown, Then each lead disc capacitor 1/2' and wrap capacitor leads around...
- Page 115 Page 1 - 1 1 3 EISER± Th e are i n < C O N T I N U E NOTE. T o install socket, insert the after installed. So l d e r t he , er 4 # L ii?'?"...
- Page 116 Page 1 - 1 1 4 EESEE The steps performed in this Pictorial are in €50 3. C514. NOTE: Before install an electrolytic o ff excess lead lengths. t he l ook On e lead will have a plus (+) m ark or a Install f i v e...
- Page 117 Page 1 - 1 1 5 E A S H 0501: 406 7 3 (#417-274). PART IDENTIFICATION ta b i ng NUMBER DRAWING t he ■ cuit ss lead lengths. S H O R T I NG ~re. • ¢ Install the seven transistors at: 0512.
- Page 118 Page 1 - 1 1 6 G E E S E ± C O N T I N U E • £ L501: T o r o i d coil (#40-1686). =&7 lugs t o < capacitor, a t i t a nd identity the leads. •...
- Page 119 Page 1 - 1 1 7 IEEE IDENTIFICATION DRAWING foil R534: 50 00 control. (May marked 5K), It may be necessary t o move k 2 resistor slightly, Solder th e lugs t o the foil, p" n the circuit board as shown.
- Page 120 Page 1 - 1 1 8...
- Page 121 POWER A M P L I F I E R C I R C U I T BOARD PARTS LIST RESISTORS CAPACITORS IATIHHIT' 1 - 1 1 9...
- Page 122 G E ES E ± H MISCELLANEOUS washer brass brass Package, consisting 2N6456or 0951, 0 9 5 2 C D - 2 664 A transistor 0 9 5 3 , 0 9 5 4 Circuit board connector L 9 5 8 Circuit board 85-1423 Circuit board...
- Page 123 Page 1-121 S T E P - B Y - S T E P A S S E M B L Y Position power amplifier circuit board (#85-2055-1) shown. Then proceed with the following steps. NOTE: When y ou install ferrite bead G O O D...
- Page 124 Page 1-122 EIEESE t he the outer shield t o the circuit bo ar d bend until hole aligned with open hole t he foil. B e sure the inner lug does not touch the outer shield. NOTE: Before install an electrolytic capacitor, l ook a t a n d identity t h e leads.
- Page 125 Page 1-123 E I ESE disc. 3 3 p F mica. O n e l ead passes a nd t h e h o l e t h e l ug . So l d er bo th l ea d s o ne l ead t h e...
- Page 126 Page 1-124 C E EES E E they will take the solder easily, 1/4" o f S M A L L B O A R D P A R T N U M B E R B R A S S T U B E \ R G E B O A R D...
- Page 127 EEESEE TRANSFORMER ASSEMBLY F E R R I T E B E A D S � rn o em, 1/2" C L E A R TU B I N G 2 - TU R N S Detail 11-5A � � ':::�;E �...
- Page 128 G E ES E t a r e B E A D S Detail 11-5C 3/8". B R A S S T U B E vertical position at the locations marked A and B in Pictorial. Insert long leads into circuit solder the bent...
- Page 129 Page 1 - 1 2 7 C E SE E � o l 5 «=a ( ° ° Detail 1 1 - 5 E PICTORIAL 11-6 (, i Connect g ay wi e ( S - 1 ) ( s - 1 ) . hole ( S- 1 ) ( S- 1 ) .
- Page 130 Page 1-128 E I ES L 9-3/4 19" 9-3/4° 19" PICTORIAL 1 1 - 7 9-3/4" ( s- 1 ) . (NCH9) ¼ ½ r wrr • • • 1. 3 •...
- Page 131 Page 1-129 ± I SL E TRANSISTOR INSTALLATION C O N T I N U E N O T C O V E R T H I S H O L E N O T E S : T H E C U T O F F C O R N E R P A R T #...
- Page 132 Page 1-130 C E Z5 E R E C O N T I N U E IMPORTANT: Follow this Pictorial ONLY i f furnished type 2N6456 you were (#417-831). carefully have mind just what i s t o b e done and ho w you will t o it.
- Page 133 Page 1-131 E ESE Four 3 6 0 p F mica capacitors. C969... . C968 C968 C967. (brown-black-black) 951. R955. Solder the teads t o the foil a nd cut o f f t he excess...
- Page 134 h8 I EE E will ge ts foil. ba k ally e m l compound. F 1 S H P A P E R < [ s ] Detail 1 1 - 1 1 B rn mo Detail 1 1 - 1 1 A (INCHES) (cw) •...
- Page 135 C H A S S I S A S S E M B L Y P A R T S L I S T each against aft er you call~dd step. aw ay parts part . QTY. RESISTORS-CONTROLS /2-watt 5600 DET.
- Page 136 Page 1-134 0TY. CIRCUIT DESCRIPTION HEATH Component No . CAPACITORS 1 8 p F disc T e s t F disc .001 disc 017, C22, RF Del. electrolytic electrolytic electrolytic electrolytic electrolytic 1000 electrolytic p F m ica 20-109 Carrier Null...
- Page 137 Page GEISE 0TY. DESCRIPTION CIRCUIT HEATH SWITCHES-RELAY (cont'd.) Relay 3-position detent 9-position detent I N S U L A T O R S plastic socket SHEET METAL PARTS...
- Page 138 Page 1-136 LEESE 0 TY, CIRCUIT DESCRIPTION HEATH Component No. SHEET METAL PARTS (cont'd.) 200-1232 C h assi s 203-1532-2 Front pan el • • • ,; · � � 203-1596-3 Rear panel 204-102 Panel bracket Window bracket 204-1918 25 r...
- Page 139 IESHEREE HEATH SHEET METAL PARTS (cont'd.) 205-1557 205-1576 205-1585 206- 1 1 0 1 206-1102 2 06- 1 1 03 206-1265 HARDWARE #2, #3, and # 4 Hardware 2 - 56 1 1 / 1 6 " 250-352 2-56 �@...
- Page 140 C E ES E # 0TY. # 6 Hardware head /2" #8 and #10 Hardware 250-456 253-19 Other Hardware...
- Page 141 E ESE 0TY. • CONNECTORS-SOCKETS connector connector Wire connector Chassis connector ::J') ¥ » ...
- Page 142 Page EATIHIT 0TY. DESCRIPTION HEATH CIRCUIT SHAFTS-BUSHINGS KNOBS � --:-- , MISCELLANEOUS FB (2) FB (4) 446-628...
- Page 143 a i l """No. MISCELLANEO (cont'd.) )U S 431-49 134-886 € compound & > , (; Circuit b o a r , "" °" � rning • ound In c st;gt...
- Page 144 Parts" inside t h e rear cover this Manual. Your Warranty is located inside front cover. pricing information, refer separate "Heath Parts Price List." aligned. tamper with this circuit board; to do could decrease performance and will void the Warranty.
- Page 145 Page 1 - 1 43 G E ES E S T E P - B Y - S T E P A S S E M B L Y ARTS MOUNTING P O I N T E D LU G S 7 A 8 C H A S S I S C O N N E C T O R...
- Page 146 Page C E I E E E Compare the holes in a transistor socket insulator with holes the center are offset so the insulator can b e will heat sink compound in the next step and several other Should this happen, rinse your eyes with warm water. If the /4''// compound gets into your clothing, the clothing may require professional cleaning.
- Page 147 +2 u1 & : < s o u s e t u ¢ 6 · 3 2 , 3/8" S C R E W Q2 , Detail 1 2 - 1 Squeeze an amount o f thermal compound equal t o a ®...
- Page 148 Page 1-146 terminal st r i p insulator. Save the indicated pieces for tern rarily. • " SAVE DISCARD Detail 12-2A C I R C U I T 8 O A R D S H I E L D S s c s w ts ->...
- Page 149 Page G E ESE S H I E L D next four steps. R E A R L I P C H A S S I S scr ews · sequence: "'q,,,, !<,,,.:·/· S O L D E R L eft ...
- Page 150 C E I ES E RE 3) , 4 6 / 2 ° H E A D 3 - L U G s e t et following steps. T ER M I N A L S C R E W Pict --�J6 L O C K W A S H ER...
- Page 151 E EES E E lower CHASSIS W I R I N G w ill soldering that 2-1/4 3-1/2" 2-1/2° 12-4 12-4 • fy m / 4 " -1/4"...
- Page 152 Page 1-150 C E L EES E ± € cu.@ 0 R G <D R A Y EE3EM. 55SEE (4eE8 G R A Y 6ks..57.. PICTORIAL 12-5 (INCH9 ¾ ¼ ½ , ' ' J rrrrrr " • ( C ) •...
- Page 153 Page IEEE 1 ). 4" orange 4" r ed from 7" orange 3" gray 4" g r a y n e 5" gray ✓ wire up through chassis cutout - 1 ) . $ 1 ) . 1 ). ( l.1 · connection, each wire...
- Page 154 Page 1-152 G E I S E FR OM ±HR9 Doc"i G R A Y R E D #eye9 0 R G G~¢- PICTORIAL 12-6 Pictorial 12-6 for the foll g steps Connect e nd gray wire coming from term B 6 t t rm F7 (S-1).
- Page 155 Page 1-153 GEJLth 11 · 5 ; � " gr a y terminal ( S- 1 ) terminal #6 x5/8" € l] s e e r g ra y fr o m terminal (S-1) t o terminal E 1 4 ( S- 1 ) , S C R E W C I R C U I T...
- Page 156 IEEE O R G --------------of-----------------... PICTORIAL 12 5" ( s - 1 ) . 4" orange 5" orange 5" wire, ferrite bead. Then, when you install the gray wire, push the eads down against the chassis so the cement will hold them the chassis.
- Page 157 Page are wire from solder lug BJ (S-1) K2 and encircle terminal K 1 . Solder the wire terminal terminals. ( v(' Co n n ec t " K (s- 1) . / 2" � 2 " ba e H 4 (S-1), (S-2), H2 (S-1).
- Page 158 E ES E efer ewire section A. Solder the other five connections. Trim off any excess wire between sections C and D. 2" gray Detail 12-10A Switches and Controls /4" wire 2' ' section larger than the other five sections. Then refer chassis lip.
- Page 159 Page E I ES E C O N T R O L C O N TR O L FLAT W A S H � R 1 / 4 " - 3 2 N U T Detail 12-10E [�� 12-10C < fo �...
- Page 160 Page 1 - 1 58 E EES E E BLUE YELLOW WHT-RED WIRING HARNESS 9.WIRES 8-1/2" PICTORIAL 1 2 - 1 1 W I R I N G HARNESS connectors on a group o f harness wires as shown in Detail /4"...
- Page 161 Page 1-159 C E E EES E E ,• PICTORIAL 12-12 12-12 (#432-120) B O # 1 1 BO#11 wires. BO# 18: B0#17: wires. BO#1, � ) gray wire. Push the group o f wires through grommet BO# 1 6 : wires.
- Page 162 8IEEE U se sold er on a connection. Conn Connect the gray wire coming from switch S3, section Push the blue and yellow wires down through chassis type (#56-56) (S3), (NCH6) + + + m rr rr 1 • 1 «4 (cw) "...
- Page 163 Page 1 - 1 6 1 LEESE W H T V I Ol ® PICTORIAL 12-14 db ). are gray wires as follows: Refer to torial 1 2 - 1 4 for the following steps. ect harness wires to S3 as follows: G R A onnect harness wires as follows: nnect...
- Page 164 C E ES T E E W H T WHT- W H T e Y EL T w > ] r ; 'a ] W H T - (tL5EE W H I - W H T G R N - B R N , 8 R N 1_1...
- Page 165 Page white-orange...
- Page 166 Connect harness wires a s follows: wires wire t p , p sh essa ee Detail 12-18A. - 1 ) . Detail 12-18A...
- Page 167 EEESTEE A n. #H e9 W H T G R N k l 2-ER. W H T B L K W H I - R E D 8 L K ° � � 00$Gcat PICTORIAL 12-18 /wni6read; 16%so «s-1.
- Page 168 LEESE S AND CABLES P R P A R T I A N H S H 0 E N D nu+H i w -, , Page 1 0 ) for · 3 I 8 " p -"] J / 7 Cut a 1 - 1 / 2 "...
- Page 169 E Z E R termi fals follows. connections center ( J:·:· B A N D E D E N D Detail 1 2 - 1 9 C e n d d will be c o rre c t ed later. �onne •...
- Page 170 Page 1-168 IEEE CABLE HARNESS ORANGE PICTORIAL 12-20 (NCHr6) ¾ _ [ " rr rprrrr t • (CM) • •...
- Page 171 CABLE HARNESS j,,. T W 151 «lid / 4 1 u R N Detail 12-218 Detail 12-21A...
- Page 172 Page 1 - 1 7 0 E L E7S E E 85255EE. 0 . OL _. ssangWE=g PICTORIAL 12-22 QNcts) 4 + J ± ± ± ± mrprrnr (CM)
- Page 173 to solder l e ad o ther 7/8). $4). +vwvwv-v f ] [ K s -+v v w ww+ o» t%@I PICTORIAL 12-23...
- Page 174 Page 1-172 G EES E G R O U N D I N S I D E R E A R P A N E L f f . f R f [ d REAR PANEL Place soft cloth your work bench prevent...
- Page 175 Page 1-173 Detail 12-24C Detail 12-24E € « control nut. C o s s « r s · ( s u u 1 t o c r w A s t « ' L . 7 � # 6 • ·...
- Page 176 E ES E (' 03) £ PICTORIAL 12-25 2" 21/2" P U S H W I R E I N T O T H E H O L E U N T I L C O M E S O U T T H E E N D T H E...
- Page 177 Page 1-175 @ E r = A r r + O R A N G E S I R A N D E D W I R E W R A P A R O U N D Connect the other six wires coming from grommet BC A N D S O L D E R 4 R E D...
- Page 178 IESE for th e following steps. ( S2, " Co y the 2-3/4" gray (s-1). %%.«vs s n ». lyossossn Connect shielded cables coming from grommet s e e+ i o (INCHES) ± ± • (CM) 1 ¢ •...
- Page 179 Page 1-177 E EE E W H T W H T V I 0 G R A Y . - - � PICTORIAL 12-26...
- Page 180 E ES E ± # 6 3 / 8 ° F L A T H E A D PICTORIAL 12-27 S H E E T M E T A L S C R E W panel and chassis carefully t o make sure n o wires have UNDER-CHASSIS W I R I N G 23/4"...
- Page 181 l"7 S A V E O N E P I E C E wires _,..,, . · (4connect center conductor shielded cable R E M O V E O U T E R connect the shield wires yet. T A K I N G C A R E C UJ T T H E...
- Page 182 Page 1-180 E # IEE E O P E N I N G O N E E N D W I T H P I E R S Detail 12-28D C U T O U T S T R I P S y·...
- Page 183 under-chassis wiring against steps the Pictorials t o make sure there are no errors. (#4, This completes the under-chassis wiring. TOP CHASSIS 19($-1). • ss.a? , a nd /2" W I R E connected later. wire Detail 12-29A t/4n�ect the r ed wire coming from switch S2 section terminal intq...
- Page 184 1-182 G E I S B E N D THE L A R G E P O R T I O N P O S I T I O N T H E S M A L L OF T H E G R O M M E T O V E R A N D P O R I O N...
- Page 185 1-183 orange r e6ar e type Q2 , «'%,ot% ta ry switch lateral shield. U se s and 4-40 nuts. '-Co Detail 12-30D (INCHES) • • r rrr • • • •...
- Page 186 Page 1-184 L A T E R A L S H I E L D W H T - V I O L V 1 0 l PICTORIAL 12-31 ½ ¾ ' [ s a g s_ s y s, ouces»...
- Page 187 the gray wire coming from switch S3 section C r ed wire coming from white Connect the red wire coming from switch S 3 section C 7" will t o the three rectangular openings. Connec nine wires coming from BO#13 t o switch S1 M a ke.a position the rotors of all...
- Page 188 Page 1-186 =eeejig R E M O V E C O V E R I N F R O M O NE ON L P E N C I L u?-] Detail 12-328 L � K W A S H ER � 4 - 4 0 N U T �...
- Page 189 IEEE Remove covering from side wind9. black (@) . covering as shown a t Detail 12-32D 6 - 3 2 N U T L O C K w A S H E R S H O R TE R 4-40 6 - 3 2 1 3 / FLAT Detail 12-32E...
- Page 190 Page 1-188 C E Z5 E H ,ors B E N D ( « w t p- 1 / 4 " � L O C K W A S H ER · « Detail 12-32G Detail 12-32F (#434-44) window into rabbets window hex spacers.
- Page 191 1-189 EE2SEE B L A C K Detail 12-32J 12-32J O V E R L A P S C L E A R I D E N T I F I C A T I O N S T R I P After have 2"...
- Page 192 Page 1-190 IESE v i ] [ w i s n o 6" 0 R G e a. cs=as se s s < '6" G R A Y Detail 12-32M the two wires. • strip and tighten the nuts. V F O A S S E M B L Y C O N N E C T O R 3 l a m p...
- Page 193 IEEE M I C R O P H O N E FRONT PANEL AND VFO MOUNTING P A N E L (I O N N E C T I N S I D E FRONT P A N E L �...
- Page 194 E EE S E E 3/8 - 3 2 K N U R L E D C O N T R O L C O N T R O L "6 c o o • s a t , ± s n .
- Page 195 Page 1 - 1 93 IEEE t o c K w A S H E R -4o vu1 Detail 12-33H B0#11 BJ6k � � £ ± ± ± ran ge onto ± .d .} } _ } ~! (al e ± ..:.r�..
- Page 196 P age 1-194 ± r}_}_)__} )_j },j, V � � H 'J fl � 'i:J � '1 � � � - ., <f!J � � � � ] -1 w t - a u � w H r - 0 R G. □...
- Page 197 Page F O L D D I S C A R D sleeving 2" ao#y9/ - 1 / 1 6 " ]-3fl' 8 O: Detail 12-33M full eon/ 4... bly t o the chassis with #8 1/2" hex head BG a d BH Be su t o posi...
- Page 198 G E ES E @ 6 - 3 2 + / 8 " S C R E W 6 - 3 2 J/8" S C R E W ' � dl i 6 B E N D u P, L o C K w A S H E R ? PE R E T A I N E R <_...
- Page 199 Page 1-197 I" ·H REMOVE I" T E R N S U L A T I O N b r ai d are causing a short the center cont Ictor. R E M O V E 3 / 4 " T H E c s .
- Page 200 Page 1 - 1 98 EE5EE € GD » ... o • : : : o W W • ::: ¢ £ v o e v o e Oft4v 4 i t A N D € £T£ w o t AL ¢...
- Page 201 8 3 2 s u s c R , S H A F T C O L L A R setscrews. € L A T E R A L S H I E L D 8" S H A F T Detail 12-36C Detail 12-368 notches are up.
- Page 202 C E8 I EESE E s e e n7 o r [ @ r S P R I N G C L I P C R I M P ONTO BARE W I R E E N D A N D S O L D E R Detall 12-37A ,.,,, ..
- Page 203 I f I t Is convenient, personally deliver your kit t o a Heathkit Electronic Center. For warranty parts replacement, sup Parts on your packing slip. OBTAINING REPLACEMENTS FROM kit. HEATH ELECTRONIC CENTERS resilient TECHNICAL CONSULTATION The effectiveness o f our consultation service depends on...
- Page 204 HEATH • W O R L D ' S FINEST E L E C T R O N I C EQUIPMENT FORM LITHO U S.A...
Need help?
Do you have a question about the Heathkit SB-104A and is the answer not in the manual?
Questions and answers