Advertisement
Quick Links
E XP ERIM E NT MANUAL
E XP ERIM E NT MANUAL
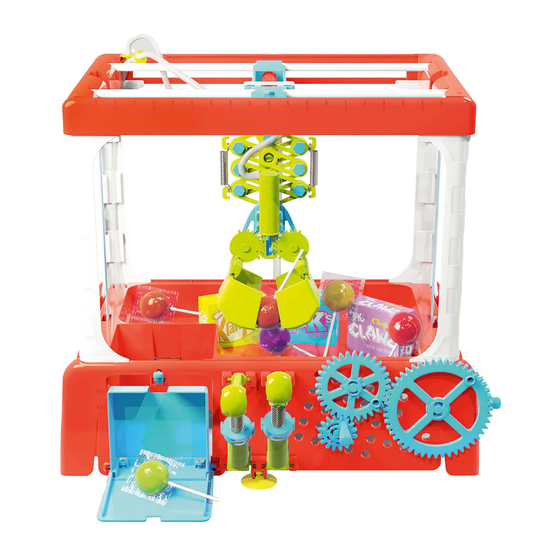
Candy Claw
Machine
Franckh-Kosmos Verlags-GmbH & Co. KG, Pfizerstr. 5-7, 70184 Stuttgart, Germany | +49 (0) 711 2191-0 | www.kosmos.de
Thames & Kosmos, 89 Ship St., Providence, RI, 02903, USA | 1-800-587-2872 | www.thamesandkosmos.com
ASSEMBLY VIDEO !
Scan this QR code to view a step-by-step
assembly video and tips on how to use
the Candy Claw Machine.
Advertisement

Subscribe to Our Youtube Channel
Related Manuals for Thames & Kosmos Candy Claw Machine

Summary of Contents for Thames & Kosmos Candy Claw Machine
- Page 1 Scan this QR code to view a step-by-step assembly video and tips on how to use the Candy Claw Machine. Franckh-Kosmos Verlags-GmbH & Co. KG, Pfizerstr. 5-7, 70184 Stuttgart, Germany | +49 (0) 711 2191-0 | www.kosmos.de Thames & Kosmos, 89 Ship St., Providence, RI, 02903, USA | 1-800-587-2872 | www.thamesandkosmos.com...
- Page 2 Good to know! KIT CONTENTS Do you have any questions or are you missing any parts? Our tech support team will be happy to help you! support@thamesandkosmos.com What’s inside your experiment kit: or 1-800-587-2872 No. Description Qty. No. Description Qty. Plastic frame A (Parts A1 –A17) P14 Suction cup Plastic frame B (Parts B1 –...
- Page 3 15, 16, and the pages Inside back cover. ASSEMBLY STARTS ON PAGE 3 Candy Claw Machine Assembly ......How to Use the Candy Claw Machine ....Experiments ............ How Hydraulics Work ........Handy-Dandy End Effectors ......Inside back cover About Gears and Levers .....
- Page 4 With this kit, you can build a mechanical claw machine. Your machine requires no electricity or electronics — just simple machines and the power of your hand. Here is an overview of the different parts of the Candy Claw Machine: Hydraulic Tubes: Move waTer back and forTH beTween...
- Page 5 Candy Claw Machine CANDY CLAW MACHINE ASSEMBLY Ready? Let’s get asseMbly vIdeo! building! Scan this QR code to view a step-by-step assembly video and tips on how to use the Candy Claw Machine. If the suction cups get stuck to your work...
- Page 6 CANDY CLAW MACHINE ASSEMBLY Make sure the straight arm of the spring (P20) is in the notch in P8. Note: See the back cover of this manual for an alternate setup of the prize door. Peel any thin protective films off the panels.
- Page 7 Candy Claw Machine Pay very close attention to the proper orientation of each piece. A10 x6 IMPORTANT! In steps 13–16, you will be assembling the four hydraulic cylinders. You must lubricate each piston seal (P13) with oil. Use baby oil, vegetable oil, or another cooking oil from your home.
- Page 8 CANDY CLAW MACHINE ASSEMBLY Lubricate P13! Nozzle Scissor arm hydraulic cylinder Piston Cylinder Nozzle Claw hydraulic cylinder Piston Cylinder Lubricate P13! Tube assembly: There are three 450-mm tubes and one 240-mm tube. Connect them as shown here. Tube 1 450 mm...
- Page 9 Candy Claw Machine Filling cylinder X2 and tube T2: 19b. Connect tube T2 to 19a. Submerge the nozzle of tube T2 in the cylinder X2 basin of water. underwater. 19c. Move the 19d. Remove the piston in and out assembly from the repeatedly to fill water.
- Page 10 CANDY CLAW MACHINE ASSEMBLY Claw controller: For each cylinder, snap the left peg into left side the base first. Then snap in the right peg. Guide the tubes back, under the base. Scissor arm controller: right side Guide the tubes up through the holes in the base (1) and top (2) of the machine.
- Page 11 Candy Claw Machine P17 x2 Note: The scissor arm is behind B9. Side view Connect the tubes to the cylinders as shown. A. The tube (T1) from the scissor arm controller (X1) connects to the upper cylinder — the scissor arm cylinder (X3).
- Page 12 CANDY CLAW MACHINE ASSEMBLY Hold the claw lever up, so the piston with the teeth on it in X4 is retracted up, and you can attach the gears as shown. Align the gears exactly as shown. Wind the belt around the right spool in the base of the machine.
- Page 13 Candy Claw Machine Make sure the left spool is pushed to the left so it can rotate freely on the axle for winding. Guide the belt under the machine, through the slot, up the far side, over the roller, through the...
- Page 14 CANDY CLAW MACHINE ASSEMBLY Connect the ends of the flexible shaft (P15) to A5 and A6. Guide the flexible shaft (P15) through the slot in the base. Peel any thin protective films off the panels. Gears Line up the prongs on the gear with the tabs inside the hole in A1.
- Page 15 When the prize drops, it should hit the bullseye of the prize trigger. This will cause the prize door to pop open and the prize to pop out! CAn you mAsTer The candY ClAw MAchine and get a prize every tiMe?!?
- Page 16 EXPERIMENTS A. Change the claws 1. Lift up the front plastic panel. Press the tabs on C9 and C10 toward each other to release the current claw piece. 2. Snap the new claw pieces into C9 and C10. Experiment to see which claws work best for picking up a variety of different objects! B.
- Page 17 Check It Out CHECK IT OUT HoW HYDRAULICs WoRK In the claw machine, you saw how you could use the piston of one hydraulic cylinder to move another cylinder’s piston, and thereby transfer force, when the two of them are connected by a tube and the system is filled with water.
- Page 18 CHECK IT OUT Handy-Dandy End Effectors The device at the end of a robotic arm is called the end effector. You can think of it like a human hand, but the variety of different end effectors and their capabilities goes far beyond what a human hand can do on its own. In this kit, there are three interchangeable end effectors: scoop, three-point gripper, and two-point gripper.
- Page 19 CHECK IT OUT GEARS AND GEAR RATIOS Gears are actually just wheels with teeth on them. The teeth allow the wheels to mesh together and turn each other. In other words, they allow forces to be transmitted from one wheel to another. The mechanical advantage of a gear is evident when a large gear meshes with a small gear.
- Page 20 You might find that some prizes you want to use in the claw machine are too big and get stuck when they should be ejected from the prize chute. In this case, you can easily remove the ejector tray from the prize door and install it in a fixed position at the bottom of the prize chute.
Need help?
Do you have a question about the Candy Claw Machine and is the answer not in the manual?
Questions and answers