Bossini L00833 Installation And Care Instructions
Outdoor shower columns
Hide thumbs
Also See for L00833:
Advertisement
Quick Links
Outdoor Shower Columns - Duschsäule für den Außenbereich
Colonne de douche extérieur - Columnas Ducha para exterior
Istruzioni di montaggio e manutenzione
Installation and care instructions
conseils d'entretien
Instrucciones de montaje y de mantenimiento
LEGGERE ATTENTAMENTE IL PRESENTE LIBRETTO DI INSTALLAZIONE E MANUTENZIONE.
READ THIS INSTALLATION AND CARE MANUAL CAREFULLY.
DIE VORLIEGENDE MONTAGE- UND WARTUNGSANLEITUNG AUFMERKSAM DURCHLESEN.
LIRE ATTENTIVEMENT CETTE NOTICE D'INSTALLATION ET D'ENTRETIEN.
LEA ATENTAMENTE ESTE MANUAL DE INSTALACIÓN Y MANTENIMIENTO
ВНИМАТЕЛЬНО ПРОЧИТАТЬ ИНСТРУКЦИЮ ПРЕЖДЕ, ЧЕМ ПРИСТУПАТЬ К УСТАНОВКЕ
INDOSSARE GUANTI DI PROTEZIONE.
WEAR PROTECTIVE GLOVES.
SCHUTZHANDSCHUHE TRAGEN.
UTILISER DES GANTS DE PROTECTION.
UTILICE GUANTES DE PROTECCIÓN.
ИСПОЛЬЗОВАТЬ ЗАЩИТНЫЕ ПЕРЧАТКИ
Colonne doccia da esterno
Montage-und Wartungsanleitung
Rubinetto d'arresto
On-off valve
Stoppventil
Robinet d'arrêt
Llave de paso
Rubinetto a tempo
Self closing valve
Selbstschluss
Robinet temporisateur.
Grifo temporizado
Instructions pour l'installation et
Инструкция по монтажу и эксплуатации
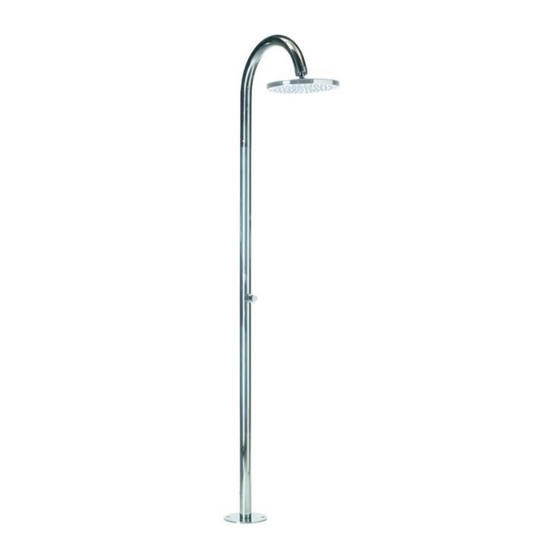
L00833
Oki Floor Ø250
L00827
Oki Floor Ø200
L00832
Dinamic Ø140
L00826
Pool Floor
L00829
Oki Floor Ø250
L00830
Oki Floor Ø200
L00834
Dinamic Ø140
L00831
Pool Floor
Advertisement

Related Manuals for Bossini L00833


Summary of Contents for Bossini L00833
- Page 1 Instrucciones de montaje y de mantenimiento Инструкция по монтажу и эксплуатации Rubinetto d’arresto On-off valve Stoppventil Robinet d’arrêt Llave de paso L00833 Oki Floor Ø250 L00827 Oki Floor Ø200 L00832 Dinamic Ø140 L00826 Pool Floor Rubinetto a tempo...
- Page 2 Componenti - Parst - Composants - Einzelteile - Componentes - Комплектация Ø 200 KIT PER INCASSO A PAVIMENTO 1/2GASF...
- Page 3 Componenti - Parst - Composants - Einzelteile - Componentes - Комплектация Componenti Parts 1) Tubo curvo 1) Curved shower pipe 2) Tubo verticale 2) Straight vertical shower pipe 3) Basamento 3) Base 4) Viti M8X40 (4 pezzi) 4) M8x40 mm screws (4 pieces) 5) Flessibile di collegamento 5) Supply fl exible hose 6) Viti M6 ( 4 pezzi )
- Page 4 Installazione - Installation - Installation - Installation - Instalación - Установка Fig.A3 pavimentazione Tiles fl ooring Carrelage Fig.A4 pavimentazione Tiles fl ooring Carrelage Fig.A5 calcestruzzo concrete béton Dimensioni in mm - Measures in mm - Dimensions en mm - Maß im mm - Medidas en milímetros - Размеры выражены в мм...
- Page 5 Installazione - Installation - Installation - Installation - Instalación - Установка Fig.B Fig.C Dimensioni in mm - Measures in mm - Dimensions en mm - Maß im mm - Medidas en milímetros - Размеры выражены в мм...
- Page 6 Installazione - Installation - Installation - Installation - Instalación - Установка Fig.D Dimensioni in mm - Measures in mm - Dimensions en mm - Maß im mm - Medidas en milímetros - Размеры выражены в мм...
- Page 7 Installazione - Installation - Installation - Installation - Instalación - Установка Fig.E REGOLAZIONE RUBINETTO A TEMPO SELF CLOSING TAP ADJUSTEMENT Dimensioni in mm - Measures in mm - Dimensions en mm - Maß im mm - Medidas en milímetros - Размеры выражены в мм...
- Page 8 Raccomandazioni - Recommendations - Conseils - Empfehlungen - Recomendaciones - Рекомендации RACCOMANDAZIONI PER IL CORRETTO UTILIZZO Un corretto utilizzo del prodotto Vi consentirà di evitare possibili danni al vostro ambiente bagno. * Per evitare che impurità o detriti possano giungere all’interno del prodotto dando origine a problemi di funzionamento, spurgare sempre l’impianto prima di collegare i tubi di alimentazione.
-
Page 9: Istruzioni Di Montaggio
Installazione - Installation - Installation - Installation - Instalación - Установка ISTRUZIONI DI MONTAGGIO Avvertenza! Per la corretta installazione della colonna doccia con alimentazione acqua esterna è necessario decidere preventivamente con i progettisti/installatori l’orientamento desiderato del getto d’acqua, poiché la direzione di installazione della colonna è determinata dal fissaggio del basamento (3) come indicato nella Fig. -
Page 10: Installation Instructions
Installazione - Installation - Installation - Installation - Instalación - Установка INSTALLATION INSTRUCTIONS Important! To ensure the correct installation of the shower column with exposed water inlet, it is necessary to decide in advance with planners / installers the desired direction of the shower head. - Page 11 La garanzia non copre danni causati da deposito di calcare o impurità. CLEANING Congratulations for choosing a Bossini product and we thank you for the trust you have given us. To keep the material’s appearance as long as possible, a few guidelines must be followed.
-
Page 12: Warranty Terms
The defective parts have to be returned to Bossini carriage free with a report describing the defect. Bossini reserves the right to inspect the part alleged to be faulty or defective and to evaluate the applicability of the warranty terms.
Need help?
Do you have a question about the L00833 and is the answer not in the manual?
Questions and answers