Table of Contents
Advertisement
Quick Links
Advertisement
Table of Contents

Subscribe to Our Youtube Channel
Related Manuals for MOGlabs FSC


Summary of Contents for MOGlabs FSC
- Page 1 Fast servo controller Version 1.0.4, Rev 2–4 hardware...
- Page 2 MOGL Contact For further information, please contact: MOG Laboratories P/L MOGLabs USA LLC 49 University St 419 14th St Carlton VIC 3053 Huntingdon PA 16652 AUSTRALIA +61 3 9939 0677 +1 814 251 4363 info@moglabs.com...
-
Page 3: Table Of Contents
Contents 1 Introduction 1.1 Basic feedback control theory ... . . 2 Connections and controls 2.1 Front panel controls ....2.2 Rear panel controls and connections . - Page 4 Contents B.7 Laser undergoes slow mode hops ... . C PCB layout D 115/230 V conversion D.1 Fuse ......D.2 120/240 V conversion .
-
Page 5: Introduction
1. Introduction provides the critical elements of a high-bandwidth MOGL low-latency servo controller, primarily intended for laser frequency stabilisation and linewidth narrowing. The can also be used for amplitude control, for example to create a “noise-eater” that sta- bilises the optical power of a laser, but in this manual we assume the more common application of frequency stabilisation. - Page 6 Chapter 1. Introduction 1.1.1 Error signals The key common feature of feedback control is that the error signal used for control should reverse sign as the laser frequency shifts above or below the setpoint, as in figure 1.2. From the error signal, a feedback servo or compensator generates a control signal for a transducer in the laser, such that the laser frequency is driven to- wards the desired setpoint.
- Page 7 1.1 Basic feedback control theory 1.1.2 Frequency response of a feedback servo The operation of feedback servos is usually described in terms of the Fourier frequency response; that is, the gain of the feedback as a function of the frequency of a disturbance. For example, a common disturbance is mains frequency, = 50 Hz or 60 Hz.
- Page 8 Chapter 1. Introduction Proportional Fourier frequency [ Hz] Figure 1.3: Conceptual Bode plot showing action of the fast (red) and slow (blue) controllers. The slow controller is either a single or double integrator with adjustable corner frequency. The fast controller is with adjustable corner frequencies and gain limits at the low and high frequencies.
-
Page 9: Connections And Controls
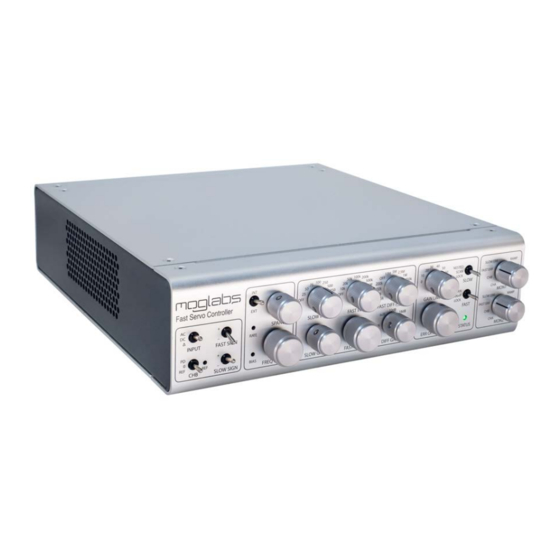
2. Connections and controls 2.1 Front panel controls The front panel of the has a large number of configuration op- tions that allow the servo behaviour to be tuned and optimised. Please note that switches and options may vary between hardware revisions, please consult the manual for your specific device as in- dicated by the serial number. - Page 10 Chapter 2. Connections and controls 2.1.2 Ramp control The internal ramp generator provides a sweep function for scanning the laser frequency typically via a piezo actuator, diode injection current, or both. A trigger output synchronised to the ramp is pro- vided on the rear panel ( TRIG Internal or external ramp for frequency scanning.
- Page 11 2.1 Front panel controls Ten-turn fast servo proportional gain; from 10 dB to +50 dB. FAST GAIN Controls the high-frequency servo response. When set to “ ”, the FAST DIFF/FILTER servo response remains proportional. When turned clockwise, the differentiator is enabled with the associated corner frequency. Note that decreasing the corner frequency increases the action of the differentiator.
- Page 12 Chapter 2. Connections and controls Multi-colour indicator displaying status of the lock. STATUS Power on, lock disabled. Green Lock engaged but error signal out of range, indicating the lock Orange has failed. Lock engaged and error signal is within limits. Blue 2.1.5 Signal monitoring Two rotary encoders select which of the specified signals is routed to...
-
Page 13: Rear Panel Controls And Connections
2.2 Rear panel controls and connections 2.2 Rear panel controls and connections MONITOR 2 MONITOR 1 SWEEP IN GAIN IN B IN A IN LOCK IN Serial: TRIG FAST OUT SLOW OUT MOD IN POWER B POWER A All connectors are , except as noted. - Page 14 Chapter 2. Connections and controls +12 V 12 V Figure 2.1: M8 connector pinout for POWER A, B High-bandwidth modulation input, added directly to fast output, MOD IN ±1 V if is on. Note that if is on, should be DIP4 DIP4 MOD IN...
-
Page 15: Internal Dip Switches
2.3 Internal DIP switches 2.3 Internal DIP switches There are several internal switches that provide additional op- tions, all set to by default. There is potential for exposure to high voltages inside the , es- WARNING pecially around the power supply. Fast gain Front-panel knob External signal... - Page 16 Chapter 2. Connections and controls changing the laser frequency by bumping the offset knob. Reverses the direction of the sweep. DIP 6 Fast . Should normally be , so that the fast error signal is DIP 7 coupled to the feedback servos, with time constant of 40 ms (25 Hz). , a 2.5 V offset is added to the fast output, suitable for direct DIP 8 connection to...
-
Page 17: Feedback Control Loops
Slow error ∫ #1 Gain SLOW GAIN Double integrator [2] Figure 3.1: Schematic of the MOGLabs . Green labels refer to controls on the front-panel and inputs on the back-panel, brown are internal switches, and purple are outputs on the back-panel. -
Page 18: Input Stage
Chapter 3. Feedback control loops 3.1 Input stage The input stage of the (figure 3.2) generates an error signal as is taken from the “ ” con- A IN OFFSET nector, and V is set using the selector switch, which chooses between the “... - Page 19 3.2 Slow servo loop depending on whether is enabled. The slow integrator time DIP2 constant is controlled from the front-panel knob, which is SLOW INT labelled in terms of the associated corner frequency. SLOW SERVO Integrators LF sweep SLOW OUT SLOW INT ∫...
- Page 20 Chapter 3. Feedback control loops 3.2.1 Measuring the slow servo response The slow servo loop is designed for slow drift compensation. To observe the slow loop response: 1. Set and connect the output to an MONITOR 1 SLOW ERR oscilloscope. 2.
- Page 21 For use with different laser controllers, a larger change in the locked slow output of the FSC can be enabled via a simple resistor change. The gain on the output of the slow feedback loop is defined by R82/R87, the ratio of resistors R82 (500 Ω) and R87 (100 kΩ).
-
Page 22: Fast Servo Loop
Chapter 3. Feedback control loops 3.3 Fast servo loop The fast feedback servo (figure 3.5) is a -loop which provides precise control over each of the proportional (P), integral (I) and differential (D) feedback components, as well as the overall gain of the entire system. - Page 23 3.3 Fast servo loop Proportional Fourier frequency [ Hz] Figure 3.6: Conceptual Bode plot showing action of the fast (red) and slow (blue) controllers. The slow controller is either a single or double integrator with adjustable corner frequency. The fast controller is a compensator with adjustable corner frequencies and gain limits at the low and high frequencies.
- Page 24 Chapter 3. Feedback control loops knob anti-clockwise from the position to set the roll-off fre- quency for filtering mode. The fast servo has three modes of operation: SCAN SCAN+P . When set to , feedback is disabled and only the bias LOCK SCAN is applied to the fast output.
- Page 25 3.3 Fast servo loop • On the oscilloscope, the output of the FSC should show FAST a 100 Hz sine wave. • Adjust the knob to vary the proportional gain of the FAST GAIN fast servo until the output is the same amplitude as the input.
-
Page 26: Modulation And Scanning
Chapter 3. Feedback control loops 3.4 Modulation and scanning Laser scanning is controlled by either an internal sweep genera- tor or an external sweep signal. The internal sweep is a sawtooth with variable period as set by an internal four-position range switch (App. -
Page 27: Application Example: Pound-Drever Hall Locking
4. Application example: Pound-Drever Hall locking A typical application of the is to frequency-lock a laser to an optical cavity using the technique (fig. 4.1). The cavity acts as a frequency discriminator, and the keeps the laser on resonance with the cavity by controlling the laser piezo and current through its outputs respectively, reducing the laser linewidth. -
Page 28: Laser And Controller Configuration
Chapter 4. Application example: Pound-Drever Hall locking 4.1 Laser and controller configuration is compatible with a variety of lasers and controllers, pro- vided they are correctly configured for the desired mode of operation. When driving an (such as the lasers), the MOGL ECDL requirements for the laser and controller are as follows:... -
Page 29: Achieving An Initial Lock
4.2 Achieving an initial lock 4.1.2 DLC configuration Although the can be configured for either internal or external sweep, it is significantly simpler to use the internal sweep mode and set the as a slave device as follows: 1. Connect on the SLOW OUT SWEEP / PZT MOD... - Page 30 Chapter 4. Application example: Pound-Drever Hall locking steps are illustrative of the process required to achieve a stable lock. Values listed are indicative, and will need to be adjusted for specific applications. Further advice on optimising the lock is provided in §4.3.
- Page 31 4.2 Achieving an initial lock Figure 4.2: Scanning the laser with P-only feedback on the fast output while scanning the slow output causes the error signal (orange) to become extended when the sign and gain are correct (right). In a PDH application, the cavity transmission (blue) will also become extended.
-
Page 32: Optimisation
Chapter 4. Application example: Pound-Drever Hall locking 5. Set mode to and observe the slow error signal. SLOW LOCK If the slow servo locks, the DC level of the slow error may change. If this occurs, note the new value of the error signal, back to and use the error offset trimpot to bring SLOW... - Page 33 4.3 Optimisation provides noise analysis up to a Fourier frequency of 96 kHz with 140 dB dynamic range. Ideally the spectrum analyser would be used with an independent frequency discriminator that is insensitive to laser power fluctua- tions [11]. Good results can be achieved by monitoring the in-loop error signal but an out-of-loop measurement is preferable, such as measuring the cavity transmission in a PDH application.
- Page 34 Chapter 4. Application example: Pound-Drever Hall locking care should be taken to eliminate or mitigate these. The earth of should be as close as possible to both the laser controller and any electronics involved in generating the error signal. One procedure for optimising the fast servo is to set FAST DIFF and adjust to reduce the...
- Page 35 4.3 Optimisation the measured noise. The slow servo can then be optimised to minimise the over-reaction to external perturbations. Without the slow servo loop the high gain limit means that the fast servo will respond to external perturbations (e.g. acoustic coupling) and the resulting change in current can in- duce mode-hops in the laser.
- Page 36 Chapter 4. Application example: Pound-Drever Hall locking...
-
Page 37: A Specifications
A. Specifications Parameter Specification Timing Gain bandwidth ( 3 dB) > 35 MHz Propagation delay < 40 ns External modulation > 35 MHz bandwidth ( 3 dB) Input A IN, B IN SMA, 1 MΩ, ±2 5 V SWEEP IN SMA, 1 MΩ, 0 to +2 5 V GAIN IN SMA, 1 MΩ, ±2 5 V... - Page 38 Appendix A. Specifications Parameter Specification Output SLOW OUT SMA, 50 Ω, 0 to +2 5 V, BW 20 kHz FAST OUT SMA, 50 Ω, ±2 5 V, BW > 20 MHz MONITOR 1, 2 SMA, 50 Ω, BW > 20 MHz TRIG SMA, 0 to +5 V POWER A, B...
-
Page 39: B Troubleshooting
• on the SWEEP • span is fully clockwise. • Connect the to an oscilloscope, set the FSC MONITOR 1 MONI- knob to and adjust FREQ OFFSET until the ramp TOR 1 RAMP is centred about 1.25 V. If the above checks have not solved your problem, disconnect the... -
Page 40: When Using Modulation Input, The Fast Output Floats To A Large Voltage
Appendix B. Troubleshooting B.2 When using modulation input, the fast output floats to a large voltage When using the functionality of the enabled) the MOD IN DIP 4 fast output will typically float to the positive voltage rail, around 4V. Ensure is shorted when not in use. -
Page 41: Monitor Outputs Wrong Signal
B.6 Monitor outputs wrong signal B.6 Monitor outputs wrong signal During factory testing, the output of each of the knobs MONITOR is verified. However, over time the set screws that hold the knob in position can relax and the knob may slip, causing the knob to indicate the wrong signal. - Page 42 Appendix B. Troubleshooting jumps of the free-running laser on slow timescales, of the order of 30 s where the laser frequency jumps by 10 to 100 MHz. Ensure the laser has sufficient optical isolation, installing another isolator if necessary, and block any beam paths that are unused.
-
Page 43: C Pcb Layout
C. PCB layout C373 C371 C375 C377 R338 R340 R343 C370 C374 C376 C378 C379 C380 C365 C368 R344 R346 R347 R345 R329 R330 R333 R116 C118 R126 C106 R139 C107 R109 C130 C112 R113 C100 R127 R125 R165 C121 C104 C105 R118... - Page 44 Appendix C. PCB layout...
-
Page 45: D 115/230 V Conversion
D. 115/230 V conversion D.1 Fuse The fuse is a ceramic antisurge, 2.5A, 5x20mm, for example Littlefuse 021502.5MXP. The fuse holder is a red cartridge just above the IEC power inlet and main switch on the rear of the unit (Fig. D.1). Figure D.1: Fuse catridge, showing fuse placement for operation at 230 V. - Page 46 Appendix D. 115/230 V conversion Figure D.2: To change fuse or voltage, open the fuse cartridge cover with a screwdriver inserted into a small slot at the left edge of the cover, just to the left of the red voltage indicator. When removing the fuse catridge, insert a screwdriver into the recess at the left of the cartridge;...
- Page 47 D.2 120/240 V conversion Figure D.4: 230 V bridge (left) and fuse (right). Swap the bridge and fuse when changing voltage, so that the fuse remains uppermost when inserted. Figure D.5: 115 V bridge (left) and fuse (right).
- Page 48 Appendix D. 115/230 V conversion...
- Page 49 Bibliography [1] Alex Abramovici and Jake Chapsky. Feedback Control Systems: A Fast-Track Guide for Scientists and Engineers. Springer Sci- ence & Business Media, 2012. 1 [2] Boris Lurie and Paul Enright. Classical Feedback Control: With MATLAB® and Simulink®. CRC Press, 2011. 1 [3] Richard W.
-
Page 50: References
[9] S. C. Bell, D. M. Heywood, J. D. White, and R. E. Scholten. Laser frequency offset locking using electromagnetically in- duced transparency. Appl. Phys. Lett., 90:171120, 2007. 1 [10] W. Demtr¨ o der. Laser Spectroscopy, Basic Concepts and Instru- mentation. - Page 52 MOG Laboratories Pty Ltd © 2017 – 2021 49 University St, Carlton VIC 3053, Australia Product specifications and descriptions in this doc- Tel: +61 3 9939 0677 info@moglabs.com ument are subject to change without notice.
Need help?
Do you have a question about the FSC and is the answer not in the manual?
Questions and answers