
Related Manuals for Comfee CMP10


Summary of Contents for Comfee CMP10
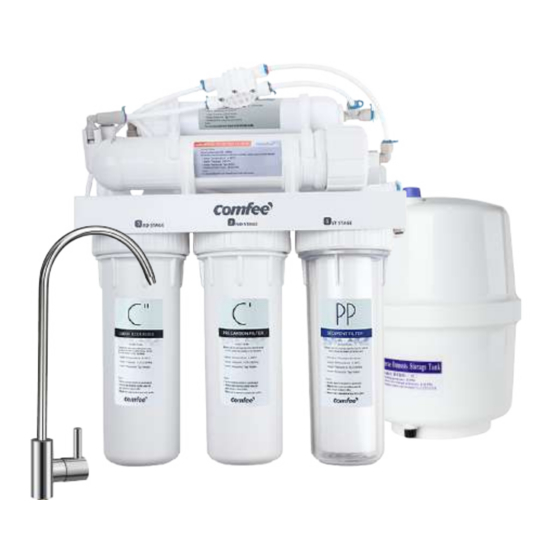
- Page 1 Reverse Osmosis Water Purifier Instruction Manual Model: CMP10 Please read the manual carefully before operating your water purifier. Please keep this owner’s manual for future reference.
-
Page 2: Table Of Contents
Table of Contents page Product Introduction ---------------------------------------------------------------------------------------- Benefits of Comfee CMP10 ------------------------------------------------------------------------------- Specifications and Dimensions -------------------------------------------------------------------------- Packing List --------------------------------------------------------------------------------------------------- Tools Needed for Installation ----------------------------------------------------------------------------- Plan Your Installation --------------------------------------------------------------------------------------- Site Preparation --------------------------------------------------------------------------------------------- Installation Procedure -------------------------------------------------------------------------------------- How to Cut and Connect PE Tubes -------------------------------------------------------------------- Installation Instructions ------------------------------------------------------------------------------------ STEP 1 –... -
Page 3: Product Introduction
1) Removes Disease-Causing Contaminants: CMP10 removes bacteria, viruses, and dissolved impurities from water to make it safe for consumption. 2) Makes Tasty Food: CMP10 purification process improves the taste of your food by removing chlorine and odors caused by the impurities in water. -
Page 4: Packing List
Packing List Your Reverse Osmosis Drinking Water System is shipped complete in one carton. Remove all items from your shipping carton and check all items against the packing list below. Note any items lost or damaged in shipment. It is recommended to keep the small parts in the parts bag until you are ready to install them. -
Page 5: Tools Needed For Installation
Read through the entire manual before beginning your installation and follow all steps exactly. Comfee CMP10 RO system can be installed under a sink or in a remote location. Before starting, close the hot and cold water shutoff valves, reference Figure 1 as a visual aid. -
Page 6: How To Cut And Connect Pe Tubes
Under Sink Location Both the Reverse Osmosis Assembly and fresh water storage tank will need to be installed in a kitchen or bathroom sink cabinet. The reverse osmosis waste water line will need to be hard connected to a sink drain-line by using the drain saddle adapter enclosed in the package. Note: The drain saddle adapter will need to attach above the sink drain P-Trap to drain water from the reverse osmosis system. -
Page 7: Installation Instructions
PE Tube Supplied with Reverse Osmosis System Inlet (White) Outlet (Blue) Drain (Red) Installation Instructions STEP 1 – Install Cold Water Supply Fitting Check and comply with your local plumbing codes before you start installation. Refer to the Specifications and Dimensions page 3 for supply water requirements. The Water Supply Fitting can be adapted to a 3/8”... -
Page 8: Step 2 - Install Drain Saddle Adapter
STEP 2 – Install Drain Saddle Adapter The drain saddle adapter is needed for the drain water produced from the Reverse Osmosis Filter. Please make sure the drain saddle adapter is located above the P-trap, as shown in Figure 6 and do not connect or install the drain saddle adapter on a drain-line coming from a garbage disposal. -
Page 9: Step 4 - Install Filters
INSTALL REVERSE OSMOSIS FAUCET 1. The RO faucet is included with your RO System. Locate and organize the RO installation parts, see Figure 9 for more details on assembly. 2. Referring to Figure 9, You will need to install the part in the order shown, Stainless Steel Washer;... - Page 10 INSTALL THE VERTICAL FILTERS Top Inside Grove 1. Referring to Figure 11, you will install two O-Rings on each filter housing. Install one O-Ring seal on the top outside grove of the filter housing. Gently slide the O-Ring down the outside filter housing surface until the O-Ring is seated into the upper grove.
-
Page 11: Step 5 - Install Fresh Water Storage Tank & Reverse Osmosis Assembly
STEP 5 – Install Fresh Water Storage Tank & Reverse Osmosis System Your RO system utilizes a pressurized tank to store purified water. Because the Reverse Osmosis process is slow, the fresh water storage tank is pressurized to improve the water flow at the faucet. - Page 12 Connection Description PE Tube Color Points A to B Water inlet from water supply line to the water purifier White PE Tube C to D RO Waste water outlet to drain saddle adapter Red PE Tube E to F RO fresh water outlet to RO storage tank White PE Tube G to H RO fresh water outlet to faucet connector...
- Page 13 CONNECT RED TUBE FROM RO SYSTEM TO DRAIN Point C SADDLE ADAPTER (POINT C to D) 1. Locate the red PE tube and attach one end to the Waste Water Output, Point C, and the other end to the Drain Saddle Adapter attached to the drain line under the sink, Point D.
-
Page 14: Maintenance And How To Section
CONNECT WHITE TUBE FROM RO PURE WATER OUTPUT Point G TO WATER FAUCET (POINT G to H) 1. Locate the white PE tube and attach one end to the RO pure water output, Point G, and the other end to the RO faucet, Point 2. -
Page 15: How To Install The Ro Filter
Flushing Stage 1 – 3 Filter, Steps Please make sure the person performing this process has clean hands while handling or servicing the inner parts of the filtration system. 1. To begin the flushing process, you will need to make sure the RO fresh water storage tank valve, letter F in the above picture, is in the closed position. -
Page 16: Flushing All Filters In System
Congratulations, you have successfully installed your Comfee Reverse Osmosis Water Filtration System! Replacement of Filter Elements Your Comfee CMP10 Reverse Osmosis filtration system is designed for low maintenance. Stage 1 Stage 2 Stage 3... -
Page 17: How To Replace 1St To 3Rd-Stage Filter Elements
Replacement of 1st to 3rd-Stage Filter Element If the flow or quality reduction is found, it should be replaced every 6 months or earlier. The frequency of replacement depends on your water consumption and the quality of source water. In order to protect the reverse osmosis membrane from chlorine and other harmful contaminants, it is necessary to replace the filter element according to its service life. -
Page 18: How To Replace The Ro Membrane Filter Element
How To Replace The RO Membrane Filter Element 1. Your Reverse Osmosis membrane usually has a useful life of about 2-3 years. The useful life of filter membrane depends on the quality of source water, household water consumption and the frequency of replacing 1st to 3rd filter element. NOTE: In order to ensure the performance of the system and the purity of water, please replace the 1st to 3rd filter element as planned. -
Page 19: Filter Element Parameters
Filter Element Parameters Filter Element Name Recommended Life Function Reduces sand, silt, scale, and rust particles Stage 1 - in residential tap water. The filter is made of 4 ~ 6 Months Sediment Filter (PP) spun polypropylene fibers for resistance to chemicals and bacteria. - Page 20 The product is subject to change without notice. Please keep this manual properly.
Need help?
Do you have a question about the CMP10 and is the answer not in the manual?
Questions and answers