Anker Nebula Capsule Max User Manual
Hide thumbs
Also See for Nebula Capsule Max:
- User manual (14 pages) ,
- Owner's manual (14 pages) ,
- User manual (109 pages)
Table of Contents
Advertisement
Advertisement
Table of Contents

Related Manuals for Anker Nebula Capsule Max


Summary of Contents for Anker Nebula Capsule Max
- Page 1 User Manual Nebula Capsule Max...
-
Page 2: Table Of Contents
Table of Contents Safety Instructions What’s Included Overview Getting Started Nebula App Settings Using the Nebula Capsule Max Specifications Troubleshooting Notice Trademarks Warranty... -
Page 3: Safety Instructions
Safety Instructions Read all instructions before you use this device. Do not make any changes or create settings that are not described in this manual. If physical injury, loss of data, or damage is caused by failure to follow instructions, the warranty does not apply. Setup •... - Page 4 Power Supply • Use only the provided power adapter. • Power off the device before removing the power supply from the socket. • Protect the power cord from being walked on or pinched, particularly at plugs, convenience receptacles, and the point where they exit from this device.
- Page 5 • The remote control contains batteries which can be swallowed. Keep the remote control out of the reach of children. • Risk of explosion! Keep batteries away from heat, direct sunlight, or fire. Never dispose of batteries by burning. • Remove the batteries when the remote control has not been used for a long period of time.
-
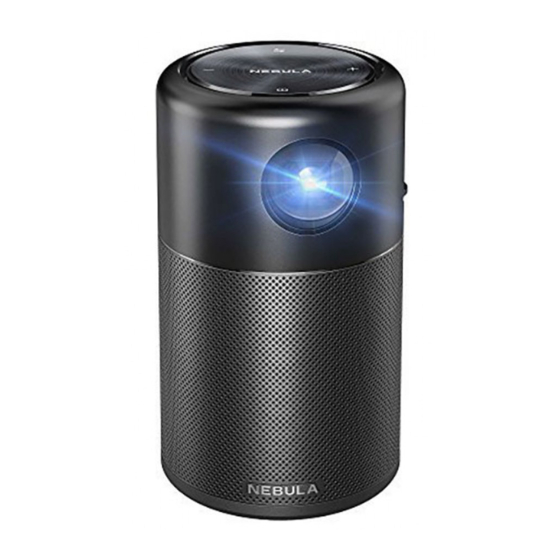
Page 6: What's Included
What’s Included Overview 1. Front View Lens Air ventilation (inlet) - Page 7 2. Rear View Air ventilation (outlet) Infrared receiver Power button • Press and hold for 2 seconds to power on / off • Press to wake up the projector / enter the standby mode in projector mode Speaker DC-IN • Connect to power supply (with supplied adapter) USB port •...
- Page 8 3. Top View Volume up / down button Confirmation button Return button Navigation buttons 4. Bottom View Tripod socket...
- Page 9 5. Remote Control • Press to select an option: shutdown, standby, reboot, or enter Bluetooth speaker mode • Press to enter / exit mouse key mode • Press to confirm a selection or entry • Pause / resume play • Open the home menu •...
- Page 10 6. LED Indication Button LED Status Description Power on / Operating in projector Solid blue mode Solid yellow Standby in projector mode Solid red Charging Solid green Fully charged Flashing red Low battery Ready to pair / Bluetooth is pairing / Flashing blue Bluetooth disconnected (Bluetooth speaker mode)
-
Page 11: Getting Started
Getting Started 1. Placement Place Nebula Capsule Max on a stable, flat surface in front of the projection surface. For the best results, the projection surface should be white and flat. The distance between Nebula Capsule Max and the projection surface must be a minimum of 0.58 meters (23 inches) and a maximum of 3.08 meters (121 inches) to get a projection image... - Page 12 Or you can press and hold for 3 seconds to manually adjust the focus. ⑤ For first time use, follow the on-screen instructions to complete the basic set-up. To give your Nebula Capsule Max the fastest, safest charge, only use the provided adapter.
-
Page 13: Nebula App
Nebula App To easily control Nebula Capsule Max, we recommend downloading the Nebula Connect app. With this app, you can operate your mouse using the screen. ① Download the Nebula Connect app from the App Store (iOS devices) or Google Play (Android devices). -
Page 14: Settings
Settings Go through the setup process when you power on Nebula Capsule Max for the first time. 1. Network This projector can be connected to the Internet via a wireless (Wi-Fi) connection. ① On the home menu, select [Network] and press ②... - Page 15 3. Projector to access the home menu, select [Settings] > [Projector], and Press press [Image Mode] [Auto] / [Standard Mode] / [Battery Mode] [Color Temperature] [Normal] / [Cool] / [Warm] [Auto Keystone Correction] Enable / disable auto keystone correction. [Vertical Keystone When the Auto Keystone Correction is Off, Correction] manually adjust the vertical keystone value.
- Page 16 4. App Manager ① Press to access the home menu, select [Settings] > [App Manager], and press ② Select an app and check the current version, open or force stop the app, check the storage used or clear data, or uninstall the app. When more than 3 apps are installed, you can select [All] at the bottom line of the home page to access the [Apps] page or App Store on the home page.
-
Page 17: Using The Nebula Capsule Max
TV box, TV stick, DVD player, set-top box (STB), gaming consoles, or other devices. To play content from HDMI playback devices: ① Connect Nebula Capsule Max to an HDMI playback device with an HDMI cable (not provided). ② Press to access the home menu, select [HDMI], and press •... - Page 18 2. Play from a USB Storage Device With Nebula Capsule Max, you can enjoy music, video, and pictures, or install apps that are stored on a USB 2.0 storage device. ① Press to access the home menu. ② Select [File Manager] and press ③...
- Page 19 Before connecting headphones and putting them on, turn down the volume to avoid hurting your ears. 4. Install Apps Once connected to a wireless network, you can access online services, enjoy movies, music and pictures, and browse online. Aside from the pre-installed apps, you can also install additional apps either from the Nebula App Store or via a USB flash drive.
- Page 20 5. Screen Mirroring You can wirelessly cast movies, games, and music from your phone or tablet onto Nebula Capsule Max. To use screen mirroring: ① Press to access the home menu, select [Settings] > [General] > [Screen Mirroring], and press ②...
- Page 21 For iOS devices: For Android devices: Certain content cannot be cast on Nebula Capsule Max due to copyright restrictions. In this case, you can stream the content via the same app installed on your Nebula Capsule Max.
-
Page 22: Specifications
Specifications Specifications and design are subject to change without notice. Power supply: DC 15V Power consumption: < 20W Standby power consumption: < 0.5W Display technology: 0.3 in 1280 × 720p DLP Light source: RGB LED Projection image size: 20-100 in Resolution: 1280 ×... -
Page 23: Troubleshooting
Troubleshooting ① Fail to power on by the remote control? • Press and hold for 2 to 3 seconds on the projector to turn it on. • When powered off, you cannot use the remote control to turn it on. ②... -
Page 24: Notice
Declaration of Conformity This product complies with the radio interference requirements of the European Community. Hereby, Anker Innovations Limited. declares that this device is in compliance with the essential requirements and other relevant provisions of Directive 2014/53/EU. For the Declaration of Conformity, visit the Web site www.SeeNebula.com. - Page 25 Your product is designed and manufactured with high quality materials and components, which can be recycled and reused. This symbol means the product must not be discarded as household waste, and should be delivered to an appropriate collection facility for recycling. Proper disposal and recycling helps protect natural resources, human health and the environment.
- Page 26 RF exposure requirements. Lors de l'utilisation du produit, maintenez une distance de 20 cm du corps afin de vous conformer aux exigences en matière d'exposition RF. Anker Innovations Limited Room 1318-19, Hollywood Plaza, 610 Nathan Road, Mongkok, Kowloon, Hong Kong...
-
Page 27: Trademarks
® The Bluetooth word mark and logos are registered trademarks owned by the Bluetooth SIG, Inc. and any use of such marks by Anker Innovations Limited is under license. Other trademarks and trade names are those of their respective owners. - Page 28 +81 03 4455 7823 ( 日本 ) 月 - 金 9:00-17:00 ©Anker Innovations Limited. All rights reserved. NEBULA and the NEBULA logo are trademarks of Anker Innovations Limited, registered in the United States and other countries. All other trademarks are the property of their respective owners.
Need help?
Do you have a question about the Nebula Capsule Max and is the answer not in the manual?
Questions and answers