Advertisement
Quick Links
Advertisement

Related Manuals for Digital Guard Dawg iKEY-M


Summary of Contents for Digital Guard Dawg iKEY-M
- Page 1 Passive Entry & Keyless Ignition for 2010-2014 Mustang's...
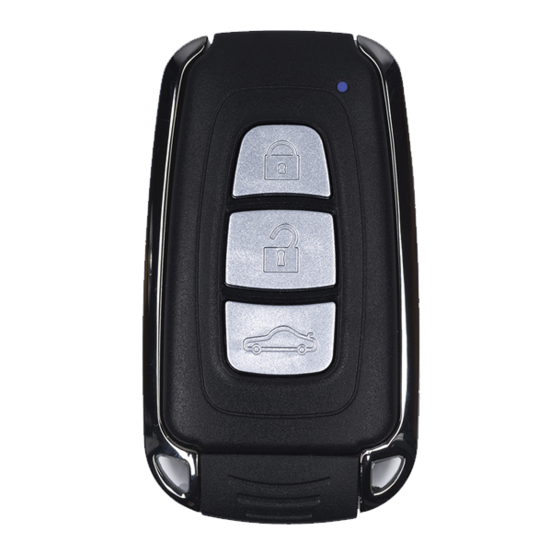
- Page 3 Mustang securely protected. With the iKEY-M it’s Impossible to forget to protect your vehicle! Made with high quality factory grade components, the iKey-M includes an OEM style Key Fob, lighted factory style Start Button and Emergency backup vehicle access card. Our innovative plug &...
- Page 4 Table of Contents Preface Tools You Will Need System Overview Before you begin: Key-M Install Overview Cut and Program Red Key - 1a: Cut Spare key blank - 1b: Program Spare key to vehicle Assemble Bypass Module -2a Separate Transponder from key blade -2b Mount Transponder into Bypass module Remove Vehicle Panels -3a Remove Upper Steering Wheel Shroud...
-
Page 5: Section A. Tools You Will Need
Finalizing Connections and Mounting System Modules -14a Final Connections -14b Mounting System Modules System Pre-Test -15a Connect Battery +12V -15b Key Fob Test -15c Testing Flow Chart Finalizing your Start Button Installation Final System Testing Section A. Tools You Will Need: Standard Pliers (for closing quick connects) - Small Hacksaw or Dremel Drill ( to cut Key Blank) - Wire Terminal crimpers / Kline Style... -
Page 6: Before You Begin
Section B System Overview Primary Components Section C Before you begin Start your vehicle and check that all your Mustangs current features work correctly. Did your car start easily? Is the battery strong? Check if both door locks work from the power switch? Do your parking lights all work? Does your trunk pop? Now roll down your windows, then turn everything back off. - Page 7 STEP 1. Cut and Program Spare Key 1a: Cut Spare key blank Included in kit is a Spare Mustang Key Blank. You will be using this blank to release the steering column lock as well as activate the Bypass module of your system.
- Page 8 RFID Chip inside and place it into the systems “Bypass Module”. This module will send the ID code to your vehicles computer when you push the Start Button of your iKEY-M system. You will use the cut KEY BLADE later in Step 13 2A: Separate Transponder chip from key blade Using a Dremel drill or other cutting tool;...
- Page 9 STEP 3. Remove Vehicle Panels To gain access to your Mustangs ignition connector and key switch you will need to remove the four following interior panels: 3a. Remove Upper Steering Wheel Shroud. Begin by first lowering the tilt wheel to its bottom position, (pic1). Grab shroud by outer edges and firmly pull up (Pic2).
- Page 10 3b Remove Plastic Knee Panel Begin by removing the two 9/32” screws, (one on each side of panel) (pics 2 & 3). Next, pull out firmly to release panel. Note: on the left side of panel there is a corner piece that slips behind the left side pillar molding.
- Page 11 Step 4: Access Ignition Harness Connector 4a Locate Ignition Connector The Ignition Connector is attached to the back of the Ignition Switch. It can be accessed by reaching in the opening behind where the lower steering wheel shroud was attached. It faces the firewall and can be seen easier by looking up under the dash.
- Page 12 Step 5: Primary Module Connections Step 5: Make Main Harness Connections Begin by unspooling the Main Harness on the driver floor area. 5A - Make connections C2, C3, C4 and C5 from the Main Harness to iKey Module as shown. 5B - Make connection C5 from the Main Harness to the Bypass Module.
- Page 13 Step 7: Mount System Antennas a - Types of system Antenna’s There are three types of system Antenna’s. #1 The Bypass Antenna plugs into the 556U Bypass module and goes around the vehicles ignition switch. #2 The Proximity Antenna’s read the Transponder Key Fobs and activates the system as you approach your vehicle. #3 The Emergency Access Antenna reads the systems Emergency Backup Card which allow you to operate your vehicle in the event you were to lose your Transponder Fobs.
- Page 14 7c - Mounting the Primary Proximity Antenna’s The Proximity Antenna’s read the Transponder key fobs as you approach the vehicle. There are two Proximity Antenna's and a "Y" harness that the antennas plug into. One antenna is mounted on at the top of each side of the vehicles windshield.
- Page 15 Step 8: Mount Immobilizer Bypass Antenna Ring The 556U and Bypass antenna ring allow your vehicle’s security system to receive an authorization code without a key being present. You will be mounting the Bypass ring around the ignition switch cylinder and plugging it into the 556U module.
- Page 16 To make the Ignition connections, take the connector you unplugged from the Mustang’s Ignition switch and firmly plug it into Connector “C1” from the iKEY-M Main harness. Be sure the connectors “Snap and lock” next use a ziptie to secure the connectors up under the dash.
- Page 17 Step 11: Make Accessory Connections at SJB (Smart Junction Box) SJB - INSTALLATION The next group of connections you will make, are the wires that operate the Mustang’s Accessory functions such as Door lock & unlock, Trunk pop, Parking light flash and Factory security arm & disarm. All these connections are made at the vehicle’s SBJ or “Smart Junction Box”.
- Page 18 11c – Making Accessory Connections For ease of access and to give yourself some room to work, it is easiest to unplug the connectors from Begin by releasing the #1 Connector. Simply pull the SJB before making connections to them. the clip from the bottom of the connector upwards to release the locking clip of connector (Pic1 ).
- Page 19 11c – Making Accessory Connections "Continued" Begin with connection #1 the Blue / Green Lock wire. Separate the wire from the others and attach a Quick Connect. Be sure the Quick Connect is snaped closed. Next plug the spade connector from the #1 Blue / Green wire in the Accessory harness into the Quick Connect.
- Page 20 Step 12: Initial Start Button Mountin *** Should you desire to mount your start button elsewhere, almost any surface will work fine using the 3M mounting tape placed on the back of the button. If you are mounting your Start button in another location other than over the existing key switch, be sure to remove the 4 Phillips screws from the metal mounting plate from the rear of the Start button.
- Page 21 Step 13: Mounting the Status LED 13a – LED function and mounting The iKEY system has a dual color (Red/Blue) LED that provides system status information, such as when the system is Armed or Disarmed or when the vehicle security system has been violated. Additionally the LED is necessary to program certain customizable system features.
- Page 22 Step 14: Finalizing Connections and Mounting System Modules 14a – Final Connections Now it is time to make all remaining connections to the iKey system module. Use the picture below to locate and confirm all connectors are plugged into the correct ports and securely locked into place. There are 4 Module Ports that will have No connectors in them.
- Page 23 Factory Ignition Connector Connector "C1"...
- Page 24 14b – Mounting System Modules Once all connections to the module are completed, you are ready to mount the iKey system module under the dash. Zip-Ties can be used to securely attach both modules up under you dash so no wires hang down or aulternately a Velcro pad can be used.
- Page 25 Step 15: System Pre-Test Now it’s time to do a pre-test of the system. We do a pre-test before finalizing the installation of your Start Button and buttoning up all panels and wires. If anything needs additional attention, it’s better to catch it now while wire and module access are easy.
- Page 26 Next use the flow chart below to complete system pre- testing. Leave Start Button loose at this time, turn the Start Button so you can see button’s status LED to complete Flow Chart instructions. Occasionally, some system features / functions may not become active until the vehicle has been turned On / Off once or twice.
-
Page 27: Step 17 Final Testing
Step 16: Finalizing your Start Button Installation Begin by Test Fitting your button over the lock cylinder. The metal mounting arms should slide over the sides og the cylinder. * Depending on the ignition switch you have , you may need to Cut and shorten the mounting arms so the button fits flush onto the face of the cylinder.
Need help?
Do you have a question about the iKEY-M and is the answer not in the manual?
Questions and answers