Table of Contents
Advertisement
Quick Links
Advertisement
Table of Contents

Related Manuals for FLYSURFER PEAK5

Summary of Contents for FLYSURFER PEAK5
- Page 1 USER MANUAL PEAK5...
- Page 2 PEAK5 User Manual ENGLISH #01 / 12-2021 Änderungen vorbehalten / data subject to change © FLYSURFER Kiteboarding 2021, www.flysurfer.com...
-
Page 3: Table Of Contents
CONTENT Release of Liability ..........................4 Safety Notes ............................. 5 02.01 Do not fly with kites................................5 Overview of the Kite ..........................6 Handling ..............................8 04.01 Setting Up a Single-Skin Kite ............................8 04.02 Sorting the bridle ................................9 04.03 Securing a Single-Skin Kite ............................9 Launching ..............................10 05.01 Self launching at the edge of the wind window ......................10 05.02 Edge of the wind window with an assistant ......................10... -
Page 4: Release Of Liability
FLYSURFER Product and any of its components. To release Skywalk GmbH & Co. KG and all related parties from any and all liability for any loss, damage, injury or expense that you or any users of your FLYSURFER product may suffer, or that your next of kin may suffer, as a result of the use of the FLYSURFER product, due to any cause whatsoever, including negligence or breach of contract on the part of Skywalk GmbH &... -
Page 5: Safety Notes
Every user should be qualified by a FLYSURFER kiteschool or a FLYSURFER dealer. 02. The user carries the sole responsibility for themselves and third parties when using this product. The user must check their equipment for wear, especially wearing parts, before each kite session. -
Page 6: Overview Of The Kite
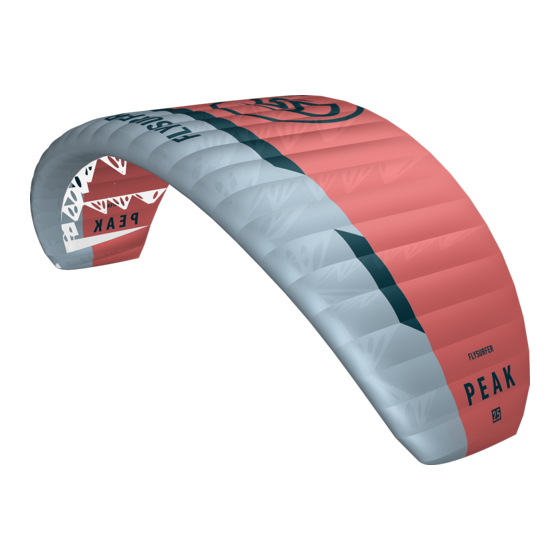
03 OvERviEW Of THE KiTE... - Page 7 TX-Light Single Skin Concept The single skin concept has high buoyancy profiles and a very efficient depower. Reducing its weight to a minimum brings advantages in terms of stability, drift and light wind handling. Single skins allow the use of our B-Safe system and absorb hard impacts.
-
Page 8: Handling
04 HANDLiNg Check your bridle for tangles. Make sure that none of the lines are caught around the back of the kite. A kite needs to be secured properly even if the wind is light. A runaway kite can be a serious danger to people or animals down- wind. -
Page 9: Sorting The Bridle
If the lines are still twisted, untwist them by turning the bar. Lightly tension up the bridle again to check it. If necessary, It may be possible (especially after not being careful when pa- repeat the last step till the left and right bridles are separated. cking away or setting up the kite) that the bar has to be pushed through the lines again to untwist. -
Page 10: Launching
05 LAUNCHiNg Release the kite from the sand or object securing it with a step backwards away from the kite and carefully steer it. Please check not only the wind and weather conditions, but also all your equipment, especially the safety system before launching. Do not use any kite outside of its recommended upper wind range. -
Page 11: Powerzone
As soon as the kite is inflated and you are ready, give the Put the flying lines under tension so that the kite rises slow- assistant the thumbs up signal that he can let go. Make sure to ly. Take another step to windward to release the weight from the once again check whether all lines run freely before doing this. -
Page 12: Relaunch
06 RELAUNCH The kite will now spin around. As soon as the leading edge of the kite points up let go of the remaining leader line and put 06.01 Reverse Launch your hand back on the bar. Depower the kite till its back in the sky towards the zenith. -
Page 13: Landing
07 LANDiNg As soon as the assistant has the kite securely in their hands, walk towards them until all flying lines are no longer under ten- 07.01 Landing with an assistant sion. This way the kite will flag out downwind of the assistant. The easiest and safest way to land your kite is with the help of an assistant. -
Page 14: Self-Landing Using The B-Safe System
You can convert every PEAK5 to use the B-Safe System. The lines required for the installation are included in the scope of delivery. Secure the kite as described in “Securing the Kite“. -
Page 15: Reactivating The Kite
09 EMERgENCiES The kite is gathered up and falls from the sky without pres- sure. This method is suitable for self-landing. Using the B-Safe system offers the highest level of security! In an emergency situation it is important not to panic, and to react purposefully and goal orientated. -
Page 16: Packing Up
10 PACKiNg UP Lay the bridle lines in between the folded kite. A FLYSURFER kite is quickly packed. Make sure that the bridle lines are stored securely inside the kite and the control bar does not get caught between them. -
Page 17: Kite Care
11 KiTE CARE 12 ASSEMBLy Of THE B-SAfE SySTEM FLYSURFER kites are very durable and very UV and saltwater re- sistant. With proper care, your kite may last even longer. Even- 12.01 Conversion of the CONNECT2 Control Bar from tual color changes of the cloth can be caused by environmental... -
Page 18: Instalment Of The B-Safe Top Lines
Unfold the PEAK5 on the ground in front of you. Start in the middle of the PEAK and lift the A-Level on either side of the wing. ... -
Page 19: Maintenance
Disconnect the front and steering lines on one side. Undo the free beneath the A-Level. Repeat the process on the other side front- and back main lines at the mixer. of the PEAK5. Pull the old sparepart lines out of the pulley. Always ex- change both lines. -
Page 20: Little Connection Lines
A spe- cial binding agent (silicone sealing compound) for the X-Light Cloth is available through Flysurfer sales partners or directly at FLYSURFER. A repair manual is included with the binding agent. -
Page 21: Optimum Trim Of The Flying Lines
(C-Level) until all 3 knots are at the same level. Repairs can be done at either our workshop in the head office, or by a Flysurfer sales partner who offers a repair service. High quality original spare parts for all our Flysurfer products can be ordered directly from our Online-Shop: shop.flysurfer.com... - Page 22 FLYSURFER Kiteboarding Brand of Skywalk GmbH & Co. KG Windeckstr. 4 83250 Marquartstein, GERMANY WEBSiTE: www.flysurfer.com EMAiL: info@flysurfer.com PHONE: +49 (0) 86 41 69 48 0...
Need help?
Do you have a question about the PEAK5 and is the answer not in the manual?
Questions and answers