
Related Manuals for Rotomec CYCLONE C70 Series


Summary of Contents for Rotomec CYCLONE C70 Series
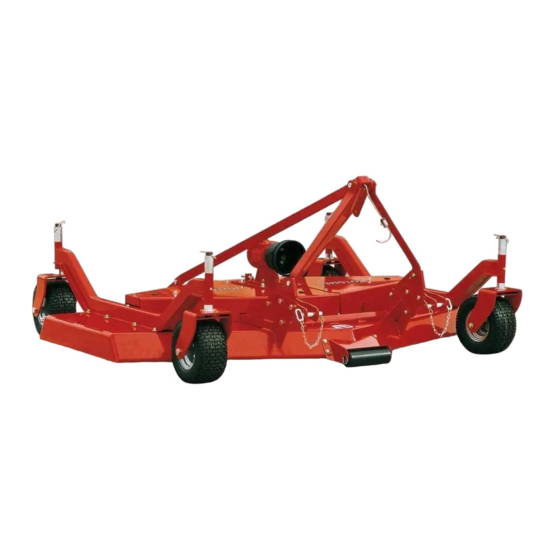
- Page 1 Operator's Manual CYCLONE CYCLONE CYCLONE CYCLONE Three Spindle Grooming Mower Series C70 Series C70 Series C70 Series C70 The operator's manual is a technical service guide and must always accompany the machine MEC70EB...
- Page 2 SAFETY SAFETY SAFETY SAFETY Take note! This safety alert symbol found throughout this manual is used to call your attention to instructions involving your personal safety and the safety of others. Failure to follow these instructions can result in injury or death. This symbol means: ATTENTION! BECOME ALERT!
- Page 3 Operator's Manual CYCLONE CYCLONE CYCLONE CYCLONE Three Spindle Grooming Mower Series C70 Series C70 Series C70 Series C70 The operator's manual is a technical service guide and must always accompany the machine...
-
Page 4: Table Of Contents
INDEX 1 - GENERAL INFORMATION 1.01 - General 1.02 - Model and Serial Number ID 2 - SAFETY PRECAUTIONS 2.01 - Preparation 2.02 - Starting and Stopping 2.03 - Messages and Signs 3 - OPERATION 3.01 - Operational Safety 3.02 - Setup 3.03 - Cutting Height Adjustment 3.04 - Pre-Operational Check 3.05 - Attaching to the Tractor... -
Page 5: General Information
Attached to the frame is an ID plate showing the model and serial number (see below). Record your implement model and serial number in the space provided below, a facsimile of the ID Plate on the machine. Your dealer needs this information to give you prompt, efficient service when you order parts. GENERAL INFORMATION ROTOMEC... - Page 6 This limited warranty covers defective material and workmanship. The cost of normal maintenance or repairs for accidents or improper use and related labour will be borne by the owner. See chapter 8 - Warranty. ROTOMEC GENERAL INFORMATION...
-
Page 7: Safety Precautions
6. Operate only in daylight or good artificial light. 7. Ensure mower is properly mounted, adjusted and in good operating condition. 8. Ensure that all safety shielding and safety signs are properly installed and in good condition. SAFETY PRECAUTIONS ROTOMEC... -
Page 8: Starting And Stopping
6. Allow no riders on tractor or mower. 7. Allow moving parts to stop before repair. 8. Securely support mower before working underneath. Additional warning and operating decals are available at no extra charge. Please specify model and serial number when ordering. ROTOMEC SAFETY PRECAUTIONS... - Page 9 4. Keep away from rotating driveline. 5. Keep away, objects can be thrown. 6. Never allow passengers. 7. Keep away from rotating blades. 8. Keep away from rotating belts. 9. Keep away from raised mower. left side right side SAFETY PRECAUTIONS ROTOMEC...
-
Page 10: Operation
Only properly trained people should operate this machine. 4. When this machine is operated in populated areas where thrown objects could injure persons or property, standard equipment safety chain shielding (which is designed to reduce the possibility of thrown objects) must be installed. ROTOMEC OPERATION... - Page 11 The weight may be attained with a front end loader, front wheel weights, ballast in tires or front tractor weights. When attaining a minimum 20% A special version with PTO at 1000 rpm is available upon request. OPERATION ROTOMEC...
-
Page 12: Setup
This is accomplished by simply turning the three point hitch and the gearbox 180 degrees (see fig. 3 & 4). See chapter 4 - Maintenance. See chapter 7 - Pre-delivery Checklist. ROTOMEC OPERATION... -
Page 13: Cutting Height Adjustment
Removing the spacers, lowers it by the same height (see fig. 5). Be sure all wheel arms are adjusted equally. This is the only way to ensure a completely uniform cut. OPERATION ROTOMEC... -
Page 14: Pre-Operational Check
8. The tractor, to ensure correct direction of PTO and rpm speed. 9. All safety shields and guards are in place and tightly attached. 10. No people or animals are in the work area. See table 1, page 20. ROTOMEC OPERATION... -
Page 15: Attaching To The Tractor
Push the yoke onto the PTO shaft as far as it will go. Release the pin and pull back slowly until the pin clicks in place. Repeat this operation on the implement end. See table 2, page 20. OPERATION ROTOMEC... -
Page 16: Start Up
10. Checking the tractor tires for the proper pressure in accordance with the tractor operator's manual. A special version with 1000 rpm PTO is available upon request. See chapter 4.03 - Blade Maintenance. See chapter 4.03 - Blade Maintenance. ROTOMEC OPERATION... -
Page 17: Working Speed
Under certain conditions, tractor tires may roll some grass down and prevent it from being cut at the same height as the surrounding area. If this occurs reduce the tractor See Sharpening Blades in section 4.03 - Blade Maintenance. OPERATION ROTOMEC... -
Page 18: Uneven Terrain
When mowing over uneven terrain, observe the type of terrain and develop a safe mowing pattern. Whenever traction or stability is doubtful, first test drive over the terrain with the PTO disengaged. ROTOMEC OPERATION... -
Page 19: Removing Mower From The Tractor
CAUTION: disengage tractor PTO. Set parking brake. Stop engine and remove key from ignition. Disconnect mower driveline from tractor PTO shaft. Collapse drive- line and secure it in place with the storage hook on the mower three point. Disconnect three point linkage and carefully drive tractor away from mower. OPERATION ROTOMEC... - Page 20 Type & Size 8" m/sec. C70-230RD 1575 64.30 35 - 135 2 CX 4-310x100 ASAE 4 cat. C70-280RD 1405 68.70 35 - 135 2 CX 4-310x100 ASAE 4 cat. PTO 1000 rpm, available upon request. ROTOMEC OPERATION...
-
Page 21: Maintenance
12. Inflating or servicing tires can be dangerous. Whenever possible, trained personnel should be called to service and/or mount tires. 13. After servicing, be sure all tools, parts and service equipment are removed. MAINTENANCE ROTOMEC... -
Page 22: Service
Every 25 hours: check hardware tightness; mower vibration can loosen bolts Check tightness of the hardware periodically, using this table as a guide. Refer to table 1 - Torque Specifications, for head identification marking. See section 4.03 - Blade Maintenance. See table 1, page 20. ROTOMEC MAINTENANCE... - Page 23 7). The top grease fittings are easily accessible from the top of the deck by simply removing the plastic dust guards. 2. Check belt tension Fig. 7 Lubrication of the spindle shafts easily accessible from the top of the deck. See section 4.04 - Belt Tension. MAINTENANCE ROTOMEC...
-
Page 24: Blade Maintenance
HP requirements thus keeping cost down, proper blade maintenance is important. Blades must be kept sharp, at their original length and corners maintained. A blade must be replaced if, due to wear or damage, its original shape has been distorted. ROTOMEC MAINTENANCE... - Page 25 CAUTION: unbalanced or warped blades can cause damage to the mower and/or personal injury. Replace damaged blades before operating the mower. Sharpen each end of the mower blades equally or until the blades are balanced. MAINTENANCE ROTOMEC...
-
Page 26: Belt Tension
1. remove belt shields. Clean foreign material from the mower deck and belt area. 2. Loosen the four nuts holding the gearbox support plate to the central plate. 3. Loosen the two blocking nuts on the adjustment bolt. ROTOMEC MAINTENANCE... -
Page 27: Belt Replacement
11. Turn the adjustment bolt counter clockwise until the belt proper tension is reached. This will draw the gearbox support plate to the rear, thus tightening the belts. 12. Tighten the two blocking nuts on the adjustment bolt. MAINTENANCE ROTOMEC... -
Page 28: Driveline
5 cm. (2") gap between the end of the guard tube and bell guard. 3. Cut off both guard tubes the same amount as marked in step 2. 4. Shorten both drive tubes the same amount as guard tubes. ROTOMEC MAINTENANCE... -
Page 29: Transport
5. Beware of traffic on public roads. Install a SMV (Slow Moving Vehicle) sign when travelling on roads or streets. 6. Reduce ground speed when turning and take care that the mower does not strike obstacles such as trees, fences or buildings. MAINTENANCE ROTOMEC... -
Page 30: Repair Procedures
5. If necessary remove and replace the bearings from the rotor using presses or extractors. Take care not to damage the oil seals. Replace them if necessary. See section 4.05 - Belt Replacement. See section 4.05 - Belt Replacement. ROTOMEC REPAIR PROCEDURES... - Page 31 3. Apply a layer of grease to the inner ring of the bearing. Pack the bearings with grease. 4. Carefully lubricate the oil seal and assemble it on the spindle shaft with the lip turned down toward the blade mounting plate. 5. Place the bearing over the spindle shaft. REPAIR PROCEDURES ROTOMEC...
-
Page 32: Suggested Spare Parts
4. Loosen the belts if the mower is to be stored for an extended length of time. 5. Cover the mower from the elements in order to have it in perfect condition for the start of the next season. ROTOMEC REPAIR PROCEDURES... -
Page 33: Troubleshooting
Dull blades. Sharpen blade. See sharpening blades section. Blades worn down, preventing Change blades. overlap. Cut grass windrows. Ground speed too low. Increase ground speed. Tractor rpm too slow. Increase tractor rpm, check engine and PTO speeds. TROUBLESHOOTING ROTOMEC... -
Page 34: Pre-Delivery Checklist
IMPORTANT: warranty is not valid unless Delivery and Warranty Registration Form in operator's manual is completed in detail and mailed to the Company. Model Number: __________ Serial Number: __________ Delivery Date: __________ Dealer's Signature: __________ ROTOMEC PRE-DELIVERY CHECKLIST... -
Page 35: Warranty
All obligations of the Company under this limited warranty shall be terminated if original parts of this machine have been modified or altered in any way, the machine has been repaired by unauthorised dealers, or when unauthorised spare parts have been used. PRE-DELIVERY CHECKLIST ROTOMEC... - Page 36 EC Declaration of Conformity EC Declaration of Conformity EC Declaration of Conformity EC Declaration of Conformity according to Directive 2006/42/EC ROTOMEC spa Via Molino di Sopra, 56 37054 Nogara (Verona), Italy declare under our sole responsibility, that the product Grooming Mower...
- Page 37 I have been instructed on and do understand the application, limitation and capacities this equipment was designed and recommended for, all as described in the operator's manual and literature published by Rotomec. Inspected by: Date: Date: Customer's Signature:...
- Page 38 Place stamp here ROTOMEC spa Via Molino di Sopra, 56 37054 Nogara (VR) ITALY...
- Page 39 All rights reserved. It is unlawful to copy, reprint or use any of the information or details in this manual without the expressed written permission of ROTOMEC spa, Nogara, (Verona) Italy. Technical infor- mation provided in this manual is approximate, the Company reserves the right to modify or improve the models shown for technical or commercial purposes.
- Page 40 ROTOMEC Via Molino di Sopra, 56 37054 Nogara (VR) - ITALY Tel: +39.0442.510400 Fax: +39.0442.510038 www.rotomec.com...
Need help?
Do you have a question about the CYCLONE C70 Series and is the answer not in the manual?
Questions and answers