Table of Contents
Advertisement
NACS II-ROYAL Table of contents
01. Hardware Coverage..........................................................
02. NACS II-ROYAL Diagnostic Interface ..................................
03. Product Specification........................................................
04. Hardware Connection Diagram ..........................................
05. WARNING......................................................................
06. Trouble shooting..............................................................
07. PC Requirements ............................................................
08. PC Settings....................................................................
09. Software Installation ........................................................
10. Software Removal.........................................................
11. Diagnostic software for Handheld tool.................................
12. Registration Guide.........................................................
13. Firmware upgrade tool....................................................
14. Record analyzing software................................................
15. Customer support............................................................
01
02
03
03
04
05
06
06
08
11
13
24
25
29
35
Advertisement
Table of Contents

Related Manuals for Royal Enfield NACS II-ROYAL

Summary of Contents for Royal Enfield NACS II-ROYAL
-
Page 1: Table Of Contents
NACS II-ROYAL Table of contents 01. Hardware Coverage…………….…………………………………… 02. NACS II-ROYAL Diagnostic Interface ……………………………. 03. Product Specification……………………..…………..…………..04. Hardware Connection Diagram …………………..…..…..…..…. 05. WARNING……………………………..…..…..…..…..…..…..….. 06. Trouble shooting…………..…..…..…..…..…..…..…..…..…..… 07. PC Requirements ……………..……..……..……..……..……..… 08. PC Settings……………….…….…….…….…….…….…….……. 09. Software Installation ………….….….….….….….….….….….… 10. Software Removal…………………………………………………... -
Page 2: Hardware Coverage
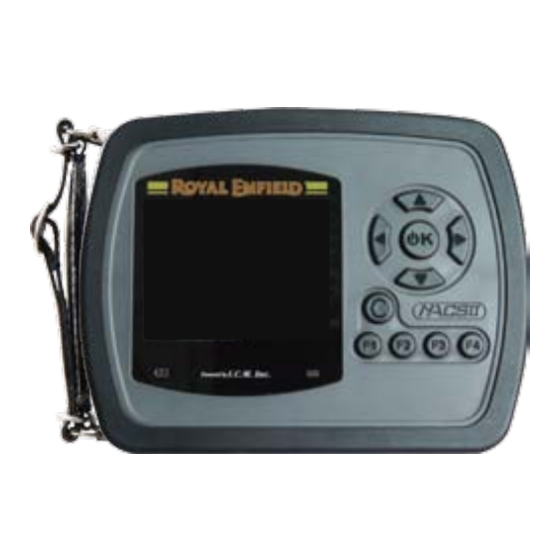
1. Hardware Coverage 2. NACS II-ROYAL Diagnostic Tool Kit NACS II-ROYAL Interface Main cable (Transfer cable) Diagnostic cable (6PIN) NACS II-ROYAL interface USB Hi-speed cable connector USB Hi-speed cable Cigarette lighter cable OBD II 16PIN cable (Plug adapter) Reset button... -
Page 3: Product Specification
0℃~+70℃ Dust and water resistance IP55 Standard 4. Hardware Connection Diagram Before diagnosis, please connect NACS II-ROYAL diagnostic tool kit as below. Hand-Held: NACS II-ROYAL interface→Main cable →Diagnostic cable →Motorcycle (IG ON) 5. WARNING When NACS II is already connected to the motorcycle, do NOT plug in AC Adaptor. -
Page 4: Trouble Shooting
6. Trouble shooting ▲There is a warning message showing on the screen. What’s ▲Why can’t I install the software successfully? wrong? A: If you are using Windows 7, 8 10, please check whether you have turned UAC A: It means communication off before installation. -
Page 5: Software Installation
8-2. 9. Software Installation Click “User Accounts“ 9-1. Start the computer. Insert installation CD to CD-ROM 01.NACSII Firmware Upgrade Tool INSTALL drive. Select “01 INSTALL 02.NACSII Record Read Tool 02.Diagnostic Software 03.USB Hi-Speed Driver(Please omit this step if it was installed.) INSTALL NACSII Firmware 04.User Manual... - Page 6 9-4. 9-7. Click “Finish” to exit Go back to installation installation. menu again. Select “03 USB Hi-Speed Driver” to run the installation. Click “Extract” to continue. 9-5. 9-8. Click “Next” to continue. Back to installation menu. Select “02 NACSII Record Read Tool”...
-
Page 7: Software Removal
9-9. 10-3. Go back to installation Find “NACSII_RECORD_ menu again. Select “04 ROYAL” and click User manual” to open “Change/Remove”. the file. You can save the file to your PC for reading purpose. 10. Software Removal 10-4. 10-1. When “Uninstalling ” Click“Start Menu”→“All window pops up, please Programs”→“Control... -
Page 8: Diagnostic Software For Handheld Tool
Select “Royal D1 Press 11-A. continue. Diagnosis 11-A1. Please connect your NACSII-ROYAL diagnostic tool kit with your motorcycle. NACS II-ROYAL interface→Main cable →Diagnostic cable →Motorcycle Orange light indicates whether the system is communicating. 11-A4. NACS II will automatically detect which system the vehicle is. - Page 9 11-A9. 11-A6. Press to view “History” DTC. Press to view next page and Press to exit “Vehicle press to view last page. After viewing all the “History DTC”, Info” page. The page will return to the main menu. press to exit. The screen will return to the previous page. 11-A7.
- Page 10 11-A11. 11-A13. Erase DTC. It’s the function to Press to view all the content. erase Diagnostic Trouble Code in both “Current” and “History”. Press to erase. To confirm erasing DTC, press “Yes”. When showing on the screen, it means the DTC has been erased.
- Page 11 11-A16. 11-B2. Back to the main menu, move Press to view System Information. the cursor to “Special Function” and press “Special function” is customized functions provided to specific vehicles. 11-A17. Select “CO Adjustment”, press 11-B3. Press to to set Date and Time. Before start setting, adjust the CO value.
- Page 12 11-C. 11-C4. ABS Functions Follow each step on the screen to finish the procedure. 11-C1. Select “BOSCH ABS System”. BOSCH ABS System Press to continue. 11-C2. 11-C5. Select “Special Function”. Then, select “Repair Air Bleed”. SILA Lamp Blinking Test Follow the screen guide to finish the test. 11-C3.
-
Page 13: Registration Guide
11-C7. Follow the instructions on screen to finish the activation. 12. Registration Guide 12-1. When the first time you use software, the software will enter register process automatically. *Be sure the computer is connected to diagnostic tool properly and it has internet access. -
Page 14: Firmware Upgrade Tool
13-4. 13. Firmware upgrade tool Click on icon of NACSII interface to proceed next for firmware 13-1. Please use USB High Speed upgrade. cable to connect NACS II interface to PC computer as picture shown on the right side. 13-5. Please check if NACS II interface is connected to USB connector 13-2. - Page 15 13-7. 13-10. Click on “Start HW upgrade” You may now release the pin from pressing down. Upgrading….Please wait….. 13-8. 13-11. Please follow the steps on screen to complete the upgrade procedure. After upgrading is complete, Do NOT turn off the power or exit the software. you may see the screen of displaying current firmware version, and upgraded date.
-
Page 16: Record Analyzing Software
14. Record analyzing software 14-3. Select the items which used This software is for reading NACS II handheld recorded data. Please take out often. Selected items will be SD card from NACS II handheld tool and insert SD card to PC. listed in the block of “Live Data Item”. - Page 17 14-6. 14-9. To view different sections of When window pops up “Setting wave chart, please click OK”, the setting is completed. select page number. Click the to go back to last page. 14-7. 14-10. Select items to set breakdown The setting value will display point for analysis.
- Page 18 14-15. 14-12. Click to quickly find the 2 Sometimes, setting only one value still can not find the main problem matched conditions. which causes malfunction. In this case, setting the 2nd value or more values can help user to find satisfied conditions. To set the second value please select Live data item.
-
Page 19: Customer Support
14-18. 15-2. Click to wave chat. You can also open the link by clicking “OPEN” of Customer Support on the CD. 01.NACSII Firmware Upgrade Tool INSTALL 02.NACSII Record Read Tool 02.Diagnostic Software INSTALL 03.USB Hi-Speed Driver(Please omit this step if it was installed.) INSTALL 04.User Manual INSTALL...
Need help?
Do you have a question about the NACS II-ROYAL and is the answer not in the manual?
Questions and answers