
Subscribe to Our Youtube Channel
Related Manuals for Otic HJ09JRB01

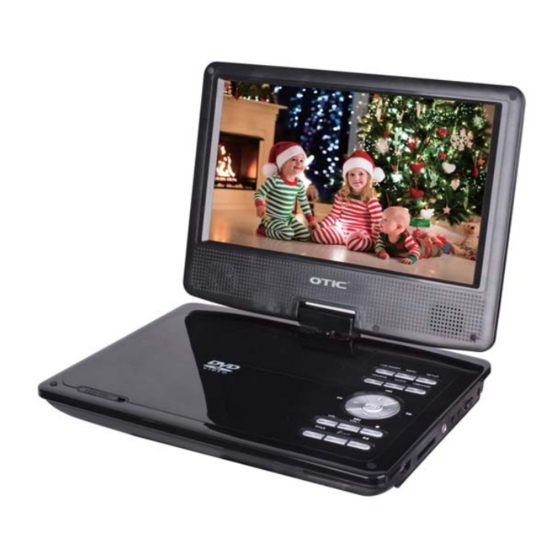
Summary of Contents for Otic HJ09JRB01
- Page 1 9 INCH PROTABLE DVD/CD PLAYER MODEL: HJ09JRB01 PLEASE READ CAREFULLY BEFORE OPERATING THIS EQUIPMENT KEEP IT IN A SAFE PLACE FOR FUTURE REFERENCE...
-
Page 2: Table Of Contents
CONTENTS Important Safety Information......................3-8 About Discs ............................ 9 Location of Controls ......................10-11 Remote Control ..........................12 Making Connections ......................13-14 Swivel Panel ..........................15 General Operations ....................... 16-17 USB or Card Playback........................ 18 Other Way to Play........................19 Bluetooth Transmitter Operation .................. -
Page 3: Important Safety Information
IMPORTANT SAFETY INSTRUCTIONS The lightning fl ash with arrowhead symbol within an equilateral triangle is intended to alert the user to the presence of CAUTION: TO REDUCE THE RISK OF uninsulated dangerous voltage within ELECTRIC SHOCK, DO NOT REMOVE the product`s enclosure that may be of COVER (OR BACK). - Page 4 IMPORTANT SAFETY INSTRUCTIONS FCC NOTICE: WARNING USE UNDER SUPERVISION OF AN This equipment has been tested and found to comply with the limits for a Class ADULT DUE TO LONG CORD B digital device, pursuant to part 15 of the This unit has a long AC cord or other long FCC rules.
- Page 5 IMPORTANT SAFETY INSTRUCTIONS 12 ) Use only with the cart, stand, tripod, 7 ) Do not block any ventilation bracket, or table specifi ed by the openings. Install in accordance with manufacturer, or sold with the apparatus. the manufacturer's instructions. Slots and openings in the cabinet and When a cart is used, use caution when in the back or bottom are provided for...
- Page 6 IMPORTANT SAFETY INSTRUCTIONS 16 ) Power lines 20 ) Service An outside antenna system should not be Do not attempt to service this product located in the vicinity of overhead power yourself as opening or removing covers lines or other electric light or power may expose you to dangerous voltage circuits, or where it can fall into such or other hazards.
- Page 7 IMPORTANT SAFETY INSTRUCTIONS f ) When the product exhibits a distinct NOTES ON HANDLING: change in performance-this indicates a When shipping the unit, always use the need for service. original shipping carton and packing materials. For maximum 25 ) Note to CATV system installer protection, repack the unit as it was This reminder is provided to call the CATV originally packed at the factory.
- Page 8 IMPORTANT SAFETY INSTRUCTIONS NOTES ON MOISTURE WARNING: CONDENSATION: - Do not use or leave the device in direct Moisture condensation damages the sunlight or a hot environment such as a DVD player. vehicle etc. that is in hot environment. Please read the following carefully. Overheating can damage the device.
-
Page 9: About Discs
ABOUT DISCS The region number for this DVD Player is: 1 See the following page for information regarding region numbers. PLAYABLE DISCS: The following discs can be played back on this DVD player: DISC TYPES: Data on most DVDs is divided into sections called titles and then into subsections called chapters, each of which is given a title or chapter number. -
Page 10: Location Of Controls
LOCATION OF CONTROLS DISCONNECT 1. LCD ON/OFF: Press to turn on or turn off the screen. (Saving the battery power while music playback) 2. MENU: Press to return to disc's menu page. (Function depends on the disc features). 3. SETUP: Press to enter to DVD system setup menu and press again to exit. 4. - Page 11 LOCATION OF CONTROLS Right Side View: 18 19 15. USB Port 19. AV IN Jack 16. CARD Slot 20. POWER ON/OFF Switch (Phones) Jack 21. DC IN Jack 18. AV OUT Jack Front Side View: 22 23 24 22. Charging indicator When the DVD player is connected to the power supply, the indicator will turn on in red if the built-in battery is not fully charged, and will turn off if the battery gets fully charged or the power supply is cut off.
-
Page 12: Remote Control
REMOTE CONTROL 1. POWER button 15. SLOW button 2. VOLUME +/– buttons 16. LCD ON/OFF button MUTE button 17. Numeric buttons 4. SOURCE button 18. SETUP button 5. Direction buttons Skip Previous button Skip Next button Fast Backward button Fast Forward button 21. -
Page 13: Making Connections
MAKING CONNECTIONS For the Unit Charging by AC/DC Adapter: 1. Connect the small plug of AC/DC Adapter to the DC IN Jack on the right of unit. 2. Connect the other plug of AC/DC Adapter to the wall outlet with AC 100-240V~; 50/60Hz. Note: Your battery will last longer if you follow these simple guides for caring for and storing it. - Page 14 MAKING CONNECTIONS For the Remote Control Battery installation 1. Press the tabs on the battery door and lift it off. 2.Install two (2) x AAA size batteries into the battery compartment as the figure on right and the polarity markings inside battery compartment.
-
Page 15: Swivel Panel
SWIVEL PANEL The viewing angle of the swivel panel can be adjusted as below as desired:... -
Page 16: General Operations
GENERAL OPERATIONS 1. Lift the panel and turn to desired angle. Slide the Power ON/OFF switch to "ON" position to power on the unit. 2. Slide the OPEN switch to right to open the disc door. Place a disc on the center spindle with label side facing up. - Page 17 GENERAL OPERATIONS 2. Using the Direction buttons and OK button (or ENTER button) select and set the desired track playback order. button to select the desired track on the right; use OK button to confirm it. then the track is added into the left box. button to move to next page.
-
Page 18: Usb Or Card Playback
USB OR CARD PLAYBACK 1. Insert the USB Device or SD/MMC memory card into the USB port/card slot as the fi gure below. 2. Turn on your DVD player, and press the DVD/USB/SD button, the "DISC, CARD, USB" selection window will pop up on the screen. Use the Direction buttons to select and highlight the desired source then press the OK button to confirm. -
Page 19: Other Way To Play
OTHER WAY TO PLAY Connecting to a TV or Video Player (such like DVD; VCR; DVR Players ...) with AV connection cable NOTE: The default setting of the unit is AV OUT, if connect to external video player (such like DVD; VCR; DVR Players ...), press the SOURCE button to set to AV IN mode ("AV IN"... -
Page 20: Bluetooth Transmitter Operation
BLUETOOTH TRANSMITTER OPERATION With the Bluetooth transmitter feature, you can enjoy the movie or music through your home theater system instead of through the DVD player. A. Bluetooth Overview Bluetooth version: 5.0 Bluetooth connection range: 10m (on the line of sight without obstacles) B. - Page 21 BT SETUP BT CONTROL OTIC AEA7 BT LIST ("OTIC AEA7" is just an example of the Pair Name of your home theater system.) 4. Press button to highlight Pair Name. and press OK/ENTER button to confirm it. If you press button to move away the cursor, you will find the Pair Name of your home theater system has already turn to yellow.
- Page 22 BLUETOOTH TRANSMITTER OPERATION In most cases the Bluetooth connection will be established smoothly. If it is failed, please check as follows: Problem Possible Cause Solution Be sure the device is an BT receiver, The device is not compatible such as BT speaker, BT earphone… Connect the awaiting device to your The Bluetooth function of the smartphone via BT.
-
Page 23: Remote Control Operation
REMOTE CONTROL OPERATIONS LCD ON/OFF: Press to turn on or off the LCD display. POWER: Press to turn to standby mode, press again to turn on. VOLUME +/–: Press to increase or decrease volume. MUTE: Press to turn off the sound, press again to resume. SOURCE: Press to switch to AV IN mode, press again to resume normal mode. - Page 24 REMOTE CONTROL OPERATIONS GOTO (CD) ~ Press the GOTO button once, using the Numeric and OK buttons to set the desired playback time of disc. ~ Press the GOTO button twice, using the Numeric and OK buttons to set the desired playback time of track.
-
Page 25: System Setup
SYSTEM SETUP System setup The SETUP menu enables you to set your preferences for the different options available on your DVD Player. You can use the Down, Left and Right directional buttons to highlight each function or option and then press the OK button to confirm. To move to the next set of Setup options after making changes, press the Left arrow followed by the down arrow. - Page 26 SYSTEM SETUP Use the right arrow to highlight the 4-digit password and unlock symbol again. Enter your own 4 digit password and press the OK button. The lock symbol will now be changed to be locked again and your new 4-digit password has been saved.
- Page 27 SYSTEM SETUP BT Setup The third setup up menu option display is for the BT setup. You can change the Bluetooth settings with Down, Left and Right buttons to highlight each option and then press the OK button to confirm. BT SETUP BT CONTROL BT LIST...
-
Page 28: Troubleshooting
TROUBLESHOOTING Problem Possible Cause Solutions The power supply is not Check the mains power plug connection at the No power/No connected. wall socket and ensure that it is switched on. response Power in the battery has run Recharge the internal battery as mentioned in out (when not connected to the section of "Charing by AC/DC Adapter". -
Page 29: Region-Free Guide
REGION-FREE GUIDE Use the directional buttons to highlight Power on your DVD player, and slide "OPEN" switch to open the disc door. the "TEST 0", then press OK button to The screen will appear as follows: confirm. After you finished, the screen should like below: OPEN Note:... -
Page 30: Care And Maintenance
CARE AND MAINTENANCE Caring for Disc Treat the disc carefully. Handle the disc only by its edges. Never allow your fi ngers to contact with the shin, unprinted side of the disc. Do not attach adhesive tape, stickers, etc. to the disc label. Clean the disc periodically with a soft, lint-free, dry cloth. -
Page 31: Specification
SPECIFICATION Power Source: Built-in DC 12V 1A Lithium-ion rechargeable battery, recharge by: DC 7.4V 2000mAh Disc Compatibility: DVD/VCD/CD/CD-R/CD-RW/DVD±R/DVD±RW Charging time: about 5 hours Playback time: about 5 hours Speaker output: 3.27V/1.34W (1K0dB/ VOL Max) Bluetooth version: 5.0 Bluetooth connection range: 10m (on the line of sight) ACCESSORIES 1 x User's Manual 1 x AC/DC Adaptor... -
Page 32: Mounting Strap Usage Guide
Mounting Strap Usage Guide Screen swivel 180 degrees. Put the strap on the operation panel. Fasten the loop and hook at the bottom. Put the strap across headrest frame. Put one end of strap across the lock. Pull the strap at the direction of the arrow. Zoom in (top view) strap lock...
Need help?
Do you have a question about the HJ09JRB01 and is the answer not in the manual?
Questions and answers
The unit is on and the sound is playing, but the screen is blank (it is lighted, but not displaying the picture
If the Otic HJ09JRB01 unit is on and playing sound but the screen is blank, press the LCD ON/OFF button on the unit or the remote control to turn on the display.
This answer is automatically generated