Advertisement
Quick Links
Advertisement

Related Manuals for Infinity Backroads


Summary of Contents for Infinity Backroads
- Page 1 Toll Free - 1(855) 521 1127!
- Page 2 TOOLS R EQUIRED adjustable w rench • adjustable o r 1 5 screwdrivers mm o pen e nd wrench open e nd w renches • ...
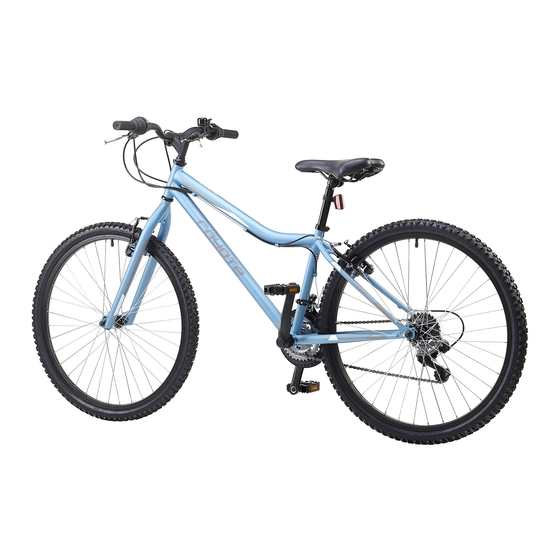
- Page 3 Your b ike w ill arrive p ar=ally assembled i n a box s imilar t o t he one s hown. w w w . i n f i n i t y c y c l e w o r k s . c o m...
- Page 4 Ensure t he a rrows on t he s ide o f t he box a re p oin=ng up, t hen O pen Bike B ox f rom t he top ...
- Page 5 Carefully r emove your b ike f rom the b ox a nd o pen the k ickstand t o keep u pright a s shown. ...
- Page 6 Note t he P edals are a 9ached t o the c hain s tays o n their c orrect s ide as s hown. w w w .
- Page 7 Note t he P edals are a 9ached t o the c hain s tays o n their correct s ide a s shown. R emove pedals ...
- Page 8 When r emoving the p acking material e nsure you r emove t he rear a xle/ derailleur c aps a s well. w w w . i n f i n i t y c y c l e w o r k s . c o m...
- Page 9 A9ached t o t he handle b ar i s y our Owners a nd Assembly m anual, as w ell a s o ther informa=on ...
-
Page 10: Packing Material
Once y ou h ave removed a ll t he packing m aterial and p edals y our bike i s r eady f or the ... - Page 11 The F irst adjustment w ill be s traightening the h andlebar/ stem a ssembly. You w ill n eed a 6 mm ...
- Page 12 Insert t he 6 m m Allen w rench a s shown a nd l oosen the b olt b y turning i t c ounter clockwise. ...
- Page 13 Insert t he 6 m m Allen w rench a s shown a nd l oosen the b olt b y turning i t c ounter clockwise. ...
- Page 14 Ensure t he f ork i s posi=oned w ith the b rakes poin=ng i n t he forward p osi=on as s hown. R otate the ...
- Page 15 Standing b eside your b icycle a nd looking d own a t the s tem, t urn t he handle b ar u n=l the ...
- Page 16 Standing b eside your b icycle a nd looking d own a t the s tem, t urn t he handle b ar u n=l the ...
- Page 17 Once t he handlebar a nd stem a re a ligned, use t he 6 m m Allen w rench t o =ghten t he s tem bolt ...
- Page 18 Once t he handlebar a nd stem a re a ligned, use t he 6 m m Allen w rench t o =ghten t he s tem bolt ...
- Page 19 Double c heck your c ables t o ensure t hey a re not p inched o r tangled. w w w . i n f i n i t y c y c l e w o r k s . c o m...
- Page 20 Next S tep threading t he pedals o n t he crank a rms ensuring t hey follow t he s =ckers for w hich s ide t he pedal ...
- Page 21 The p edals t hread into t he c rank arms i n t he direc=on s hown on t he d ecal o n their ...
- Page 22 Each P edal w ill have a s =cker no=ng w hich crank a rm t hey are t o b e a9ached. w w w . i n f i n i t y c y c l e w o r k s . c o m...
- Page 23 First t hread t he correct p edal i nto the c orresponding crank a rm b y hand, f ollowing the d irec=on shown ...
- Page 24 Finish = ghtening the p edal u sing a 15 m m b ox e nd wrench, o r narrow a djustable wrench. Remember ...
- Page 25 Finish = ghtening the p edal u sing a 15 m m b ox e nd wrench, o r narrow a djustable wrench. w w w .
- Page 26 Finish = ghtening the p edal u sing a 15 m m b ox e nd wrench, o r narrow a djustable wrench. Remember ...
- Page 27 Ensure y ou h ave the c orrect p edal for t he c orrect side c rank a rm and n ote t he direc=on ...
- Page 28 First t hread t he correct p edal i nto the c orresponding crank a rm b y hand, f ollowing the d irec=on shown ...
- Page 29 Finish = ghtening the p edal u sing a 15 m m b ox e nd wrench, o r narrow a djustable wrench. w w w .
- Page 30 Finish = ghtening the p edal u sing a 15 m m b ox e nd wrench, o r narrow a djustable wrench. Remember ...
- Page 31 Check y our s eat post h eight a nd alignment. G rab the q uick r elease and o pen i t t o loosen ...
- Page 32 Check y our s eat post h eight a nd alignment. G rab the q uick r elease and o pen i t t o Minimum ...
- Page 33 To s traighten, align y our s eat along w ith t he top t ube. w w w . i n f i n i t y c y c l e w o r k s . c o m...
- Page 34 To s traighten, align y our s eat along w ith t he top t ube. w w w . i n f i n i t y c y c l e w o r k s . c o m...
- Page 35 Once y ou a re happy w ith t he posi=on o f y our seat, a nd t he minimum inser=on l ine i s NOT ...
- Page 36 Once y ou a re happy w ith t he posi=on o f y our seat, a nd t he minimum inser=on l ine i s NOT ...
-
Page 37: Final Review
FINAL R EVIEW You h ave n ow c ompleted y our r equired a ssembly p rocedure. For a fi nal r eview w e s uggest y ou u se t he c heck l ist b elow t o d o o ne l ast check ...
Need help?
Do you have a question about the Backroads and is the answer not in the manual?
Questions and answers