Advertisement
Quick Links
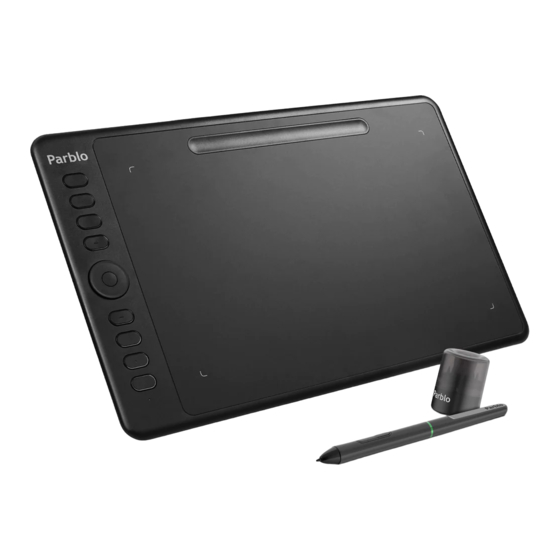
User Manual for Intangbo M Graphics Tablet
Key Warnings:
1. Do not disassemble or refit the device. Damages such as heating, fire hazard, electric shock and personal injury may be
caused if you don't follow such instruction. The warranty will be void in case of any disassembly;
2. Do not excessively bend the USB cable to avoid any damage. Damaged or broken USB cables, or any touch with water
and other liquid may cause malfunction, fire hazard and electric shock;
3. Do not insert any metal object or foreign item into the mouth or ports. Damages such as malfunction and electric
shock may be caused if you don't follow such instruction;
4. Keep out of reach of children, and separated parts or accessories may be swallowed accidentally by kids if you don't
follow such instruction;
5. Do not wipe the product with alcohol, organic solution or neutral detergent in order to avoid damages such as color
change;
6. The following damages aren't covered by the warranty scope:
(a) Damages caused by the large fluctuation of temperature;
(b) Damages caused by naked fire;
(c) Damages caused by falling
7. Do not disassemble the product due to its built-in precision electronic circuit. Any malfunction caused by unauthorized
disassembly won't be covered by the warranty scope, but users can pay for such maintenance;
8. Please wipe the surface with soft clothes and rags.
1
Advertisement

Related Manuals for Parblo Intangbo M


Summary of Contents for Parblo Intangbo M
- Page 1 User Manual for Intangbo M Graphics Tablet Key Warnings: 1. Do not disassemble or refit the device. Damages such as heating, fire hazard, electric shock and personal injury may be caused if you don’t follow such instruction. The warranty will be void in case of any disassembly;...
- Page 2 User Manual Outline I Product Overview 1. Product Diagrams II Connection Methods 1. Intangbo M Connection Methods 2. Computer System Requirements III Install Drive Programs 1. Installation Notes 2. Windows 3. Mac IV Introduction to the Driven Page 1. Windows 2.
-
Page 3: I Product Overview
(7) USB Type-C Data Transmission Port II Connection Methods How to Connect the Intangbo M Graphics Tablet to Your Computer: The graphics tablet can work with computer and Android devices (the default option is to work with computer). Users can refer to the following ways to switch its working modes between computer and Android device: (1) Simultaneously press any key for 3s, then release them. - Page 4 (3) If drivers of other graphic drawing tablets or monitors have been installed, please restart your computer after you remove them, then install Intangbo M drive program; (4) Download the latest drive program on the official website of Parblo (www.parblo.com), then decompress and open the file. Click “.exe” or “.pkg” to install;...
- Page 5 1, Connect the USB Type-C cable to your computer and graphics tablet. The indicator will be off after flashes once, which indicates a successful connection; 2, Download the latest drive program on the official website of Parblo (www.parblo.com), then click “.pkg” to download after the file is decompressed;...
- Page 6 Figure 4-1 Windows Drive Page 1. Pen Settings Interface 1.1 Pressure Testing Area Test whether there is pressure change during drawing in the area. Figure 4-2 Pressure Testing Area...
- Page 7 1.2 Pen Key Settings Set functions of 2 keys in the drawing pen according to your needs. Select hot keys to customize settings in the drop-down list; Figure 4-3 Pen Key Settings Note: Click keys to activate functions only when the graphic drawing pen is within the sensing height (below 10mm) of Intangbo M graphics tablet.
- Page 8 1.3.2 High pressure sensitivity—softer pressure Figure 4-5 Softer Pressure 1.3.3 Lower pressure sensitivity – harder pressure Figure 4-6 Harder Pressure 1.4 Coordinate Mode “Absolute Coordinate” indicates that the graphics tablet matches the coordinate position on display; “Relative Coordinate” indicates that the position of the graphics tablet relatively maps the screen’s resolution ratio site (also known as mouse mode)
- Page 9 Figure 4-7 Coordinate Mode 1.5 Windows Ink Check such function to support Windows handwriting tablet protocol, and partial drawing software support Windows Ink function. Figure 4-8 Windows Ink 2, Area Settings Figure 4-9 Area Settings 2.1 Display Settings Users can select the control area of the graphics tablet as the whole or single display; 2.2 Whole Display The working area of the graphics tablet can map the whole are of the display;...
- Page 10 2.4 Rotation Settings User can set the angle of Intangbo M graphics tablet, and 0° is the default (it means that it can be used on the left). In case of other angles, please rotate the Intangbo M graphics tablet through the relevant angles clockwise;...
- Page 11 Figure 4-11 Self-defined Key 1 Figure 4-12 Self-defined Key 2 3.2 Rotation Settings...
- Page 12 Figure 4-13 Rotation Settings The default functions of R1, R2 and R3: Mouse wheel, Canvas size (Photoshop), Brush size (Photoshop). R4, R5 and R6 come no functions, and you can click the drop-down list to define your settings according to your actual demands. Figure 4-14 Self-defined Rotation 1...
- Page 13 Check “Disable Shortcut Keys”, and keys’ functions fail to work. 3.4 Self-defined Options Figure 4-16 Self-defined Option 1 The default setting is the Parblo built-in key + rotation function (Photoshop), and you can click to add in order to configure more software with self-defined keys’ functions.
- Page 14 Figure 4-17 Self-defined Option 2...
- Page 15 Figure 4-18 Self-defined Option 3 Click the software icon that has been added to customize its key and rotation functions; Select the software icon and click “Remove” to delete the current software configuration; Click “Reset” to restore the default settings. 4, Configuration Settings Figure 4-19 Configuration Settings You can save and read the set value of functions such as shortcut keys and rotation via export and import configuration.
- Page 16 Figure 4-20 Export Configuration Figure 4-21 Import Configuration 5, About...
- Page 17 Figure 4-22 About Show the current driver version: 3.2.1.6 You can find the Parblo icon in the Launchpad, then click to open the drive interface. Figure 4-23 Drive Icon 1, The Main Interface...
- Page 18 Figure 4-24 Drive Interface 1.1 Pen Settings Set functions of 2 keys in the drawing pen according to your needs. Select hot keys to customize settings in the drop-down list, and click “Default pen settings” to restore keys’ functions to factory default settings; Figure 4-25 Pen Settings Note: Click keys to activate functions only when the graphic drawing pen is within the sensing height (below 10mm) of Intangbo...
- Page 19 The default working mode is 0° (it means that it can be used on the left); You can adjust the laying style of Intangbo M graphics tablet according the way that you hold pens, and now it supports 4 working angles.
- Page 20 Figure 4-28 Pressure Test 1.5 Coordinate Mode “Absolute Coordinate” indicates that the graphics tablet matches the coordinate position on display; “Relative Coordinate” indicates that the position of the graphic drawing pen relatively maps the screen’s resolution ratio site (also known as mouse mode). Now, only graphics tablet supports such mode, instead of graphic drawing monitor. Figure 4-29 Coordinate Mode 2, Display Settings Users can select to make the graphic drawing pen control the whole display or main display/external display;...
- Page 21 Figure 4-30 Screen Setting 1 Figure 4-31 Screen Setting 2 3, Working Area Settings 1.1 Whole Working Area...
- Page 22 It indicates that the whole working area maps the display, meaning that the whole working area of the graphics tablet controls the current display that has been selected. Figure 4-32 Working Area Setting 1 1.2 Display Scale 1.2.1 Users can adjust the working area scale according to the display scale; 1.2.2 Users can adjust the working area size, and drag the red wireframe to set.
- Page 23 Figure 4-33 Working Area Setting 2 4, Key/Rotation Settings Figure 4-34 Key/Rotation Settings Notes:...
- Page 24 4.1 Key Settings The default setting of Parblo is the shortcut functions of Photoshop, and you can customize the functions of K1, K2, K3, K4, K5, K6, K7 and K8. Click the drop-down list to select “Self-defined” and enter the self-defined interface.
- Page 25 Figure 4-36 Hot Key Setting 2 Click “Hot Key Settings” to customize the function of shortcut keys for different software; a Click “+”...
- Page 26 Figure 4-37 Self-defined Software Hot Key 1 b Select software that you want to add Figure 4-38 Self-defined Software Hot Key 2...
- Page 27 c Set functions for each shortcut key in sequence Figure 4-39 Self-defined Software Hot Key 3 4.2 Rotation Settings The default functions of R1, R2 and R3: Mouse wheel, canvas size (Photoshop), brush size (Photoshop). R4, R5 and R6 come no functions, and you can click the drop-down list to define your settings according to your actual demands.
- Page 28 Figure 4-40 Rotation Setting 1 Click “Self-defined” to set left/right rotation, and users can name such function. Figure 4-41 Rotation Setting 2 Click “Rotation Settings to customize rotation function for each software.
- Page 29 a click “+” Figure 4-42 Self-defined Software Rotation 1 b Select software that you want to add...
- Page 30 Figure 4-43 Self-defined Software Rotation 2 c Set functions for each shortcut key in sequence Figure 4-44 Self-defined Software Rotation 2...
- Page 31 5, Configuration File Figure 4-45 Configuration File You can save and read the set value of functions such as shortcut keys and rotation via export and import configurations. Note: When all the shortcut key functions are set, you can click "Export Configuration" to save your settings. Figure 4-46 Export...
- Page 32 Figure 4-47 Import 6, About Figure 4-48 About...
- Page 33 1.3.1 Diagnostic tools can show the current “hardware information”, “environment information” and “pen coordinate information”; 1.3.2 Click “firmware download” and the page will turn to the parblo support page to download the corresponding upgraded firmware files; 1.3.3 Click “firmware upgrade” to upgrade the current product and update the firmware version.
- Page 34 Figure 5-1 Remove (Windows) Go to Finder—APP to find and open “ParbloTablet”, then find and double click “uninstallParbloTablet” to remove according to instructions. 000.
- Page 35 Figure 5-2 Remove (Mac)
-
Page 36: Frequently Asked Questions And Solutions
(3) Check whether there are other brands of tablet drivers in the computer. If so, please uninstall other drivers and the installed Parblo driver and restart the computer. (4) Turn off the computer's anti-virus software temporarily, and reinstall the tablet driver. After the installation is complete, you can find the icon in the desktop taskbar to open the driver and reconnect. - Page 37 ( 4 ) Turn on this computer, and open it in the C drive: Users\"computer user name"\AppData\Roaming\Adobe\Adobe Photoshop 2020\Adobe Photoshop 2020 Settings\PSUserConfig.txt, the following window will pop up, put the number "0 "To "1". (5) Restart Photoshop, if there is still no pressure, go to step 6. (6) Uninstall and reinstall the driver, and restart the computer.
- Page 38 (3) Set the minimum brush size to 0%. 5. What should I do if there is no pressure in painting in AI? Take AI2020 as an example: (1) Select the brush tool and open the "brush options" in the brush drop-down list.
- Page 39 (2) In the brush options window, select the brush size as "pressure" (3) Set the pressure sensitivity variable size equal to the brush size such as "5", click "OK".
- Page 40 6. How to set up and use Parblo Tablet driver in macOS? macOS Mojave (10.14) system (1) After completing the driver installation, the system will automatically pop up the following prompt when the tablet or screen is recognized for the first time:...
- Page 41 (3) On the "Accessibility" setting, click the "Press Lock" button, and then enter the administrator password system for authorization. (4) Please click the "+" button, search for "ParbloTabletDriver" in the search box, select "ParbloTabletDriver", and...
- Page 42 then click the "Open" button. (5) Please click the "press lock" button to lock.
- Page 43 (6) Turn off "Security and Privacy" and restart the system. When the system enters the desktop, open "ParbloTabletSetting" on the launchpad to use it. macOS Catalina (10.15) and higher (1) After completing the driver installation, first set the permissions of the same "macOS Mojave (10.14) system" as above, and then on the "input monitoring"...
- Page 44 (2) Please select "ParbloTabletDriver". (3) Please click the "press lock" button to lock.
- Page 45 (4) Turn off "Security and Privacy" and restart the system. When the system enters the desktop, open "ParbloTabletSetting" on the launchpad to use it. 7.What should I do if the pen on the tablet does not work? (1) Check whether the connection between the USB cable and the tablet port and computer port is loose. (2) Check whether the digital pen and tablet are within the effective sensing height or whether the LED indicator of the tablet is flickering when touching the tablet.
- Page 46 (2) Find "Pen and Touch" in "Control Panel" and open it. (3) Click "Long press, right-click", and then click "Settings" to open the long press setting window.
- Page 47 (4) Do not check "Use long press as right-click" and click "OK" twice.
- Page 48 9. What are the Android device APPs compatible with the product? Remarks: The Android version of the device must be 6.0 and above. The low battery of the device will affect the connection. √(支持) 是否兼 是否有 应用名称 X(不支持) 容 压感 ╱(软件无此项)...
- Page 49 (3) Then connect the USB head to the OTG adapter, and the Type-c port to the digital tablet. Keep the mobile phone (tablet) and the tablet vertically (as shown in the figure below). (4) Click on the "Notification page" to display the tablet model, such as "Parblo Intangbo M" (as shown in the figure below: some phones do not prompt).
- Page 50 a. Press and hold any two buttons on the tablet at the same time for more than 3 seconds and then release, the indicator light will flash 3 times quickly and then go out. At this time, the coordinate mode switch is completed. b.
- Page 51 3. Reinstall the driver. Note: Before installing the driver, please turn off all anti-virus software and uninstall all other pen tablet or pen display drivers from the computer and restart the computer.
Need help?
Do you have a question about the Intangbo M and is the answer not in the manual?
Questions and answers
Здравствуйте, не работают кнопки на планшете и на самом пере, нажимаю на пере "ластик" предварительно настроив в настройке пера "кисть/ластик" появляется иконка маленькая "ластик" но ластик не переключается, и так на всех кнопках, как исправить? Модель Intangbo M
У меня стала на телефоне малая область всего планшета,хотя раньше все было нормально, пытаешься нарисовать круг, а выходит овал