Table of Contents
Advertisement
Available languages
Available languages
Quick Links
Advertisement
Table of Contents

Subscribe to Our Youtube Channel
Related Manuals for Electrolux LTA13


Summary of Contents for Electrolux LTA13
- Page 1 INSTRUCTION MANUAL LTA13 ELECTRIC WASHING MACHINE MADE IN BRAZIL...
-
Page 2: Table Of Contents
User Manual 1. Safety 1.1 For Children Thank you for choosing Electrolux. In this manual you can find all information for your Avoid accidents. After unpacking the washing safety and the proper use of your product. machine, keep the packaging material away from Read all instructions before using the product children. -
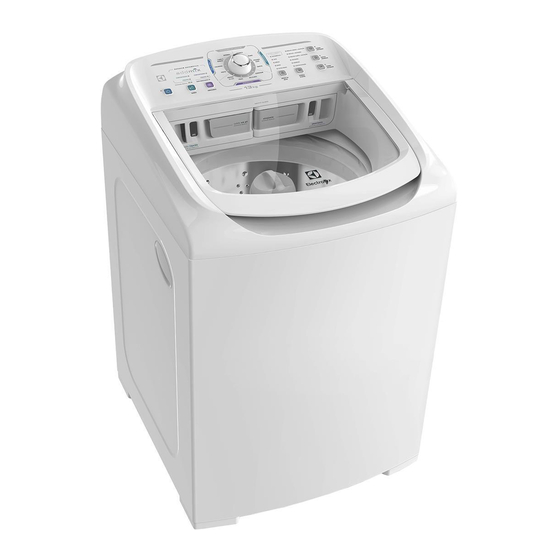
Page 3: Product Description
2. Product Description 1. Control panel (see page 8) 2. Liquid soap reservoir 3. Powder soap dispenser 4. Softener reservoir 5. Bleach dispenser 6. Agitator (inside the product) 7. Filter (inside the agitator) Drum (inside the product) 9. Lid 10. Leveling legs (4) 11. -
Page 4: Installation
Running shoes Program • Do not be washed shoes with very rigid It was specially developed for washing running soles, with locks or fittings (football boots or shoes . running shoes for bicycles), safety shoes (with metal or plastic toe) or any type of footwear that may compromise the washing machine and accessories, as well as damage some detail the shoes itself. - Page 5 Circuit Breaker Electrical Installation It is mandatory to install an exclusive circuit breaker WARNING for the washing machine. If in doubt regarding the electrical system of Before connecting your your residence, consult the energy provider . product, ensure that the voltage on the socket where the product will be plugged is the same to the voltage indicated on label...
-
Page 6: How To Use
Drain hose Hydraulic Installation Place the hose (B) in the drain outlet or at the edge of the laundry sink(C) with a maximum height of 140 cm and a minimum of 90 cm for the proper operation of your product. Place the hose into the tube at a maximum of 20 cm in the drain outlet. - Page 7 When selecting liquid soap mode be sure “WITHOUT SOFTENER” option to not use softener there is no powder soap in the dispenser, in the washing cycle. The selected option will be as this will cause double dosage (with both indicated by a blue light. soaps) and it will be harmful to the correct operation of your washing machine.
-
Page 8: Control Panel
After pressing the ON/OFF key, the If you want, use the “HOT WATER” program can still be changed. After this option. When pressing this key, a change wait 5 seconds for the washing blue light will illuminate beside machine starts working again. the key indicating the option is If you stop the wash process before the selected... -
Page 9: Washing Programs
6. Washing Programs When selecting a "Washing Program" the washing machine will automatically choose the most appropriate Wash Step. In this case, the approximate time duration of each program will be as indicated in the figure below: 1h 12min 2h 00min 1h 32min 1h 20min 2h 32min... -
Page 10: Auto Dosing
7. Auto Dosing 7.1 How to Change the Quantity of Liquid Soap If it's necessary to change the quantity of soap automatically released by the machine, increasing or decreasing, follow the instructions below: 3. The change of liquid and/or concentrated soap (more or less) is done by the WATER LEVEL key HIGH - More soap 1. - Page 11 7.2 Instruction to Change the Quantity of Softner If it's necessary to change the quantity of softener automatically released by the machine, increasing or decreasing, follow the instructions below: 3. The change of liquid and/or concentrated softener (more or less) is done by the WATER LEVEL key HIGH - Regular softner 1.
- Page 12 7.4 Instructions to return to the factory setting Press and hold the SOAP and SOFTENER keys at the same time, until you hear a beep and the LED lights turn on. Release the keys and wait until you hear the beep and the LED lights turn OFF.
-
Page 13: Cleaning And Maintenance
8. Cleaning and Maintenance 8.1 Inside 8.3 Dispenser Clean the inside of the washing To clean the dispenser, proceed as follows: machine at least once a month. Open the drawer completely. Put 1 liter of bleach in the drum. Remove the dispenser from Select the High water level and the the inside of the drawer and wash it. -
Page 14: Troubleshooting
8.5 Water Filter 8.7 Outside Close the water inlet. Clean it with warm water and neutral soap. After cleaning, wipe it with a soft cloth. To avoid acci- Disconnect the end of the hose dentally turning the product on when cleaning, is from the faucet and remove the recommended to remove the plug from the socket. - Page 15 Problem Probable Causes Correction Place the hose to a maximum height The drain hose water is too high. of 140 cm. Do not let the end of the drain hose stay The end of the drain hose in the The washing submerged when the laundry sink is full.
- Page 16 Problem Probable Causes Correction Too much softener and/or soap. Use the quantity recommended on page 7. The water of the house is dirty. Install a filter in the faucet. Internal cleaning of the washing Clean the washing machine machine wasn’t done. as recommended.
-
Page 17: Tips And Advices
Stain Removal 10. Tips and Advice It is possible that certain stains are not removed with soap and water. It is therefore advisable to take • Always try to check the washing special care before washing. recommendations on the clothing labels before •... -
Page 18: International Symbols
Weight of Clothes 11. International Symbols The maximum capacity of this washing machine refers to a standard load of 13 kg, These symbols appear on the clothes labels, to consisting of sheets, pillowcases and cotton help in the selection of the the best way to treat towels,whose composition, size and weight are them. -
Page 19: Electrical Diagram
12. Electric Diagram WARNING Remove the power cord from the socket before performing any repair or maintenance to avoid the risk of electric shock. Failure to do so can result in serious injury or death. -
Page 20: Technical Specifications
13. Technical Specifications 220 V Washing Voltage Net weight 48 kg Dimensions (height x width x depth) 104×66×70 cm Maximum height wiht lid open 148 cm Number of programs Maximum capacity with dry clothes** 13 kg Frequency 60Hz 0,40 kWh / ciclo Power consumption/Program Heavy Duty Spinning rotation*** 730 rpm... - Page 21 Notes...
- Page 22 Notes...
- Page 23 Notes...
- Page 24 69500XXX Rev.00 June/15...
- Page 25 كتيب التعليمات غسالة المالبس الكهربائية LTA13 صنعت في البرازيل...
- Page 26 .1 السالمة دليل المستخدم 1.1 خاص باألطفال . يمكنك في هذا الدليل العثور علىElectrolux شكرً ا الختيارك كافة المعلومات الالزمة لسالمتك والستخدام الغسالة على النحو تجنب الحوادث. عقب إخراج الغسالة من صندوقها، احتفظ بمواد الصحيح. اقرأ كافة التعليمات قبل استخدام المنتج واحتفظ بها للرجوع...
- Page 27 .2 وصف المنتج )8 لوحة التحكم (انظر صفحة وعاء الصابون السائل موزع الصابون المسحوق وعاء منعم المالبس موزع مبيض المالبس )محرك (داخل المنتج )الفلتر محرك (داخل المحرك )حلة الغسيل (داخل المنتج الغطاء )4( أرجل االستواء )خرطوم الصرف. (خلف الغسالة )خرطوم دخل الماء والفلتر (متصلين بالفعل بالخرطوم المنحنى...
- Page 28 برنامج أحذية العدو ال تغسل أحذية العدو المزودة بنعال بالغة الصالبة أو بأقفال أو • تركيبات (مثل أحذية كرة القدم أو أحذية العدو المخصصة لركوب .تم تصميمه خصي ص ًا لغسيل أحذية العدو الدراجات) أو أحذية األمان (المزودة بغطاء واق ٍ ألصابع القدم من المعدن...
- Page 29 قاطع الدائرة الكهربائية التركيب الكهربي .من الضروري تثبيت قاطع دائرة كهربائية منفرد للغسالة تحذير إذا كنت غير متيقن ٍ بشأن النظام الكهربائي لسكنك، استشر .مزود الطاقة قبل توصيل منتجك، تأكد من أن فلطية المقبس الذي سيتم توصيل المنتج فيه يحمل نفس...
- Page 30 التركيب الهيدروليكي خرطوم الصرف ) بارتفاعC( ) في مخرج الصرف بحوض الغسيلB( ضع الخرطوم 041 سم كحد أقصى و09 سم كحد أدنى لضمان عمل الغسالة على النحو األمثل. ضع الخرطوم داخل األنبوب على مسافة 02 كحد باردFRIA أقصى داخال مخرج الصرف. في حالة وضع الخرطوم على حافة حوض...
- Page 31 " (بدون منعمWITHOUT SOFTENER" يمكن تحديد خيار عند اختيار وضع الصابون السائل تأكد من عدم وجود أي مسحوق .مالبس) إذا لم تكن ترغب في استخدام منعم مالبس دع دورة الغسيل صابون داخل الموزع، حيث سيؤدي وجوده إلى جرعة مضاعفة من المنظف...
- Page 32 يمكن تغيير البرنامج حتى عقب الضغط على مفتاح التشغيل وإيقاف " وف ق ً اHOT WATER" استخدم خيار ٍ التشغيل. عقب إجراء التغيير المطلوب، تستغرق الغسالة 5 ثوان لرغبتك. عند الضغط على هذا المفتاح، سيضاء لتعاود العمل مجد د ًا. إذا أوقفت عملية الغسيل قبل انتهاء دورة مصباح...
- Page 33 .6 برامج الغسيل " (برنامج غسيل)، ستقوم الغسالة تلقائ ي ًا باختيار خطوة الغسيل األنسب. وفي تلك الحالة، ستكون المدة التقريبيةWashing Program" عند تحديد :لكل برنامج متوافقة مع ما هو مشار إليه في الشكل أدناه ساعة واحدة و21 دقيقة ساعتين 00 دقيقة ساعة...
- Page 34 7. تحديد الجرعة آل ي ً ا 1.7 كيفية تغيير كمية الصابون السائل إذا كان من الضروري تغيير كمية الصابون المسحوب تلقائيا بواسطة :الغسالة سواء بالزيادة أو النقصان، اتبع اإلرشادات التالية .3 يتم تغيير جرعة الصابون السائل و/أو المركز (بالزيادة أو )...
- Page 35 2.7 تعليمات تغيير كمية منعم المالبس إذا كان من الضروري تغيير كمية منعم المالبس المسحوب تلقائيا بواسطة الغسالة، سواء بالزيادة أو النقصان، اتبع اإلرشادات :التالية .3 يتم تغيير جرعة منعم المالبس السائل و/أو المركز (بالزيادة أو ) (مستوى الماءWATER LEVEL النقصان) بواسطة مفتاح .LED .1 أوصل...
- Page 36 4.7 تعليمات إعادة المنتج إلى ضبط المصنع (الصابون) وSOAP اضغط مع االستمرار على مفاتيح (منعم المالبس) في نفس الوقت حتى تسمع صوتSOFTENER . حرر المفاتيح وانتظر حتى تسمعLED صفير ويضاء مصباح .LED الصفير مجددا وينطفئ ضوء مالحظة: سيرجع خياران الصابون ومنعم المالبس إلى وضع الجرعة .)المتوسطة...
- Page 37 .8 التنظيف والصيانة 3.8 الموزع 1.8 الجزء الداخلي :لتنظيف الموزع، اتبع الخطوات التالية نظف األجزاء الداخلية من الغسالة مرة واحدة على األقل شهر ي ًا. ضع لتر واحد من المبيض في ..1 افتح الدرج بالكامل حلة الغسيل. حدد مستوى الماء المرتفع وبرنامج ..2 انزع...
- Page 38 .7.8 البدن الخارجي 5.8 فلتر الماء قم بتنظيفه مستخد م ًا الماء والصابون المحايد. عقب تنظيفه امسحه بقطعة أغلق مدخل الماء قماش ناعمة. لتجنب تشغيل الغسالة بدون قصد أثناء التنظيف، يفضل نزع افصل طرف الخرطوم عن الصنبور وانزع .القابس من المقبس الفلتر.
- Page 39 التصحيح األسباب المحتملة المشكلة .ضع الخرطوم على ارتفاع 041 سم كحد أقصى .خرطوم الصرف مرتفع للغاية ال تدع طرف خرطوم الصرف مغمورً ا في حوض طرف خرطوم الصرف في حوض الغسيل مغمور في .الغسيل حينما يكون ممتل ئ ً ا .الماء...
- Page 40 التصحيح األسباب المحتملة المشكلة تم استخدام كمية أكثر مما ينبغي من المنعم و/أو .7 استخدم الكمية الموصي بها في صفحة .الصابون ركب فلتر في الصنبور .مياه الخرطوم غير نظيفة .اغسل الغسالة حسبما هو موصي به لم يتم إجراء التنظيف الداخلي للغسالة إذا...
- Page 41 إزالة البقع .01 أفكار ونصائح قد يتعذر إزالة بعض البقع باستخدام الماء والصابون، لذا ينصح .باالعتناء بها عناية خاصة قبل غسيلها حاول دائ م ًا تفقد توصيات الغسيل الموجودة على بطاقات المالبس • .قبل غسلها، حتى ال تتسبب في إتالفها الدماشطفه...
- Page 42 وزن المالبس .11 الرموز الدولية ،السعة القصوى لهذه الغسالة تشير إلى حمل قياسي يبلغ 31 كجم تظهر تلك الرموز على ملصقات المالبس للمساعدة على تحديد أفضل يشمل المالءات وأكياس الوسائد والمناشف القطنية، والتي يتم تحديد خاماتها وحجمها ووزنها وف ق ً ا للمعايير العالمية. جدول أوزان المالبس .طرق...
- Page 43 .21 التركيب الكهربي تحذير عليك نزع سلك الكهرباء من المقبس قبل أداء أي أعمال تصليح أو صيانة لتجنب مخاطرة التعرض لصدمة كهربائية. عدم القيام بذلك .قد يؤدي إلى التعرض إلصابة خطيرة أو حتى الوفاة...
- Page 44 .31 المواصفات الفنية 022 فولطية فلطية الغسيل 84 كجم الوزن الصافي )األبعاد (االرتفاع × العرض × العمق 104×66×70cm 841 سم االرتفاع األقصى مع فتح الغطاء عدد البرامج 31 كجم **السعة القصوى مع المالبس الجافة 06 هرتز التردد 04.0 كيلو واط/سيكلو استهالك...
- Page 45 مالحظات...
- Page 46 مالحظات...
- Page 47 مالحظات...
- Page 48 69500XXX 00 المراجعة 2015/يونيو...
Need help?
Do you have a question about the LTA13 and is the answer not in the manual?
Questions and answers