Advertisement
Quick Links
LOAD MOMENT INDICATOR (LMI)
LOAD MOMENT INDICATOR (LMI)
Complies to the MACHINES DIRECTIVE Standards: EN60204-1, EN954, EN12077-2
EMC according to the " Heavy Industrial Environment" category: EN50081-2, EN50082-2
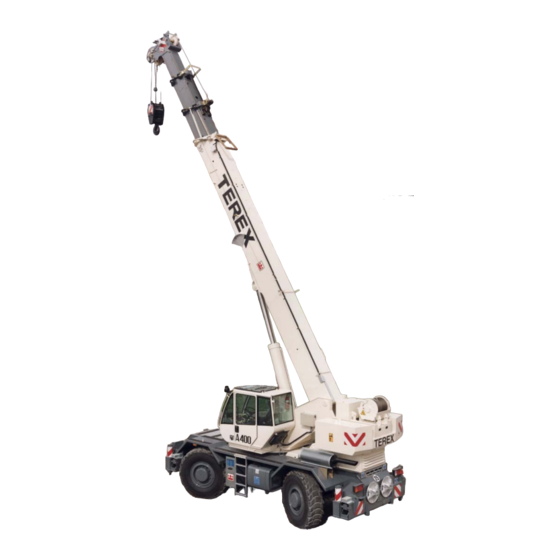
TELESCOPIC CRANES
TELESCOPIC CRANES
USER MANUAL
USER MANUAL
LTB1
Name
Code
C71_1: BOOM ON OUTRIGGERS
300
0
1
2
3
1
Length
9,4
14,4
2
I
0
24
3
II
0
24
4
III
0
24
5
IV
6
7
8
Amax
79
32
79
19
9
Amin
0
8
0
4,3
10
2
2
11
3
62,4
32
71,9
20
12
3,5
58,4
27,45
69,8
20,35
13
4
54,1
24,4
67,4
20,75
14
4,5
49,5
21,8
65,2
21,2
15
5
45
19,4
62,8
19,3
16
6
33,4
15,5
58
14,75
17
7
19,1
11,5
53
11,7
18
8
47,7
9,4
19
9
41,8
7,65
20
10
35
6,4
21
11
24,7
5,4
22
12
11
4,65
23
13
24
14
25
15
26
16
27
17
28
18
29
19
30
20
31
21
32
22
33
23
34
24
35
25
36
26
37
27
38
28
39
29
40
Ballast
Outrigger
Jib Angle
Jib Length
2,5
6,3
4
5
6
7
8
9
10
19,5
24,7
28,9
48
73
93
48
73
93
48
73
93
79
17
79
14
79
10
0
2
0
1,05
0
0,5
2
2
2
75,9
18
74,5
18,45
76
14
73,1
18,7
75,2
14,5
71,7
17,3
74,6
14,3
68,6
13,45
72,9
12,35
77,2
10
65,2
10,9
71,2
10,1
75,2
9,55
61,7
9,05
69,2
8,5
73,2
8,05
57,8
7,7
67,9
7,25
71,2
6,9
53,7
6,45
64,4
6,25
69
6
49,4
5,4
61,8
5,4
66,8
5,25
43
4,7
59
4,75
64,4
4,6
40,4
4,05
55,8
4,1
62
4,1
35,6
3,55
52,6
3,6
59,4
3,6
30,6
3,05
48,9
3,1
57
3,1
23,7
2,75
45
2,75
54,2
2,8
12,9
2,35
40,8
2,4
51,4
2,4
36,2
2,15
48,6
2,2
31,4
1,95
45,8
1,95
26,4
1,7
42,8
1,7
22,6
1,5
40
1,5
12,4
1,35
36
1,35
31,2
1,2
26
1,05
19,2
0,9
11
0,8
0,5
01/08/05 Up-Grade
REV 4
3B6
3B6
Zone
0
11
12
13
14
30,4
100
100
100
79
9
18
0,8
2
2
78,2
9
76,4
8,85
74,5
7,9
72,5
6,8
70,4
5,9
68,2
5,15
65,8
4,55
63,4
4,05
61
3,6
59,5
3,1
55,6
2,8
53
2,4
50,1
2,2
47,2
1,95
44,2
1,7
43,3
1,5
37,8
1,35
33,8
1,2
29,2
1,05
24
0,9
18
0,8
Advertisement

Related Manuals for Terex 3B6

Summary of Contents for Terex 3B6
- Page 1 LOAD MOMENT INDICATOR (LMI) LOAD MOMENT INDICATOR (LMI) TELESCOPIC CRANES TELESCOPIC CRANES USER MANUAL USER MANUAL LTB1 Name Code Ballast Outrigger Jib Angle Jib Length Zone C71_1: BOOM ON OUTRIGGERS Length 14,4 19,5 24,7 28,9 30,4 Amax Amin 1,05 62,4 71,9 58,4 27,45...
- Page 2 INDEX INDEX What the load moment indicator does? Pag. LOAD MONITORING INDICATOR (LMI) FUNCTIONAL DESCRIPTION Which components are included in an LMI? SYSTEM LAY-OUT AND CONNECTIONS 4 - 7 How is the LMI installed on the machine? COMPONENTS LOCATION ON THE MACHINE What’s the need of the control panel? CONTROL PANEL DESCRIPTION What’s does it happen when starting the machine?
- Page 3 What the load moment indicator does ? The LMI aim is to control that the machine doesn’t exceed working condition limits, making the Operator aware and acting through alarms and shut-down of dangerous movements. LOAD MONITORING INDICATOR (LMI) LOAD MONITORING INDICATOR (LMI) FUNCTIONAL DESCRIPTION FUNCTIONAL DESCRIPTION Data display and setting...
- Page 4 Which components are included in an LMI? It’s a system including sensors able to detect lifted load, boom position, a main unit and a control panel situated inside at the cabin. SYSTEM LAY OUT MEGAMAC.106 SYSTEM LAY OUT MEGAMAC.106 AND CONNECTIONS AND CONNECTIONS HIGH CHAMBER (ROD SIDE) CV 4X0.5+SCH...
- Page 5 Which components are included in an LMI? It’s a system including sensors able to detect lifted load, boom position, a main unit and a control panel situated inside at the cabin. SYSTEM LAY OUT MEGAMAC.HC118 SYSTEM LAY OUT MEGAMAC.HC118 AND CONNECTIONS AND CONNECTIONS PG3 PG4 PG5 PG6 HIGH CHAMBER (ROD SIDE)
- Page 6 Which components are included in an LMI? It’s a system including sensors able to detect lifted load, boom position, a main unit and a control panel situated inside at the cabin. SYSTEM LAY OUT MEGAMAC.HC212 SYSTEM LAY OUT MEGAMAC.HC212 AND CONNECTIONS AND CONNECTIONS PG5 PG6 INPUT OUTPUT SIGNALS...
- Page 7 Which components are included in an LMI? It’s a system including sensors able to detect lifted load, boom position, a main unit and a control panel situated inside at the cabin. SYSTEM LAY OUT MEGAMAC.HC220 SYSTEM LAY OUT MEGAMAC.HC220 AND CONNECTIONS AND CONNECTIONS PG5 PG6 INPUT OUTPUT SIGNALS...
- Page 8 How is the LMI installed on the machine? The sensors are positioned on the boom and cylinders in order to detect data when working, while the main unit and the control panel are located inside the cabin. COMPONENTS LOCATION ON THE MACHINE COMPONENTS LOCATION ON THE MACHINE Length sensor Used in case of boom...
-
Page 9: Control Panel Description
What’s the need of the control panel? It gives to the operator all information in order to work in safe conditions and allows proper setting . CONTROL PANEL DESCRIPTION CONTROL PANEL DESCRIPTION Working data display; GREEN Button/lamp : if pressed, it allows the operator to scroll the pages lit = safety AMBER Button/lamp :The lamp lit indicates that the load has reached the pre-alarm condition. -
Page 10: Switching The Machine On
What does it happen when starting the machine? The system gets activated and automatically proceeds to its self test mode giving information to the Operator SWITCHING THE MACHINE ON SWITCHING THE MACHINE ON Starting the system the display shows the last operating mode setted prior to the system switching off. - Page 11 Is the control panel informing about safety on the machine? Yes! It has been designed and its main scope is to check the machine working conditions, comparing them to the limits given by the load Tables previously memorised. PANEL MONITORING PANEL MONITORING - Lifting Conditions % and alarms 1) LCD bar showing the percentage of the load lifted at this moment.
- Page 12 Is the control panel giving useful information to work? Yes! It shows on the display all data related to the lifted load and the boom position PANEL MONITORING -Main Working Data Reading on the display 1.2) LIFTED LOAD Reading in “Tonnes” or “Lbs”, with a decimal point 1.3) MAXIMUM ADMITTED LOAD (According to the selected load table) Reading in “Tonnes”...
- Page 13 Is the control panel giving useful information to work? Yes! It shows on the display all data related to the lifted load and the boom position PANEL MONITORING -Main Working Data Reading on the display 1.8a 1.9a 1.9b 1.9c 1.9d 1.9e 1.8) WRITTEN TEXT...
- Page 14 Is the control panel giving useful information to work? Yes! It shows on the display all data related to the lifted load and the boom position through graphic. PANEL MONITORING - Main working data reading through graphics By pressing the green button, it’s possible to visualize the working data through graphics. 1.9a 1.9e 1.9b...
- Page 15 Can the control panel give further useful information regarding the machine? Yes, through the graphic display, showing complementary reading related to the machine. PANEL SCREENS -Complementary reading related to the machine functioning The further information displayed on the panel (zone 1.8) are the following : ANTI TWO BLOCK ALARM This message appears when the Anti two block alarm is activated.
-
Page 16: Selecting The Operating Mode
How to select the Operating Mode ? Simply pushing two buttons on the control panel. SELECTING THE OPERATING MODE SELECTING THE OPERATING MODE - Operating mode set 13.4 ma x 12.3 24° 0° MAIN BOOM 4 SEC. 1.9a To change the crane operating mode, please refer to the following instructions: •... - Page 17 How can I select the rope number ( tackle )? Simply pushing two buttons on the control panel. ROPE NUMBER (TACKLE) SETTING UP ROPE NUMBER (TACKLE) SETTING UP LINES OF ROPE SETTING UP It’s necessary to set the line of ropes value every time that the winch rope’s number changes.
-
Page 18: Auto - Diagnostic
Can the LMI detect faults? Of course. To be considered a reliable system, it must be able to perform self-check in order to detect internal or components faults. AUTO DIAGNOSTIC AUTO DIAGNOSTIC The LMI is equipped of an auto diagnostic system which is able to detect faulty pressure transducers, or boom angle/length sensors, broken cables or internal electronic faults. - Page 19 How the fault shows up? Through codes automatically shown on the display. Here follows the list including some hints to solve them. ALARM CODES AND ACTIONS TO TAKE ALARM CODES AND ACTIONS TO TAKE Alarm Description What to do code •...
- Page 20 How the fault shows up? Through codes automatically shown on the display. Here follows the list including some hints to solve them. Alarm Description What to do code • Verify that the cable or the connector wiring is not Boom length sensor open total reading higher If the alarm persists, please, contact Technical...
- Page 21 MEGAMAC HC is equipped with Working area limitation software. To access “isaac” menu, press and release the green pushbutton button until the following page is shown. Welcome to ISAAC. The 3B6 working area limiting system. Isaac is a graphic interface, which helps the operator set restricted working area limits for the machine.
- Page 22 Appendix Working Area Limiting Link: (option) Working Area Limiting Link: (option) i.s.a.a.c. (interactive space advanced automatic control) MAX Angle Setting: Press and release the red pushbutton to access the following menu: Graphic zone: the black area indicates the restricted working area (non-working area for the boom).
- Page 23 Appendix Working Area Limiting Link: (option) Working Area Limiting Link: (option) i.s.a.a.c. (interactive space advanced automatic control) MAX Height setting: Press and release the red pushbutton to access the following menu: Graphic zone: the black area indicates the restricted working area (non-working area for the boom).
- Page 24 Appendix Working Area Limiting Link: (option) Working Area Limiting Link: (option) i.s.a.a.c. (interactive space advanced automatic control) MAX Radius setting: Press and release the red pushbutton to access the following menu: Graphic zone: the black area indicates the restricted working area (non-working area for the boom).
- Page 25 Appendix Working Area Limiting Link: (option) Working Area Limiting Link: (option) i.s.a.a.c. (interactive space advanced automatic control) WALL limit setting. MEGAMAC HC calculates working area limitation using “virtual wall” concept. It stops the movement according to a “virtual wall” delimited by 2 preset points In order to enable “virtual wall”...
- Page 26 Appendix Working Area Limiting Link: (option) Working Area Limiting Link: (option) i.s.a.a.c. (interactive space advanced automatic control) SET POINT 1 (ONE) Press and release the red pushbutton to access to the following menu: This menu sets the max CCW point (point one) of the WALL. Graphic zone: the black area indicates the restricted working area (non-working area for the boom).
- Page 27 Appendix Working Area Limiting Link: (option) Working Area Limiting Link: (option) i.s.a.a.c. (interactive space advanced automatic control) SET POINT 2 (TWO) Press and release the green pushbutton to access to the following menu: This menu sets the max CW point (point two) of the WALL. How to store point 2 (two): Rotate the turret in the max CW position allowed, position the hook to the second point (radius set).
- Page 28 Appendix Working Area Limiting Link: (option) Working Area Limiting Link: (option) i.s.a.a.c. (interactive space advanced automatic control) Rotation angle (degrees) Operative angle limits, exceeding these values, the WALL is active. To continue to rotate in the same direction a reduction of the radius is required, as a virtual wall is installed in the operative area.
- Page 29 What should be known before starting the machine? All the recommendations and rules from the Manufacturer to work wisely and consciously in any time and situation WARNINGS WARNINGS • The LMI is an electronic device with the aim to help the operator in the current use of the machine, warning him by means of visual and acoustic signals while approaching dangerous conditions.
- Page 30 What should be known before starting the machine? All the recommendations and rules from the Manufacturer to work wisely and consciously in any time and situation. • The LMI is supplied with a key for shut-down function by-passing. • In normal working operations, this key must be positioned not to by-pass shut-down.. •...
- Page 31 Have a good day ! Have a good day !
Need help?
Do you have a question about the 3B6 and is the answer not in the manual?
Questions and answers