Table of Contents
Advertisement
Available languages
Available languages
Quick Links
1000 026 182/24BV2982-C248
USE AND CARE GUIDE
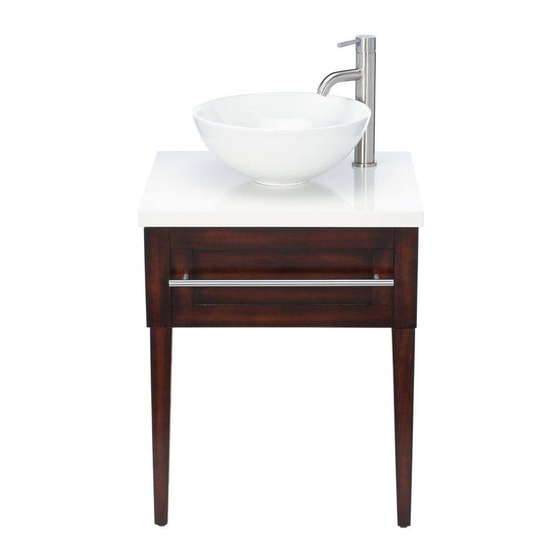
AITKEN BATHROOM VANITY
Questions, problems, missing parts? Before returning to the store,
call Home Decorators Collection Customer Service
8 a.m. - 6 p.m., EST, Monday - Friday
1-800-986-3460
HOMEDEPOT.COM/HOMEDECORATORS
THANK YOU
We appreciate the trust and confi dence you have placed in Home Decorators Collection through the purchase of this bathroom vanity. We strive
to continually create quality products designed to enhance your home. Visit us online to see our full line of products available for your home
improvement needs. Thank you for choosing Home Decorators Collection!
Advertisement
Chapters
Table of Contents

Related Manuals for Home Decorators Collection AITKEN 1000 026 182


Summary of Contents for Home Decorators Collection AITKEN 1000 026 182
- Page 1 THANK YOU We appreciate the trust and confi dence you have placed in Home Decorators Collection through the purchase of this bathroom vanity. We strive to continually create quality products designed to enhance your home. Visit us online to see our full line of products available for your home...
-
Page 2: Table Of Contents
Table of Contents Safety Information ............. 2 Package Contents ...............4 Warranty ..............3 Installation ..............5 Pre-Installation ............4 Care and Cleaning .............9 Hardware Included ............4 Replacement Parts ..........10 Safety Information Please read and understand this entire manual before attempting to assemble, operate or install the product. -
Page 3: Warranty
Warranty 1 Year Limited Warranty: The manufacturer warrants this product to be free from manufacturing and material defects for a period of one year from date of purchase, subject to the following conditions and limitations: Install and operate this Bathroom Vanity in accordance with the installation and operating instructions furnished with the product at all times. -
Page 4: Pre-Installation
Pre-Installation HARDWARE INCLUDED Part Description Part Number Quantity Bolt Lock Washer Flat Washer PH-WSRBLK001 Towel Bar with Screws Faucet and Drain Kit Hex Wrench Touch-up Pen PACKAGE CONTENTS Part Description Quantity Vanity Sink Left Leg Right Leg Vanity Top... -
Page 5: Installation
Installation Attaching the legs Securing the legs to the vanity Place the vanity (A) face down on a scratch free sur- Secure the legs by inserting bolts (AA) with lock washers face. (BB) and fl at washers (CC) through the pre-drilled holes Insert the left leg (C) and right leg (D) into the corners in the vanity (A) and into the legs (C and D). - Page 6 Installation (continued) Adjusting the levelers Positioning the vanity against the wall Find and mark locations of wall studs behind the Turn the levelers on the bottom of the vanity until the permanent location of the vanity (A). vanity is sitting level on the ground. Place the vanity (A) against the wall in the desired permanent location.
- Page 7 Installation (continued) Securing the vanity to the wall Attaching the towel bar Attach the towel bar (DD) by screwing in screws from WARNING: The vanity needs to be inside the vanity (A) as shown. mounted to the wall to prevent accidental tipping.
- Page 8 Installation (continued) Attaching the vanity top to Preparing the sink the vanity Clean the bottom surface of the sink (B) to prepare for WARNING: It is recommended two bonding to the vanity top (E). adults handle the stone top to prevent Make sure the sink (B) is completely dry before personal injury or damage to the stone.
-
Page 9: Care And Cleaning
Installation (continued) Attaching the sink, faucet, and drain kit to the vanity NOTE: Install the faucet and drain set according to the manufacturer’s directions. NOTE: Assembly instructions for the faucet and drain kit (EE) are enclosed in the faucet and drain kit box. Carefully lower the sink (B) onto the vanity top (E). -
Page 10: Replacement Parts
Replacement Parts For replacement parts, call our customer service department at 1-800-986-3460, 8 a.m.-6 p.m., EST, Monday-Friday. Part Description Part Number Leveler PH-LVRBLK001... - Page 11 Questions, problems, missing parts? Before returning to the store call Home Depot Customer Service 8 a.m. - 6 p.m., EST, Monday-Friday 1-800-986-3460 HOMEDEPOT.COM/HOMEDECORATORS RETAIN THIS MANUAL FOR FUTURE USE.
- Page 12 GRACIAS Le agradecemos la confi anza que deposita en Home Decorators Collection mediante la compra de este vanitory. Nos esforzamos constantemente por crear productos de calidad diseñados para mejorar su hogar. Visítenos en línea para ver nuestra línea completa de...
-
Page 13: Información De Seguridad
Índice Información de seguridad......... 2 Contenido del paquete ............4 Garantía ..............3 Instalación ..............5 Antes de la instalación ..........4 Cuidado y limpieza .............9 Tornillería incluida ............4 Repuestos ..............10 Información de seguridad Lea y comprenda este manual en su totalidad antes de ensamblar, operar o instalar el producto. ADVERTENCIA: Algunos pasos pueden llevarse a cabo más fácilmente si hay dos adultos. -
Page 14: Garantía
Garantía Garantía limitada de 1 año: El fabricante garantiza este producto contra defectos en materiales y fabricación durante un período de un año desde la fecha de compra, sujeto a las siguientes condiciones y limitaciones: Instale y opere este vanitory según las instrucciones de instalación y operación que se proporcionan con el producto. en todo momento. -
Page 15: Contenido Del Paquete
Antes de la instalación TORNILLERÍA INCLUIDA Pieza Descripción Número de pieza Cantidad Perno Arandela de seguridad Arandela plana PH-WSRBLK001 Barra para toalla con tornillos Kit de grifo y desagüe Llave hexagonal Lápiz para retoques CONTENIDO DEL PAQUETE Pieza Descripción Cantidad Vanitory Grifo Pata izquierda... -
Page 16: Instalación
Instalación Aseguramiento de las patas Unión de las patas a la encimera Coloque el vanitory (A) boca abajo en una superfi cie en Asegure las patas insertando los pernos (AA) con las perfecto estado. arandelas de seguridad (BB) y las arandelas planas (CC) Inserte la pata izquierda (C) y pata derecha (D) en las a través de los agujeros pretaladrados en el vanitory (A) esquinas del vanitory, como se muestra. - Page 17 Instalación (continuación) Regular los niveladores Posicionamiento del vanitory contra la pared Encuentre y marque las ubicaciones de las Gire los niveladores que se encuentran en la parte de columnas detrás de la ubicación permanente del abajo del vanitory hasta que esté apoyado de forma vanitory (A).
- Page 18 Instalación (continuación) Fijar el vanitory a la pared Sujeción de la barra para toalla Sujete la barra para toalla (DD) con los tornillos desde ADVERTENCIA: El vanitory debe dentro del vanitory (A), como se muestra. montarse a la pared para evitar que se caiga accidentalmente.
- Page 19 Instalación (continuación) Unión de la encimera del vanitory Preparación del lavabo con el vanitory Limpie la superfi cie inferior del grifo(B) como ADVERTENCIA: Se recomienda que dos preparación antes de su unión con la encimera del adultos se encarguen de la encimera de piedra vanitory (E).
-
Page 20: Cuidado Y Limpieza
Instalación (continuación) Unión del kit de lavabo, grifo y desagüe al vanitory NOTA: Instale el grifo y el conjunto de desagüe según las instrucciones del fabricante. NOTA: Las instrucciones de ensamblaje para el kit de grifo y desagüe (EE) están adjuntas en la caja del kit. -
Page 21: Repuestos
Repuestos Para obtener repuestos, llame a nuestro departamento de atención al cliente al 1-800-986-3460, de lunes a viernes de 8 a. m. a 6 p. m., hora estándar del Este. Pieza Descripción Número de pieza Cantidad Nivelador PH-LVRBLK001... - Page 22 ¿Preguntas, problemas, piezas faltantes? Antes de devolver el producto a la tienda, comuníquese con el servicio de atención al cliente de Home Depot de lunes a viernes de 8 a. m. a 6 p. m., hora estándar del Este al 1-800-986-3460. HOMEDEPOT.COM/HOMEDECORATORS CONSERVE ESTE MANUAL COMO REFERENCIA EN EL FUTURO.
Need help?
Do you have a question about the AITKEN 1000 026 182 and is the answer not in the manual?
Questions and answers