
Related Manuals for NXT Power NPTU800-OR-N


Summary of Contents for NXT Power NPTU800-OR-N
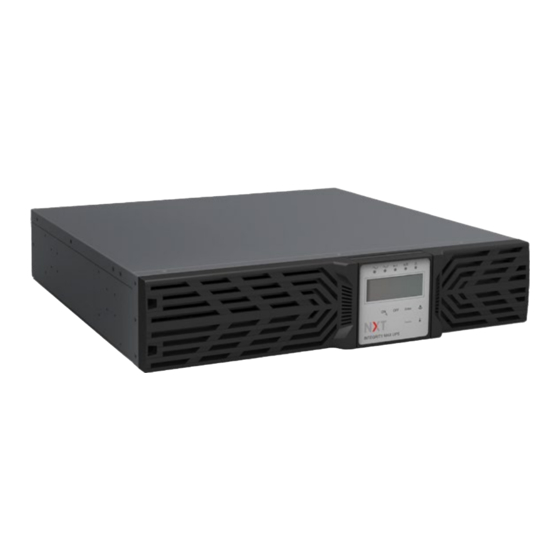
- Page 1 Intelligent True On-Line UPS For Corporate and IT Users User Manual NPTU800-OR-N NPTU1100-OR-N NPTU1500-OR-N...
-
Page 2: Table Of Contents
Table of Contents 1.Safety Instructions and Storage/ Battery Care ............. 2 1.1 Safety Instructions ................. 2 1.2 Storage / Battery Care ................5 2.Product Introduction ....................6 2.1 General Characteristics ................6 2.2 Special Features ..................7 3.UPS Functional Descriptions ................8 3.1 Front Panel Display .................. -
Page 3: Safety Instructions And Storage/ Battery Care
1. Safety Instructions and Storage/ Battery Care 1.1 Safety Instructions SAVE THESE INSTRUCTIONS. This manual contains important instructions that should be followed during installation and maintenance of the UPS and batteries. Do not open the case as there are no serviceable parts inside. Opening the case will void your warranty and introduces the risk of electric shock. - Page 4 production. If the batteries suffer breakage electrical arcing could occur in the UPS interior. If the product emits a strange noise or smell please immediately stop using the product and contact your dealer for maintenance. 10. Always switch off the UPS and disconnect the batteries when relocating the UPS.
- Page 5 22. Do not try to replace the battery yourself. Doing so will void your warranty. Contact your local supplier for repairs. 23. The UPS is intended for installation in a controlled environment. 24. Install the UPS so that it is not likely to be contacted by people. 25.
-
Page 6: Storage / Battery Care
1.2 Storage / Battery Care If the UPS is unused for an extended period, it must be stored in a moderate climate. The batteries should be charged for 12 hours every three months by connecting the UPS to the utility supply and switching on the input breaker located on the UPS rear panel. -
Page 7: Product Introduction
2. Product Introduction 2.1 General Characteristics 1. True on-line technology continuously supplies your critical device with stable, regulated, transient-free, pure-sine-wave AC power. High-efficiency PWM sine-wave topology yields excellent overall performance. 3. The high crest factor of the inverter handles all high in-rush current loads without the need to upsize the power rating. -
Page 8: Special Features
2.2 Special Features 1. This UPS is equipped with fully digital control logic for greater functionality and enhanced power protection. Digital signal processing (DSP) also provides the UPS with powerful communication capability, which simplifies remote control and monitoring. 2. Our wide input voltage tolerance of 55-150 V allows under-voltage or over-voltage correction without unnecessary battery drain and helps extend battery life. -
Page 9: Ups Functional Descriptions
3. UPS Functional Descriptions 3.1 Front Panel Display 3.1.1 NXT 1.5K < Convertible Type (Rack / Tower)> LCD panel 6 Button LCD Panel Item Sign Description LCD Display Green LED lights up to indicate that the utility input voltage is within nominal range (90Vac~145Vac);... - Page 10 UPS OFF Switch Special functions log in/out Go to next display page Go to previous display page or change the setting of the UPS. To re-confirm the change to the UPS Setting ◎ Manual Bypass: Press " ON-KEY” and " Up-KEY"...
- Page 11 3.1.2 LCD displayer description Item Sign Description Site Wiring Fault Buzzer Silent UPS Overloaded UPS Working in specified mode* UPS Fault or Abnormal Warning UPS Flow Chart 3-Digit Measurement Display Indicates the item being measured Battery Abnormal Battery Low Testing...
-
Page 12: Rear Panel
3.2 Rear Panel 800VA/1100VA/1440VA 120V AC OUTPUT PHONE/ DATA PROTECTION Not for telecommunication (telephone) network INTERFACE INPUT AC INPUT BREAKER Emergency Power Off (EPO) / Remote ON/OFF (ROO) Dry contact signal inputs USB port RS-232 port External battery connector Slot for optional communication cards* Utility input power cord Utility input circuit breaker AC outlets (Program Relay) -
Page 13: Communication Port Explanation
3.3 Communication Port Explanation The UPS is equipped with a true RS-232 and USB communication port as standard to provide communication with bundled UPS monitoring software for remote monitoring of the UPS using a PC. In addition, there are six optional interface cards available to meet various communication needs: USB, EPO/ROO, DCE (dry contact relay card), R2E, USE, and an SNMP/Web card. -
Page 14: Installation And Operation
4. Installation and Operation Please read the Safety Instruction guide (pages 2 ~4) before installing the UPS. 4.1 Unpacking Inspect the UPS upon receipt. The packaging is robust, but accidents and damage may still occur during shipment. Notify the forwarder and dealer if there is damage. - Page 15 4.1.1 Installation Instructions Tower installation Rack Mount installation Warning: Do not use rack mount kit to carry UPS Step 1 Step 2...
- Page 16 Step 3...
-
Page 17: Selecting Installation Position
4.2 Selecting Installation Position The UPS is heavy. Select a location sturdy enough to support the UPS weight. To ensure proper operation and long operating life, position the UPS according to the following requirements. 1. Keep at least 20 cm (8 inches) of clearance beyond the rear panel of the UPS. -
Page 18: Battery Connecting Procedure
4.3 Battery Connecting Procedure Qualified Service Personnel Only PLEASE READ ALL OF THE CAUTIONS AND THE WARNINGS BEFORE ATTEMPING TO CONNECT THE BATTERY MODULE Step 1 Step 2... - Page 19 Step 3...
-
Page 20: Battery Replacement Procedure
4.4 Battery Replacement Procedure Qualified Service Personnel Only PLEASE READ ALL OF THE CAUTIONS AND THE WARNINGS BEFORE ATTEMPING TO REPLACE THE BATTERY MODULE Warning: Lead-acid battery could be drained and damaged by long-term self- discharge naturally without maintenance. Step 1 Step 2... - Page 21 Step 3 Step 4 4.4.1 Recycling Used battery Contact your local recycling or hazardous waste centre for information on proper disposal of the used battery.
-
Page 22: Operation
4.5 Operation Using the standard LCD Panel 4.5.1.1 Line mode start up 1. Please ensure the source outlet is properly grounded. 2. Ensure the voltage rating of the power source matches the rating of the UPS. 3. Plug in UPS into the AC source 4. - Page 23 Back up test – Unplug power cord or switch off power source to simulate power failure condition. Green LED indicator will be off and Amber LED " "," will be on. Intermittent audible alarm will be heard and LCD display shows as below figure-C: 4.5.1.2 Cold Start (DC start) 1.
- Page 24 4.5.1.3 Operation of measurements display 1. UPS measurements can be checked after UPS has started by pressing select key . The display sequence is as below figure-F (AC input voltage)figure-G (AC input frequency)figure-H (UPS output voltage)figure-I (UPS output frequency)figure-J (UPS loading percentage)figure-K (UPS output current)figure-L (Battery voltage) figure-M (UPS inner temperature) and back to figure-F.
- Page 26 4.5.1.4 UPS Locked up UPS may lock itself up if there was a critical abnormal or failure condition. User may see LCD display as below figure-N. INPUT LOAD Buzzer Code The procedures to release UPS from locked up status are as below: (a) Check and record the error code.
- Page 27 4.5.1.5 UPS Default Data and Special Function Execution After the UPS completely starts up, press the key to change the LCD display to figure Q1. buzzer “On” buzzer “Off” 4.5.1.6 Press the key to scroll through the UPS settings. The LCD will display in sequence figure Q1 (buzzer) ...
- Page 28 Self-test is “On”. Bypass Voltage is adjusted to wide range. Bypass Voltage is adjusted to narrow range. Frequency Window is +/-3 Hz. inverter output voltage...
- Page 29 The UPS is operating in “normal mode” The UPS is operating in “Eco mode” The UPS is operating in “CVCF 50 Hz mode”. The UPS is operating in “CVCF 60 Hz mode”.
- Page 30 Output Voltage Adjustment (-6.0V ~ +6.0V) 4.5.1.7 Press the scroll up key to execute special functions. The functions include buzzer ON (as in figure Q1), buzzer OFF (as in figure Q2, Alarm silence for UPS Warning), and self-test OFF (as in figure R1) or self-test ON (as in figure R2).
- Page 31 4.5.2 UPS Default Settings and their alternatives 4.5.2.1 Make sure the UPS is not “On”. Press the On and scroll down keys simultaneously for approximately three seconds. The buzzer will sound twice, and the LCD will display figure Q1, indicating that the UPS is in setting mode.
- Page 32 * Press the Enter key to save changes. 4.5.2.10 Turn Off the Utility Input breaker. 4.5.2.11 Your setting changes are now complete. 4.5.2.12 Turn UPS off Line mode(AC input available) : Press Off key and hold until twice beeps heard, UPS output will shut off. UPS will stay in standby mode, fan(s) keep spinning and battery will be remained recharging if AC input still available after output is off, otherwise it will be shutdown completely.
- Page 33 And press to start Self-test as below figure If UPS transfers to backup mode for 10sec and transfer back to line mode operation without any code or alarm, this means the battery pack is healthy, otherwise UPS will give code to indicate the cause of failure. 4.5.3 Alarm Codes The following table contains common UPS statuses with their beep codes.
-
Page 34: Ups System Block Diagram
UPS System Block Diagram Figure 4.1 Figure 4.1 illustrates the True On-Line Double Conversion architecture of the UPS system. The major modules consist of: 1) An AC-to-DC power converter (rectifier) with PFC control circuit 2) A DC-to-AC high frequency inverter 3) An intelligent battery charger 4) A bank of stationary, maintenance-free batteries 5) A DC-to-DC push/pull converter control circuit... -
Page 35: Maintenance Guide
6. Maintenance Guide 6.1 Troubleshooting If the UPS malfunctions during operation, please check that all lines are connected properly and that the utility specifications are correct. Then check the table below for solutions. Should the problem persist please contact your local dealer for assistance. - Page 36 6.Other error codes 6. Consult your local dealer for assistance. UPS fails to provide If the backup time remains battery backup, or its unsatisfactory after 8 hours of backup time is shorter charging, please contact your than its intended local dealer for battery performance.
-
Page 37: Error Codes And Their Meanings
Error Codes Checking error cord on LCD panel: If UPS is in abnormal condition,common alarm sign will light up and come with audible alarm. The LCD screen will show information of alternate normal and error code. You can follow section 6.1 and 6.2 up for troubleshooting. -
Page 38: Communication Software
7. Communication Software 7.1 Hardware Setup (For Decide whether to use RS-232 communication or USB communication. optional interface cards please refer to Chapter 8.) 2. Connect a male RS-232 connector or a USB cable* to the UPS communication port. Connect the female RS-232 connector or the other end of the USB cable to the computer. -
Page 39: Optional Communication Cards
8. Optional Communication Cards 8.1 R2E (second RS-232) card 8.1.1 CN1 is for RS-232 DB9. 8.1.2 For interface settings and pin assignments please refer to section 3.3.1 8.1.3 Installation Position: Optional Slot 8.2 USE (USB) card 8.2.1 CN1 is for USB. 8.2.2 For the communicaiton protocol definition please refer to section 7.1.1 8.2.3 Installation Position: Optional Slot... -
Page 40: Dce (Dry Contact) Card
8.3 DCE (Dry Contact) card 8.3.1 Pin assignments of 10-Pin terminal: 1 UPS in Bypass mode (Bypass) 2 Utility Abnormal (normally closed contact) 3 Utility Normal (normally open contact) 4 Inverter On 5 Battery Low 6 ... -
Page 41: Snmp Cards
8.4 SNMP Cards 8.4.1 FIT SNMP card 8.4.1.1 For installation, please refer to the user’s manual that came with the card. 8.4.1.2 Installation Position: Optional slot on rear panel... -
Page 42: Specifications Convertible Type (Rack)
Specifications Convertible Type (Rack) ITEM PART NXT Ares Plus with Transformer RT 120V Type PF=0.9 NPTU800-OR-N NPTU1100-OR-N NPTU1500-OR-N VA / W 800VA / 720W 1100VA / 990W 1440VA / 1296W Capacity Battery Number 55-150 V (90-150 V : 0 ~ 100% Load / 75-90 V... - Page 43 149-157% for 2 seconds shuts down 158-176% for 1 seconds shuts down 177-187% for 0.32 seconds shuts down for 0.16 seconds shuts down. >188% Buzzer continuously alarms. Line Mode > 84.5% > 85% > 84.5% 100% Battery Efficiency Linear > 82.5% >...
- Page 44 ≦ 50dB Noise Level Relative Humidity 0-90% (without condensation) Standard RS-232, USB, EPO 2nd RS232, USB, EPO/ROO, Dry Contact Relay, Option Interface SNMP/WEB Card, Compatible Microsoft Windows series,etc. Platforms UL 1778, Fifth Edition, and CAN/CSA C22.2 No 107.3-14, Safety Third Edition Standards and FCC Part15 Class A Certifications...
Need help?
Do you have a question about the NPTU800-OR-N and is the answer not in the manual?
Questions and answers