Abicor Binzel CAT2 Operating Instructions Manual
Robot mount
Hide thumbs
Also See for CAT2:
- Operating instructions manual (92 pages) ,
- Operating instructions manual (68 pages)
Table of Contents
Advertisement
Available languages
Available languages
Quick Links
T E C H N O L O G Y F O R T H E W E L D E R ´ S W O R L D .
All manuals and user guides at all-guides.com
DE Betriebsanleitung / EN Operating instructions
FR Mode d'emploi / ES Instructivo de servicio
CAT2
DE Roboterhalterung
EN Robot mount
FR Support robot
ES Soporte para robot
www.binzel-abicor.com
Advertisement
Chapters
Table of Contents

Related Manuals for Abicor Binzel CAT2


Summary of Contents for Abicor Binzel CAT2
- Page 1 T E C H N O L O G Y F O R T H E W E L D E R ´ S W O R L D . All manuals and user guides at all-guides.com DE Betriebsanleitung / EN Operating instructions FR Mode d’emploi / ES Instructivo de servicio CAT2 DE Roboterhalterung EN Robot mount FR Support robot ES Soporte para robot www.binzel-abicor.com...
-
Page 2: Table Of Contents
Änderungen werden jedoch in neuen Ausgaben berücksichtigt. Alle in der Betriebsanleitung genannten Handelsmarken und Schutzmarken sind Eigentum der jeweiligen Besitzer/Hersteller. Unsere aktuellen Produktdokumente sowie alle Kontaktdaten der ABICOR BINZEL Ländervertretungen und Partner weltweit, finden Sie auf unserer Homepage www.binzel-abicor.com. Identifikation... -
Page 3: Identifikation
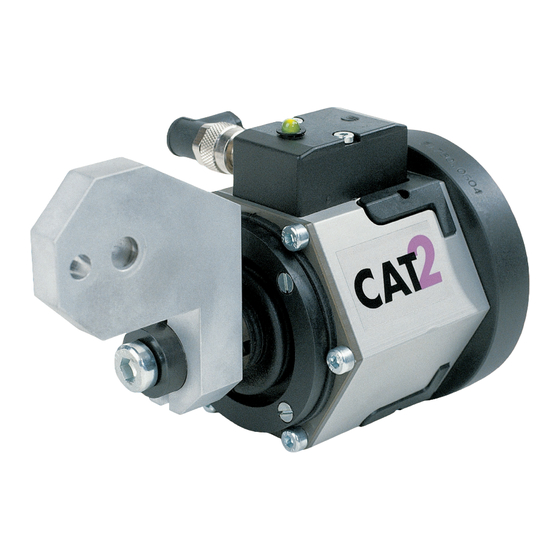
CAT2 1 Identifikation 1 Identifikation Die Roboterhalterung CAT2 wird in der Industrie und im Gewerbe zur Verbindung zwischen Roboter und Werkzeug eingesetzt. Die CAT2 ist eine dreidimensional wirkende Abschaltsicherung und ist über einen Roboterflansch an allen Robotertypen und Handlinggeräten adaptierbar. Diese Betriebsanleitung beschreibt nur die Roboterhalterung CAT2. -
Page 4: Eu-Konformitätserklärung
All manuals and user guides at all-guides.com 1 Identifikation CAT2 1.1 EU-Konformitätserklärung DE - 4... - Page 5 All manuals and user guides at all-guides.com CAT2 1 Identifikation DE - 5...
-
Page 6: Sicherheit
All manuals and user guides at all-guides.com 2 Sicherheit CAT2 2 Sicherheit Beachten Sie das beiliegende Dokument Sicherheitshinweise. 2.1 Bestimmungsgemäße Verwendung • Das in dieser Anleitung beschriebene Gerät darf ausschließlich zu dem in der Anleitung beschriebenen Zweck in der beschriebenen Art und Weise verwendet werden. -
Page 7: Klassifizierung Der Warnhinweise
All manuals and user guides at all-guides.com CAT2 2 Sicherheit 2.4 Klassifizierung der Warnhinweise Die in der Betriebsanleitung verwendeten Warnhinweise sind in vier verschiedene Ebenen unterteilt und werden vor potenziell gefährlichen Arbeitsschritten angegeben. Geordnet nach abnehmender Wichtigkeit bedeuten sie Folgendes: GEFAHR Bezeichnet eine unmittelbar drohende Gefahr. -
Page 8: Angaben Für Den Notfall
Umgebungsluft Transport, Temperatur der Umgebungsluft - 25 °C bis + 55 °C Relative Luftfeuchtigkeit bis 70 % bei 20 °C Tab. 2 Umgebungsbedingungen Transport und Lagerung CAT2 ohne Halter 0,65 kg CAT2 mit Halter 0,85 kg Tab. 3 Gewicht Belastung 24 VDC / max. - Page 9 All manuals and user guides at all-guides.com CAT2 3 Produktbeschreibung Schaltpunkt 6-8mm Auslösemoment Auslösekraft X, Y ± Rückstellgenauigkeit 0,04mm Hebellänge 300mm Abb. 2 Technische Daten Schaltpunkt: Drehung um Z-Achse 0,5° - 1° Auslenkung in X- und Y- Richtung ca. 1,5°...
- Page 10 3 Nm ± mit Feder „L“ 3 Nm ± mit Feder „XL“ 3 Nm Tab. 8 Auslösemoment, Abstand 300 mm CAT2 - XL CAT2 - L CAT2 - M CAT2 - S Abstand (mm) Abb. 3 Diagramm DE - 10...
-
Page 11: Abkürzungen
All manuals and user guides at all-guides.com CAT2 3 Produktbeschreibung 3.2 Abkürzungen High loaded Tab. 9 Abkürzungen 3.3 Typenschild Die CAT2 ist wie folgt gekennzeichnet: Typ: CAT2 Serien-Nr.: Alexander Binzel Schweisstechnik GmbH & Co.KG CAT2 Typenschild Seriennummer CAT2 Abb. 4 Typenschild Beachten Sie für alle Rückfragen folgende Angabe:... -
Page 12: Lieferumfang
All manuals and user guides at all-guides.com 4 Lieferumfang CAT2 4 Lieferumfang Der Standard-Lieferumfang beinhaltet folgendes: • Roboterhalterung CAT2 • Betriebsanleitung Beipack: • Passschraube M8 mit Unterlegscheibe und Mutter • Verbindungskabel • Passschraube M6 mit Unterlegscheibe und Mutter • Zylinderschrauben 4Stk. M4x10 •... -
Page 13: Funktionsbeschreibung
All manuals and user guides at all-guides.com CAT2 5 Funktionsbeschreibung 5 Funktionsbeschreibung Die eingesetzten Federn „S“, „M“, „L“ oder „XL“ wirken mit ihrer Haltekraft direkt auf den Auslöseflansch und fixieren die durch Kugeln positionierte Schaltachse in Null-Stellung. Im Falle einer Kollision kippt die Schaltachse, drückt mit dem Auslöseflansch den Federteller in Richtung Gehäuseboden und... -
Page 14: Inbetriebnahme
(in Deutschland siehe TRBS 1203) erfolgen. 6.1 CAT2 am Roboter befestigen Dieses Kapitel beschreibt die Montage der Roboterhalterung CAT2 und CAT2 HL. Die Handlungsschritte Schritt 1 bis Schritt 5 beziehen sich auf beide Robotervarianten. HINWEIS • Bevor die CAT2 (10) montiert werden kann, müssen Sie den Roboter (7) in Wartungsposition fahren. - Page 15 Bohrung und klicken Sie die Schutzkappen (6) heraus. HINWEIS • Achten Sie auf die korrekte Lage des Steckergehäuses. Abb. 5 Funktionsschema auf Seite DE-13 4 CAT2 (10) mit vier Zylinderschrauben (9) an Roboterflansch (8) schrauben. 5 Schutzkappen (6) wieder einklicken. DE - 15...
- Page 16 8 Klemmring (12) und Konus-Spannelement (13) in Bohrung einsetzen. 9 Zylinderschraube (14) in Bohrung einstecken und anziehen, max. Anzugsdrehmoment 15 Nm. Durch das Anziehen der Zylinderschraube (14) wird das Konus-Spannelement (13) gespreizt und befestigt so den Halter (11) kippsicher und spielfrei auf der CAT2. DE - 16...
-
Page 17: Cat2 Hl
Abb. 7 CAT2 HL Beachten Sie die vorangegangenen Handlungsschritte: 6.1 CAT2 am Roboter befestigen auf Seite DE-14, Schritt 1 bis Schritt 5 1 Zylinderschraube (6) und Scheibe (5) lösen. HINWEIS • Im Halter (1) ist eine Passfeder (4) fixiert. Diese definiert die Nullstellung der Bauteile zum Roboterarm. -
Page 18: Tcp Justieren
Abb. 5 Funktionsschema auf Seite DE-13 6.4 Aktivierung der LED-Funktion Die grüne LED signalisiert eine störungsfreie Funktion der Roboterhalterung CAT2. Im Falle einer Kollision wird die Schaltspannung unterbrochen und die LED erlischt. Abb. 5 Funktionsschema auf Seite DE-13 1 GND auf PIN 1 am Stecker belegen. -
Page 19: Betrieb
7 Betrieb HINWEIS • Die Bedienung darf nur durch befähigte Personen (in Deutschland siehe TRBS 1203) erfolgen. Da die CAT2 im Schweißprozess des Schweißbrenners eingebunden ist, erfolgen die Bedienschritte nach der Inbetriebnahme des jeweiligen Brenners. 8 Außerbetriebnahme HINWEIS • Beachten Sie bei der Außerbetriebnahme die Abschaltprozeduren aller im Schweißsystem vorhandenen Komponenten. -
Page 20: Wartungsintervalle
All manuals and user guides at all-guides.com 9 Wartung und Reinigung CAT2 HINWEIS • Wartungs- und Reinigungsarbeiten dürfen nur von befähigten Personen (in Deutschland siehe TRBS 1203) durchgeführt werden. • Tragen Sie während der Wartungs- und Reinigungsarbeiten immer Ihre persönliche Schutzausrüstung. -
Page 21: Störungen Und Deren Behebung
Störung Ursache Behebung • Falsche Brennerhalterung verwendet • Richtige Brennerhalterung Brennerhalterung verwenden lässt sich nicht • Befestigungsflansch der CAT2 defekt • CAT2 zur Servicereparatur montieren einsenden • Kabel zwischen CAT2 und • Kabel anschließen Schlauchpaket nicht angeschlossen CAT2 schaltet Stop- •... -
Page 22: Demontage
• Beachten Sie die Betriebsanleitungen der schweißtechnischen Komponenten, wie z.B. Schweißstromquelle, Robotersteuerung. • Beachten Sie die Informationen in folgendem Kapitel: 8 Außerbetriebnahme auf Seite DE-19. Abb. 6 CAT2 am Roboter montieren auf Seite DE-15 1 Zu lösende Teile entfernen. DE - 22... -
Page 23: Entsorgung
CAT2 12 Entsorgung 12 Entsorgung Bei der Entsorgung sind die örtlichen Bestimmungen, Gesetze, Vorschriften, Normen und Richtlinien zu beachten. Um die CAT2 ordnungsgemäß zu entsorgen, müssen Sie sie zuerst demontieren. 11 Demontage auf Seite DE-22 12.1 Werkstoffe Dieses Produkt besteht zum größten Teil aus Kunststoffen, Stahl und Buntmetallen. - Page 24 All brand names and trademarks that appear in these operating instructions are the property of their respective owners/manufacturers. Our latest product documents as well as all contact details for the ABICOR BINZEL national subsidiaries and partners worldwide can be found on our website at www.binzel-abicor.com...
-
Page 25: Identification
1 Identification 1 Identification The CAT2 robot mount is used in industry and in the trade for connecting the robot an the tool. The CAT2 is a three-dimensionally acting safety cut-out and is adaptable to all types of robots and handling machines via a robot flange. -
Page 26: Eu Declaration Of Conformity
All manuals and user guides at all-guides.com 1 Identification CAT2 1.1 EU Declaration of Conformity EN - 4... - Page 27 All manuals and user guides at all-guides.com CAT2 1 Identification EN - 5...
-
Page 28: Safety
All manuals and user guides at all-guides.com 2 Safety CAT2 2 Safety The enclosed safety instructions must be observed. 2.1 Designated use • The device described in these instructions may be used only for the purpose described in these instructions in the manner described. In doing so, observe the operating, maintenance and servicing conditions. -
Page 29: Classification Of The Warnings
All manuals and user guides at all-guides.com CAT2 2 Safety 2.4 Classification of the warnings The warnings used in the operating instructions are divided into four different levels and are shown prior to potentially dangerous work steps. Arranged in descending order of importance, they have the following meaning: DANGER Describes an imminent threatening danger. -
Page 30: Product Description
Ambient temperature for transport - 25 °C to + 55 °C Relative humidity up to 90 % at 20 °C Tab. 2 Ambient conditions for shipment and storage CAT2 without mount 0.65 kg CAT2 with mount 0.85 kg Tab. 3 Weight Load 24 VDC / max. - Page 31 All manuals and user guides at all-guides.com CAT2 3 Product description Switching point 6-8mm Triggering moment Triggering force X, Y ± Reset precision 0.04mm Lever length 300mm Fig. 2 Technical Data Switching point: Rotation around the Z axis 0.5° - 1°...
- Page 32 3 Nm ± with spring "L" 3 Nm ± with spring "XL" 3 Nm Tab. 8 Triggering moment (distance 300 mm) CAT2 - XL CAT2 - L CAT2 - M CAT2 - S Distance (mm) Fig. 3 Diagram EN - 10...
-
Page 33: Abbreviations
All manuals and user guides at all-guides.com CAT2 3 Product description 3.2 Abbreviations High loaded Tab. 9 Abbreviations 3.3 Nameplate The CAT2 is marked as follows: Typ: CAT2 Serien-Nr.: Alexander Binzel Schweisstechnik GmbH & Co.KG CAT2 Nameplate CAT2 serial number Fig. -
Page 34: Scope Of Delivery
All manuals and user guides at all-guides.com 4 Scope of delivery CAT2 4 Scope of delivery The standard scope of delivery includes the following components: • CAT2 robot mount • Operating instructions Accessories kit: • Dowel screw M8 with washer and nut • Connecting cable •... -
Page 35: Functional Description
All manuals and user guides at all-guides.com CAT2 5 Functional Description 5 Functional Description The inserted springs "S", "M", "L" or "XL" act with their holding force directly upon the triggering flange and fix the switching axis in the zero position by balls. -
Page 36: Putting Into Operation
• Before CAT2 (10)can be mounted, the robot (7)must be moved to the maintenance position. • To fasten the CAT2 (10) to the robot (7) a robot flange is required (8). It must correspond to the hole pattern of the CAT2 (10) and of the robot (7). - Page 37 • Ensure correct position of the connector housing. Fig. 5 Functional diagram on page EN-13 4 Mount CAT2 (10) on the robot flange (8) using four cylinder screws (9). 5 Reinsert the protection caps (6). The following steps refer to the assembly of CAT2. For further assembly of the CAT2 HL: ...
- Page 38 9 Insert the cylinder screw (14) into the bore and tighten it with max. tightening torque 15 Nm. By tightening the cylinder screw (14) the cone clamping element (13) is spread and fixes the mount (11) in a non-tipping and stable way on the CAT2. EN - 16...
-
Page 39: Cat2 Hl
2 Put the feather key (4) up to the stop into the groove (3) of CAT2 HL (2). 3 Fix the mount (1) with the washer (5) and the cylinder screw (6) and using the max. -
Page 40: Adjusting Tcp
Fig. 5 Functional diagram on page EN-13 6.4 Activating the LED function The green LED shows a trouble-free operation of the CAT2 robot mount. In case of collision the switching voltage is switched off and the LED goes out. -
Page 41: Operation
• The system may only put into operation by authorized personnel (in Germany see TRBS 1203). Due to the fact that the CAT2 is integrated into the welding process of the torch, the operating steps are performed after the respective torch has been put into operation. -
Page 42: Maintenance Intervals
All manuals and user guides at all-guides.com 9 Maintenance and cleaning CAT2 NOTICE • Maintenance and cleaning work may only be carried out by qualified personnel (in Germany see TRBS 1203). • Always wear your personal protective equipment when performing maintenance and cleaning work. -
Page 43: Troubleshooting
Solution • Wrong torch mount used • Use correct torch mount Torch mount cannot • Mounting flange of the CAT2 • Send in the CAT2 for service be mounted. defective reparation • Cable between CAT2 and cable • Connect cable... -
Page 44: Dismounting
• Observe the information provided in the following section: 8 Putting out of operation on page EN-19. Fig. 6 Mount CAT2 on the robot on page EN-15 1 Remove the parts to be disconnected. EN - 22... -
Page 45: Disposal
CAT2 12 Disposal 12 Disposal For disposal, the local regulations, laws, provisions, standards and guidelines must be observed. For the CAT2 to be properly disposed of, it first must be dismounted. 11 Dismounting on page EN-22 12.1 Materials This product consists for the most part of plastics, steel and non-ferrous metals. - Page 46 Toutes les marques déposées et marques commerciales contenues dans le présent mode d'emploi sont la propriété de leurs titulaires/fabricants respectifs. Vous trouverez nos documents actuels sur les produits, ainsi que l'ensemble des coordonnées des représentants et des partenaires d'ABICOR BINZEL dans le monde sur la page d'accueil www.binzel-abicor.com. Identification...
-
Page 47: Identification
1 Identification 1 Identification Le support robot CAT2 est utilisé dans l'industrie et l'artisanat pour relier le robot et l'outil. Le CAT2 est un dispositif d'arrêt automatique tridimensionnel et peut être adapté à tous les types de robots et appareils de maniement au moyen de la bride robot. -
Page 48: Déclaration De Conformité Ce
All manuals and user guides at all-guides.com 1 Identification CAT2 1.1 Déclaration de conformité CE FR - 4... - Page 49 All manuals and user guides at all-guides.com CAT2 1 Identification FR - 5...
-
Page 50: Sécurité
All manuals and user guides at all-guides.com 2 Sécurité CAT2 2 Sécurité Respectez les consignes de sécurité figurant dans le document joint à ce manuel. 2.1 Utilisation conforme aux dispositions • L'appareil décrit dans ce mode d'emploi ne doit être utilisé qu'aux fins et dans la manière décrites dans le mode d'emploi. -
Page 51: Classification Des Consignes D'avertissement
All manuals and user guides at all-guides.com CAT2 2 Sécurité 2.4 Classification des consignes d’avertissement Les consignes d'avertissement utilisées dans le mode d'emploi sont divisées en quatre niveaux différents. Elles sont indiquées avant les étapes de travail potentiellement dangereuses. Elles sont classées par ordre d'importance décroissant et ont la signification suivante :... -
Page 52: Consignes Pour Les Situations D'urgence
All manuals and user guides at all-guides.com 3 Description du produit CAT2 2.6 Consignes pour les situations d'urgence En cas d'urgence, coupez immédiatement les alimentations suivantes : • courant électrique, air comprimé, gaz D'autres mesures à prendre sont décrites dans le mode d'emploi « Source de courant »... - Page 53 All manuals and user guides at all-guides.com CAT2 3 Description du produit Point de commutation 6-8 mm Moment de déclenchement Force de déclenchement X, Y ± Précision de repositionnement 0,04mm Longueur du levier 300 mm Fig. 2 Caractéristiques techniques Point de commutation Rotation autour de l'axe Z 0,5°...
- Page 54 ± avec ressort «L» 3 Nm ± avec ressort «XL» 3 Nm Tab. 8 Force de déclenchement; distance 300 mm) CAT2 - XL CAT2 - L CAT2 - M CAT2 - S Distance (mm) Fig. 3 Diagramme FR - 10...
-
Page 55: Abréviations
3 Description du produit 3.2 Abréviations High loaded Tab. 9 Abréviations 3.3 Plaque signalétique Le support CAT 2 est caractérisé de la manière suivante : Typ: CAT2 Serien-Nr.: Alexander Binzel Schweisstechnik GmbH & Co.KG CAT 2 Plaque signalétique Numéro de série CAT 2 Fig. -
Page 56: Matériel Fourni
All manuals and user guides at all-guides.com 4 Matériel fourni CAT2 4 Matériel fourni L’étendue de la livraison comprend en version standard : • Support robot CAT 2 • Mode d'emploi Sachet : • Vis de réglage M8 avec rondelle et écrou •... -
Page 57: Description Du Fonctionnement
All manuals and user guides at all-guides.com CAT2 5 Description du fonctionnement 5 Description du fonctionnement Les ressorts utilisés «S», «M», «L» ou «XL» agissent directement sur la bride de déclenchement avec sa force de maintien et fixent en position zéro l’axe de commutation positionné... -
Page 58: Mise En Service
(en Allemagne, voir TRBS 1203). 6.1 Fixer le support CAT 2 sur le robot Ce chapitre décrit le montage du support robot CAT2 et CAT2 HL. Les étapes d'action étape 1 à étape 5 se réfèrent aux deux variantes de robots. - Page 59 • Tenez compte de la position correcte du boîtier de connexion. Fig. 5 Schéma de fonctionnement page FR-13 4 CAT 2 Visser CAT2 (10) à l'aide des quatre vis cylindriques (9) sur la bride robot (8). 5 Remettre les coiffes de protection (6).
- Page 60 All manuals and user guides at all-guides.com 6 Mise en service CAT2 Les étapes d'action suivantes se réfèrent au montage du CAT2. Pour le montage du CAT2 HL, voir : 6.1.1 CAT2 HL page FR-17 6 desserrer la vis cylindrique (14), enlever l'élément de serrage du cône (13) et la bague de serrage (12).
-
Page 61: Cat2 Hl
2 Insérer le ressort d'ajustage (4) jusqu'à la butée dans la rainure (3) du CAT2 HL (2). 3 Fixer le support (1) avec la rondelle (5) et la vis cylindrique (6), couple de serrage max. 20 Nm, sur le CAT2 HL (2). FR - 17... -
Page 62: Ajuster Tcp
All manuals and user guides at all-guides.com 6 Mise en service CAT2 6.2 Ajuster TCP Fig. 6 Monter le CAT 2 sur le robot page FR-15 1 Desserrer l'écrou (15) et le support torche (2) sur le TCP souhaité. -
Page 63: Fonctionnement
All manuals and user guides at all-guides.com CAT2 7 Fonctionnement 7 Fonctionnement AVIS • Seules des personnes autorisées peuvent effectuer l'installation et la mise en service (en Allemagne, voir TRBS 1203). Vu que le support CAT 2 est intégré dans le processus de soudage de la torche, les étapes de la commande sont effectuées après la mise en service de la... -
Page 64: Intervalles De Contrôle
All manuals and user guides at all-guides.com 9 Entretien et nettoyage CAT2 AVIS • Les travaux d'entretien et de nettoyage doivent être effectués par des personnes autorisées (en Allemagne, voir TRBS 1203). • Lors des travaux d'entretien et de nettoyage, portez toujours votre équipement de protection personnel. -
Page 65: Dépannage
être • Bride de fixation du CAT2 • Envoyer le CAT2 en réparation monté défectueuse • Câble entre le CAT2 et le faisceau • Raccorder le câble non raccordé CAT2 ne commute • Câble défectueux • Remplacer le câble pas le signal d'arrêt... -
Page 66: Démontage
All manuals and user guides at all-guides.com 11 Démontage CAT2 11 Démontage DANGER Risque de blessure en cas de démarrage inattendu Pendant toute la durée des travaux d'entretien, de maintenance, de montage, de démontage et de réparation, respectez les points suivants : •... -
Page 67: Elimination
Les outils de nettoyage contaminés (pinceau, chiffon etc.) doivent être également éliminés selon les indications du fabricant des produits consommables. 12.3 Emballage ABICOR BINZEL a réduit l'emballage de transport au nécessaire. Lors du choix des matériaux d'emballage, veiller à ce que ces derniers soient recyclables. FR - 23... - Page 68 Para obtener la documentación actual sobre nuestros productos así como para conocer los datos de contacto de los representantes locales y socios de ABICOR BINZEL en todo el mundo, consulte nuestra página de inicio en www.binzel-abicor.com Identificación...
-
Page 69: Identificación
1 Identificación 1 Identificación El soporte para robot CAT2 se utiliza en la industria y los oficios como pieza de unión entre robot y herramienta. CAT2 es un sistema anticolisión de acción tridimensional y puede adaptarse en todos los tipos de robot y aparatos de manejo mediante una brida del robot. -
Page 70: Declaración De Conformidad De La Ue
All manuals and user guides at all-guides.com 1 Identificación CAT2 1.1 Declaración de conformidad de la UE ES - 4... - Page 71 All manuals and user guides at all-guides.com CAT2 1 Identificación ES - 5...
-
Page 72: Seguridad
All manuals and user guides at all-guides.com 2 Seguridad CAT2 2 Seguridad Observe también el documento “Instrucciones de seguridad” adjunto. 2.1 Utilización conforme a lo prescrito • El aparato descrito en este manual debe ser utilizado exclusivamente para la finalidad especificada en él y en la forma que se describe. Observar las condiciones para el servicio, mantenimiento y reparación. -
Page 73: Clasificación De Las Advertencias
All manuals and user guides at all-guides.com CAT2 2 Seguridad 2.4 Clasificación de las advertencias Las advertencias empleadas en este Instructivo de servicio se dividen en cuatro niveles diferentes y se indican antes de operaciones potencialmente peligrosas. Ordenadas de mayor a menor importancia, significan lo siguiente: ¡PELIGRO! -
Page 74: Descripción Del Producto
- 25 °C hasta + 55 °C Humedad relativa del aire hasta 70 % a 20 °C Tab. 2 Condiciones ambientales para transporte y almacenamiento CAT2 sin pieza de amarre 0,65 kg CAT2 con pieza de amarre 0,85 kg Tab. 3... - Page 75 All manuals and user guides at all-guides.com CAT2 3 Descripción del producto Punto de conmutación 6-8 mm Par de disparo Fuerza de disparo X, Y ± Exactitud de reposición 0,04mm Longitud de la palanca 300mm Fig. 2 Datos técnicos Punto de conmutación: Rotación alrededor del eje Z 0,5°...
- Page 76 ± Con muelle "L" 3 Nm ± Con muelle "XL" 3 Nm Tab. 8 Par de disparo, distancia 300 mm CAT2 - XL CAT2 - L CAT2 - M CAT2 - S Distancia (mm) Fig. 3 Diagrama ES - 10...
-
Page 77: Abreviaciones
All manuals and user guides at all-guides.com CAT2 3 Descripción del producto 3.2 Abreviaciones High loaded Tab. 9 Abreviaciones 3.3 Placa de identificación El CAT2 está marcado como sigue: Typ: CAT2 Serien-Nr.: Alexander Binzel Schweisstechnik GmbH & Co.KG CAT2 Placa de identificación Número de serie CAT2 Fig. -
Page 78: Relación De Material Suministrado
4 Relación de material suministrado CAT2 4 Relación de material suministrado El volumen de suministro estándar incluye lo siguiente: • Soporte para robot CAT2 • Manual de instrucciones Paquete adjunto: • Tornillo de ajuste M8 con arandela y tuerca • Cable de conexión •... -
Page 79: Descripción Del Funcionamiento
All manuals and user guides at all-guides.com CAT2 5 Descripción del funcionamiento 5 Descripción del funcionamiento Los muelles utilizados "S", "M", "L" o "XL" actúan directamente sobre la brida de disparo, con su fuerza de retención, y fijan el eje de conmutación posicionado por esferas en posición cero. -
Page 80: Puesta En Marcha
• Desplazar el robot (7) a la posición de mantenimiento antes de poder montar CAT2 (10). • Para fijar CAT2 (10) en el robot (7) se requiere una brida del robot (8). Ésta debe coincidir con el calibre maestro de agujeros de CAT2 (10) y del robot (7). - Page 81 • Observar la posición correcta de la caja del enchufe. Fig. 5 Diagrama funcional en página ES-13 4 Utilizar cuatro tornillos cilíndricos (9) para fijar CAT2 (10) en la brida del robot (8). 5 Insertar otra vez los tapones de protección (6).
- Page 82 All manuals and user guides at all-guides.com 6 Puesta en marcha CAT2 Los siguientes pasos se refieren al montaje de CAT2. Para el montaje de CAT2 6.1.1 CAT2 HL en página ES-17 6 Soltar los tornillos cilíndricos (14) y extraer el elemento de sujeción del cono (13) y el anillo de sujeción (12).
-
Page 83: Cat2 Hl
2 Insertar la llave ligera (4) hasta el tope en la ranura (3) de CAT2 HL (2). 3 Fijar la pieza de amarre (1) con la arandela (5) y el tornillo cilíndrico (6) y con un par de apriete máx. -
Page 84: Ajustar El Tcp
Fig. 5 Diagrama funcional en página ES-13 6.4 Activar la función LED El LED verde señaliza el funcionamiento correcto del soporte para robot CAT2. En caso de colisión se interrumpe la tensión de conmutación y se apaga el LED. -
Page 85: Operación
• Al equipo sólo lo pueden manejar personas cualificadas (en Alemania, véase TRBS 1203). Como el CAT2 está integrado en el proceso de soldadura de la antorcha, los pasos para el manejo se efectúan después de la puesta en servicio de la antorcha respectiva. -
Page 86: Intervalos De Mantenimiento
All manuals and user guides at all-guides.com 9 Mantenimiento y limpieza CAT2 AVISO • Los trabajos de mantenimiento y limpieza deben ser realizados exclusivamente por personal cualificado (en Alemania, véase TRBS 1203). • Lleve siempre el equipo de protección individual durante los trabajos de mantenimiento y limpieza. -
Page 87: Identificación Y Eliminación De Averías
No es posible montar • el soporte de antorcha • La brida de fijación de CAT2 está • Enviar CAT2 para que se repare defectuosa • No está conectado el cable entre • Conectar el cable CAT2 y el conjunto de cables CAT2 no activa señal... -
Page 88: Desmontaje
• Observar la información en el siguiente capítulo: 8 Puesta fuera de servicio en página ES-19. Fig. 6 Montar CAT2 en el robot en página ES-15 1 Eliminar las partes a soltar. ES - 22... -
Page 89: Eliminación
Los útiles de limpieza (cepillos, paños, etc.) también deben eliminarse según las indicaciones del fabricante de los combustibles. 12.3 Embalajes ABICOR BINZEL ha reducido el embalaje de transporte a un mínimo necesario. Al seleccionar los materiales de embalaje, se tiene en cuenta un posible reciclaje. - Page 90 All manuals and user guides at all-guides.com Notas CAT2 Notas ES - 24...
- Page 91 All manuals and user guides at all-guides.com CAT2 Notas Notas ES - 25...
- Page 92 T E C H N O L O G Y F O R T H E W E L D E R ´ S W O R L D . All manuals and user guides at all-guides.com Alexander Binzel Schweisstechnik GmbH & Co.KG Postfach 10 01 53 •...
Need help?
Do you have a question about the CAT2 and is the answer not in the manual?
Questions and answers